- Home
- /
- Article

Thanks for your feedback.

Customize your webinar using stage manager
 In this article
 Feedback?
Make your webinar look and feel polished and professional by setting a background, logo, and customized name labels. Give your webinar a specific theme for a special event or use the logo and background to match your company branding.
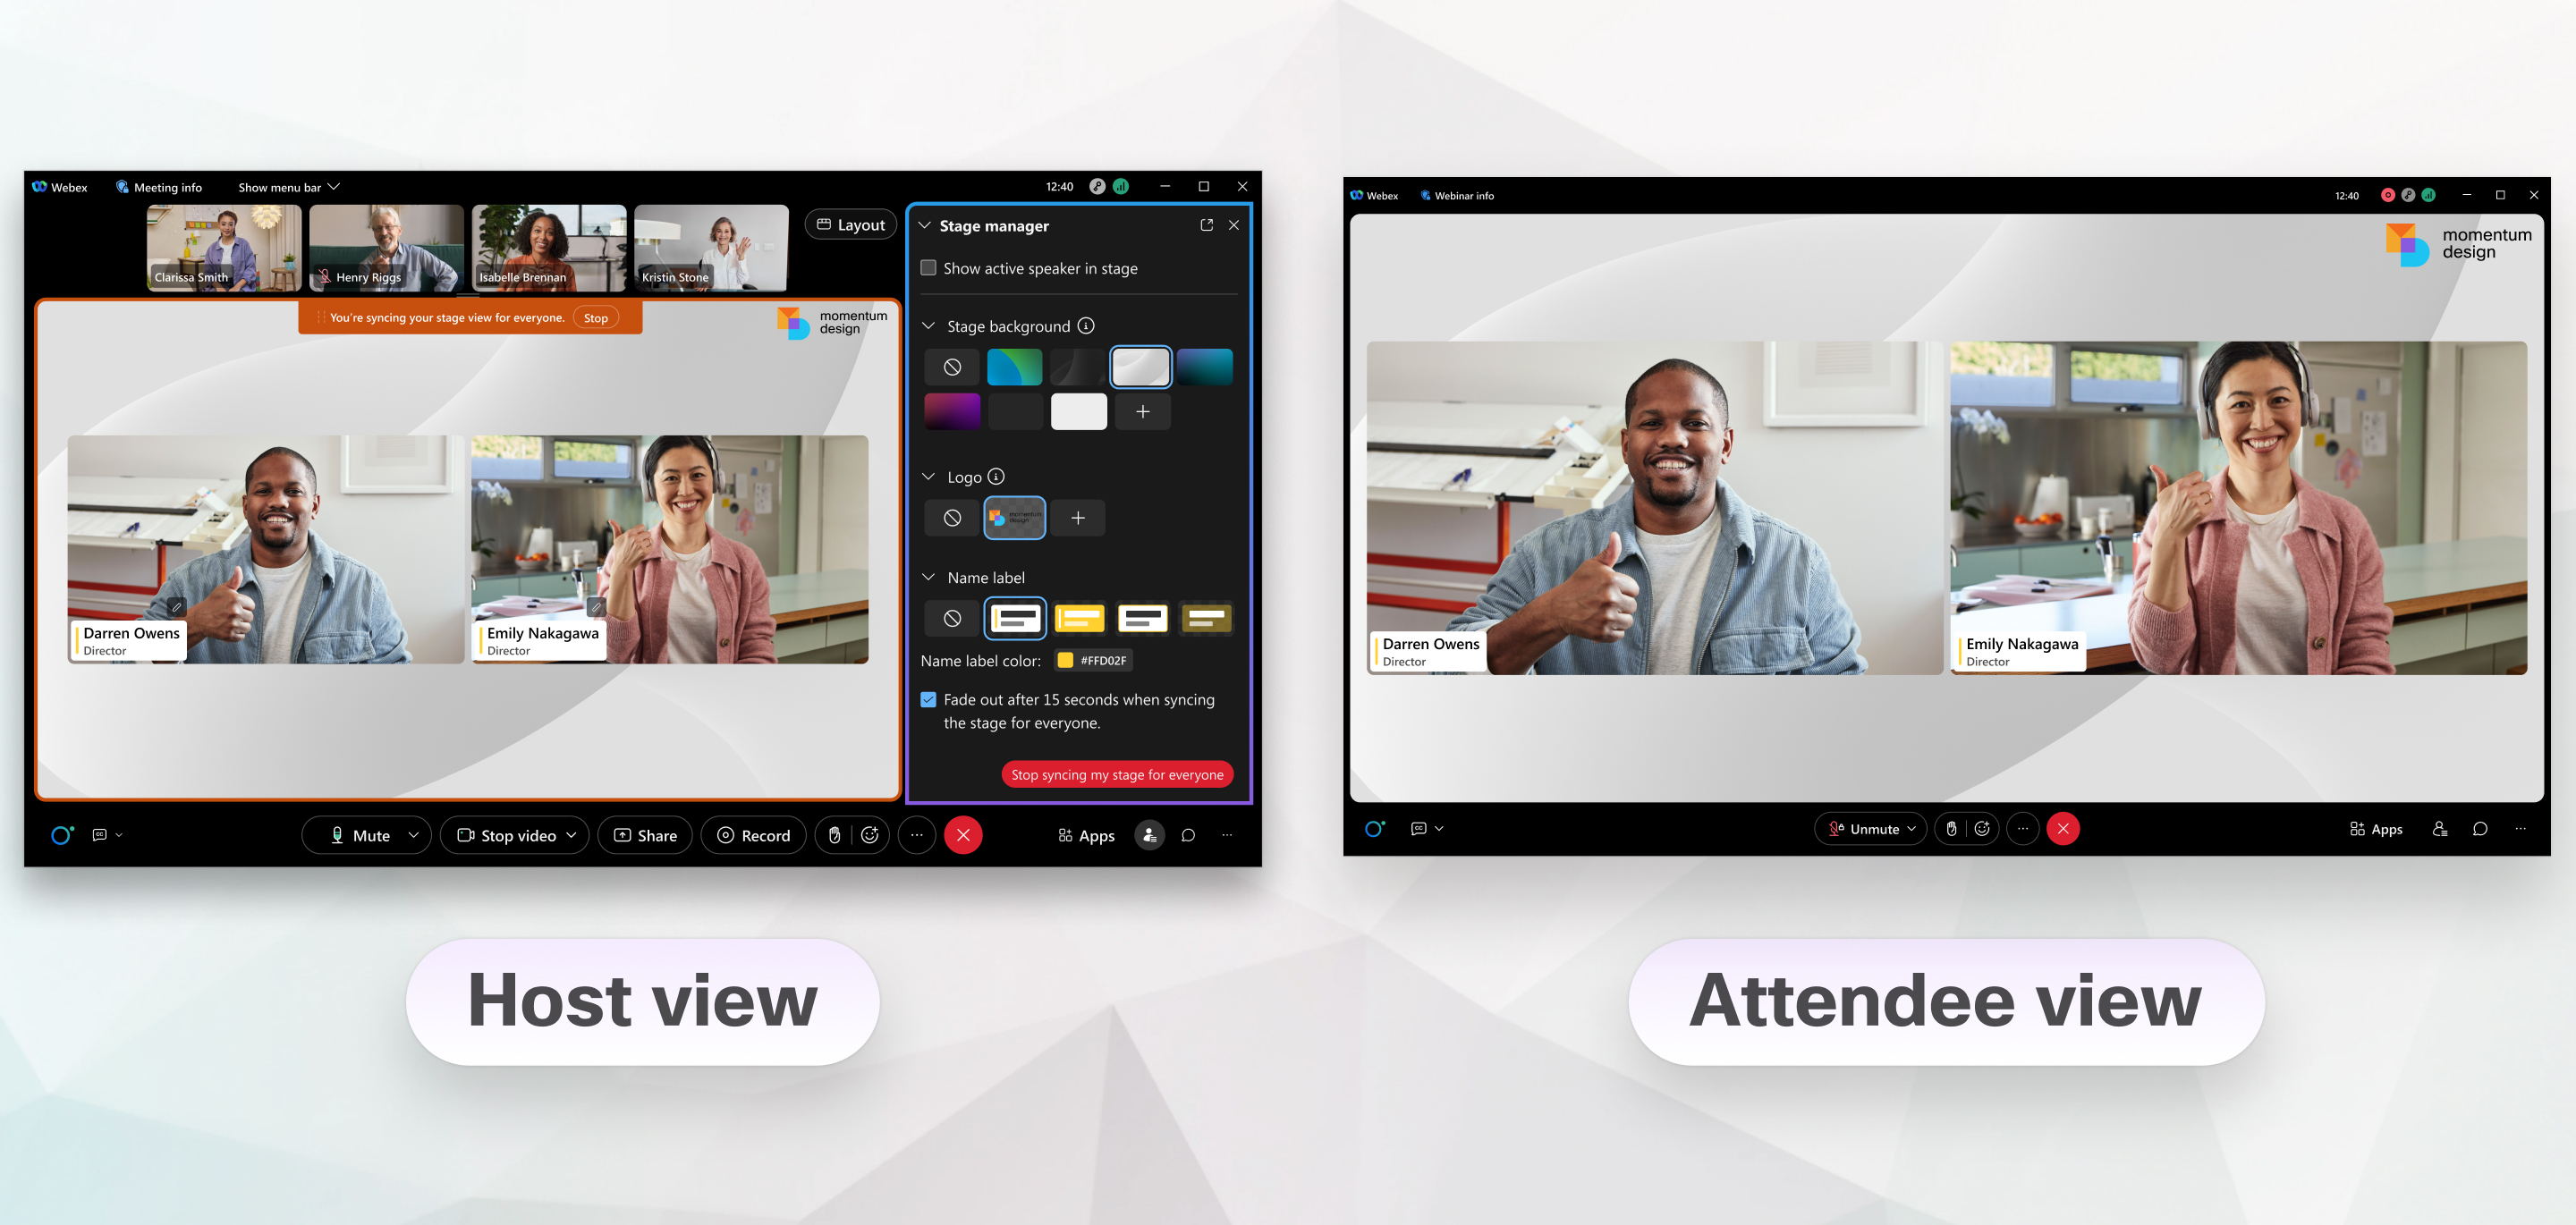
As the webinar host or cohost, you can customize three aspects of your webinar with the stage manager. Set the stage background image that displays behind everything on your stage, choose a logo and its location on the stage, and choose the look and behavior of everyone's display name. Customize your webinar when you schedule it, or at any time during the webinar.
The stage manager has the following limitations:
- The customized stage doesn't appear for people who join using a video device.
- Webinars in webcast view don't support the stage manager.
- If a panelist calls in to the webinar, the display name and subtitle given to them by the host don't appear.
Customize your stage when scheduling
Keep your customization options for future webinars by saving your webinar as a template. The customization options you make appear for attendees when you sync your stage with everyone during the webinar.
Before you begin
| 1 |
From your Webex site, click Webinars, then select your webinar. |
| 2 |
In the Stage manager section, click Edit. |
| 3 |
in the Stage background section, choose an existing background or click + and select an image from your computer. Use the preview options below the image to see how
your background looks when there's video only, or when there's shared content. |
| 4 |
In the Logo section, click +, then choose a logo image on your computer. The logo appears in the top-left corner by default.
Drag the logo to another corner to change where it appears. |
| 5 |
Click Edit display name and subtitle, then update the display name and subtitle for the panelists. |
| 6 |
In the Name label section, choose a label template and select a color, if you want to change it. |
| 7 |
By default, display names fade out after you sync your stage. If you want them to remain on screen, uncheck Fade out after 15 seconds when syncing the stage for everyone. |
| 8 |
Click Save. |
Manage the stage during a webinar
| 1 |
During your webinar, click . There must be at least two panelists, including the host, for
the layout options to appear. |
| 2 |
To show the stage to everyone, click Sync stage for everyone, then click Sync. Check Lock attendee view on stage only
to limit the attendee view to just the stage. |
| 3 |
If you want to change the look of the stage, choose a different stage background, logo, or name label, then click Update. |
| 4 |
To stop showing your customized stage, click Stop syncing my stage for everyone. |


