
תודה על המשוב.
 משוב?
משוב?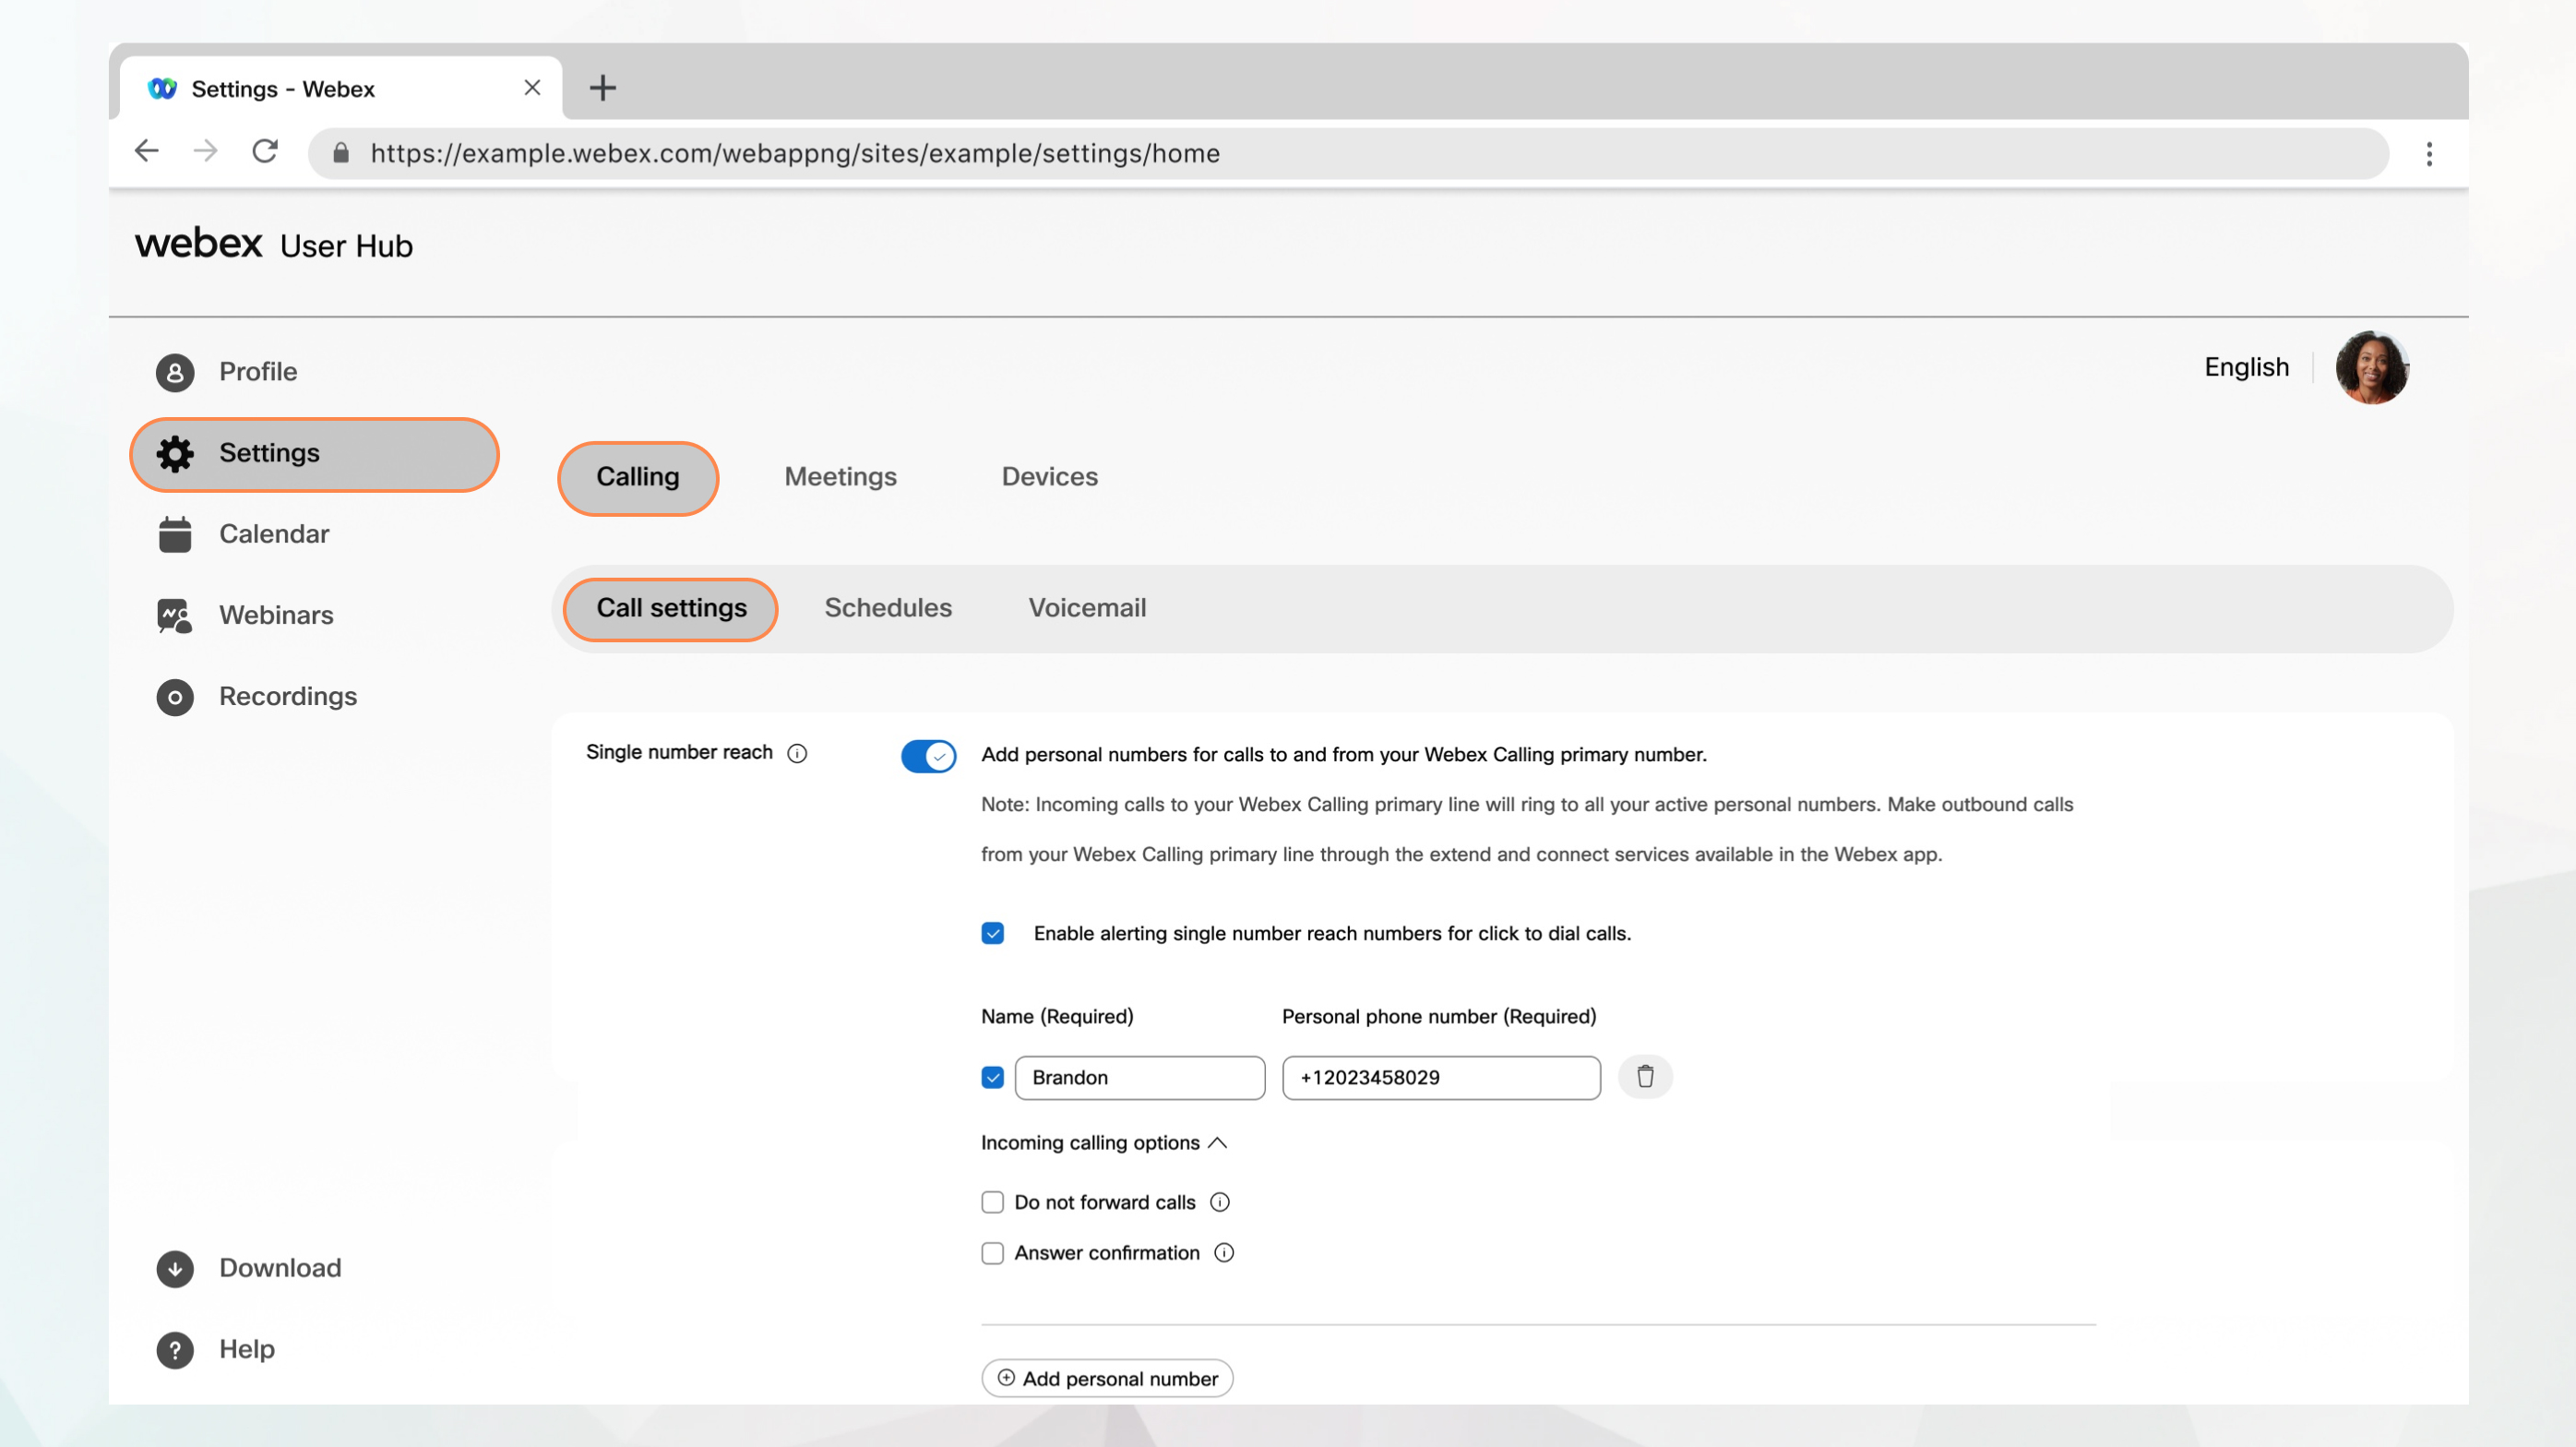
לפני שתתחיל
-
מנהל המערכת חייב להגדיר עבור מיקומך מספר גישה יחיד (בכל מקום במשרד).
-
מנהל המערכת שלך חייב להפעיל תכונה זו כדי שתוכל לגשת אליה ולהגדיר אותה. אם אינך רואה הגדרה זו, פנה למנהל המערכת שלך.
-
ניתן להגדיר את כל הגדרות השיחה ממרכז המשתמשים על ידי ניווט אל .
האפשרות שיחה זמינה רק למשתמשים עם רישיון Webex Calling. אם אינך רואה את האפשרות שיחות, פירוש הדבר שאין לך רישיון Webex Calling.
אם ברצונך לברר באיזה שירות שיחות אתה מוגדר, תוכל לבדוק זאת באפליקציית Webex. לפרטים נוספים, ראה גלה איזה שירות שיחות יש לך.
| 1 |
היכנס ל- מרכז משתמשים. |
| 2 |
עבור אל . |
| 3 |
עבור אל הקטע השגת מספר יחיד (משרד בכל מקום) והפעל את כפתור ההפעלה. |
| 4 |
בחר שם ו- מספר טלפון אישי כדי להוסיף שם ומספר טלפון שישמשו כמספר ההגעה היחיד שלך. לאחר הוספת מספר טלפון, המספר יופעל. כדי להשבית, בטל את הסימון בתיבה שליד מספר הטלפון. |
| 5 |
בחר אחת מהאפשרויות הבאות אפשרויות שיחות נכנסות:
|
| 6 |
לחץ על שמור. ניתן להוסיף מספר אישי נוסף על ידי לחיצה על הוסף מספר אישי נוסף ולאחר מכן ביצוע השלבים הקודמים. |


