
Thanks for your feedback.
Set automatic approval rules for registration requests in Webex Meetings and Webinars
 Feedback?
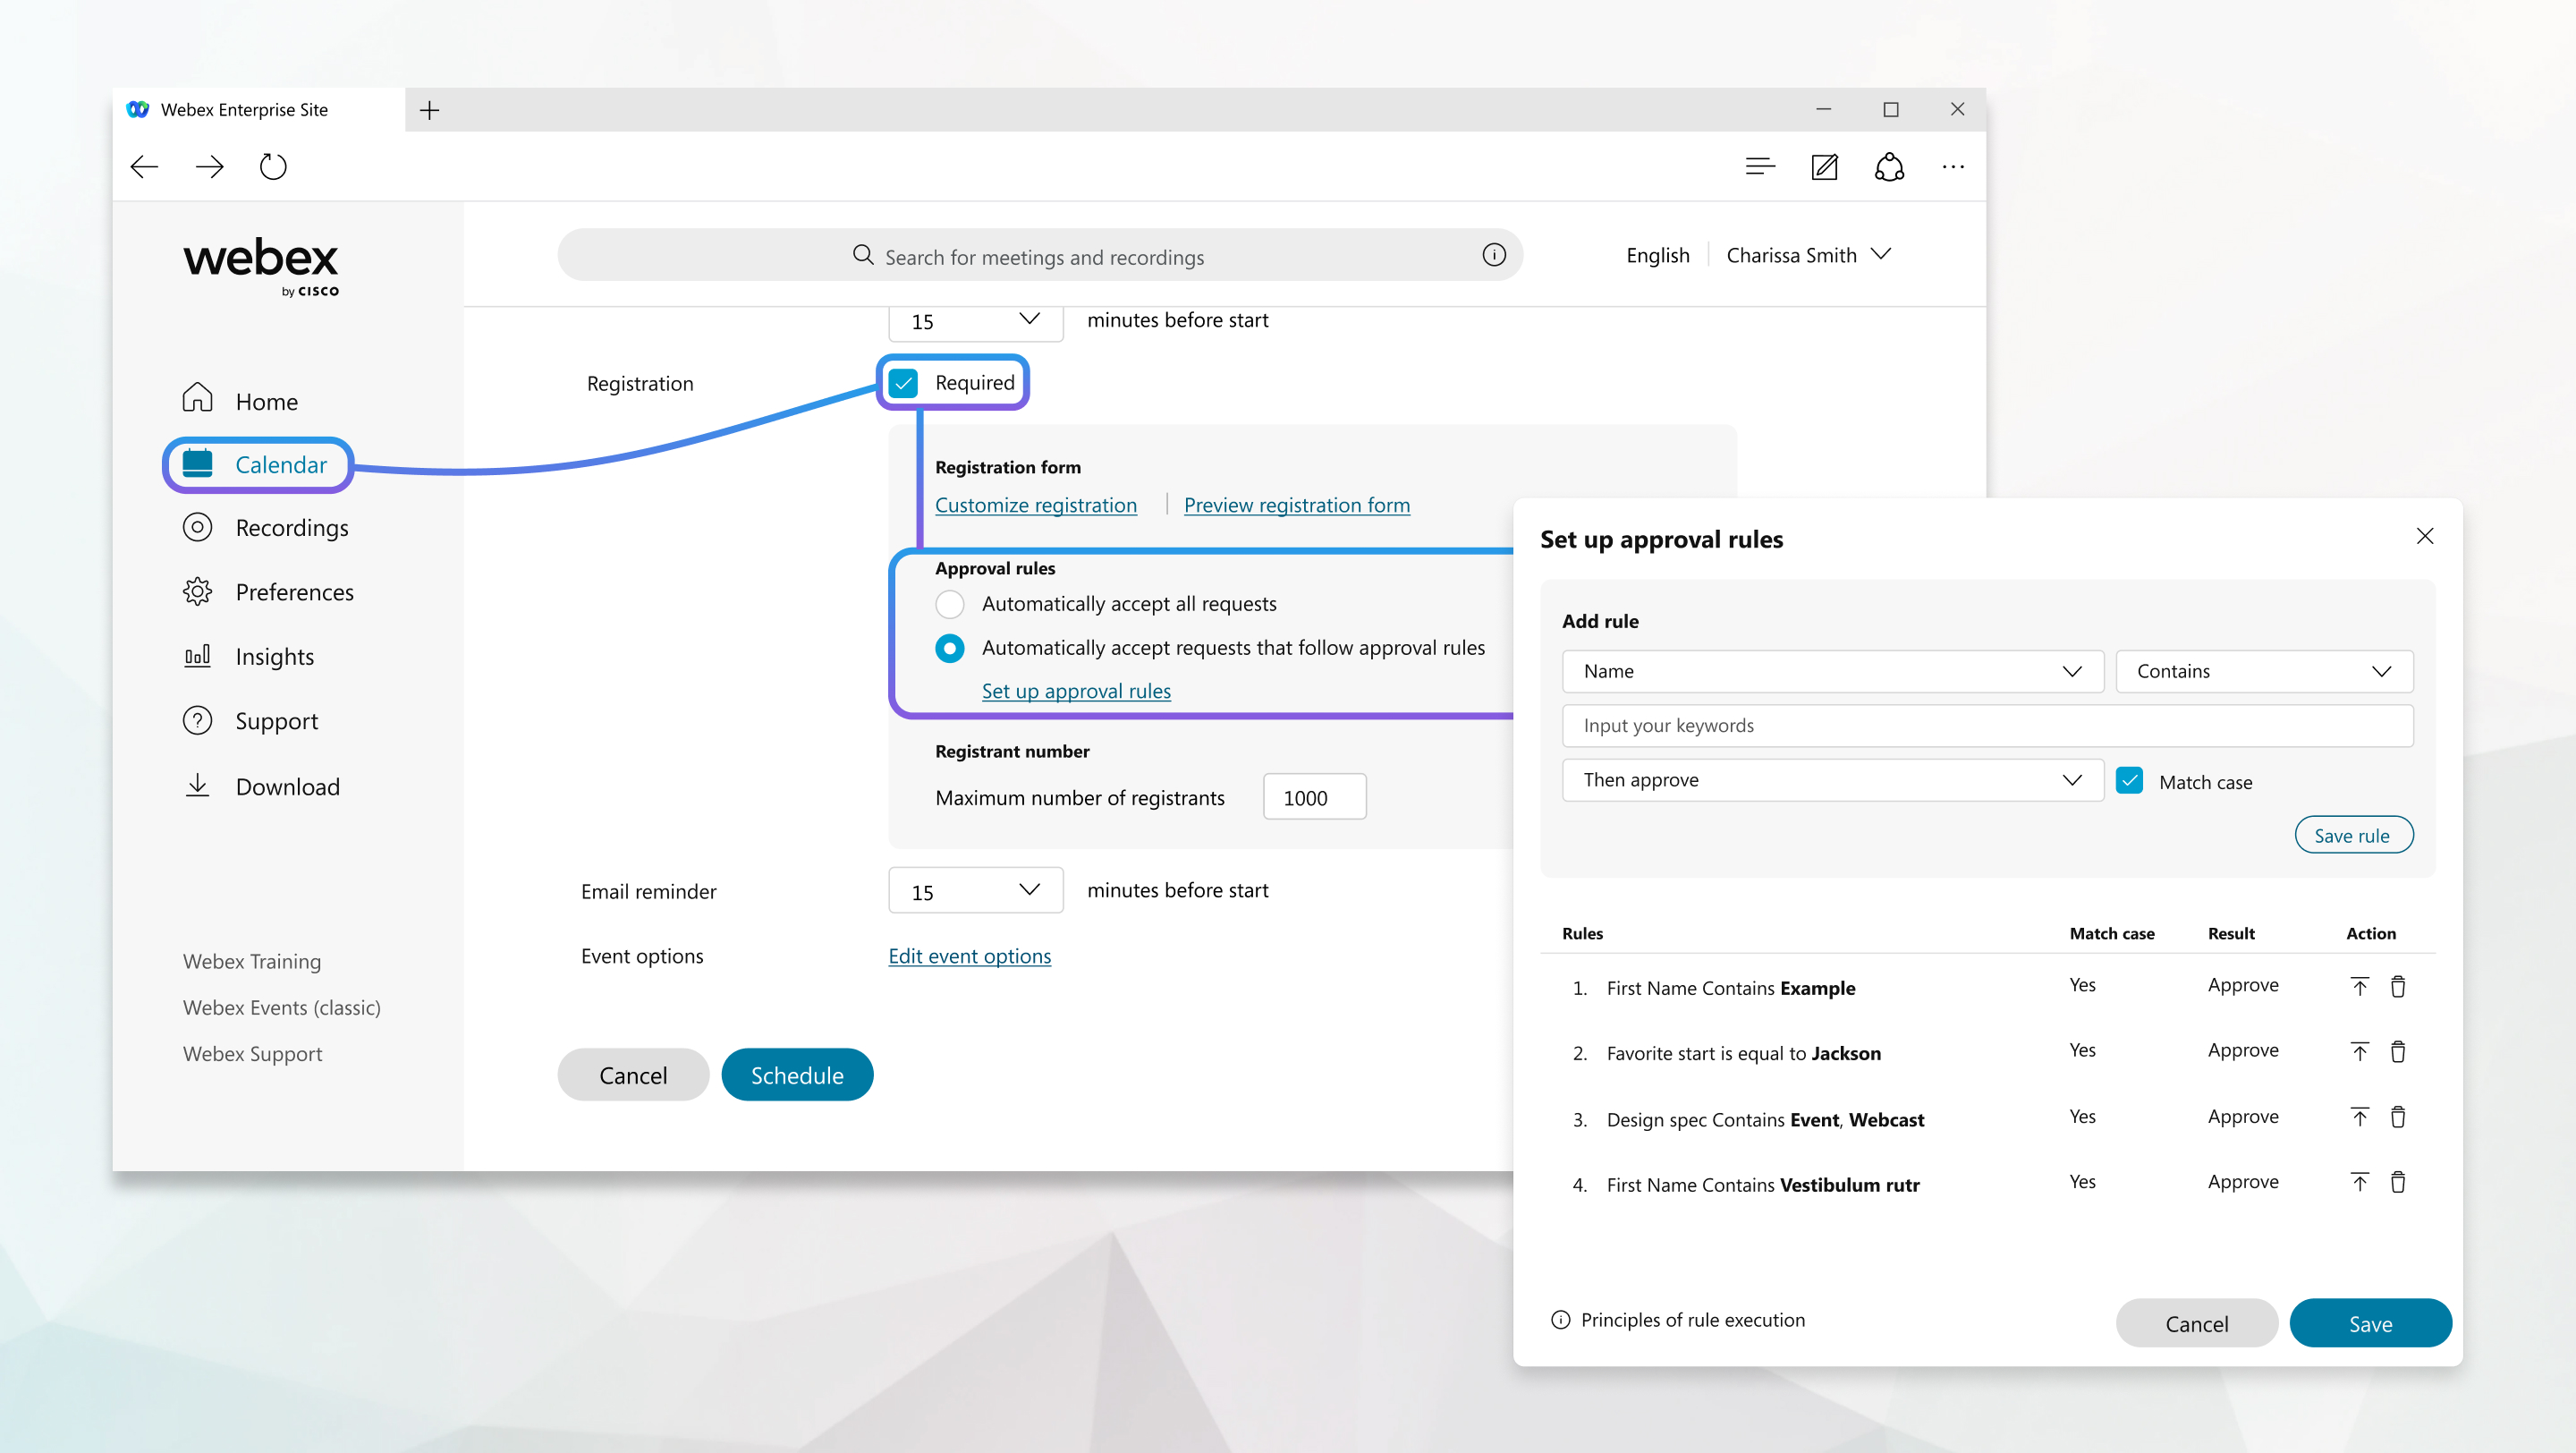
| 1 |
Sign in to your Webex site and click Schedule a meeting or Schedule a webinar. |
| 2 |
Add information about your meeting or webinar, and add email addresses of people you’re inviting or import invitees from a CSV file. |
| 3 |
Click Advanced options. |
| 4 |
Check the Required check box next to Registration. |
| 5 |
(Optional) Customize the registration form for Webex Meetings and Webinars. |
| 6 |
To prevent unauthorized access for guest attendees, check the check box next to Generate random ID authentication for each registrant. Once the webinar is scheduled, the attendee receives a registration ID through email. |
| 7 |
Select Automatically accept requests that follow approval rules and then click Set up approval rules. |
| 8 |
Set up your rule and its parameters. By default, you can set up rules for First Name, Last Name, and Email. If you customized the registration form, you can also set rules and parameters for any of the questions you've added. |
| 9 |
When you finish setting up a rule, select Add rule. Rules are applied in the order that they are set. To learn more about rules, click Principles of rule execution. |
| 10 |
When you have set up all of your approval rules, select Save. Any registration requests that don't follow the approval rules you have set are automatically rejected. If you want these registrants to attend your webinar, you can manually review and accept these registration requests. |


