- Home
- /
- Article

Thanks for your feedback.

 In this article
 Feedback?
You can add wifi-802.1X/802.1X or HTTPS certificates to individual devices and connected peripherals.
You can add certificates from the device's local web interface. Alternatively, you can add certificates by running API commands. To see which commands allow you to add certificates, see roomos.cisco.com .
Service certificates and trusted CAs
Certificate validation may be required when using TLS (Transport Layer Security). A server or client may require that the device presents a valid certificate to them before communication is set up.
The certificates are text files that verify the authenticity of the device. These certificates must be signed by a trusted certificate authority (CA). To verify the signature of the certificates, a list of trusted CAs must reside on the device. The list must include all CAs needed in order to verify certificates for both audit logging and other connections.
Certificates are used for the following services: HTTPS server, SIP, IEEE 802.1X, and audit logging. You can store several certificates on the device, but only one certificate is enabled for each service at a time.
On RoomOS October 2023 and later, when you add a CA certificate to a device, it is also applied to a Room Navigator if one is connected. To sync the previously added CA certificates to a connected Room Navigator, you must reboot the device. If you don't want the peripherals to get the same certificates as the device it's connected to, set the configuration Peripherals Security Certificates SyncToPeripherals to False.
Previously stored certificates are not deleted automatically. The entries in a new file with CA certificates are appended to the existing list.
For Wi-Fi connection
We recommend that you add a trusted CA certificate for each Board, Desk, or Room Series device, if your network uses WPA-EAP authentication. You must do this individually for each device, and before you connect to Wi-Fi.
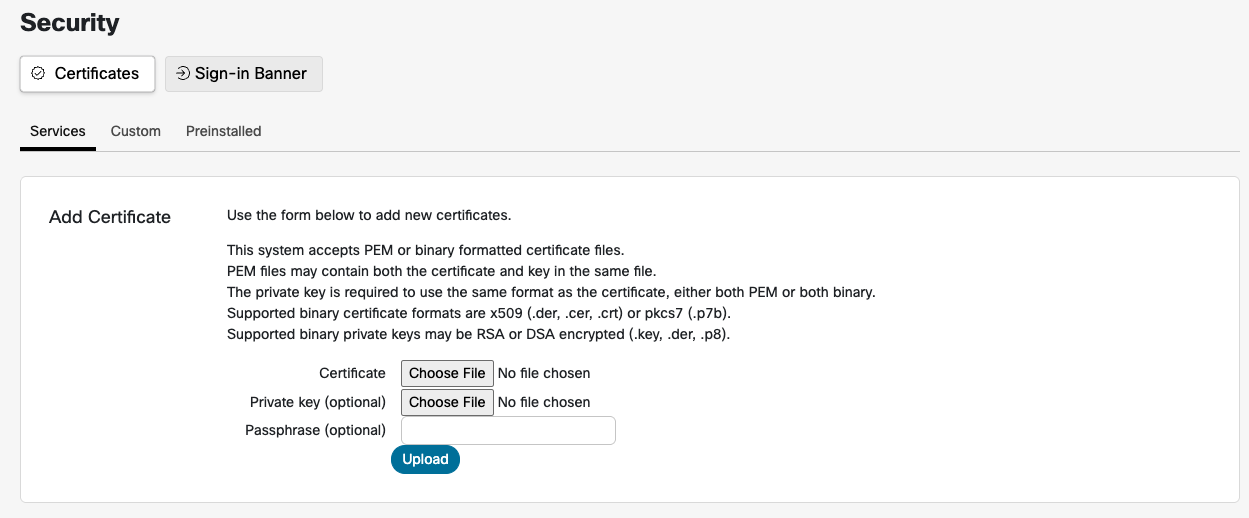
Supported Certificate and Key Formats
-
This system accepts certificate files in either PEM or binary formats.
-
PEM files may contain both the certificate and the private key within the same file.
-
The private key must be in the same format as the certificate; that is, both must be either PEM or binary.
-
Supported binary certificate formats include X.509 files with extensions .der, .cer, or .crt, and PKCS7 files with the .p7b extension.
-
Supported binary private key formats include RSA or DSA encrypted keys, typically with extensions .key, .der, or .p8.
The certificate and the private key are stored in the same file on the device. If authentication fails, the connection will not be established.
The certificate and its private key are not applied to connected peripherals.
Add certificates on Board, Desk, and Room Series devices
| 1 |
From the customer view in https://admin.webex.com , go to the Devices page, and select your device in the list. Go to Support and launch Local Device Controls . If you have set up a local Admin user on the device, you can access the web interface directly by opening a web browser and typing in http(s)://<endpoint ip or hostname>. |
| 2 |
Navigate to and upload your CA root certificate(s). |
| 3 |
On openssl, generate a private key and certificate request. Copy the content of the certificate request. Then paste it to request the server certificate from your certificate authority (CA). |
| 4 |
Download the server certificate signed by your CA. |
| 5 |
Navigate to and upload the private key and the server certificate. |
| 6 |
Enable the services that you want to use for the certificate you just added. |
Generate Certificate Signing Request (CSR)
Administrators must generate a Certificate Signing Request (CSR) from the Control Hub for a cloud-registered Board, Desk, or Room Series device.
Follow these steps to generate a CSR and upload a signed certificate to your device:
- From the customer view in Control Hub, go to the Devices page and select your device from the list.
- Navigate to Actions > Run xCommand > Security > Certificates > CSR > Create.
- Enter the required certificate details and select Execute.
- Copy all the text between ----BEGIN CERTIFICATE REQUEST---- and ----END CERTIFICATE REQUEST----.
- Use a Certificate Authority (CA) of your choice to sign the CSR.
- Export the signed certificate in PEM (Base64-encoded) format.
- Open the signed certificate file in a text editor (e.g., Notepad) and copy all the text between ----BEGIN CERTIFICATE---- and ----END CERTIFICATE----.
- In Control Hub, navigate to Devices > select your device > Actions > Run xCommand > Security > Certificates > CSR > Link.
- Paste the copied certificate contents into the Body section and select Execute.
- Refresh the page to verify that the certificate appears under Existing Certificate.
Simple Certificate Enrollment Protocol (SCEP)
Simple Certificate Enrollment Protocol (SCEP) provides an automated mechanism for enrollment and refreshing certificates that are used for example 802.1X authentication on devices. SCEP allows you to maintain the device's access to secure networks without manual intervention.
-
When the device is new or has been factory reset, it needs network access to reach the SCEP URL. The device should be connected to the network without 802.1X to obtain an IP address.
-
If using a wireless enrollment SSID, go through the onboarding screens to configure the connection with the network.
-
Once you are connected to the provisioning network, the device doesn't need to be on a particular onboarding screen.
-
To fit all deployments the SCEP Enrollment xAPIs will not store the CA certificate used to sign the device certificate. For server authentication, the CA certificate used to validate the server’s certificate needs to be added with xCommand Security Certificates CA Add.
Prerequisites
You need the following information:
-
SCEP Server's URL.
-
Fingerprint of the signing CA (Certificate Authority) certificate.
-
Information of the certificate to enroll. This makes up the Subject Name of the certificate.
-
Common name
-
Country name
-
State or Province name
-
Locality name
-
Organization name
-
Organizational unit
-
- The subject name will be ordered as /C= /ST= /L= /O= /OU= /CN=
-
SCEP Server's challenge password if you have configured the SCEP Server to enforce an OTP or Shared Secret.
You can set the required key size for the certificate request keypair using the following command . Default is 2048.
xConfiguration Security Enrollment KeySize: <2048, 3072, 4096>We send a certificate request that is valid for one year for certificate expiry. The server-side policy can change the expiry date during certificate signing.
Ethernet connection
When a device is connected to a network, make sure it can access the SCEP server. The device should be connected to a network without 802.1x to obtain an IP address. The device's MAC address may need to be provided to the provisioning network in order to obtain an IP address. The MAC address can be found on the UI or on the label at the back of the device.
After the device is connected to the network, you can SSH to the device as admin to access TSH, then run the following command to send the Enrollment SCEP Request:
xCommand Security Certificates Services Enrollment SCEP Request Once the SCEP Server returns the signed device certificate, activate the 802.1X.
Activate the signed certificate:
xCommand Security Certificates Services Activate Reboot the device after activating the certificate.
Wireless connection
When a device is connected to a wireless network, make sure it can access the SCEP server.
After the device is connected to the network, you can SSH to the device as admin to access TSH, then run the following command to send the Enrollment SCEP Request:
xCommand Security Certificates Services Enrollment SCEP Request Device receives the signed certificate from the SCEP server.
Activate the signed certificate:
xCommand Security Certificates Services ActivateAfter activating, you need to configure the Wi-Fi network with EAP-TLS authentication.
xCommand Network Wifi Configure By default, the Wi-Fi configuration skips server validation checks. If only one-way authentication is required, then keep AllowMissingCA defaulted to True.
To force server validation, ensure that the AllowMissingCA optional parameter is set to False. If a connection cannot be established due to service validation errors, check that the correct CA has been added to verify the server certificate which may be different than the device certificate.
API descriptions
Role: Admin, Integrator
xCommand Security Certificates Services Enrollment SCEP RequestSends a CSR to a given SCEP server for signing. The CSR SubjectName parameters will be constructed in the following order: C, ST, L, O, OUs, CN.
Parameters:
-
URL(r): <S: 0, 256>
The URL address of the SCEP server.
-
Fingerprint(r): <S: 0, 128>
CA Certificate Fingerprint that will sign the SCEP request CSR.
-
CommonName(r): <S: 0, 64>
Adds "/CN=" to the CSR Subject Name.
-
ChallengePassword: <S: 0, 256>
OTP or Shared Secret from the SCEP Server for access to sign.
-
CountryName: <S: 0, 2>
Adds "/C=" to the CSR Subject Name.
-
StateOrProvinceName: <S: 0, 64>
Adds "/ST=" to the CSR Subject Name.
-
LocalityName: <S: 0, 64>
Adds "/L=" to the CSR Subject Name.
-
OrganizationName: <S: 0, 64>
Adds "/O=" to the CSR Subject Name.
-
OrganizationalUnit[5]: <S: 0, 64>
Adds up to 5 "/OU=" parameters to the CSR Subject Name.
-
SanDns[5]: <S: 0, 64>
Adds up to 5 Dns parameters to the CSR Subject Alternative Name.
-
SanEmail[5]: <S: 0, 64>
Adds up to 5 Email parameters to the CSR Subject Alternative Name.
-
SanIp[5]: <S: 0, 64>
Adds up to 5 Ip parameters to the CSR Subject Alternative Name.
-
SanUri[5]: <S: 0, 64>
Adds up to 5 Uri parameters to the CSR Subject Alternative Name.
xCommand Security Certificates Services Enrollment Profiles DeleteDeletes an enrollment profile to no longer renew certificates.
Parameters:
-
Fingerprint(r): <S: 0, 128>
The CA certificate fingerprint that identifies the profile you wish to remove. You can see the available profiles to remove by running:
xCommand Security Certificates Services Enrollment Profiles List
xCommand Security Certificates Services Enrollment Profiles ListLists Enrollment profiles for certificate renewal.
xCommand Security Certificates Services Enrollment SCEP Profiles Set
    Fingerprint(r): <S: 0, 128>
    URL(r): <S: 0, 256>
Add an enrollment profile for certificates issued by the CA fingerprint to use the given SCEP URL for renewal.
Renewal
xCommand Security Certificates Services Enrollment SCEP Profiles SetIn order to automatically renew the certificate, the device needs to be able to access the SCEP Url that can resign the certificate.
Once daily, the device will check for certificates that will expire with 45 days. The device will then attempt to renew these certificate if their issuer matches a profile.
NOTE: All device certificates will be checked for renewal, even if the certificate wasn't originally enrolled using SCEP.
Navigator
-
Direct Paired: Enrolled Certificates can be activated as "Pairing" certificate.
-
Remote Paired: Tell the navigator to enroll a new SCEP certificate using the Peripheral's ID:
xCommand Peripherals Security Certificates Services Enrollment SCEP RequestEnrollment profiles are automatically synchronized to paired navigator.
-
Stand-alone Navigator: Same as codec enrollment
Configure 802.1x authentication on Room Navigator
You can set up 802.1x authentication directly from the Room Navigator's Settings menu.
The 802.1x authentication standard is particularly important for Ethernet networks, and it ensures that only authorized devices are granted access to the network resources.
Different login options are available based on the EAP method configured in your network. For example:
- TLS: User name and password are not used.
- PEAP: Certificates are not used.
- TTLS: Both user name/password and certificates are required; neither is optional.
There are several ways to get the client certificate on a device:
- Upload the PEM: Use the Security Certificates Services Add feature.
- Create the CSR: Generate a Certificate Signing Request (CSR), sign it, and link it using Security Certificates CSR Create/Link.
- SCEP: Utilize Security Certificates Services Enrollment SCEP Request.
- DHCP Option 43: Configure the certificate delivery through this option.
Setting up and updating the certificates for 802.1x should be done before pairing the Room Navigator to a system, or after factory resetting the Room Navigator.
The default credentials are admin and blank password. For more information on how to add certificates by accessing the API, see the latest version of the API guide .
- Open the control panel on the Navigator by tapping the button in the top right corner or swiping from the right side. Then tap Device settings .
- Go to Network connection and select Ethernet .
- Toggle Use IEEE 802.1X on.
- If authentication is setup with credentials, enter the user identity and passphrase. You can also enter an anonymous identity: this is an optional field that provides a way to separate the actual user's identity from the initial authentication request.
- You can toggle TLS Verify off or on. When TLS verify is turned ON, the client actively verifies the authenticity of the server's certificate during the TLS handshake. When TLS verify is turned OFF, the client does not perform active verification of the server's certificate.
- If you have uploaded a client certificate by accessing the API, toggle Use Client Certificate on.
- Toggle the Extensible Authentication Protocol (EAP) methods you want to use. The choice of EAP method depends on the specific security requirements, infrastructure, and client capabilities. EAP methods are crucial for enabling secure and authenticated network access.
SCEP parameters configuration with DHCP Option 43
You can use DHCP Option 43 to automatically deliver SCEP parameters, facilitating efficient and secure enrollment of 802.1X device certificates. DHCP Option 43 is preconfigured with the SCEP parameters, allowing the device to retrieve these parameters from the DHCP server and automatically perform the SCEP certificate enrollment.
Since DHCP option data is not protected, we recommend using this option only in trusted and secure deployment environments to prevent unauthorized devices from accessing the data.
The certificate enrolled using the DHCP option will be renewed automatically, with a renewal profile generated automatically based on the DHCP options configured for SCEP.
To enroll an SCEP certificate by configuring the SCEP parameters in DHCP Option 43, follow these steps:
- Prepare the SCEP environment.
For detailed guidance on setting up your SCEP environment, refer to your SCEP server documentation.
-
Configure DHCP Option 43.
Set up DHCP Option 43 according to the Vendor Specific Information format defined in section 8.4 of RFC 2132.
The suboptions numbered 11 through 14 are specifically reserved for specifying the method:
| Parameters | Suboption | Type | Length (byte) | Mandatory |
|---|---|---|---|---|
| SCEP Server URL | 11 | string | Variable length | Yes |
| Signing CA Fingerprint | 12 | binary | 20 or 32 | Yes |
| Challenge Password | 13 | string | Variable length | No |
| Enable 802.1X Authentication | 14 | boolean | 1 | Yes |
The total length of all parameters must not exceed the length of option 43, which is 255 bytes. If the 'Enable 802.1X Authentication' parameter is disabled (set to false), certificate enrollment will not occur.
The following table provides an example configuration of DHCP Option 43, specifically detailing suboptions 11 through 14.
|
Suboption decimal/hex | Value length (byte) decimal/hex | Value | Hex value |
|---|---|---|---|
| 11/0b | 18/12 | http://10.79.57.91 | 687474703a2f2f31302e37392e35372e3931 |
| 12/0c | 20/14 | 12040870625C5B755D73F5925285F8F5FF5D55AF | 12040870625C5B755D73F5925285F8F5FF5D55AF |
| 13/0d | 16/10 | D233CCF9B9952A15 | 44323333434346394239393532413135 |
| 14/0e | 1/01 | 1 (0: No; 1: Yes) | 01 |
Summary of the parameter values:
- Server = http://10.79.57.91
- Root CA Fingerprint = 12040870625C5B755D73F5925285F8F5FF5D55AF
- Challenge Password = D233CCF9B9952A15
- Enable 802.1X Authentication = Yes
The syntax of the final hexadecimal value is:
{<suboption><length><value>}...
According to the parameter values above, the final hexadecimal value is as follows:
0b12687474703a2f2f31302e37392e35372e39310c1412040870625C5B755D73F5925285F8F5FF5D55AF0d10443233334343463942393935324131350e0101


