
Thanks for your feedback.
 Feedback?
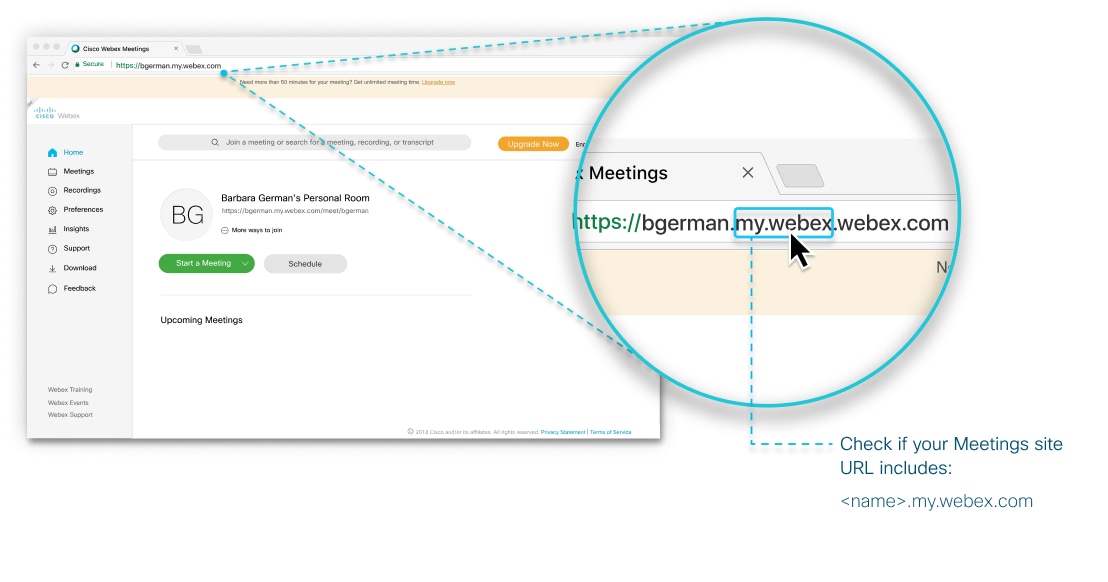
If you don't remember exactly when you signed up for your free account, sign in to your account and check the site URL in the browser bar. If it's a four-part URL and looks something like [name].my.webex.com, follow the steps in this article.
If your Meetings site URL has three parts and contains the word meetingsgamer, meetingsapec, or meetingsemea, this article doesn’t apply; follow the steps in Switch to a Webex Paid Plan (for Free Accounts Created after March 17, 2020) instead.
To upgrade to a paid plan:
| 1 | |
| 2 | In the upper right corner of the home page, click Buy Premium Plan. |
| 3 | On the Plans & Pricing page, choose the plan you want and click Buy Now. |
| 4 | Customize your plan: |
| 5 | Click Proceed to checkout. |
| 6 | Enter the email address you used with your free account. |
| 7 | Click Continue to finish upgrading to a paid plan. |


