- Home
- /
- Article

Thanks for your feedback.

Provision your Webex services subscription
 In this article
 Feedback?
Webex administrators can provision their subscriptions from Control Hub.
Overview
You can provision Webex Suite subscriptions in Control Hub. You'll get a welcome email that includes a link to set up Webex services. If you didn't get that email, contact the salesperson you worked with to place the order. New subscriptions have two parts to complete: organization finder and service setup.
For more details on the provisioning wizard, see this guide.
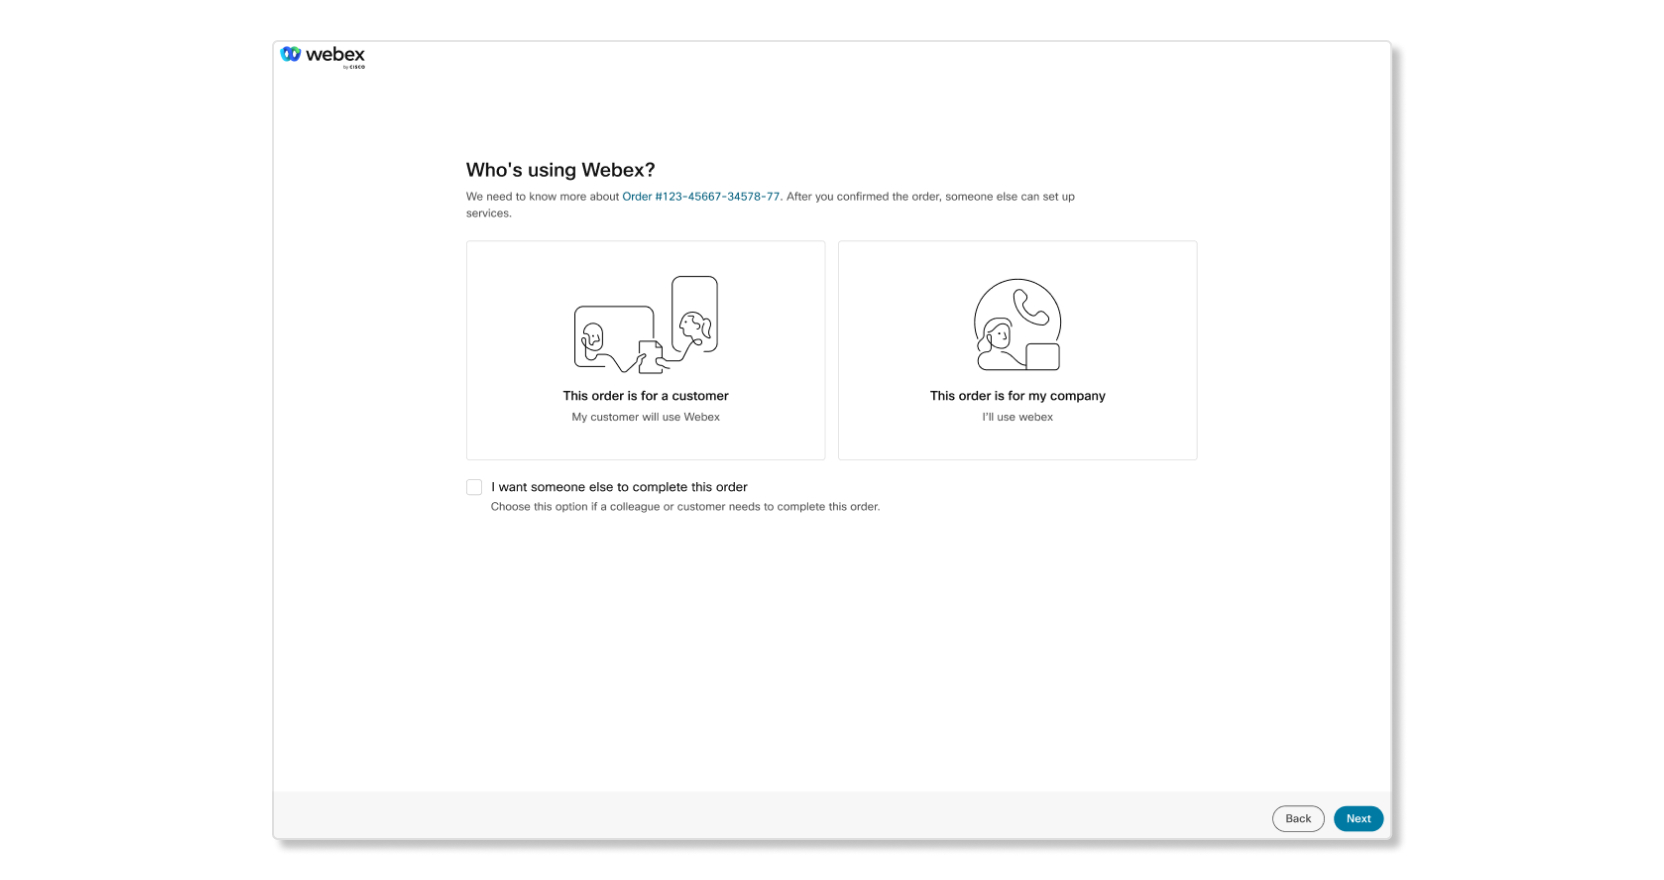
When you start the provisioning process, you'll start by choosing if the order is intended for your customer or for your own organization. We recommend partners to provision services on behalf of the customer so that the partner can support the customer even after the setup is complete.
Partner setting up a subscription for a customer
If you're a partner setting up for a customer, you'll have to complete these steps:
- Map the subscription to your partner organization.
- Map the subscription to the correct customer organization.
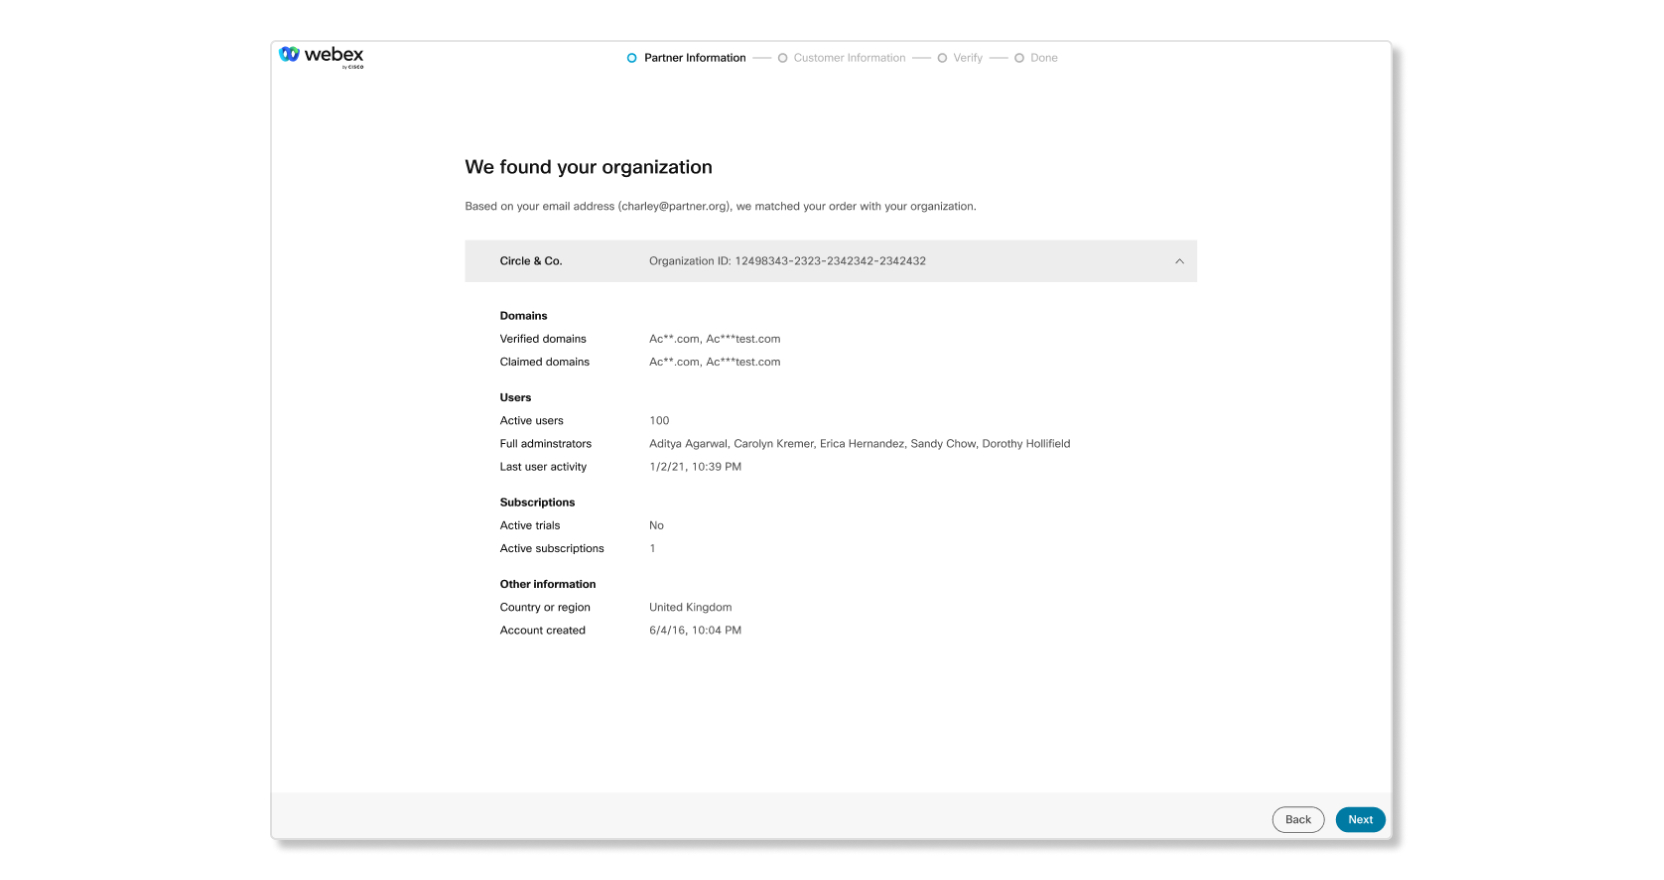
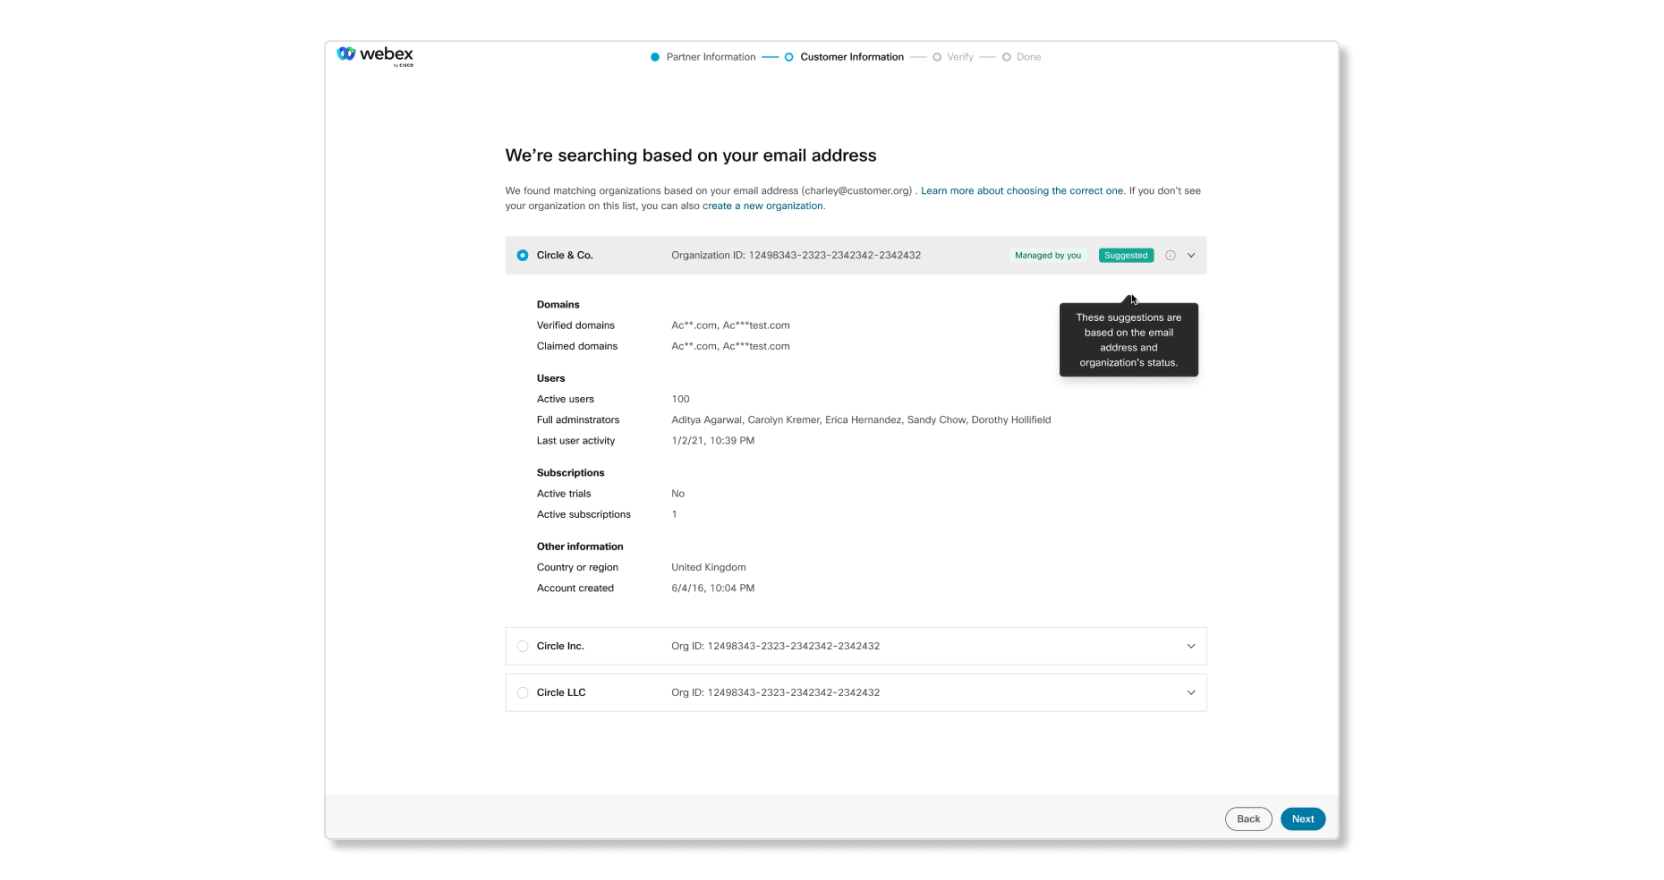
A partner and customer organizations are recommended for the order based on certain parameters. such as:
- Domains in organizations that associates with your email address.
- Most recent activity across users in an organization.
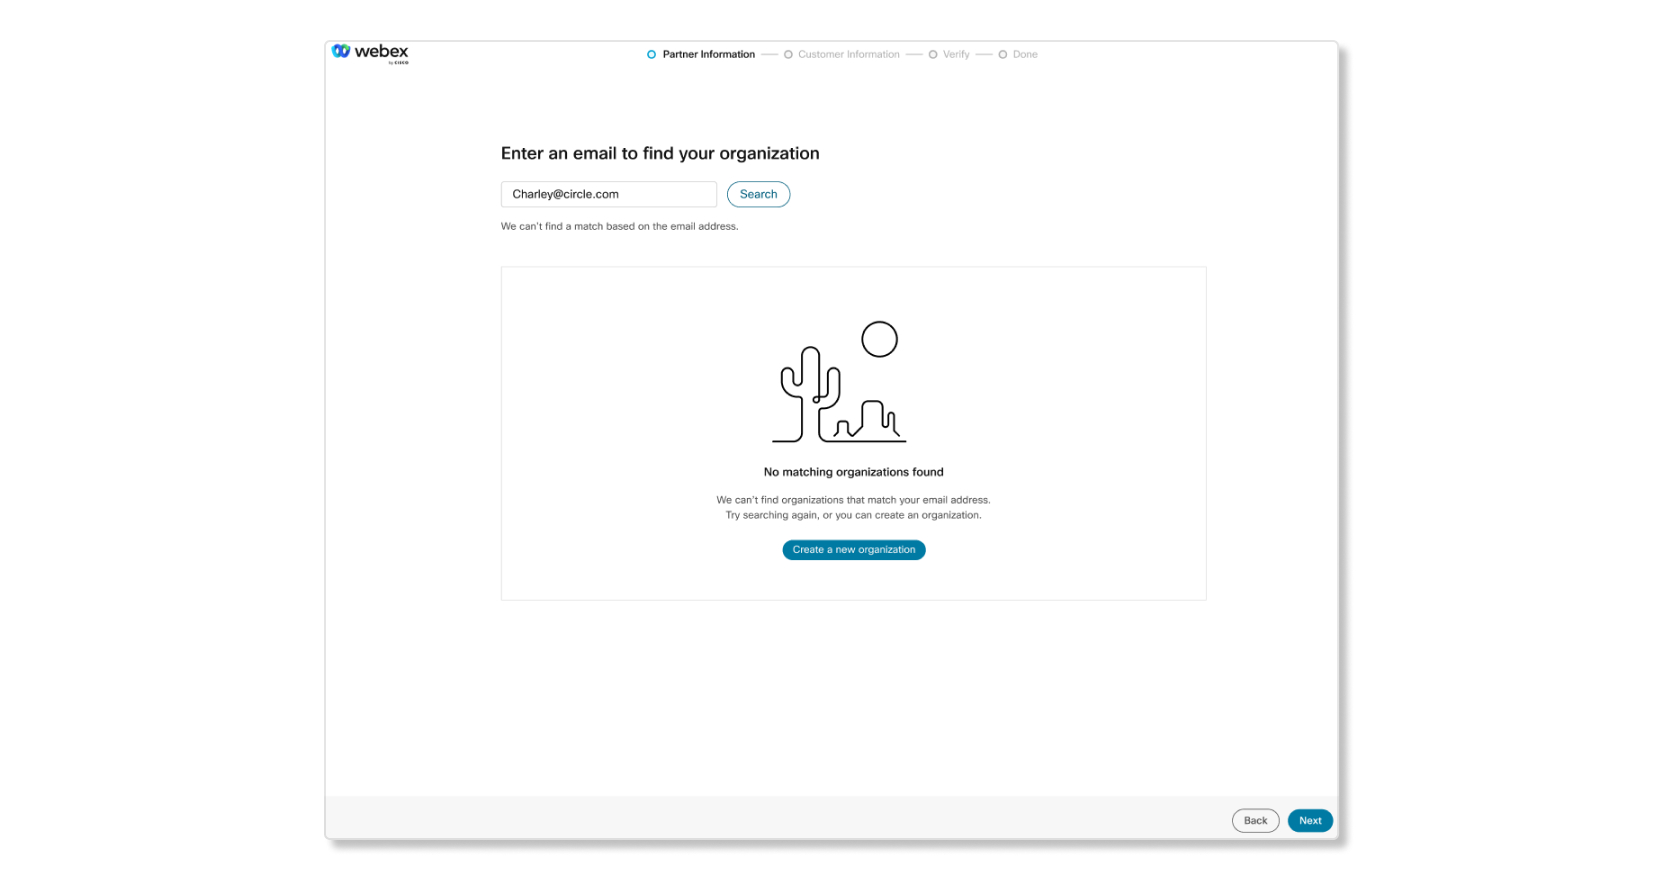
- A global domain-based search so you can choose from a list of organizations.
If you don't have a partner organization yet, then you'll be able to create a new one. Once you mapped the subscription to both a partner and customer organization, you can set up the services that the customer purchased.
Map to a partner org
| 1 |
Open the email you received titled Provisioning information required for order..., and click Set Up Your Service. |
| 2 |
Select Next. |
| 3 |
Choose one of the following options:
|
| 4 |
You'll see one of the results described below. The bold part is the first sentence of the messages you received. The rest is a description of what the message indicates.
|
Map to a customer org
After you map a subscription to a partner organization, you must then map the subscription to the correct customer organization.
| 1 |
You can find the customer organization with the following options:
|
| 2 |
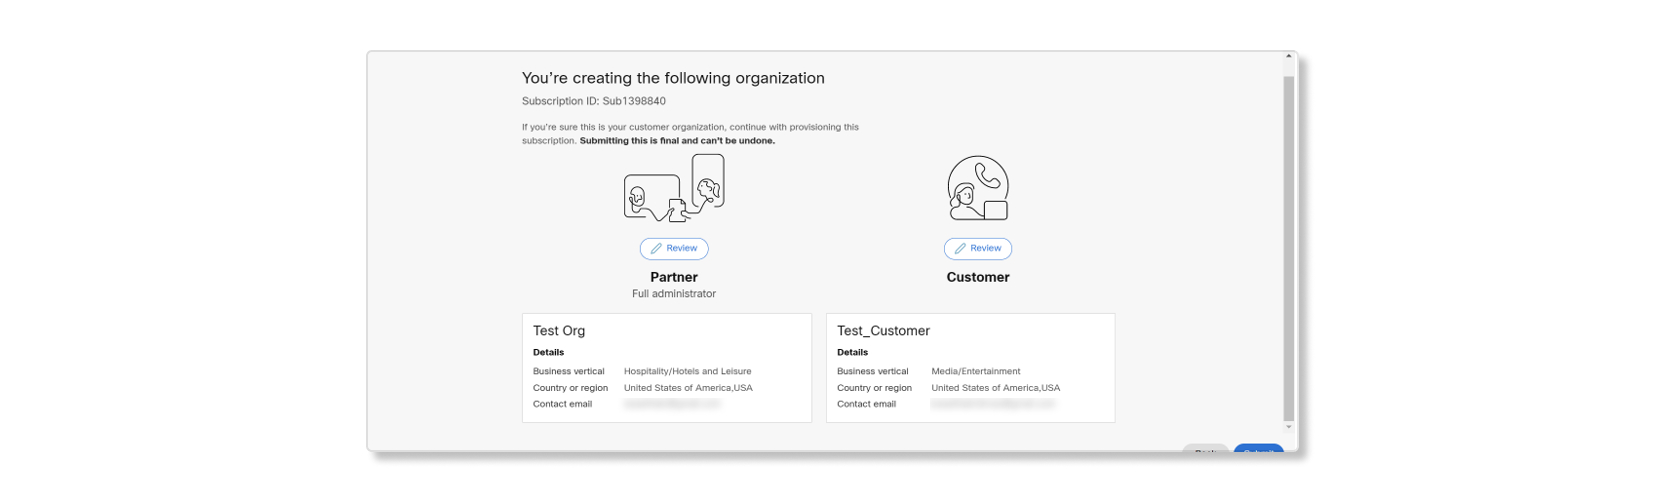
Review the details of these organizations. For partners, the label Provisioning administrator appears when you're provisioning the subscription for an existing customer. If you require full administrator privileges, first complete the service setup, then ask for full admin privileges from the customer admin. If everything looks right, click Next. 
|
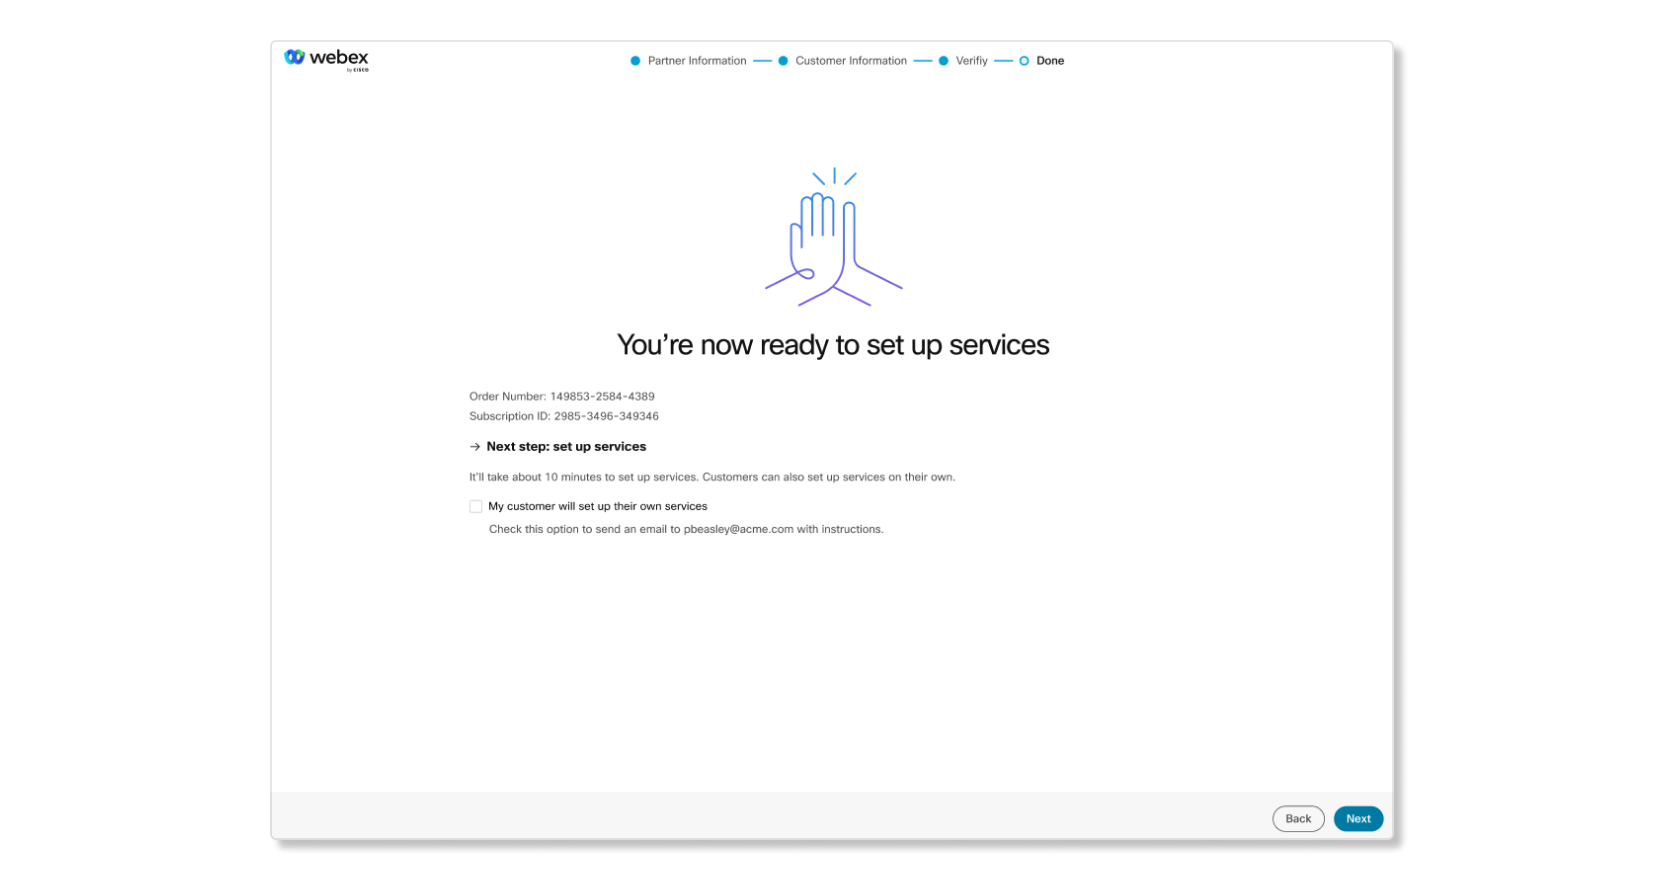
| 3 |
Click Next to start the services setup. If you're a partner, you have the option to let the customer complete the services
setup themselves by checking the My customer will set up their own
services check box. This will send an email to the customer admin to
continue with the service setup. Partners that select this option won't lose access to the
customer's organization.
 |

What to do next
Now that you've identified and mapped the subscription to the correct partner and customer organization, you can now set up the customer's services.
Provision services
After mapping the subscription to the correct organizations, you can start setting up the services.
If you choose to set up later, you can start the service setup process again the next time you sign in to Control Hub.
Provision your new Webex Meetings subscription
| 1 |
Review your subscription and click Setup now. If you choose Set up later, then your subscription won't be provisioned. 
|
| 2 |
In the Meeting setup tab, choose a Webex URL name, time zone, and if you want the site to be on an early release schedule. A site on an early release schedule receives access to features before the normal deployment cycle. 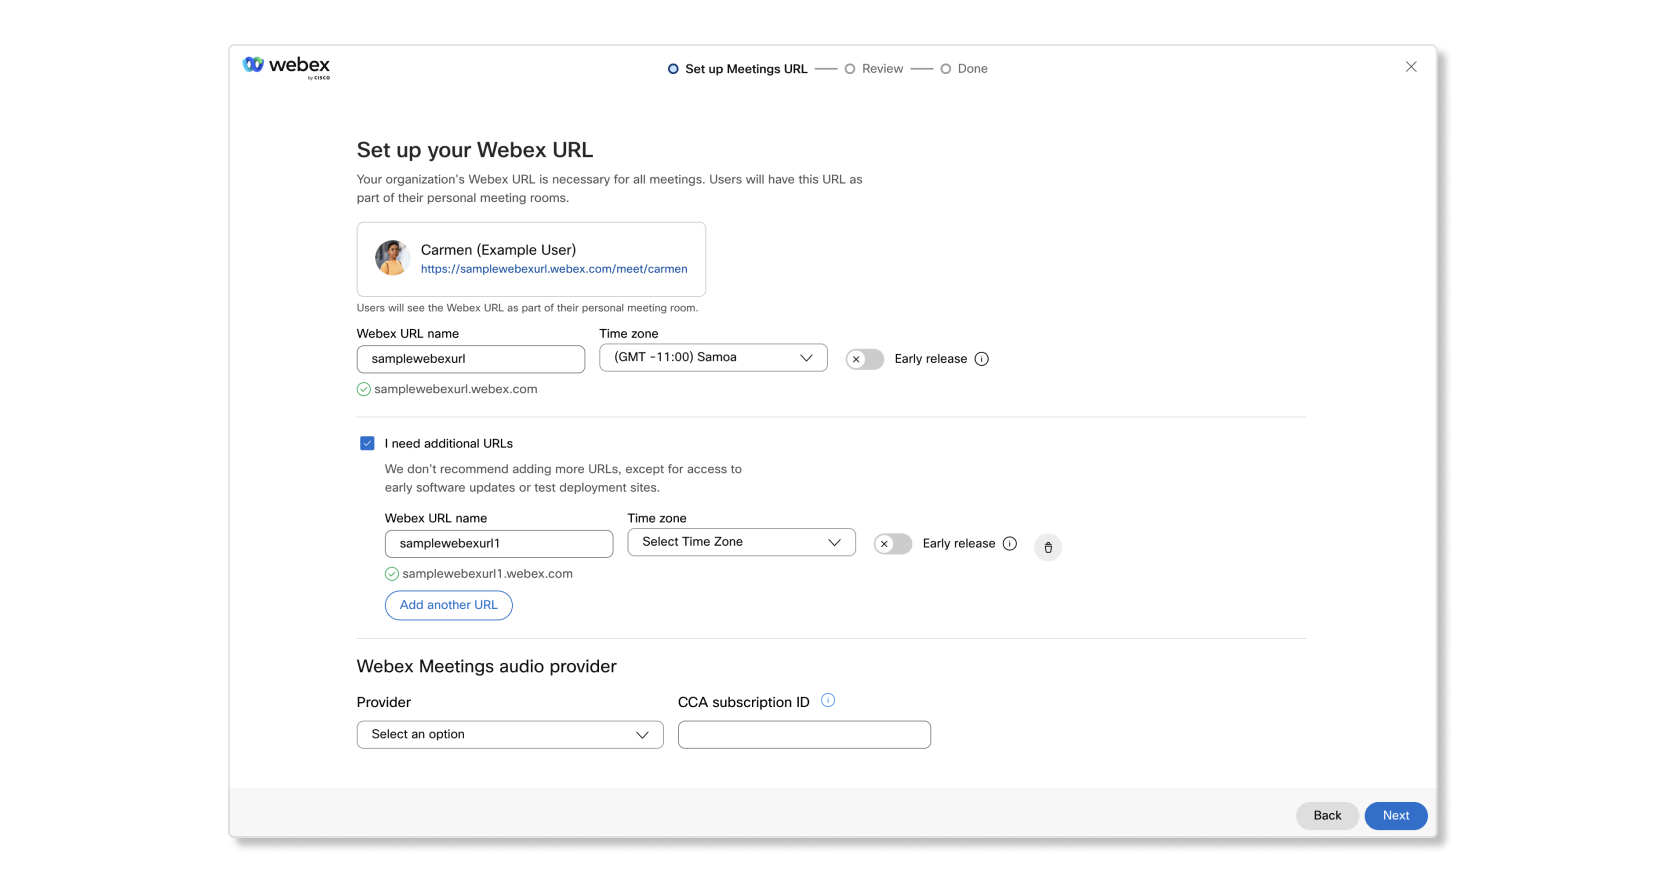
|
| 3 |
To add more Webex sites, check the I need additional URLs check box. |
| 4 |
Click Next once you've finished setting up the Webex URLs. |
| 5 |
If you have multiple Webex URLs, distribute the licenses across the necessary sites, and select Next. |
| 6 |
Review the information and then click Close. If you want to download a copy of the order summary as a PDF for your records, click Download order summary (PDF). 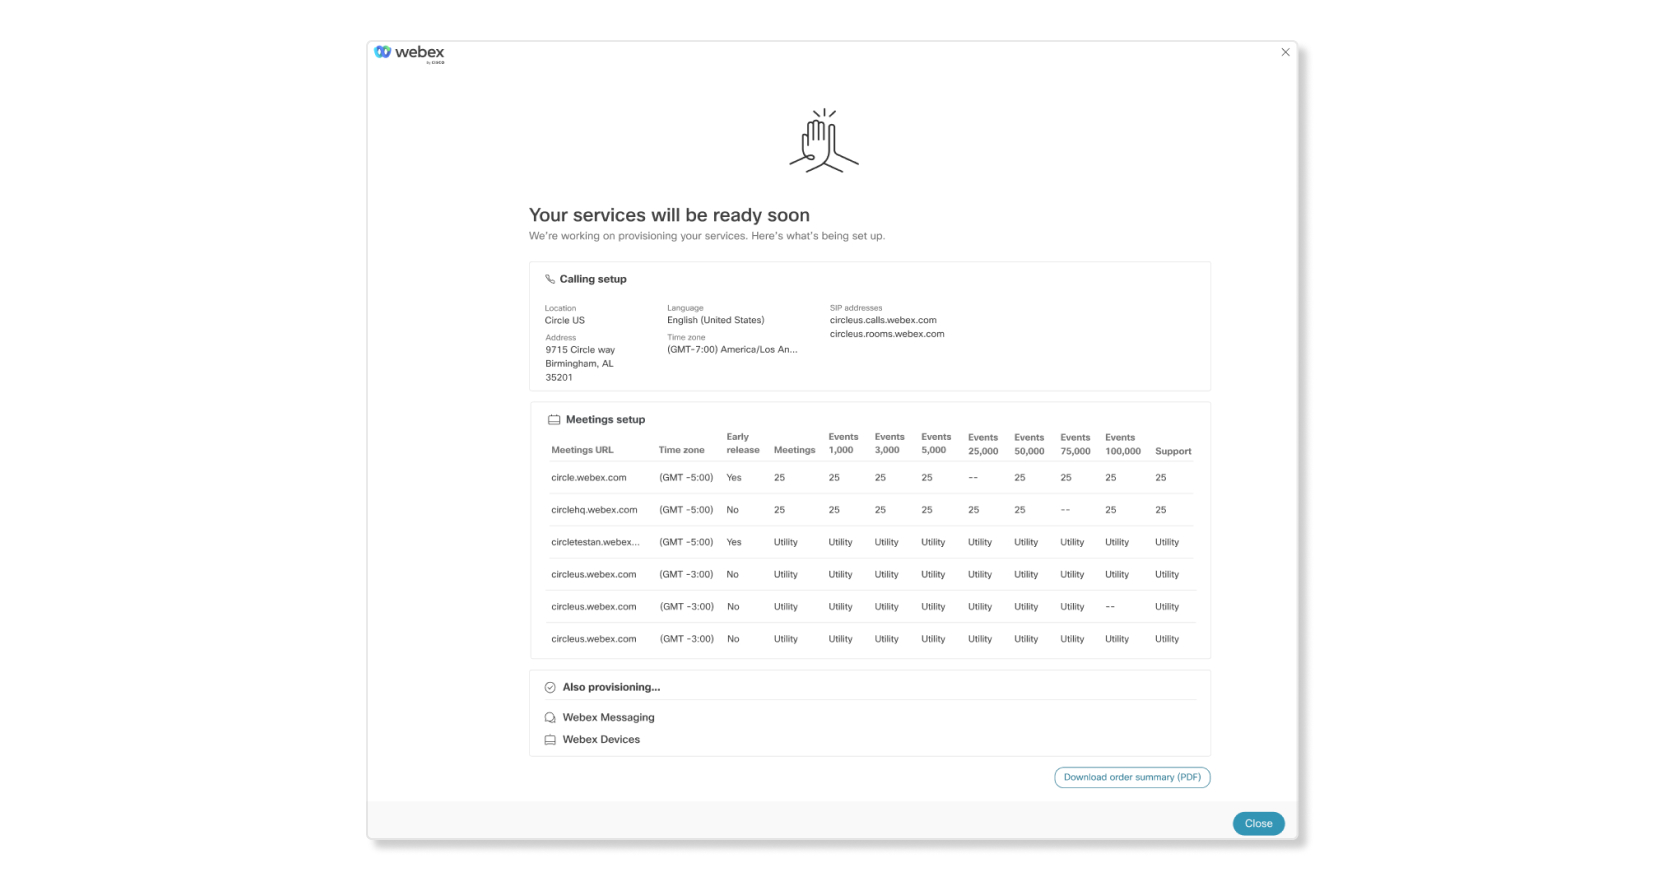
|
Provision your new Webex Calling subscription
When provisioning a Webex Calling subscription, all you have to do is enter in the location of your main headquarters. You can change the location or add more locations after provisioning in Control Hub.
| 1 |
Review your subscription and click Setup now. If you choose Set up later, then your order won't be provisioned. |
| 2 |
Enter the location name and select a country or region where most of the users are located, fill out the additional fields, and then click Next. 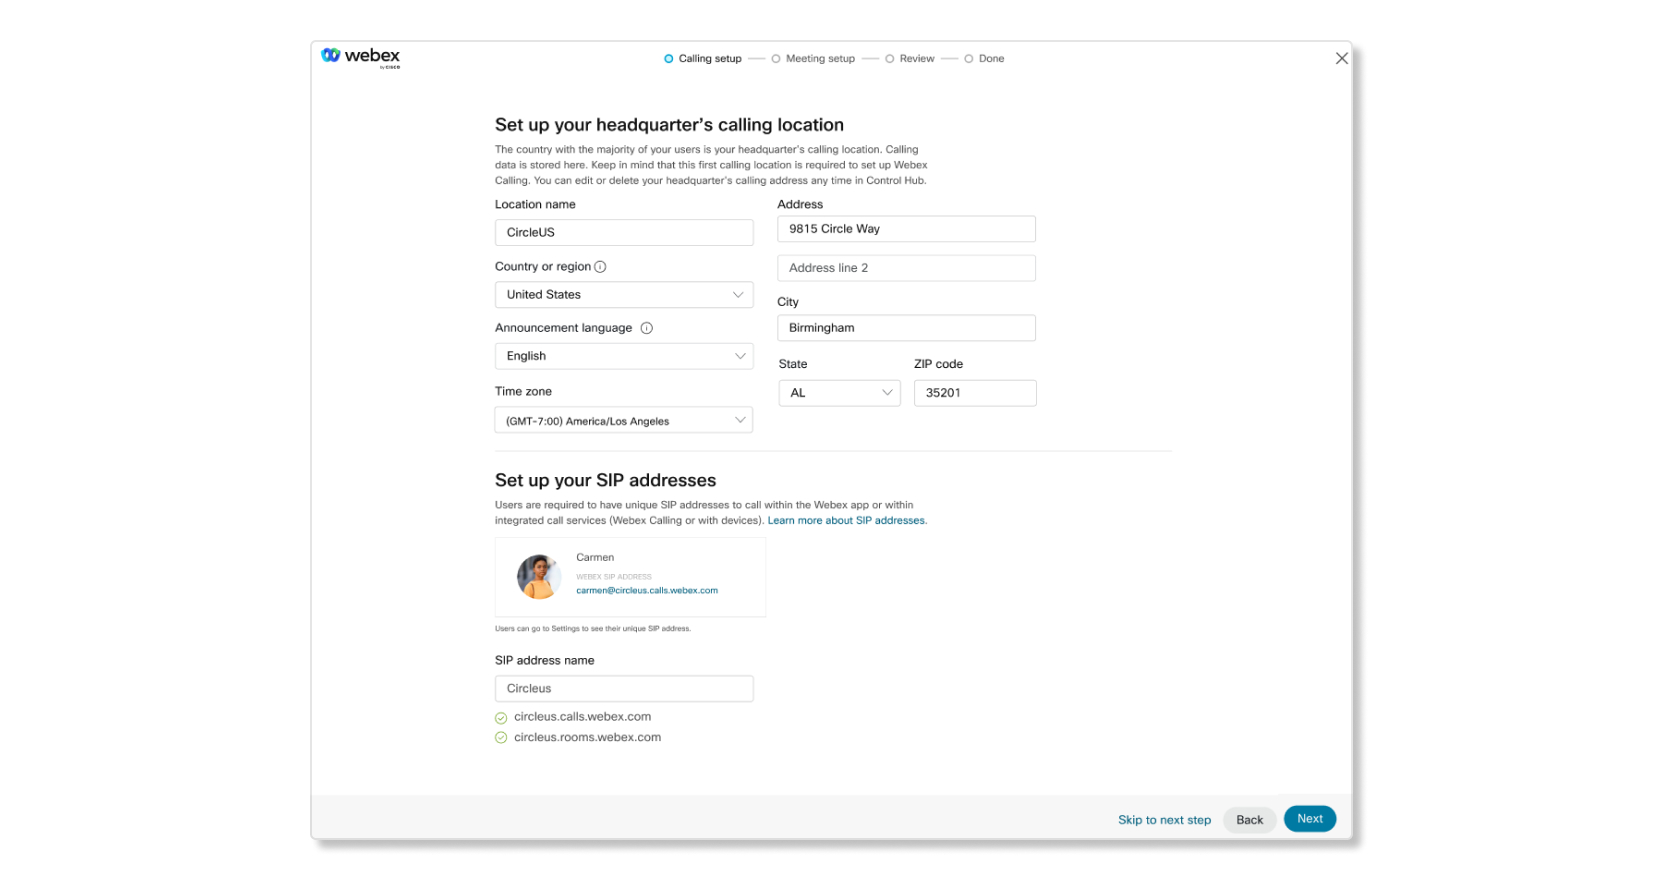
|
| 3 |
Review the information and then click Close. If you want to download a copy of the order summary as a PDF for your records, click Download order summary (PDF).
|


