
피드백을 보내 주셔서 감사합니다.
동시 벨 울림 구성
 피드백이 있습니까?
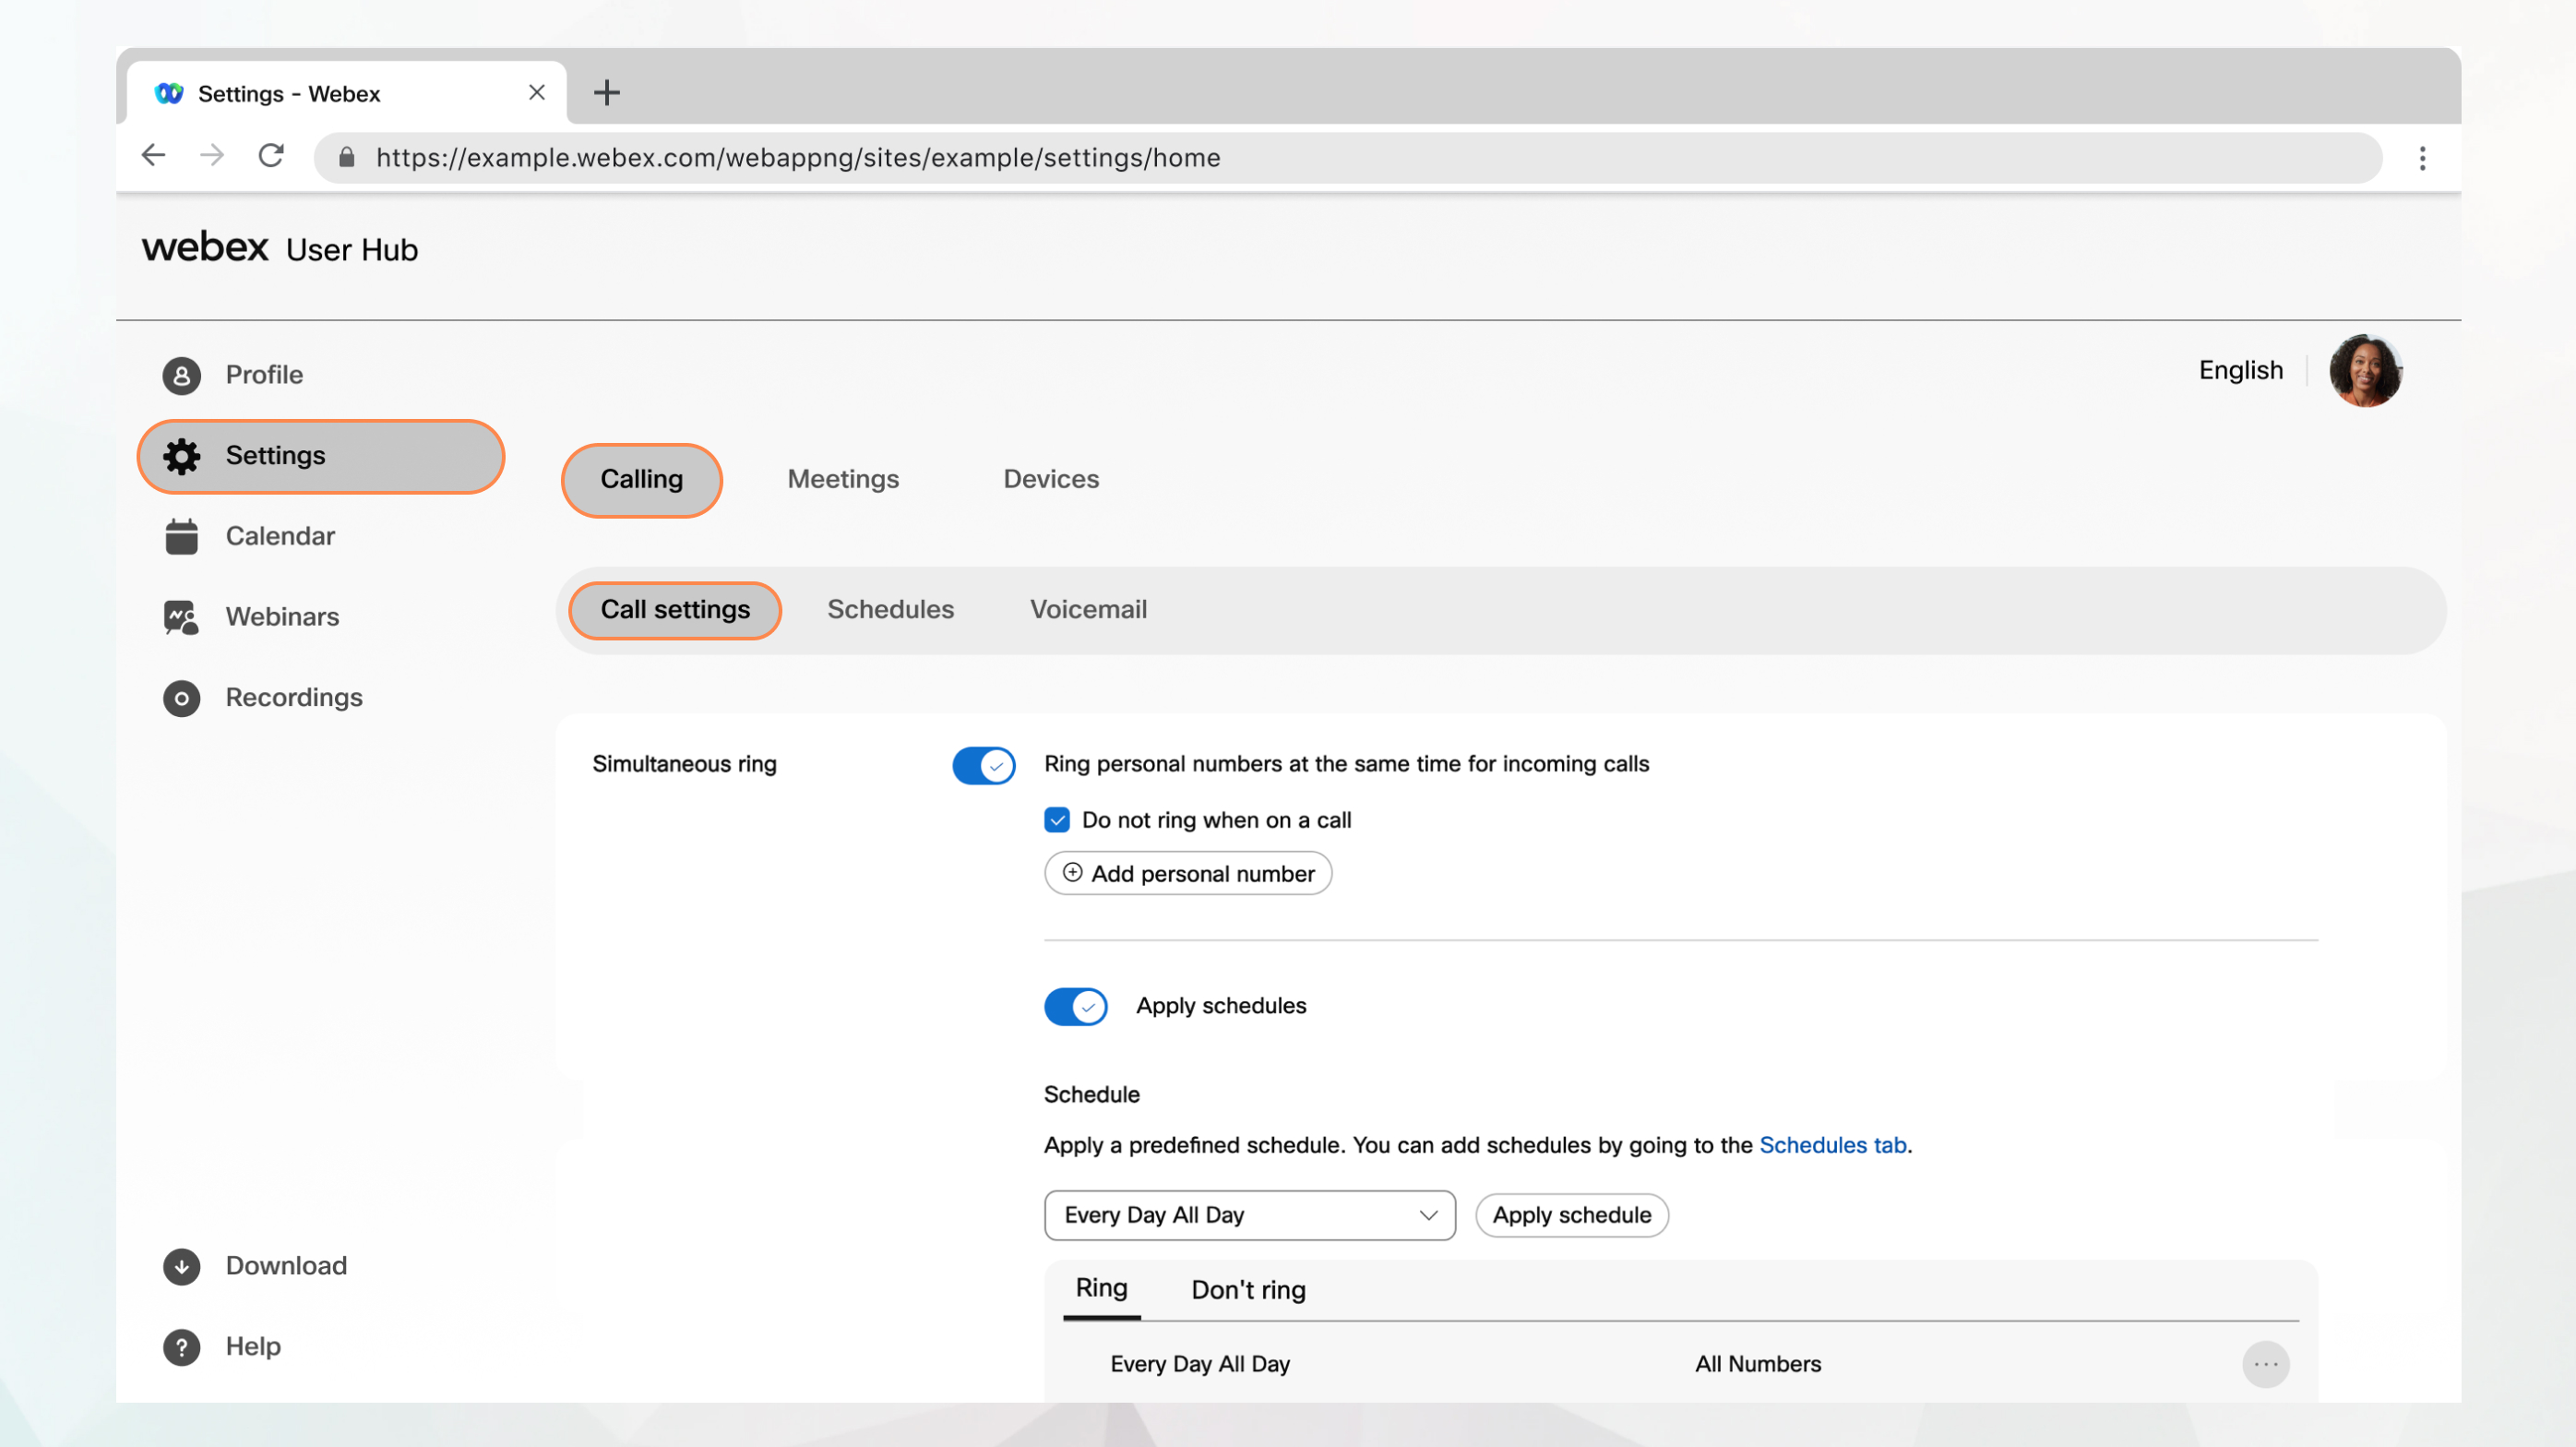
시작하기 전에
-
관리자가 이 기능에 액세스하고 구성하려면 이 기능을 활성화해야 합니다. 이 설정이 나타나지 않는 경우, 관리자에게 확인하십시오.
-
로 이동하여 User Hub에서 모든 통화 설정을 구성할 수 있습니다.
통화 옵션은 Webex Calling 라이센스가 있는 사용자만 사용할 수 있습니다. 통화 옵션이 나타나지 않는 경우, Webex Calling 라이센스가 없음을 의미합니다.
설정된 통화 서비스를 확인하려면 Webex 앱에서 확인할 수 있습니다. 자세한 내용은 어떤 통화 서비스를 사용하고 있는지 알아보기를 참조하십시오.
| 1 |
User Hub에 로그인합니다. |
| 2 |
. |
| 3 |
동시 벨 울림 섹션으로 이동하고 토글을 켭니다. |
| 4 |
전화 번호 추가 를 클릭하고 전화가 걸려오는 전화를 수신할 때 동시에 벨이 울릴 최대 10개의 전화 번호를 입력합니다. |
| 5 |
통화 중일 때 해당 전화 번호가 울리지 않게 하려면 통화 중일 때 벨 울리지 않기를 선택합니다. |
| 6 |
응답 확인 을 선택하여 통화 수신인이 연결되기 전에 키를 누르도록 안내합니다. 통화 수신인에게 걸려오는 전화가 직접 연결되지 않았음을 알리고자 할 때 이 설정을 사용합니다. |
| 7 |
이러한 전화 번호가 울릴 때 설정하려면 일정 적용을 켭니다. |
| 8 |
드롭다운 목록에서 미리 정의된 일정을 선택합니다. 이 설정에 사용하고자 하는 스케줄이 나타나지 않는 경우, 스케줄 탭에서 스케줄을 추가할 수 있습니다. 자세한 정보는 통화 설정에 적용할 일정 만들기를 참조하십시오. |
| 9 |
다음 파라미터를 설정하려면 일정 적용 을 클릭하십시오.
|
| 10 |
저장을 클릭합니다. 귀하의 예약이 벨 울림 또는 벨 울리지 않기 표에 추가됩니다. 필요에 따라 표에서 예약을 편집하거나 삭제할 수 있습니다. 벨 울리지 않기 가 벨 울림보다 우선합니다. |
| 11 |
저장을 클릭합니다. |


