- Home
- /
- Article

Thanks for your feedback.

Webex App | Use Webex on Apple Vision Pro
 In this article
 Feedback?
Connect with others in an immersive Webex meeting environment that fills the space around you. View and join upcoming meetings. Pop out individual participant videos or shared content and resize them to life size.
Your self-view is generated by your Apple Vision Pro Persona. Your Persona is a dynamic, natural representation of your face and hand movements. It allows others to see you in Webex while you’re wearing Apple Vision Pro. Go to Apple Vision Pro settings to capture your Persona.
You can't join Webex webinars, annotate on shared content, or access Messaging or Calling on Apple Vision Pro.
Requirements
- Apple Vision Pro
- Webex App downloaded to Apple Vision Pro
Sign in to Webex App on your Vision Pro
You only have to perform this task once.
|
On the Webex sign-in screen on Apple Vision Pro, tap Sign up and enter your Webex email address and password. |
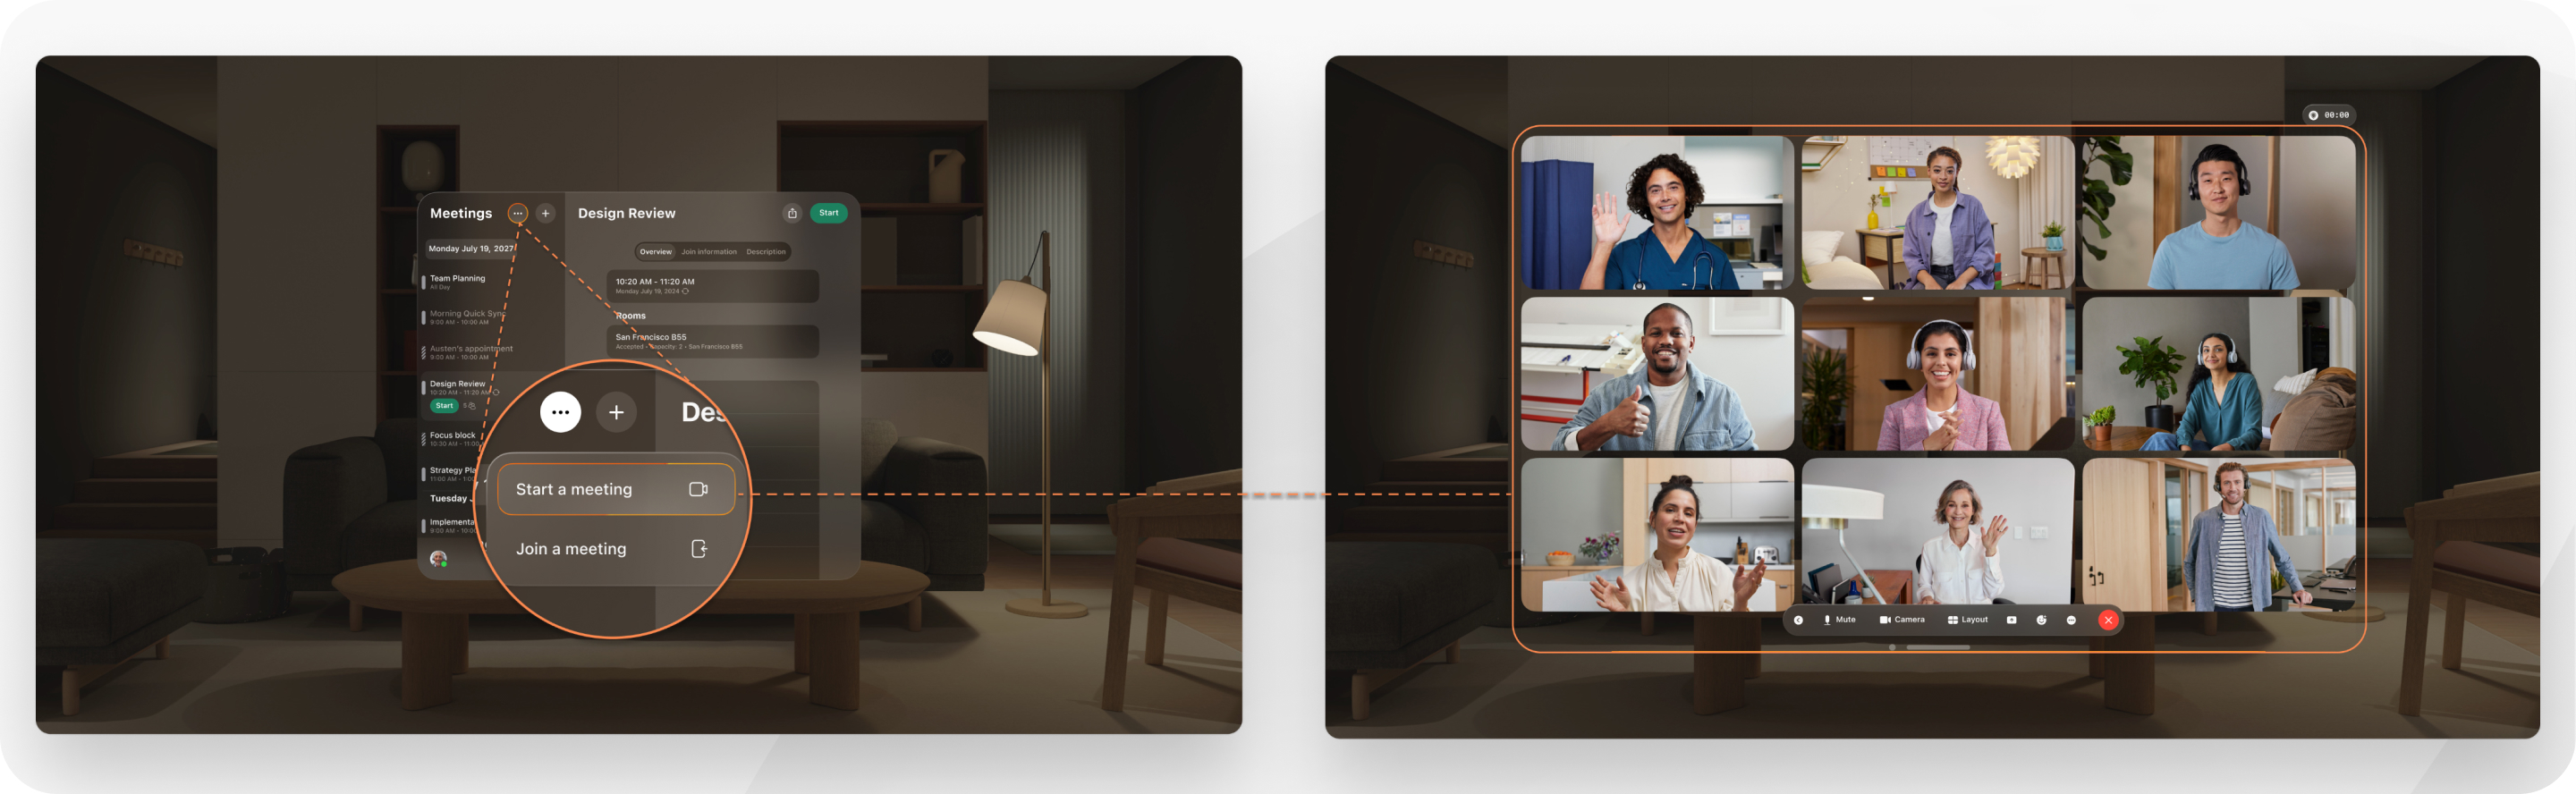
Start, join, or schedule a meeting on your Vision Pro
| 1 |
After you sign in to Webex App, you see a list of upcoming meetings. If you want to join or start a meeting with your audio muted, pinch and hold Join and tap Mute microphone.
| ||||||||||||||||||||
| 2 |
Do one of the following:
| ||||||||||||||||||||
| 3 |
Here’s some of the functionality available during a meeting:
|

 .
.


Share a 3D model in a meeting on your Vision Pro
You can share 3D models and explore them with your colleagues. Upload 3D models directly from your Vision Pro or your computer, or view models that someone else has uploaded to the meeting. Don’t have a model to upload? No problem—share one of our sample models.
For a 3D immersive experience, all meeting participants should be on Webex for Apple Vision Pro. If some participants aren’t using a Vision Pro, you can share a 2D version of the model with them.

Before you begin
Each model must be in USDZ (Universal Scene Description Zip) format and under 100 MB.
You can upload up to 2 GB of models to a meeting at a time.
| 1 |
In the meeting controls, tap You can also tap |
| 2 |
Do one of the following:
|
| 3 |
To upload from your Vision Pro, tap , select one or more USDZ files, and tap Open. |
| 4 |
To upload from your computer:
When your files appear in the 3D models panel on your Vision Pro, you can leave the meeting on your computer. |
| 5 |
In the 3D models panel, tap the model that you want to share. You can share more than one model at a time. If participants didn't join the meeting using a Vision Pro, tap Broadcast to share a 2D version of the model with them. |
| 6 |
Explore the model in the following ways:
|
| 7 |
To revert a model to its default state, tap You can also double tap the model and tap Reset. |
| 8 |
To temporarily use another app while you're sharing a model, press the Digital Crown on your Vision Pro. |
| 9 |
To stop sharing a single model, tap To stop sharing all models, tap Stop sharing all in the 3D models panel. To stop sharing a 2D version of the model, tap Stop broadcast in the 3D models panel. |
| 10 |
To delete a model from the meeting, tap You can also double tap the model and tap . You can't delete a model that someone else uploaded to the meeting. |
 in the panel tabs to the right of the video grid.
Change meeting, sound, and video settings on your Vision Pro
|
After you sign in to Webex App, at the top of the Meetings list, tap |


