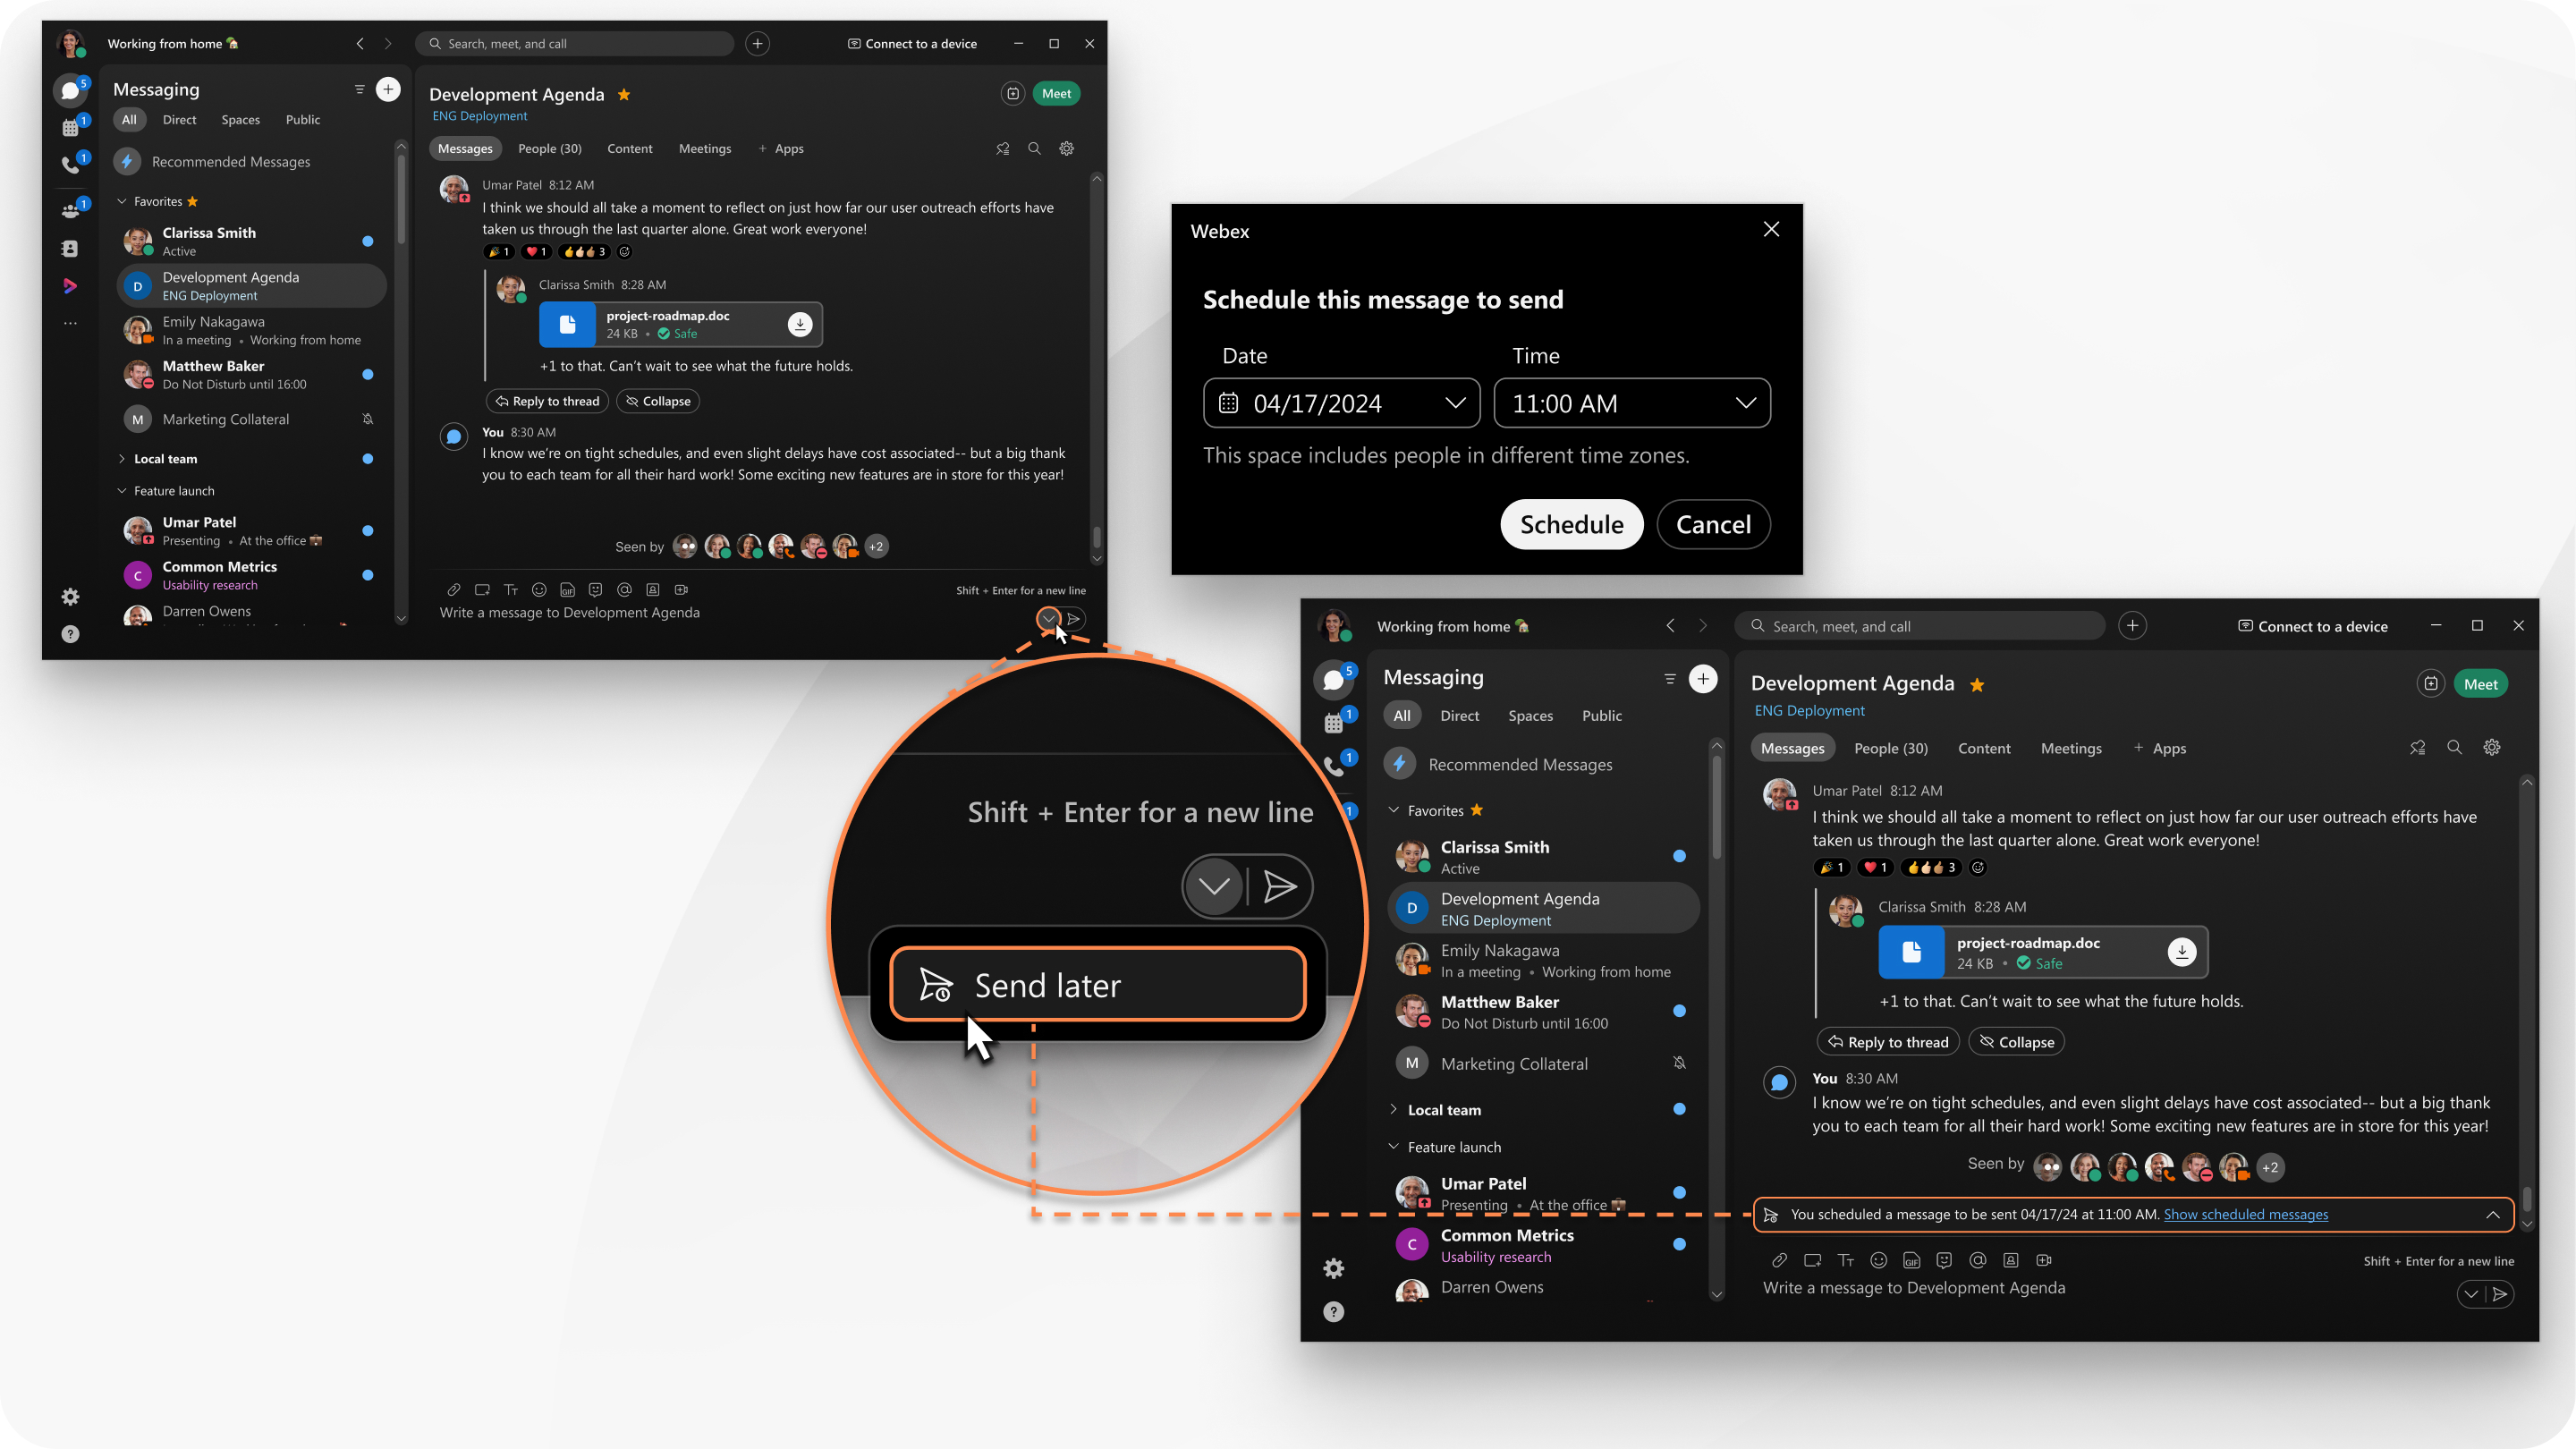
Webex App | Send a scheduled message
 Feedback?

Send a scheduled message
You can schedule your message up to three months in advance.
| 1 |
In a space, type your message in the message area. You can add files, GIFs, screen captures, and other message functions to your message. |
| 2 |
In the message area, click the drop-down, and select |
| 3 |
Select the Date and Time to send the message, and click Schedule. A banner appears in the space to alert you that you have scheduled a message, which is only visible to you. |
Post schedule message actions
After you schedule a message, you can change or discard the message.
| 1 |
In the space, click |
| 2 |
Hover over the message. Choose from the following:
|
View all scheduled messages
View a list of all the messages that you have scheduled, and perform various quick actions for each message in the list.
| 1 |
In the Messaging tab, click Filter by
Your upcoming scheduled messages appear. |
| 2 |
You can perform various actions on each scheduled message in the list. Hover over a scheduled message, and click
|
Send a scheduled message
On mobile, you can schedule a message up to 30 days in advance.
| 1 |
In a space, type your message in the message area. You can add files, GIFs, screen captures, and other message functions to your message. |
| 2 |
Tap and hold the send button. |
| 3 |
Choose the date in the calendar, and tap the time when to send your message. Then perform the following to confirm:
|
| 4 |
Perform the following to schedule your message:
A banner appears in the space to alert you that you have scheduled a message, which is only visible to you. |
Post schedule message actions
After you schedule a message, you can change or discard the message.
| 1 |
In the space, tap and hold the banner which shows your scheduled message. |
| 2 |
Choose from the following:
|
View all scheduled messages
View a list of all the messages that you have scheduled, and perform various quick actions for each message in the list.
| 1 |
In the Messaging tab, perform the following to view your filters:
|
| 2 |
Tap Scheduled to view all scheduled messages. |
| 3 |
You can perform various actions on each scheduled message in the list. Tap and hold a scheduled message from the list, and tap to perform the following:
|

 —send the message now, instead of the time you scheduled.
 —edit the message before the scheduled time. When you're finished editing, click
  —delete the message, and stop the message from sending at
your scheduled time.
 , and then select
  to:
to: .
. .
. .
.
