
Thanks for your feedback.
Set your meeting scheduling preferences
 Feedback?
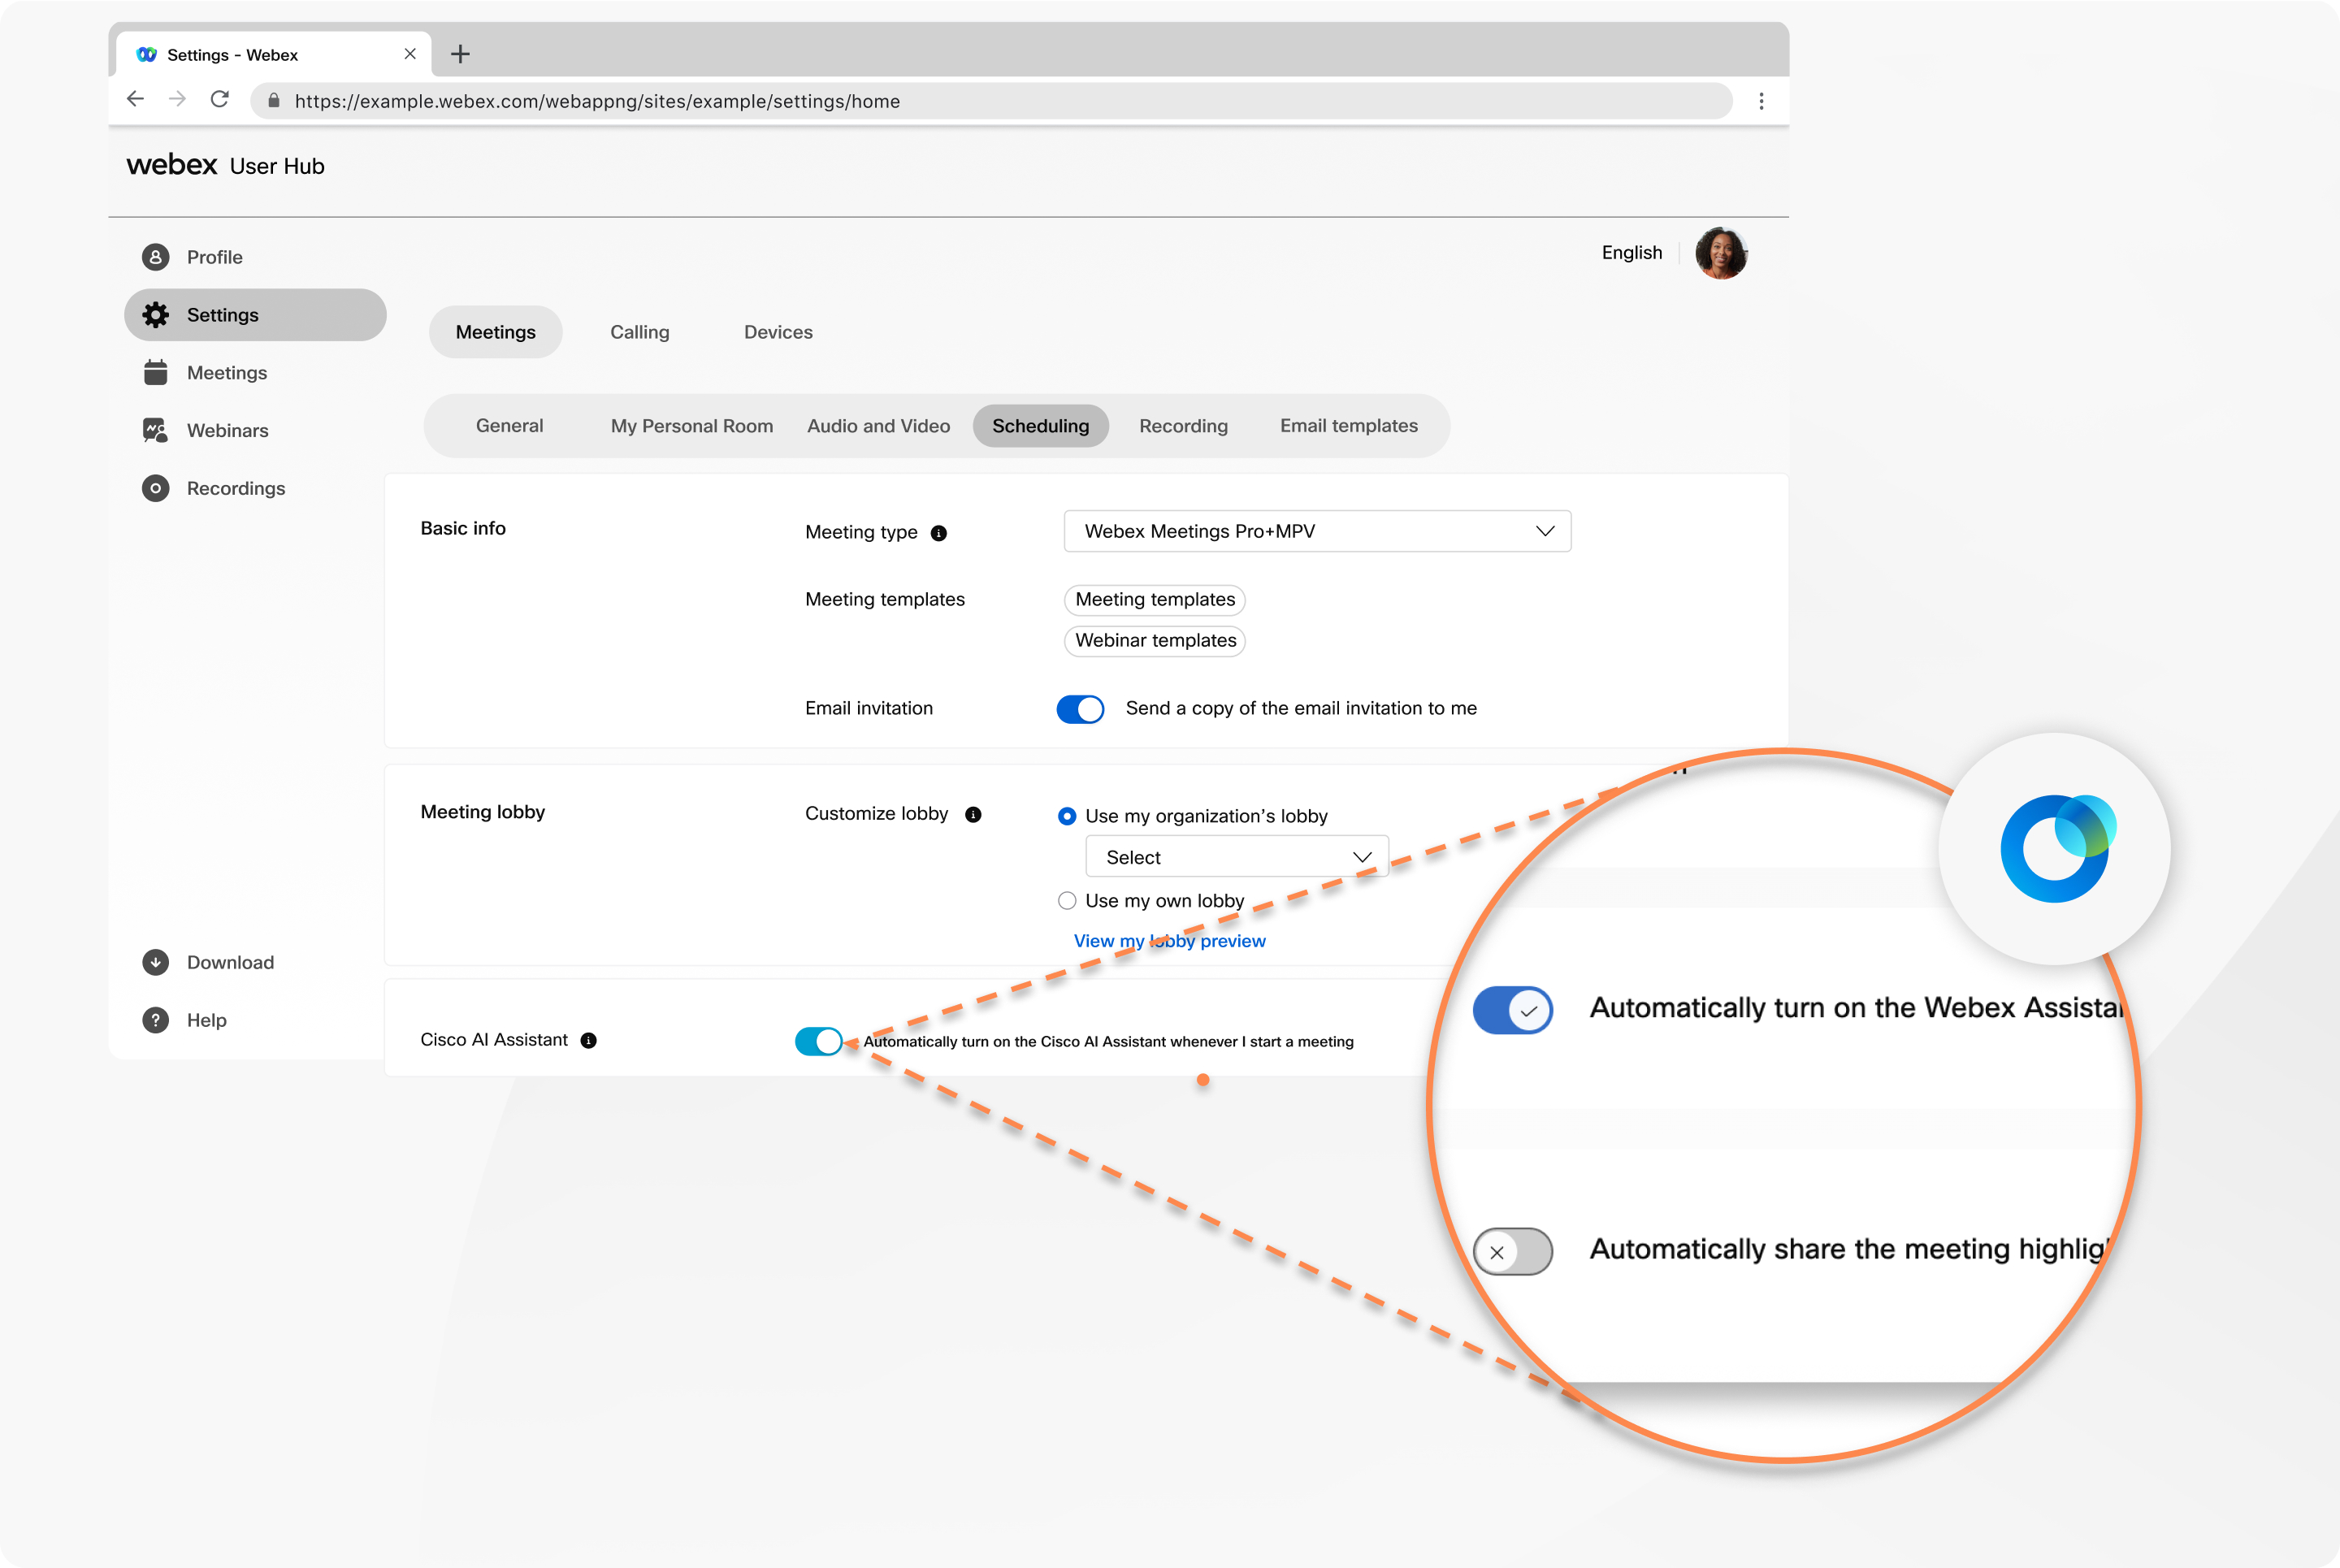
| 1 |
Sign in to User Hub, then select Settings. |
| 2 |
Go to . |
| 3 |
For Basic Info in the Meeting type, select the type of meeting you want to schedule from the drop-down list. The list includes the meeting types that are available for your service website. To avoid repeatedly entering the same settings when scheduling, you can Use a template in meetings or webinars. For Email invitation, turn on Send a copy of the invitation email to me to send an email invitation to your email. |
| 4 |
For Meeting lobby, you can choose a custom lobby created by your organization. Select Use my organization lobby and pick a lobby from the drop-down list. To create a custom lobby, select Use my own lobby, click Edit, and continue to the next step. Click View my lobby preview to preview how your lobby looks. |
| 5 |
For Cisco AI Assistant, turn on Automatically turn on the Cisco AI Assistant whenever I start a meeting if you want the Cisco AI Assistant in meetings to start automatically when you begin a meeting. If your meetings are not on the Webex Suite meeting platform, navigate to the Webex Assistant, check Automatically turn on the Webex Assistant whenever I start a meeting to turn on Webex Assistant for Meetings to turn on automatically when you start a meeting. |
| 6 |
For Share meeting content, turn on Automatically share the recording with meeting invitees to send a recording of the meeting to the attendees if you record your meeting. |
| 7 |
For Scheduling permission, allow other hosts to schedule meetings on your behalf by entering their email addresses here. Separate email addresses with a comma or semicolon. Turn on Automatically share meeting content to share meeting content with participants and invitees and give them edit privileges. |


