
Thanks for your feedback.
Webex App | Customize the lobby
 Feedback?
This feature is available on our Webex Suite meeting platform. Find out if your meetings use the Webex Suite meeting platform.
This feature isn't available on Linux or video devices.
Your customized lobby applies to all the meetings you host. Participants who join from the desktop, mobile, and web versions of the app see your customized lobby.
| 1 |
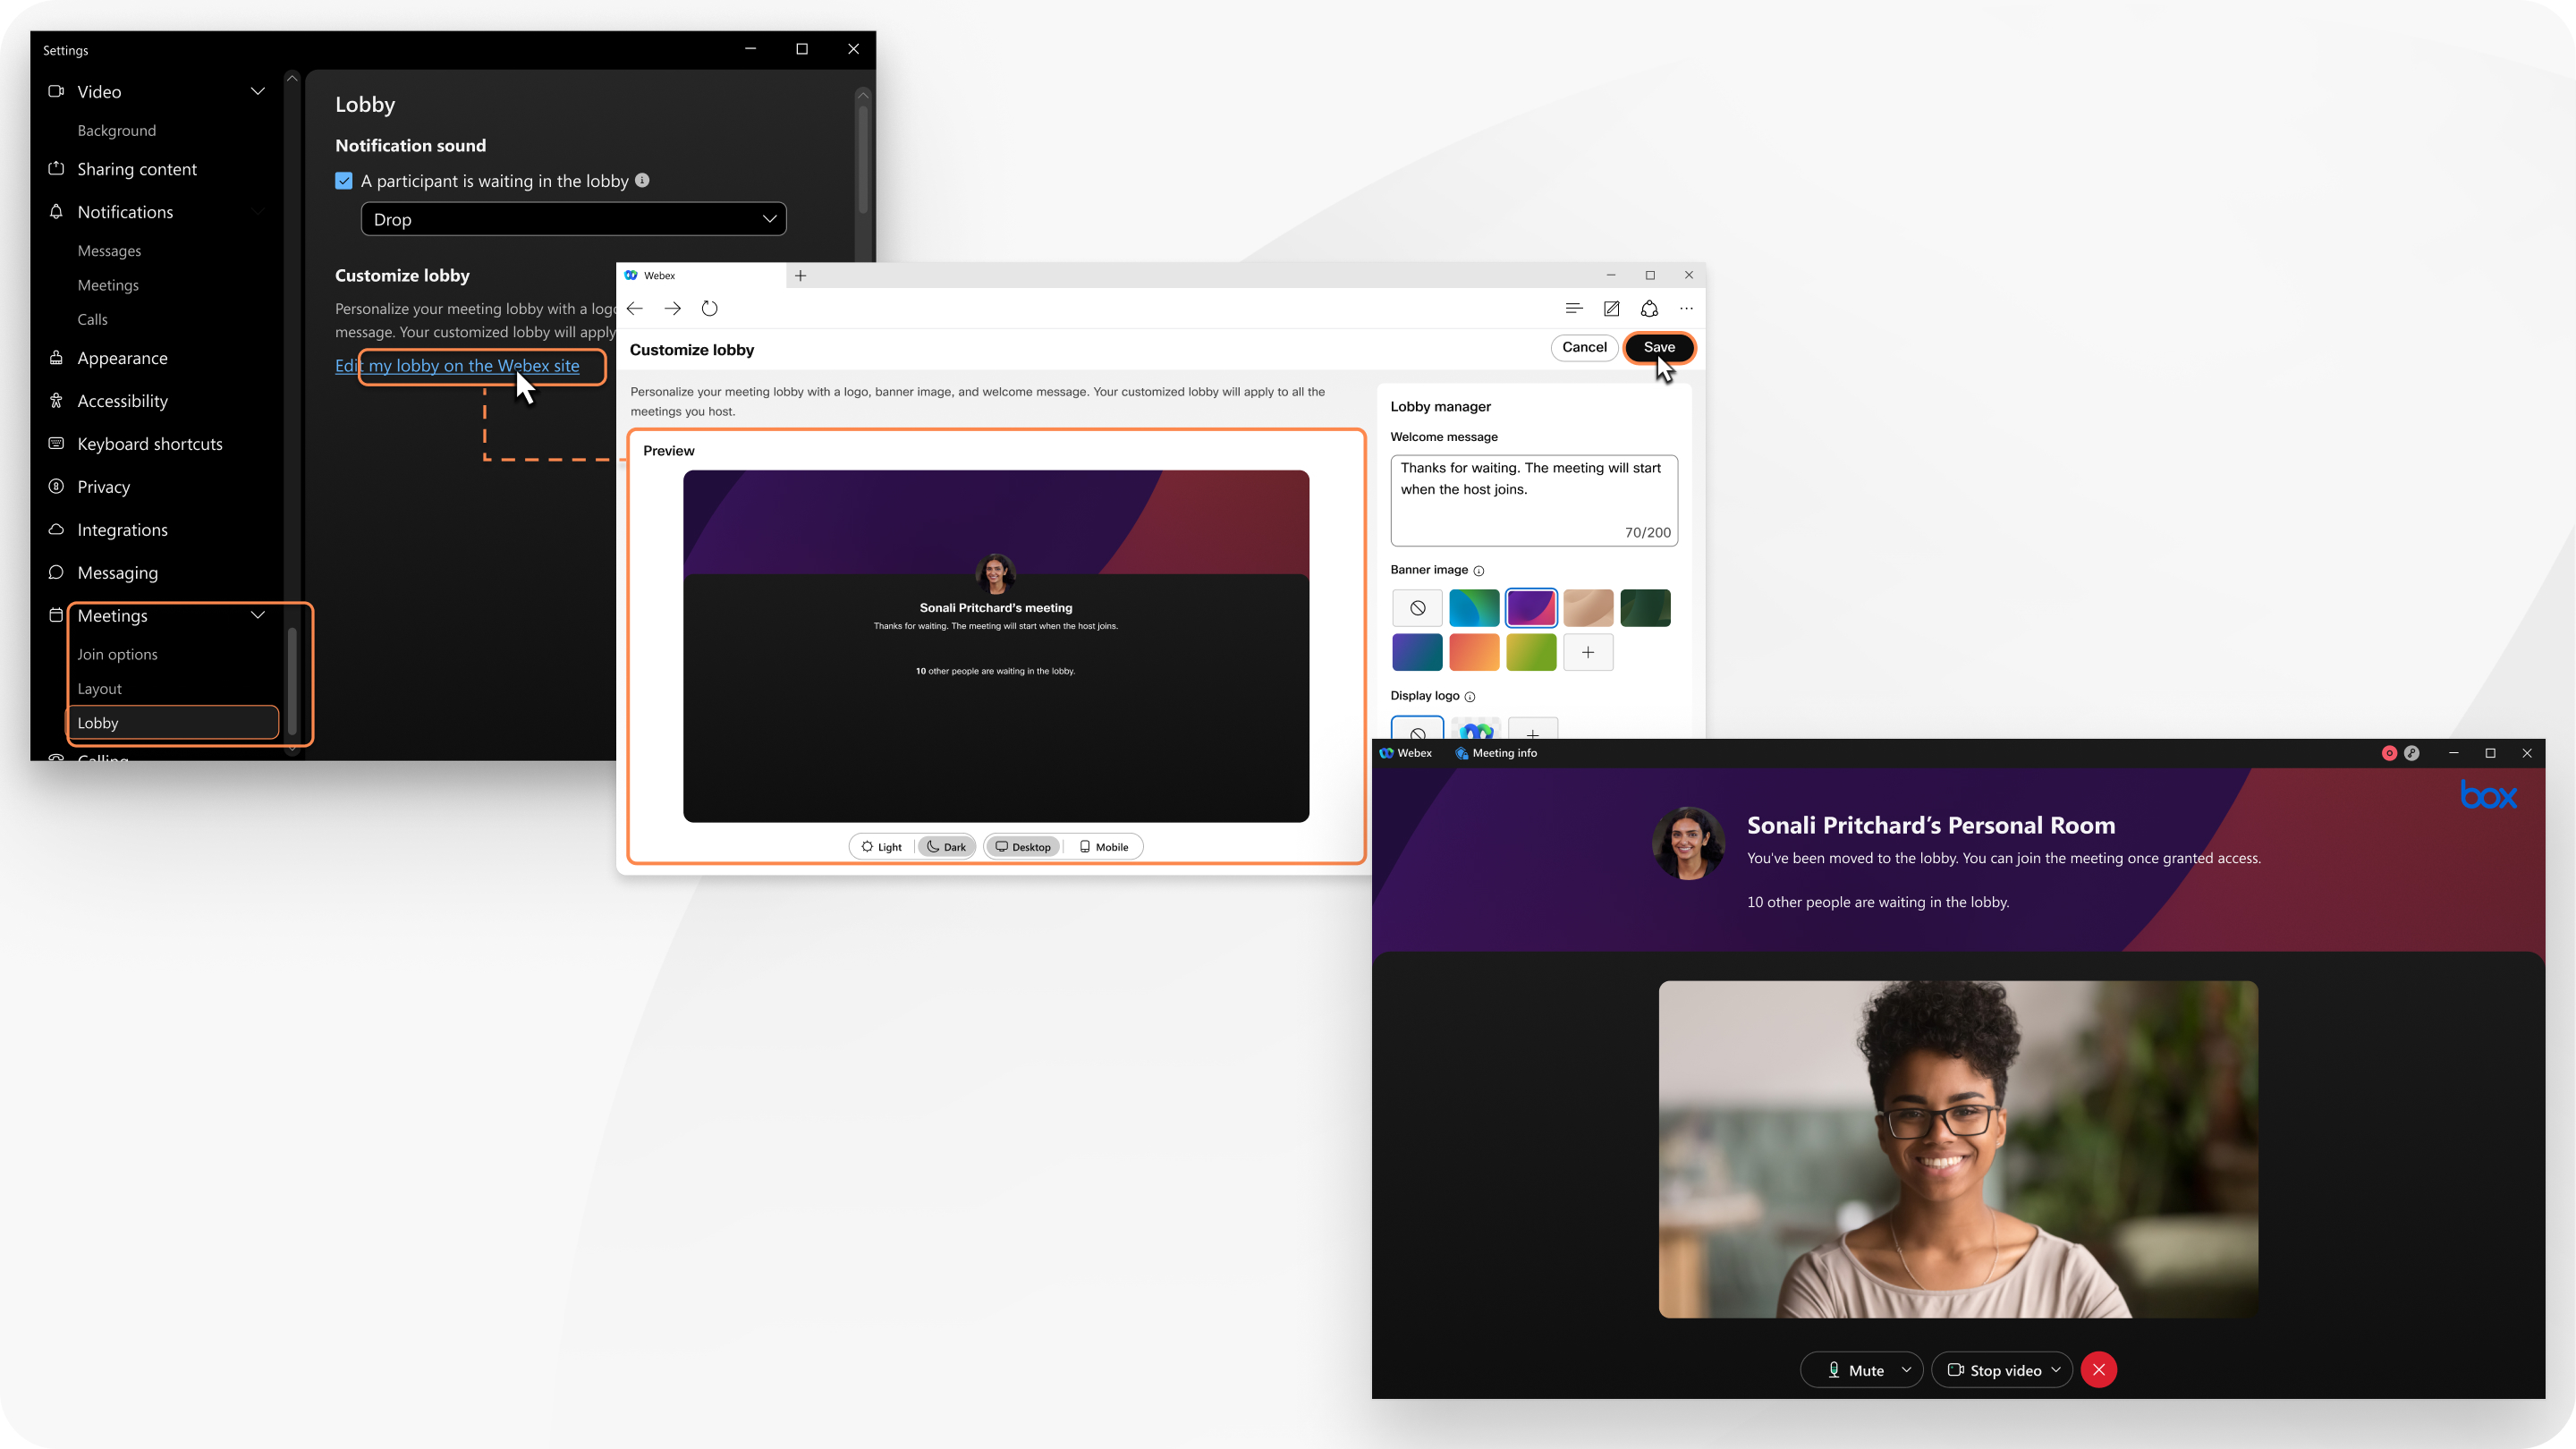
On the navigation sidebar, click Settings You can also sign into User Hub and go to .
|
| 2 |
To select a custom lobby created by your organization, next to Meeting lobby, select Use my organization lobby and select a lobby from the drop-down list. Click View my lobby preview to preview how an organization lobby looks. To create a custom lobby, select Use my own lobby, click Edit, and continue to the next step. |
| 3 |
Enter a welcome message. The Welcome message field is a plain text editor. It doesn't support rich text features such as text formatting. |
| 4 |
Under Banner image, select an image or click The image must be less than 1.5 MB and at least 800 × 400 pixels. Avoid uploading an image that has important information because, depending on the screen size and resolution, we may crop the image to fit the screen. |
| 5 |
Under Display logo, select a logo or click The logo must be less than 1 MB.
|
| 6 |
Under Video and image, click Upload and upload an MP4, MOV, or M4V video file or a JPG, GIF or PNG image file. The file must be less than 30 MB. |
| 7 |
Preview how your lobby looks, and make any necessary changes. Click Light to preview how your lobby looks for participants who are using a light theme. Click Mobile to preview how your lobby looks for participants who are joining from the mobile app.
|
| 8 |
Click Save. |

 to upload a JPG, JPEG, or PNG file.


