
Thanks for your feedback.
Get started with Webex Webinars
 Feedback?
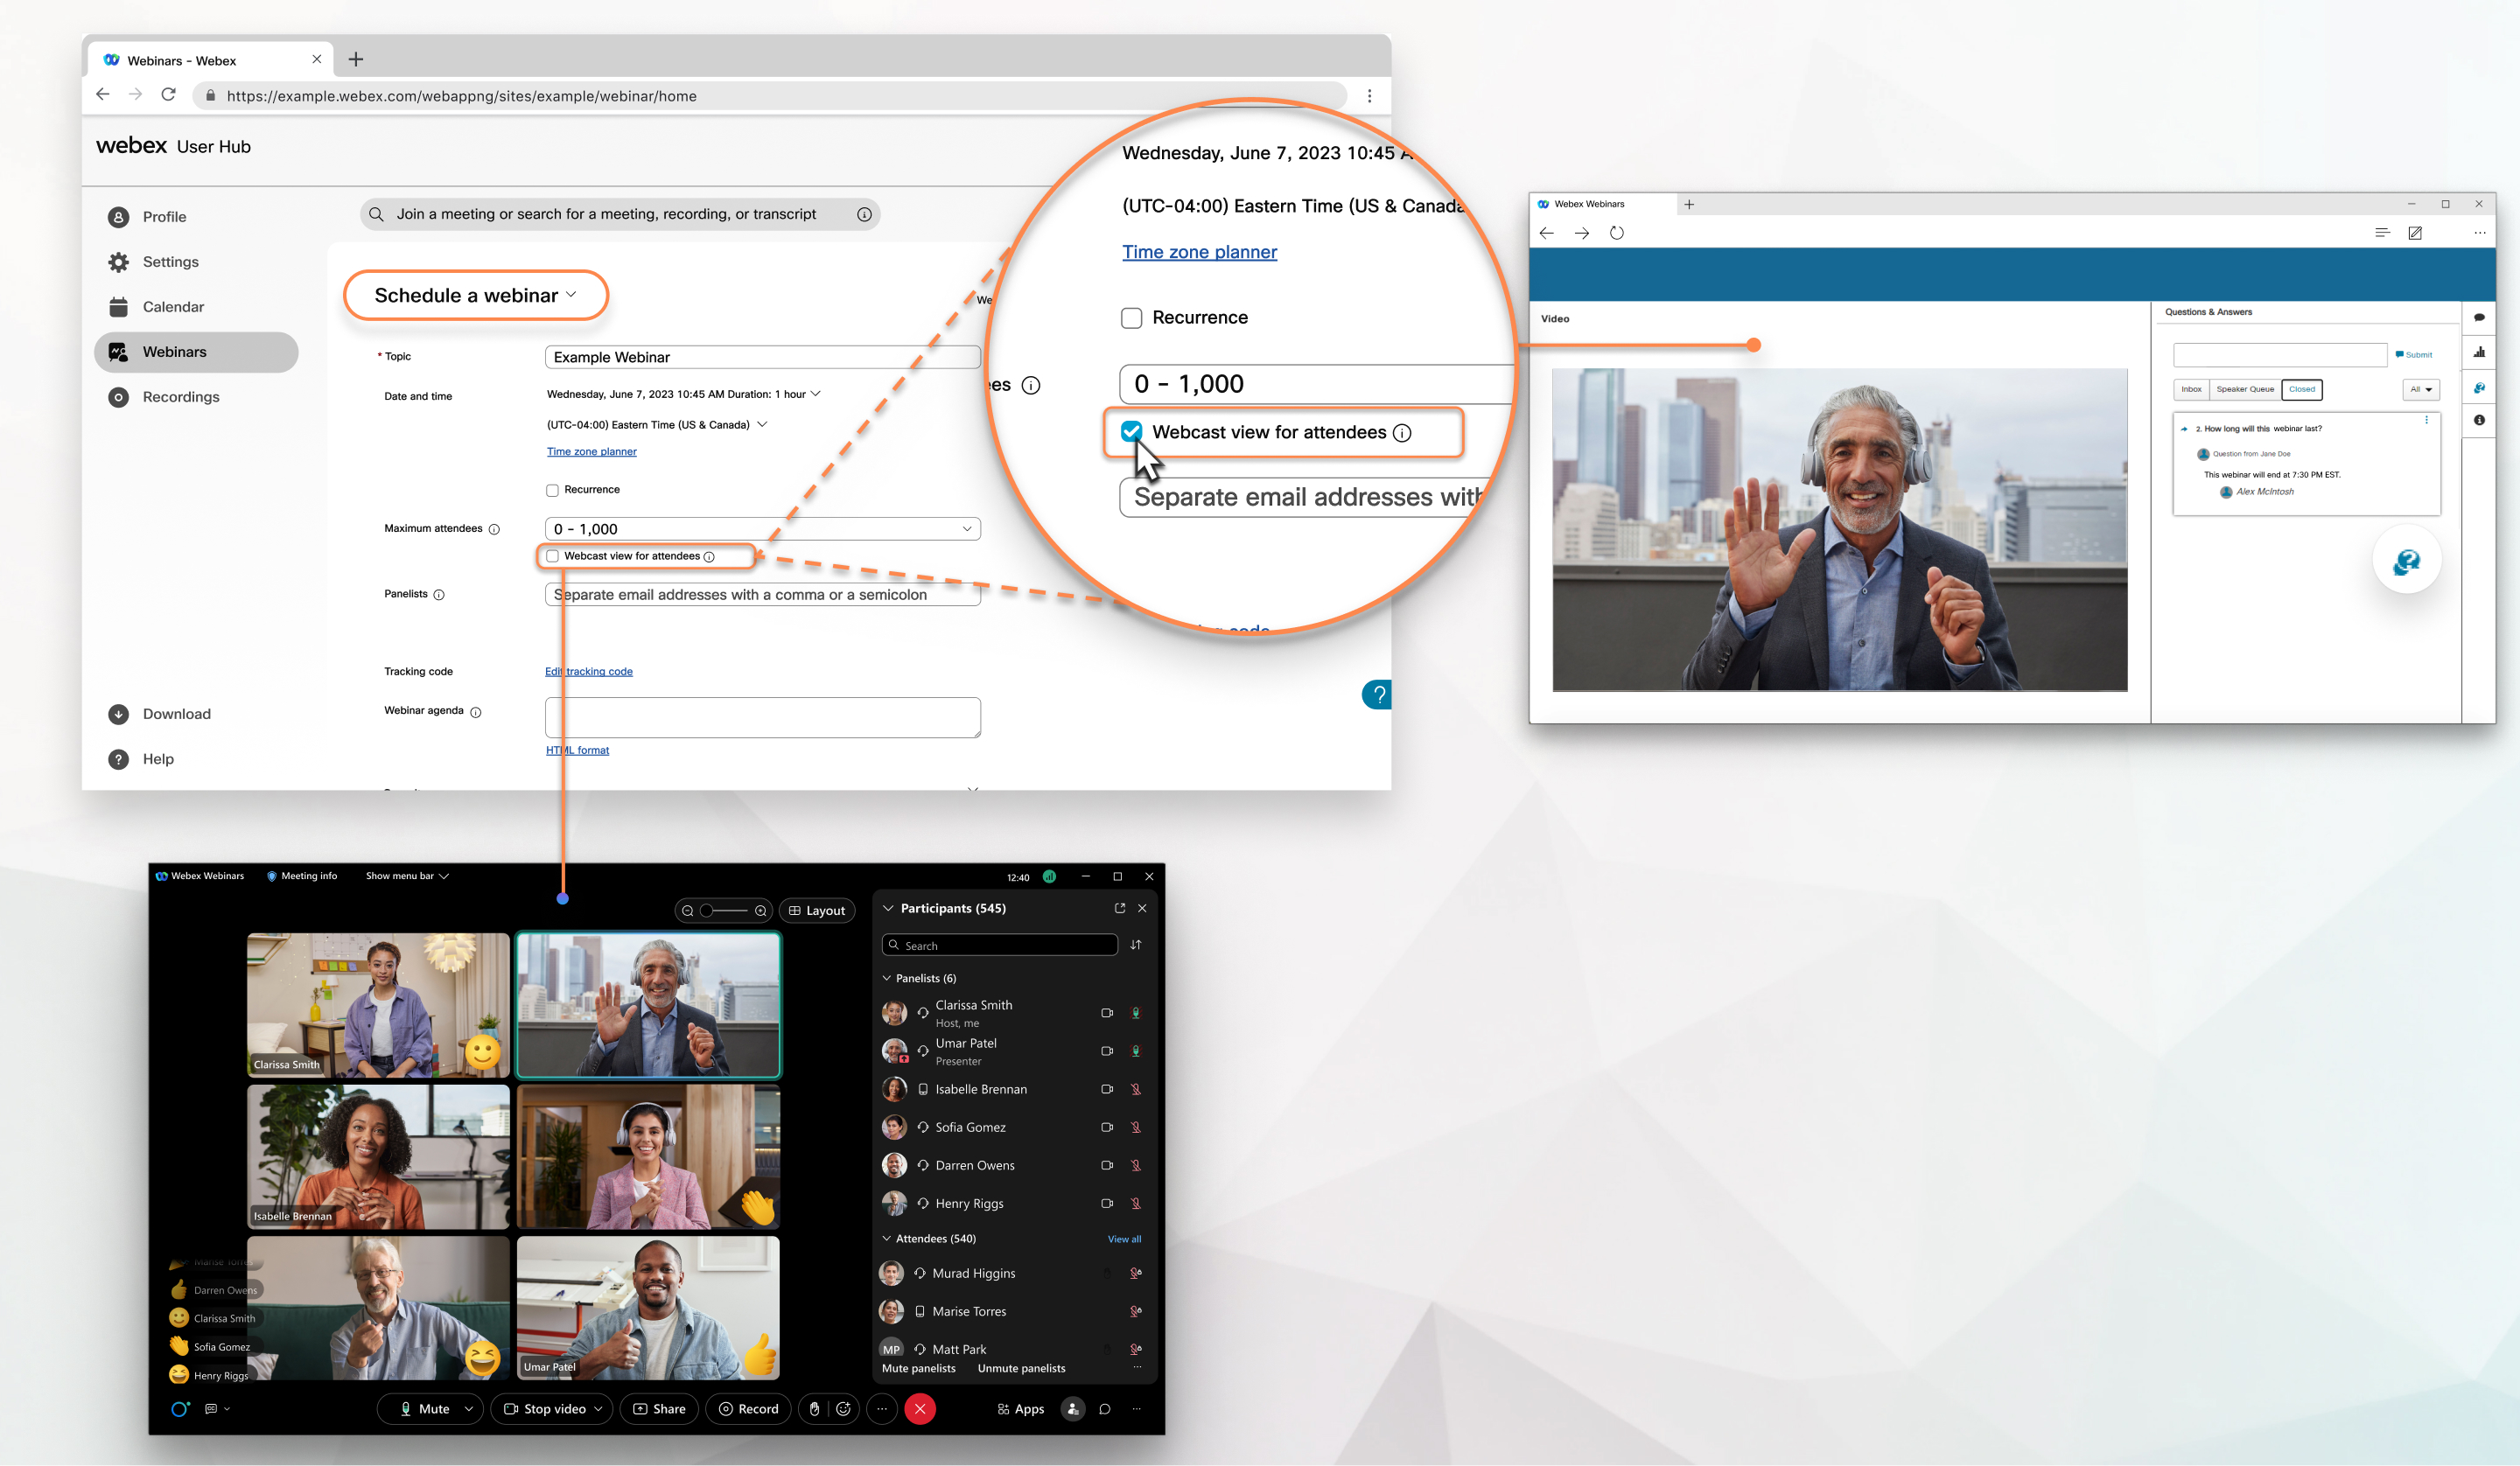
Before you begin
Compare experiences in Webex Webinars to decide which attendee experience is best for your webinar.
| 1 |
Sign in to User Hub, click the Meetings tab, then click the Schedule drop-down menu and select Schedule a webinar. |
| 2 |
Enter the webinar information such as Topic, Webinar password, and Date and time. |
| 3 |
(Optional) Select whether you want a webinars in webcast view. If you have more than 10,000 attendees, Webcast view for attendeees is automatically selected. Webinars in webcast view aren't available for Webex for Government. |
| 4 |
To help keep the webinar running smoothly, invite panelists to serve as subject matter experts. |
| 5 |
Click Show advanced options to customize audio options, require registration, hold a practice session, and more. |
| 6 |
Click Schedule. |
What to do next
Once you've scheduled your webinar and invited panelists, you can add attendees, either individually or by importing multiple attendees from one or more CSV files. For more information, see Add attendees in Webex Webinars.
| 1 |
Sign in User Hub, then click Webinars. |
| 2 |
Locate your webinar, and select Start. If you're hosting a webinar in webcast view, when you're ready to begin broadcasting, click Start webcast, choose the streaming layout, and then click Go Live. |
When you're invited to a webinar, the host will send you an email invitation. You can register and join a webinar from the invitation.
| 1 |
Open the email invitation the host sent to you. |
| 2 |
Do one of the following:
When you join a webinar in webcast view, it opens in your browser and begins once the host starts streaming the webcast. |
What you can do in a webinar varies depending on the role you were assigned. Hosts and cohosts can assign roles to participants to create an interactive and engaging experience. Hosts can also assign different chat privileges to attendees and panelists. For more information on the specific permissions and responsibilities of each role, see Roles in Webex Webinars.
Host
Hosts schedule and manage the webinar. They are able to assign roles to participants, as well as many of the same permissions as the other roles.
Cohost
Cohosts have many of the same permissions as the host. This allows them to help the host manage a webinar or start them if the host is running late.
Panelist
Panelists are the subject-matter experts speaking at your webinar. They can answer questions, chat publicly and privately, and more to moderate the webinar.
Presenters
Presenters are the subject-matter experts speaking at your webinar who can share content with all participants.
Note Taker
Note Takers write and publish notes, which can be referred to in the future or provide a summary for people who were unable to attend the webinar.
Attendee
Attendees are the participants attending the webinar.
| 1 |
Click the audio connection options in the Preview window. |
| 2 |
Choose how you want to hear the audio: 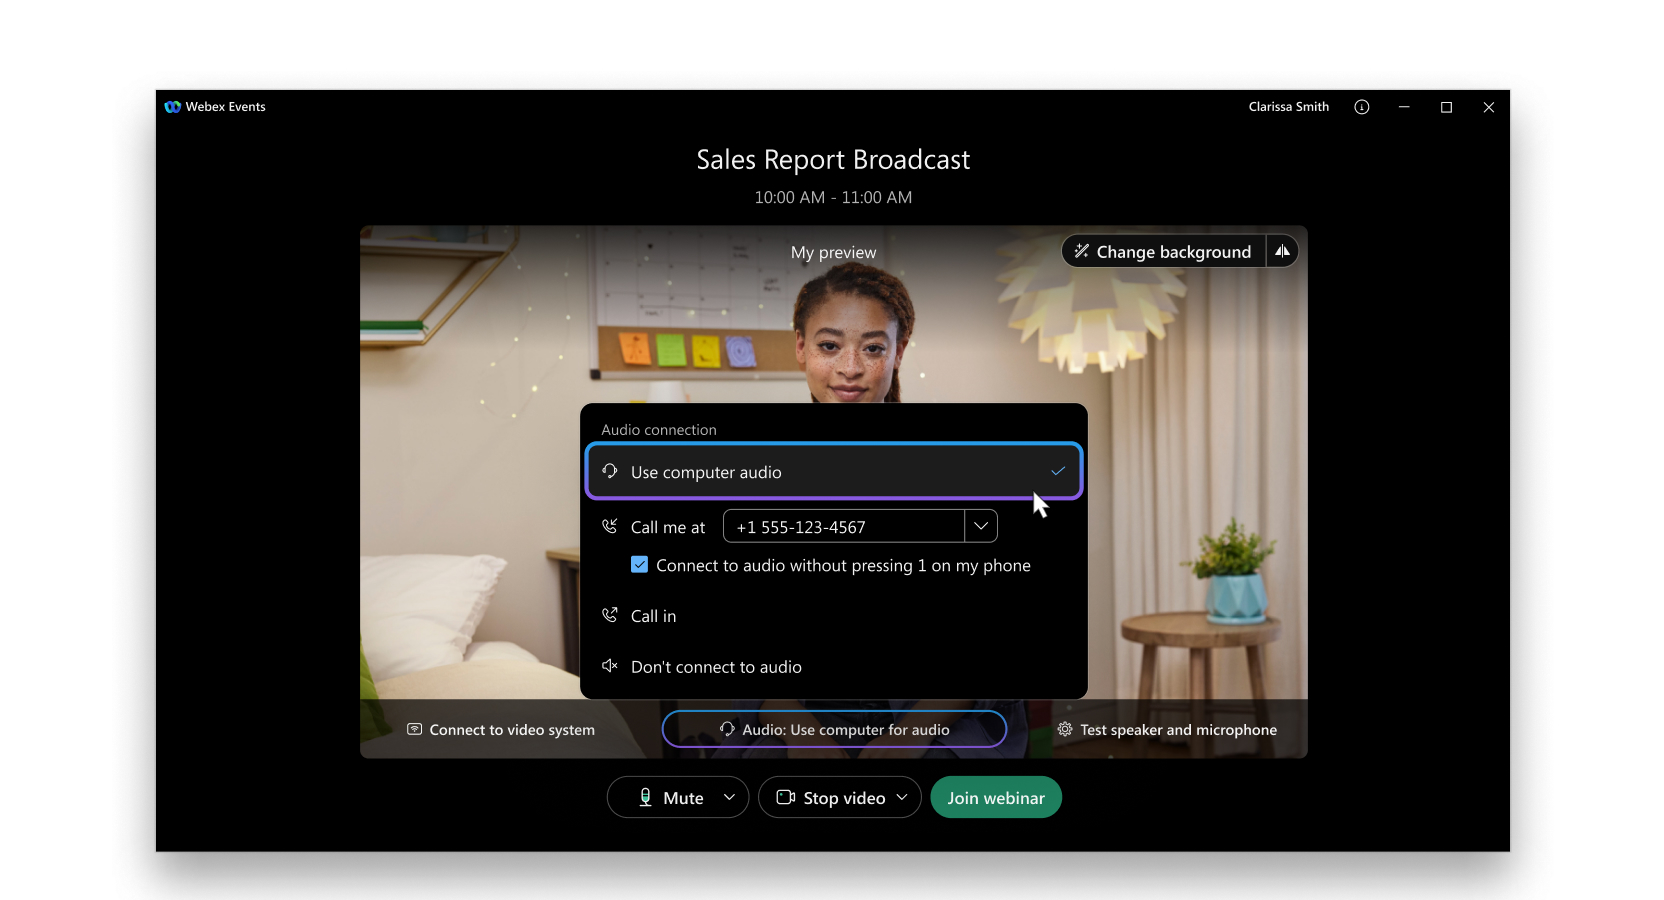
Available audio options may vary depending on your site and account. If you have questions, contact your site administrator. For webinars in webcast view, the host, cohost(s), and panelists use Webex audio. The attendees can only use VoIP.
|
| 3 |
If you want to join the webinar with your audio muted, click Mute You'll see Unmute If you're joining a webinar as an attendee, you’ll automatically join the webinar with your audio muted. Only the host or cohost can unmute you. Webinar in webcast view attendees can't connect to audio. |
 .
. when your microphone is muted. Click
 Attendees can't connect to video before or during a webinar.
| 1 |
If you want to join the webinar with your video turned off, click Stop video
You'll see Start video
|
| 2 |
Click Start video
By default, your self-view video shows in mirror view. You can turn off mirror view if you want to see yourself in your self-view video the same way that other participants see you. |
| 3 |
Click Join webinar. |

 when your video is turned off.
Share content from your device to keep webinar participants informed and engaged. You can share your entire screen with others, or choose which files and applications you want to share so you can keep everything else private.
Attendees can't share content from their devices to other webinar participants.
|
Select Share
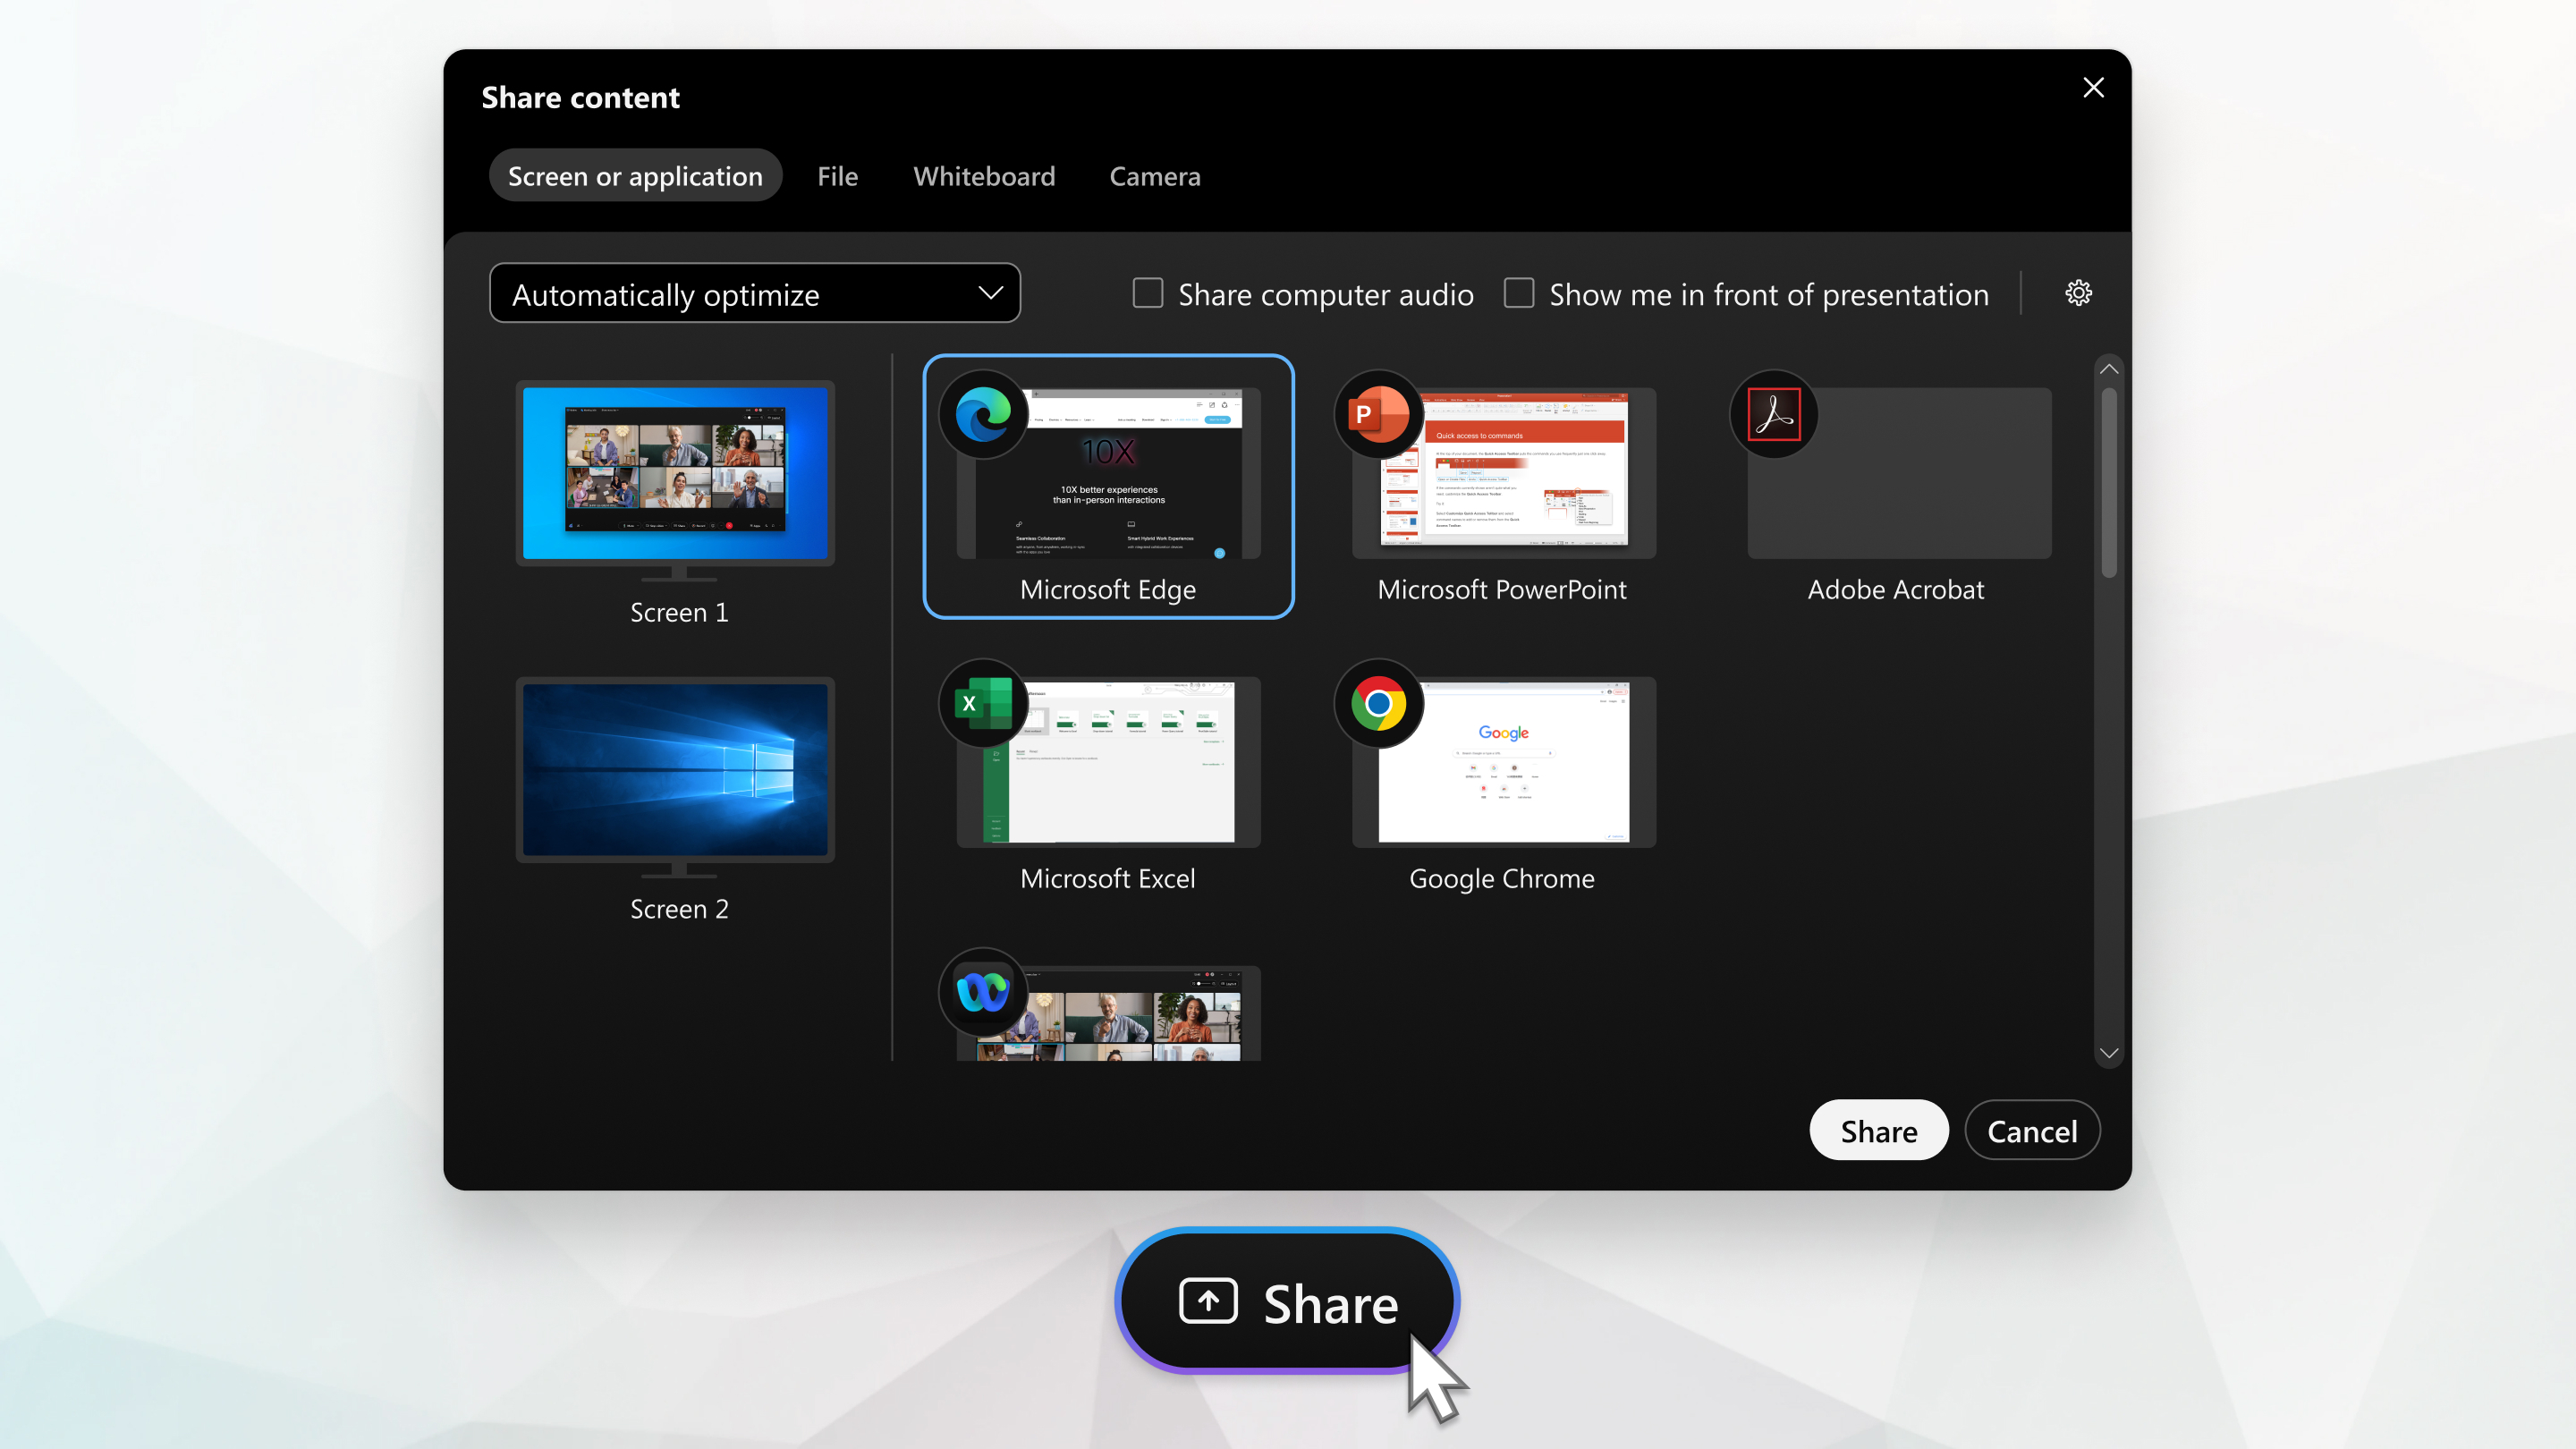 For more information on how to share your screen, an application, a file, or a whiteboard, see Share content in meetings and events. |
 in the webinar controls and choose what you are sharing to your participants.
Your webinars are important. If your whole team can't be there, or if you want to make recorded webinars available, record your webinar to share later. The recording includes the audio, video, and presentations.
When you schedule a webinar, you can enable automatic recording to begin when it starts. Your site administrator may have also enabled automatic recording for your site.
Automatic transcription of the audio is turned on by default. You can turn it back on if you turned it off, or you can turn it on only for specific users.
|
While in your webinar, select Record You and your attendees see the recording indicator When the webinar ends, you receive an email with the recording link. Your recording typically arrives within 24 hours after the webinar has ended, but this varies depending on recording size, site bandwidth, and other factors. |
 , and click
  in the Webex Webinars app window.


