
Thanks for your feedback.
Get Started with Events (classic)
 Feedback?
Schedule an Event
Events (classic) is not supported on Webex Meetings Virtual Desktop Software, so it is not available in VDI environments.
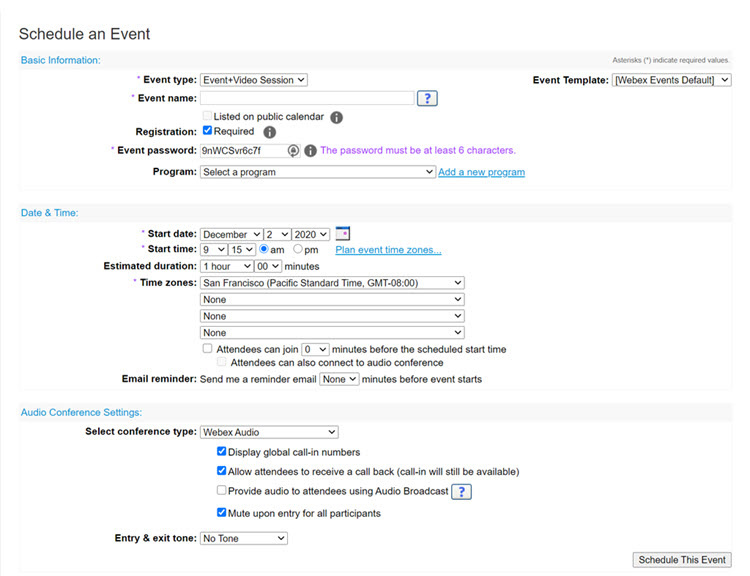
Sign in to your Webex site and select Webex Events (classic). On the left navigation bar, go to . Enter the event information, such as the registration requirements, date, audio settings, and attendees.
To help keep the event running smoothly, invite panelists to serve as subject matter experts, answer questions, and manage polls.
Start an Event
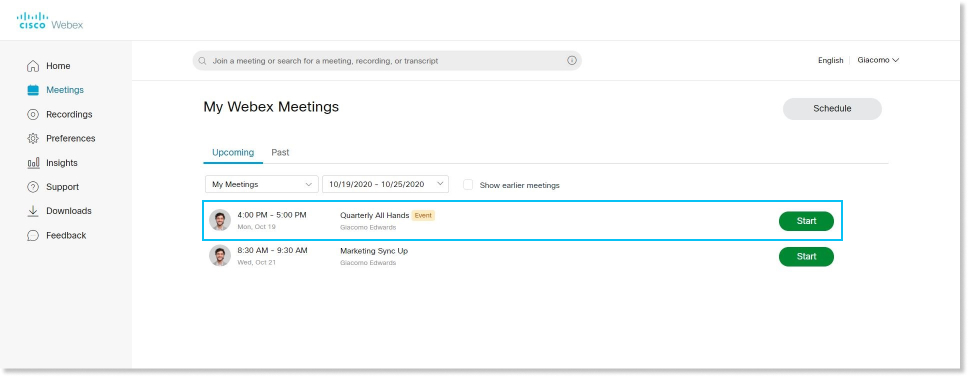
At the scheduled event time, sign in to your Webex site. From the home page, under Upcoming Meetings, locate your event and then select Start.
Join an Event
When you’re invited to a Webex event, you received an email with instructions. Click the link to join the event. Under Join Event Now, enter your name and email address, and click Join Now.
You might be asked to enter an event password. You can find this in your email invitation.
Connect to Audio
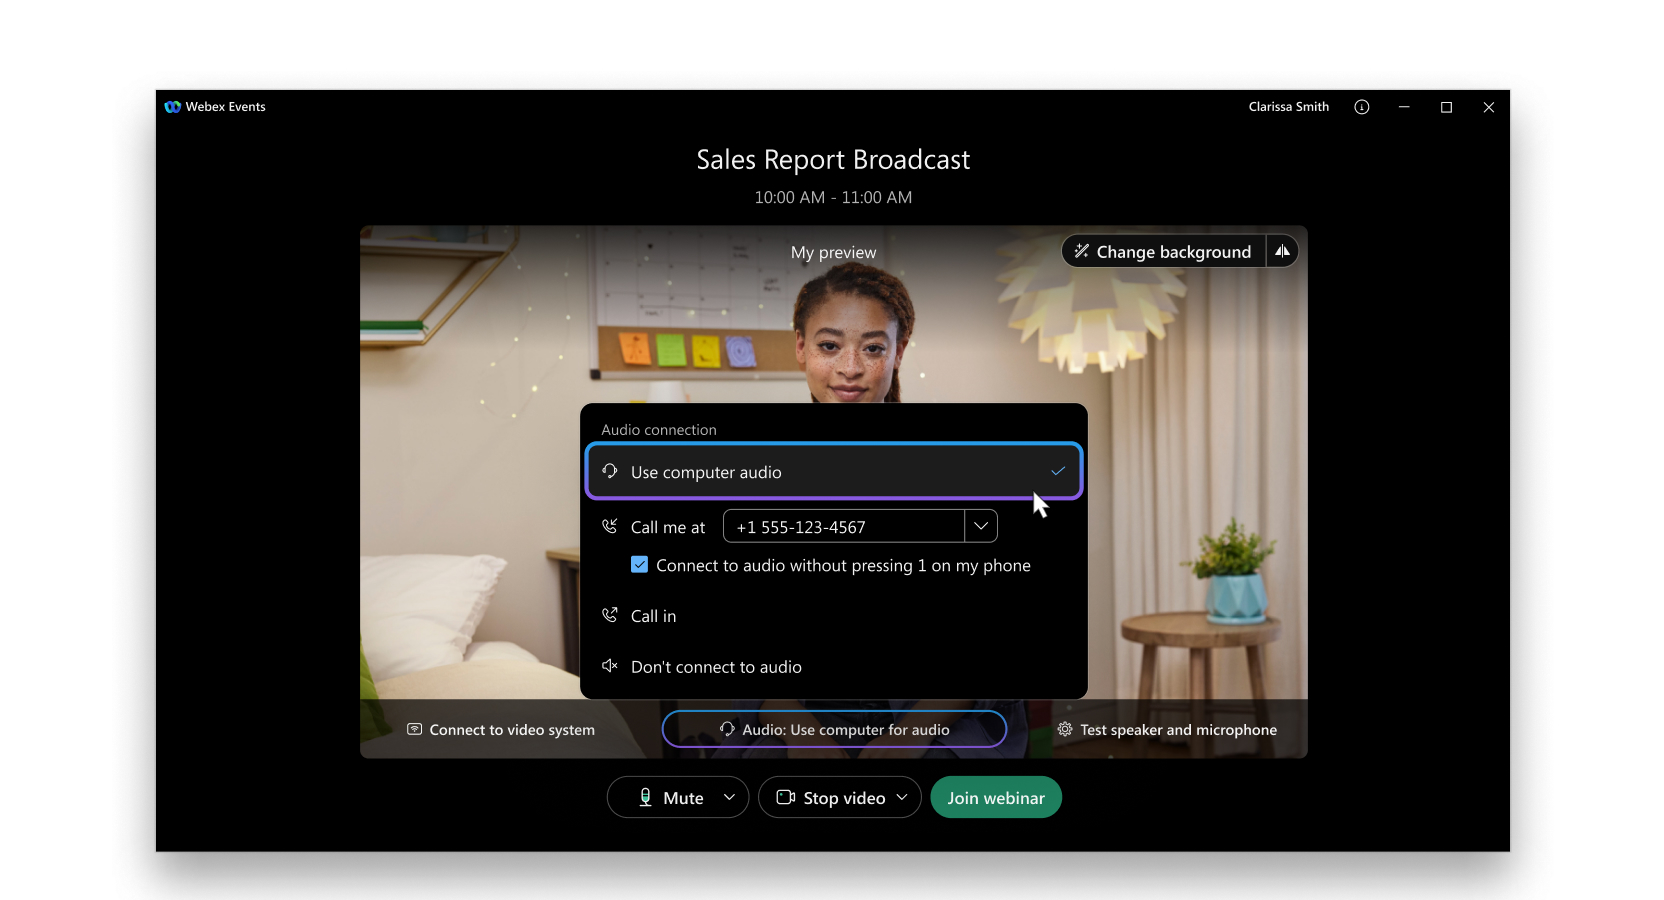
Before you join an event, you can choose the settings you use for audio in the event.
-
Click the audio connection options in the Webex Events app.
-
Choose how you want to hear the audio in the event:
-
Use computer audio—Use your computer with a headset or speakers. This is the default audio connection type.
You can change your headset, speakers, and microphone.
-
Call me at—Enter or select the work or home phone number that you'd like the event to call.
-
Call in—Dial in from your phone when the event starts. A list of global call-in numbers is available after you join the event.
-
Don't connect to audio—You won't hear any audio in the event through your computer or phone. Use this option if you're in the meeting room but want to use your computer to share content in the event.
-
-
If you want to join the event with your audio muted, click Mute
 .
.You'll see
 when your microphone is muted. Click Unmute my microphone when you want to speak in the event.
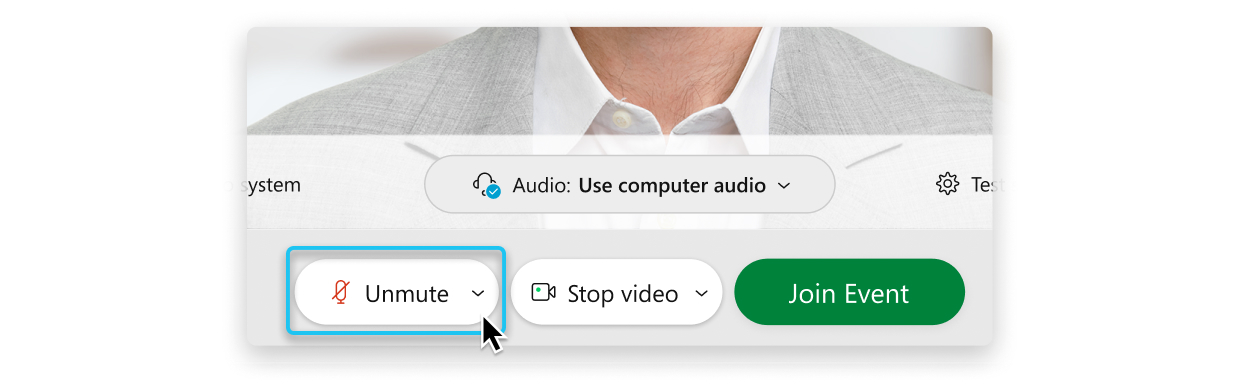
Hosts can prevent attendees from unmuting themselves, so this option may not be available.
Start Your Video
If you're a panelist, you can choose the settings you use for video in the event before you join an event.
-
If you want to join the event with your video turned off, click Turn off my video
 .
.You'll see
 when your video is turned off. Click Turn on my video when you want to show your video.
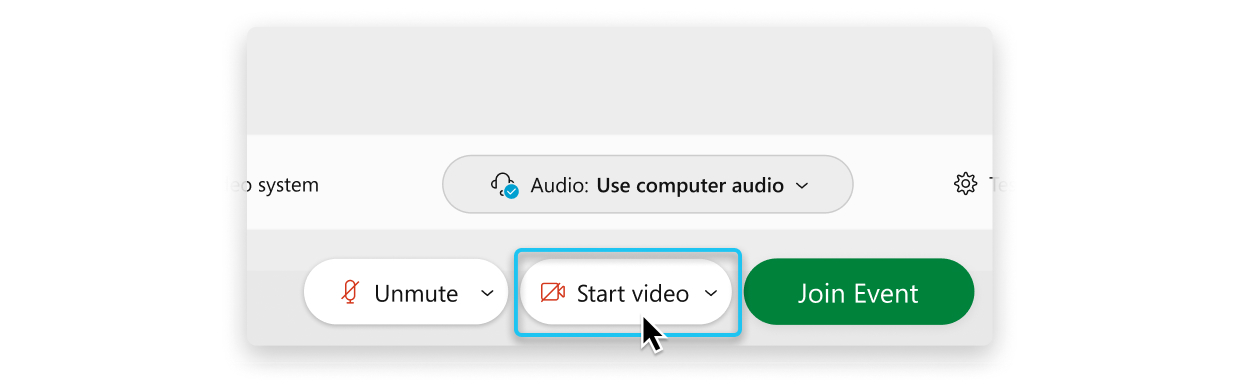
-
By default, your self-view video shows in mirror view. You can turn off mirror view if you want to see yourself in your self-view video the same way that other event participants see you.
-
Click Join Event.
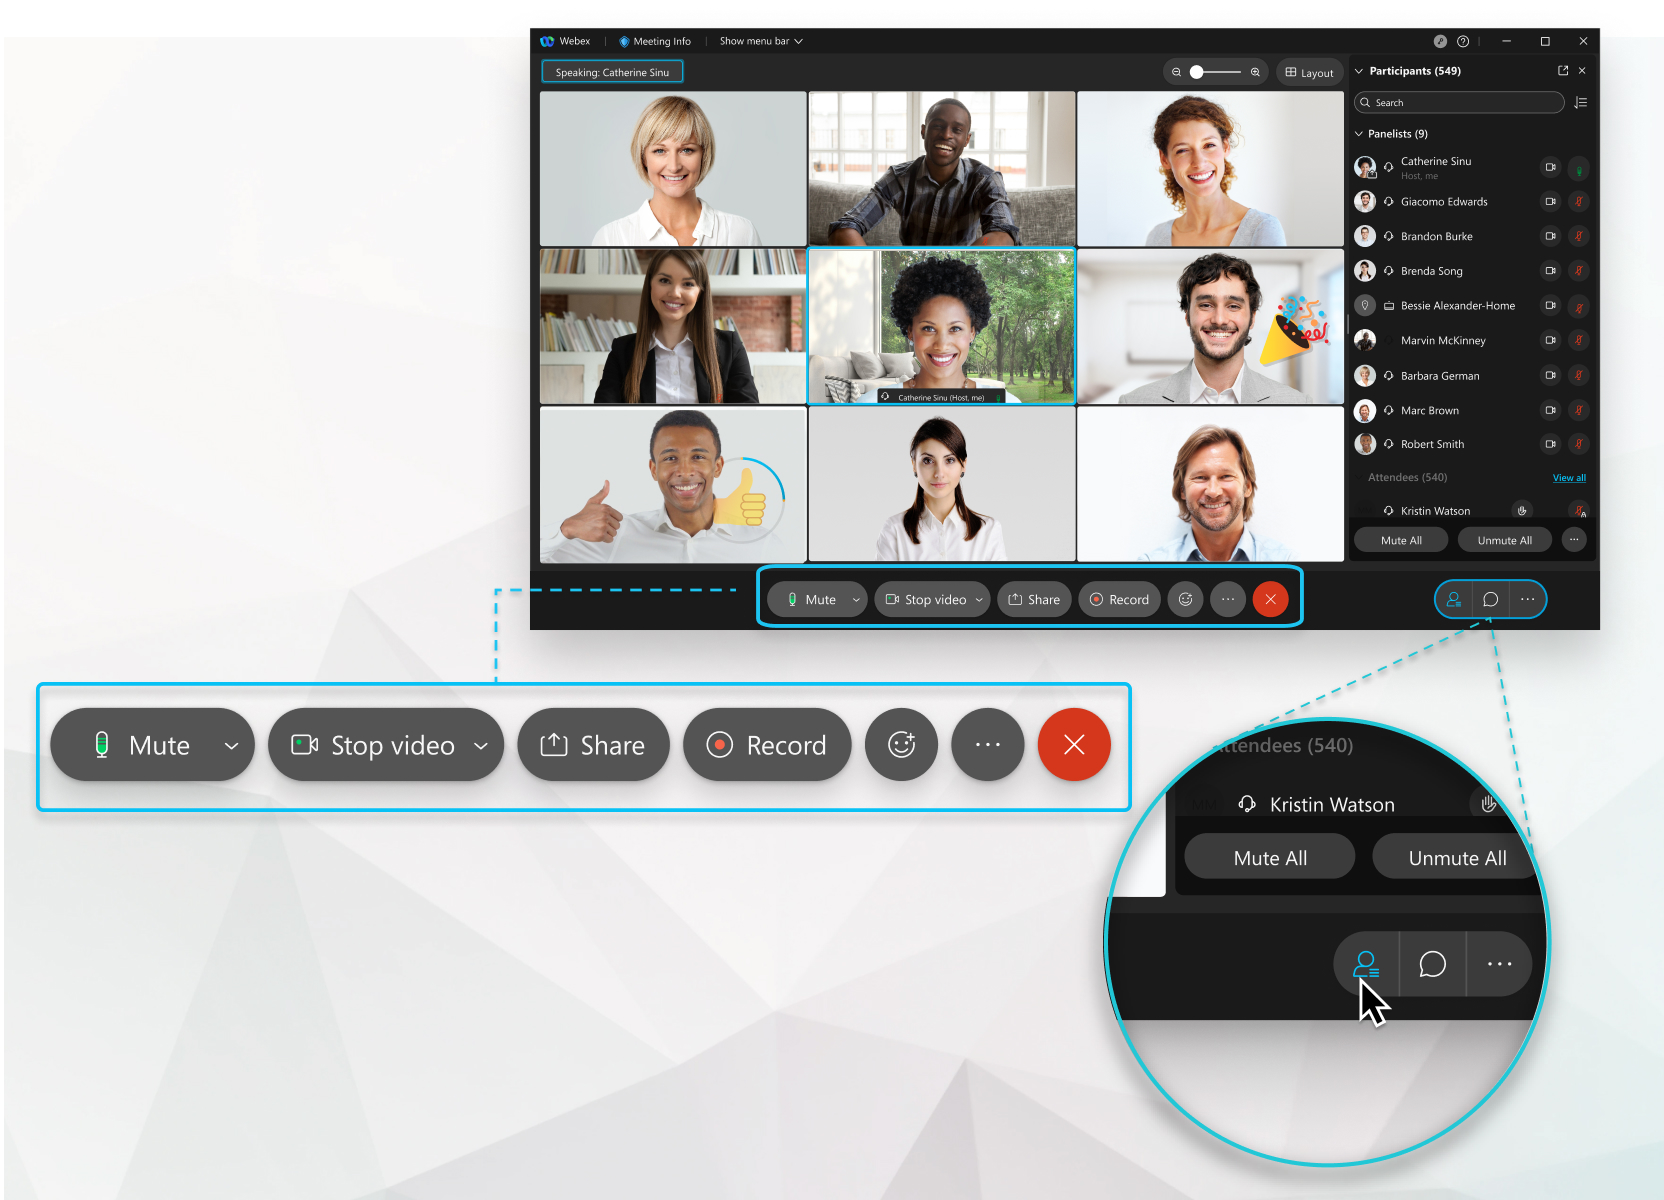
The Events (classic) user interface is simple. Most of the event options are in the center and participants and other panels are on the right.
Share Content
Presenters can share content during the event by selecting Share  . You can share your screen, an application, a file, or a whiteboard.
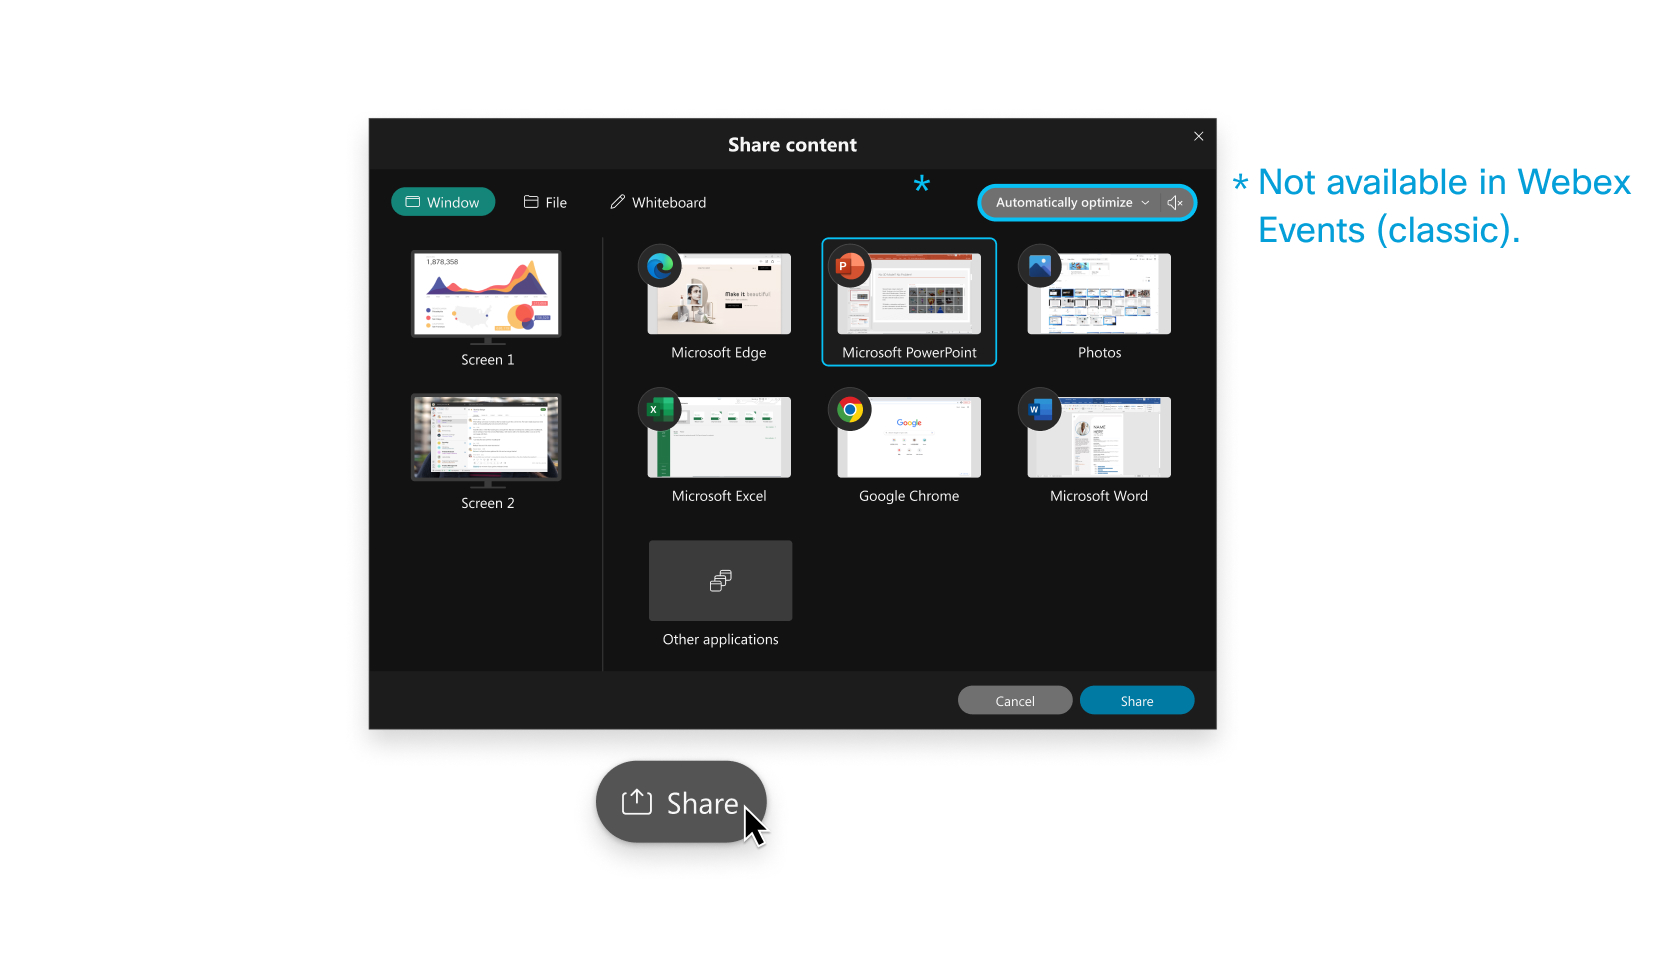
For more information on how to share content, click here.
Only panelists are allowed to be presenters. If you want an attendee to share content, have the host make them a panelist. To do this, in the Participants panel, click View all attendees. Select the attendee and select Make Panelist.
Record an Event
Your events are important. If your whole team can't be there, or if you want to make recorded events available, record your event to share later. The recording includes the audio, video, and presentations.
While in your event, select Recorder  , and select Record. You and your attendees see
  at the top of the user interface when recording is in process.
Your Webex site may already be set to record your events automatically. If not, talk to your Webex site administrator about setting it up.
When the event ends, you’ll receive an email with the recording link. Your recording typically arrives soon after the event, but it might take a while, depending on recording size, site bandwidth, and other factors.


