
Thanks for your feedback.
Webex App | Public spaces
 Feedback?
Public spaces are different from other spaces, as they aren't tied to a specific team. Only people in your organization can find a public space that you create. If you change your mind, you can make a public space private again at any time. If you can't see public spaces, contact your administrator for more information.
| 1 |
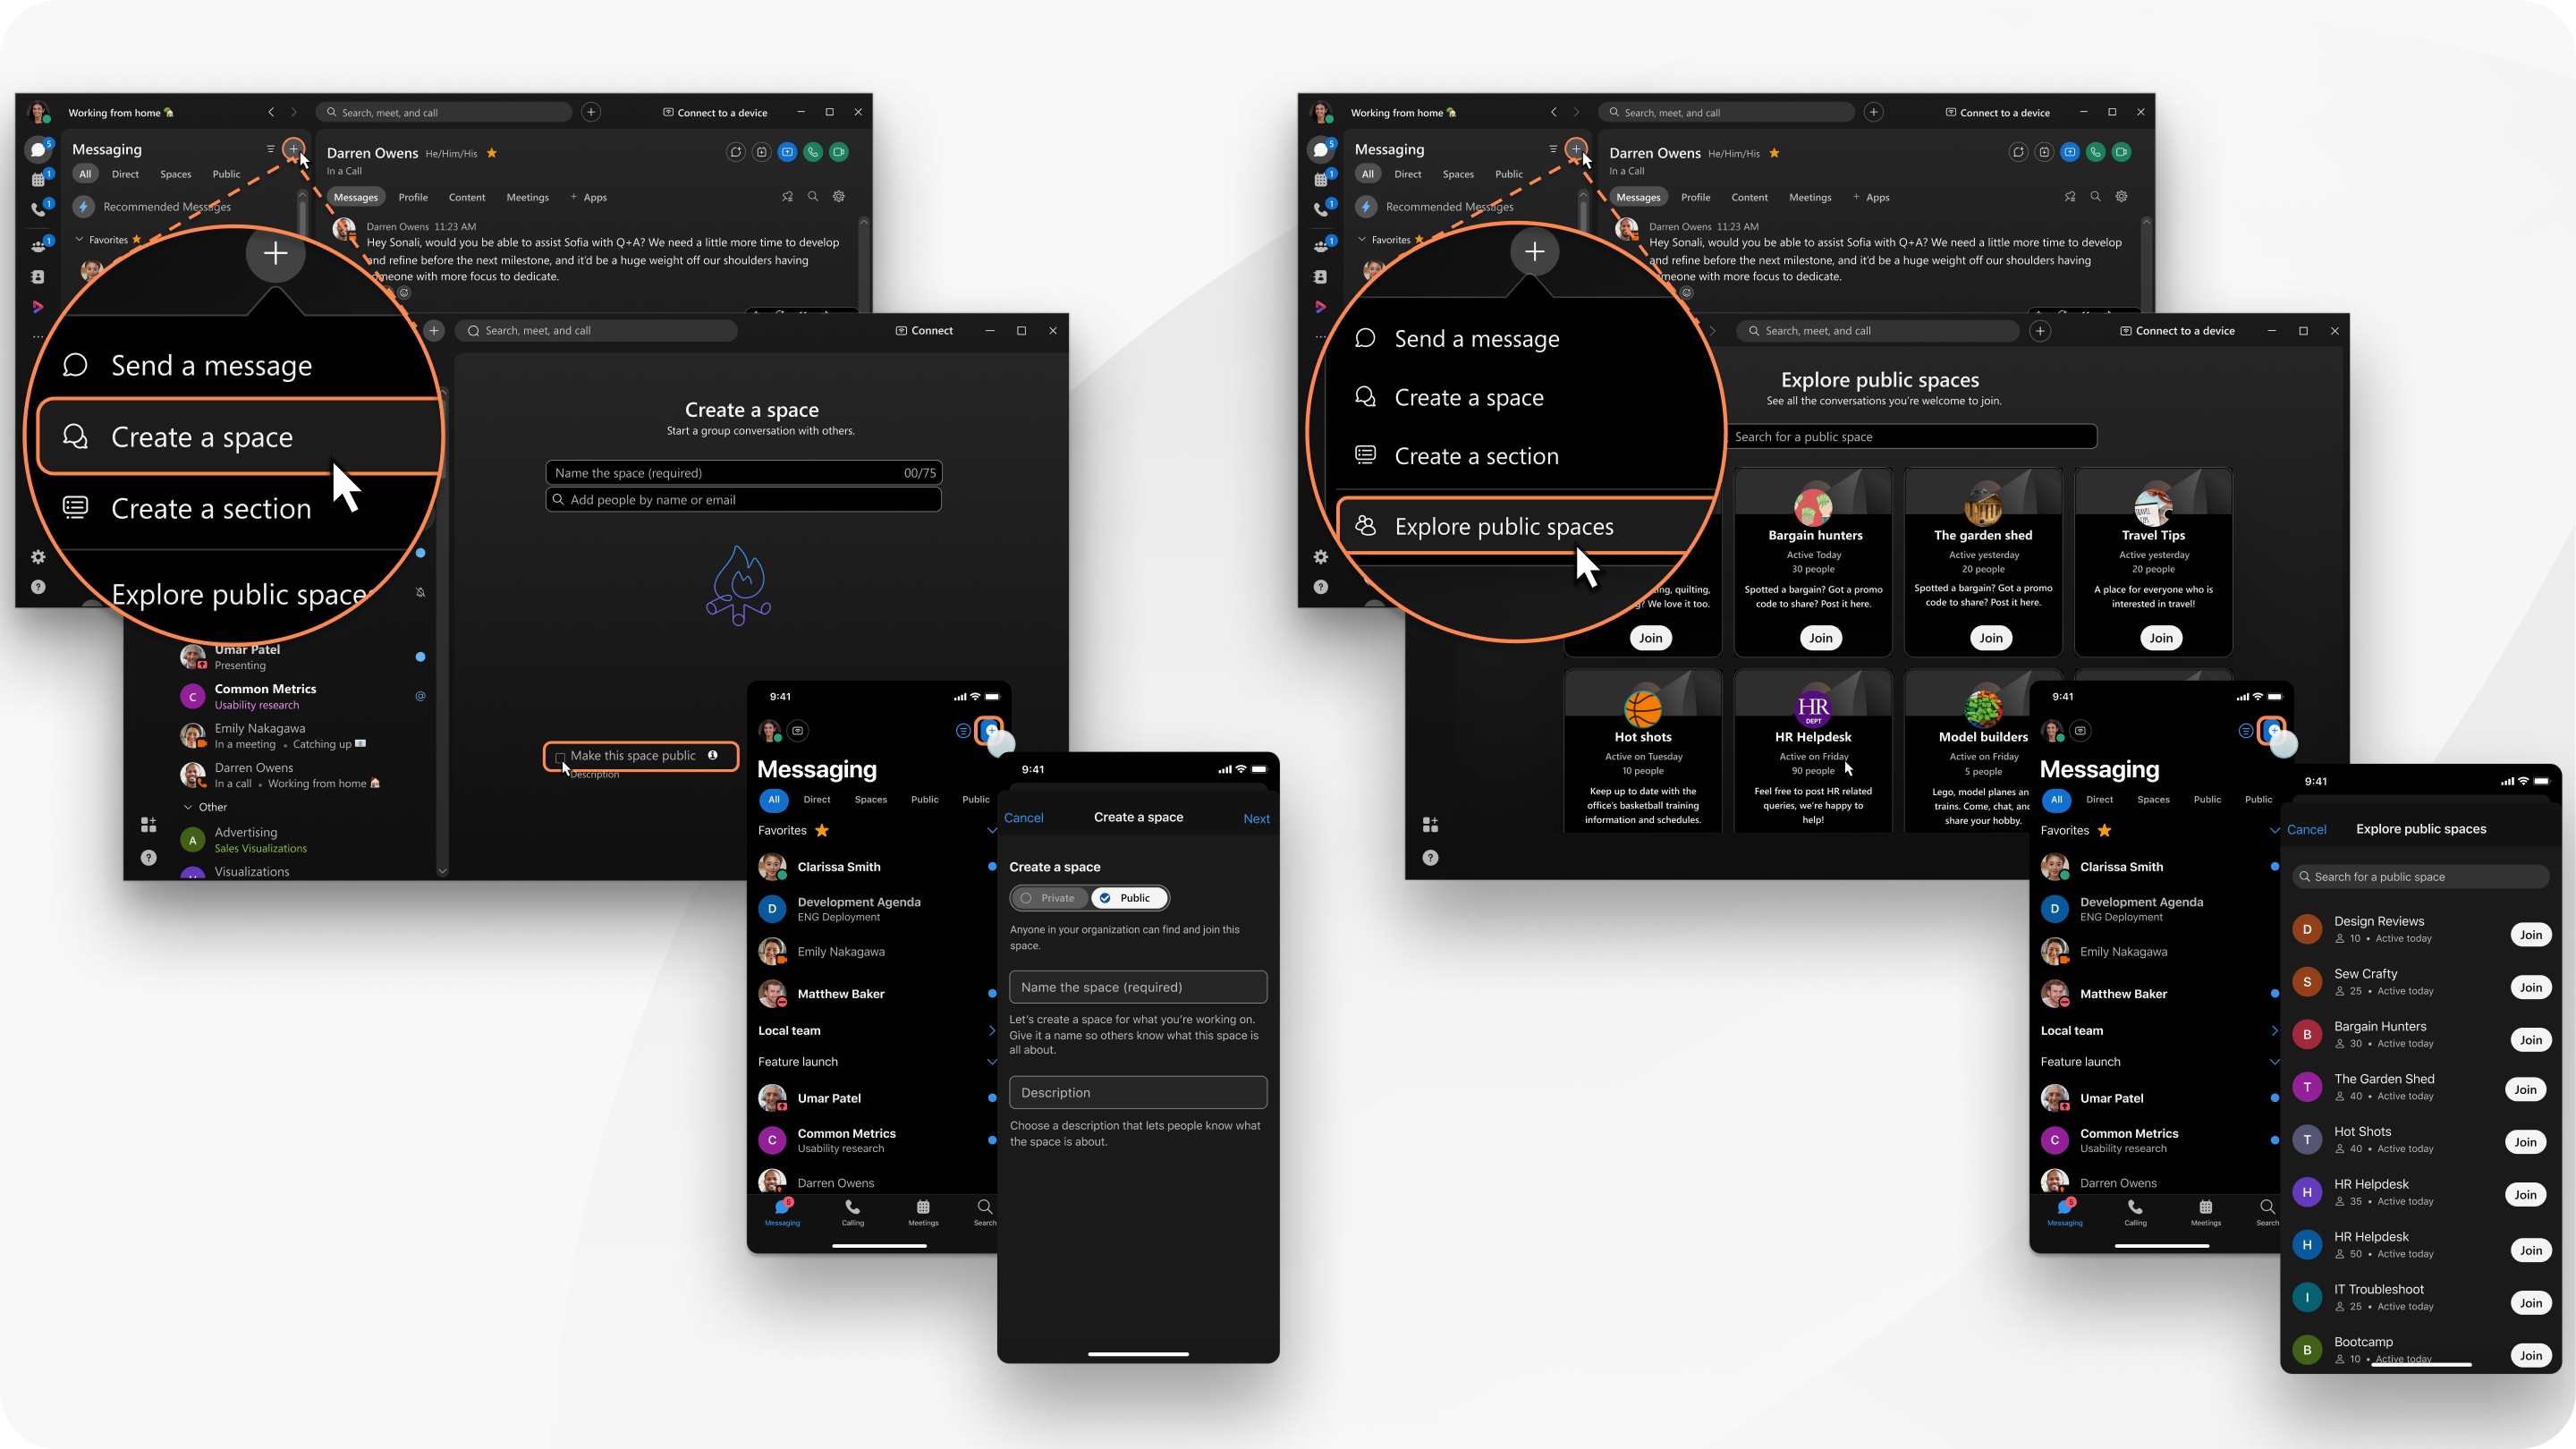
Go to Messaging |
| 2 |
Enter a name for your space. |
| 3 |
Check Make this space public. If your organization uses space
classification, you must set a public space at the lowest
classification. |
| 4 |
Click Create. |
 , and in the space list, click
  and choose
 By making a space public, it can be discovered by anyone in your organization. If you change your mind, you can change it back to private, so only people in your team can find your space.
|
In a public space, go to Space Information Once you make a public space private, you
cannot make it public again. |
 and click
 | 1 |
You can explore public spaces in two ways in the Messaging
|
| 2 |
Scroll the list of public spaces in your organization, or search for a public space in the search bar. |
| 3 |
To join a space, click Join. |
| 4 |
Click Messaging |
| 1 |
Go to Messaging, tap |
| 2 |
Give the space a name, toggle Make this space public, and tap Next. |
| 3 |
To add people to the space, enter a name or email address, and select them from the list of suggested people. Then, tap Create. You can also tap Skip to create the space without adding anyone
to the space.
|
 , and select
 By making a space public, it can be discovered by anyone in your organization. If you change your mind, you can change it back to private, so only people in your team can find your space.
|
In a public space, tap the activity menu Once you make a public space private, you
cannot make it public again. |
 , choose
 When you explore and join public spaces on your desktop, you can see the public spaces you've joined.
|
Tap . |
| 1 |
Go to Messaging, tap |
| 2 |
(Optional) Tap Add People, enter their name or email address and select them from the list of suggested people, and tap OK to add them to the space. |
| 3 |
Give the space a name, set the toggle Make this space public, and tap Create a space. |
 , and select
 By making a space public, it can be discovered by anyone in your organization. If you change your mind, you can change it back to private, so only people in your team can find your space.
|
In a public space, tap the activity menu Once you make a public space private, you
cannot make it public again. |
 , choose
 When you explore and join public spaces on your desktop, you can see the public spaces you've joined.
|
Tap . |


