
Thanks for your feedback.
Configure user access to integrations in Control Hub
 Feedback?
| 1 |
Sign in to Control Hub, then go to . |
| 2 |
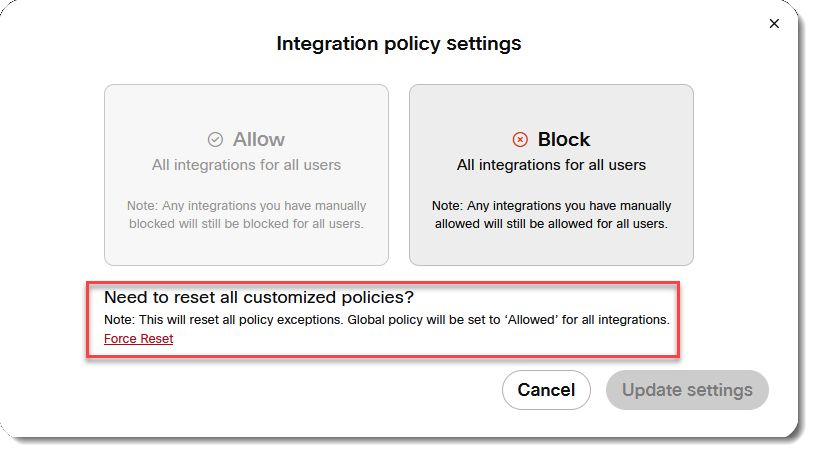
Click Manage, then click either Allow to allow all users to access all integrations, or Block to block all users from accessing all integrations. |
If you find that some of your users have access to some Webex integrations and others don't, rather than modifying each integration individually, you can reset the state of all your integrations in one step. Once reset, you can then customize access for individual integrations on a case-by-case basis.
To perform a hard policy reset on all your Webex integrations:
- Sign in to Control Hub.
- If you manage multiple partners, choose your organization from the drop-down list; otherwise, skip to the next step.

- .
- Click Manage.
- If you have no policy exceptions, you’ll see the Integration Policy Dialog, but you can still click the Force Reset link to reset customized policies.
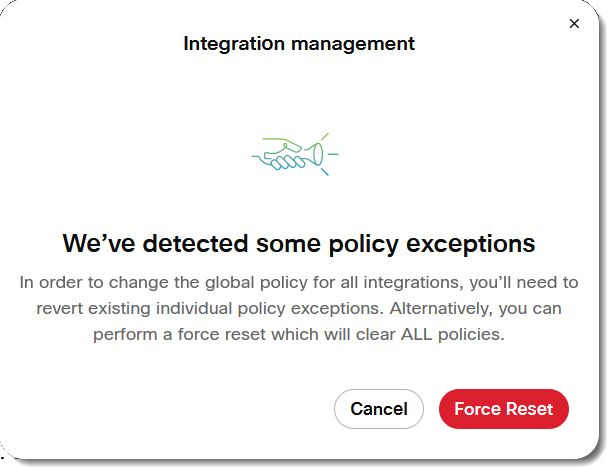
- If any of your integrations have policy exceptions applied, you’ll see an Integration
management dialog. Click Force Reset.
- You’ll see a Warning dialog. If you’re certain you want to reset policies, click
Force Reset.
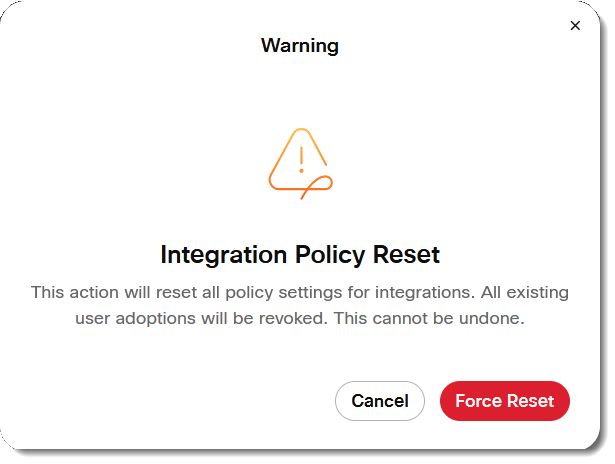 All exception policies are deleted and cannot be restored automatically. Instead, an admin will have to reconfigure the system according to the organization’s current business and security needs.
 - You’ll see a popup notification once the policies are reset.
- Click Manage, and you can again choose to block or allow integrations for all users.
Pro Pack provides advanced functionality to manage access to integrations for users. For more information, see Pro Pack for Control Hub.
| 1 |
Sign in to Control Hub, then go to . |
| 2 |
Click Manage, then click Allow.
|
Adopted user count and adopted user list may vary as they use the following two different methods:
- Adopted user count—Webex Analytics calculates this relative metric by tracking user activity over the last 120 hours.
- Adopted user list—The system generates this list using a direct database lookup for users with currently active tokens.
| 1 |
Sign in to Control Hub, then go to . |
| 2 |
Click an integration in the list or search for a specific integration. In the Overview window, click |
 , then select


