
Thanks for your feedback.
 Feedback?
Handset package contents
Your handset package has the following contents:
-
Handset with attached belt clip. Inside the handset is the battery, with a piece of plastic over the battery contacts.

You need to remove the plastic over the battery contacts. For more information, see Install the battery in the handset.
-
Charging cradle with attached USB cable.
-
Regional power adapter for the charging cradle.
-
Plastic cover to replace the belt clip on the handset.
Make sure that you save this small plastic cover, in case you want to use the handset without the belt clip.
-
Printed compliance document.
You need the label on the box during handset registration.
Install the battery in the handset
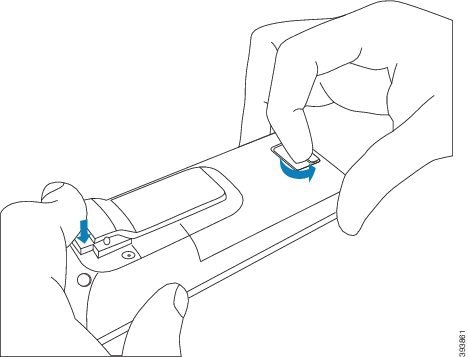
The handset battery is shipped inside the handset, but there’s a plastic tab over the battery contacts. You need to remove the plastic tab.
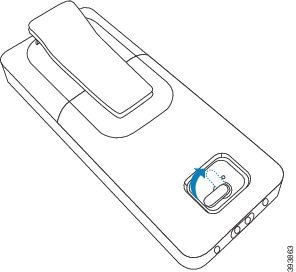
| 1 |
On the back of the handset, turn the latch counterclockwise to unlock the back, lift the clip, and lift the cover to remove the battery cover.
|
||
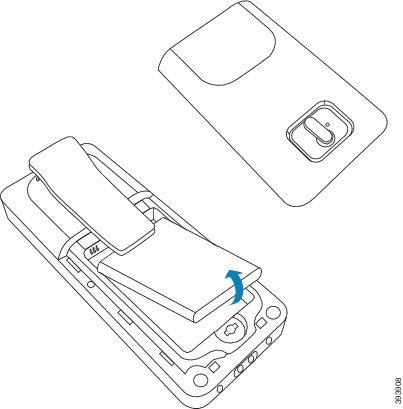
| 2 |
Remove the battery from the handset.
|
||
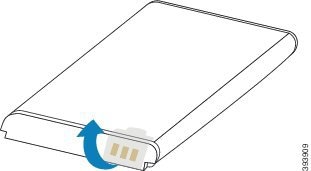
| 3 |
Remove the plastic over the contacts.
|
||
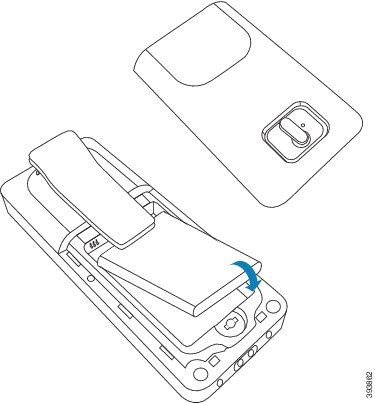
| 4 |
Place the battery under the clip and drop it into the compartment.
The battery contacts are on the top left edge of the battery and the top left edge of the battery compartment. Ensure that the contacts meet and that the battery is seated in the compartment.
|
||
| 5 |
Replace the battery cover, make sure that the cover is closed, and turn the latch clockwise to the locked position. Don't force the cover closed. If it doesn't close easily, take it off and check that the battery is completely seated in the battery compartment.
|
What to do next
Before you use the handset, you need to charge it. See Charge the handset battery.
Remove the handset clip
You can remove the clip from the back of the handset and replace it with a smooth cover that shipped with your handset.
Before you begin
You need:
-
#1 Phillips-head screwdriver
-
Plastic cover to replace the belt clip on the handset. This cover is shipped to you in the product box.
| 1 |
Turn off the handset. |
||
| 2 |
Place the handset face down on a flat, level surface. You may want to place the handset on a large, clean cloth to protect the handset. |
||
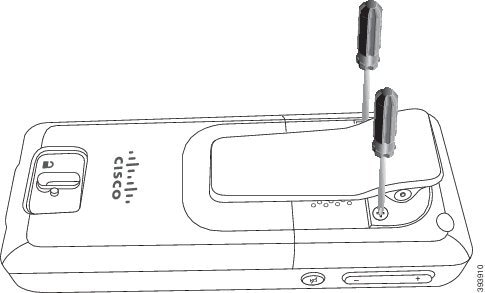
| 3 |
Use the screwdriver to remove the screws on the clip. Set the screws aside.
 |
||
| 4 |
Lift up the loose end of the clip. The clip assembly should come off the handset. 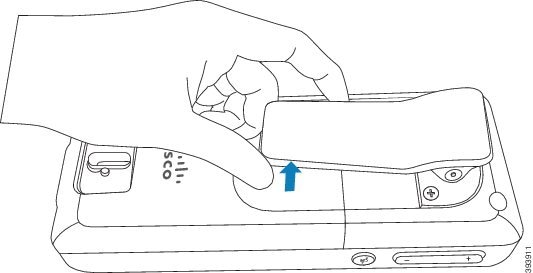 |
||
| 5 |
The replacement cover has a hook in the back. Slide the hook into the recessed area of the handset and press it into the handset. This diagram shows the hook on the back. 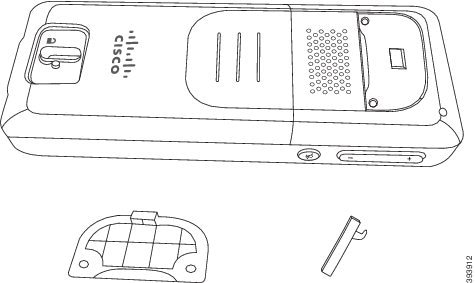 This diagram shows the way you put the hook into the handset.  Press down until the clip is in position and the back is flat. 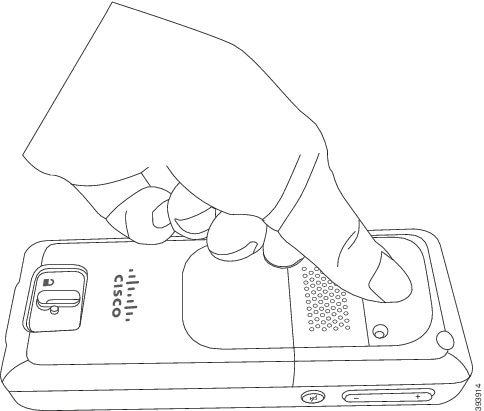 |
||
| 6 |
Use the screwdriver to screw the screws into the cover and handset. 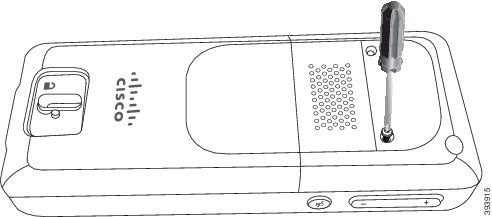 |
||
| 7 |
Store the cover with the belt clip, in case you need to use it. |
Set Up the charging cradle
You use the charging cradle to charge the handset. The cradle has a built-in USB cable that plugs into the power adapter. The power adapter is designed for your country's electrical outlet configuration and power rating.
| 1 |
Place the cradle on a level surface. |
| 2 |
Plug the USB connector of the power cord into the power adapter. |
| 3 |
Plug the power adapter into the electrical outlet. 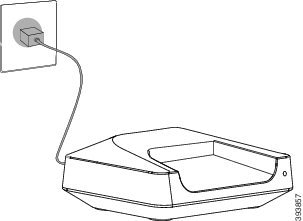
|
Charge the handset battery
You use the handset charger to charge the handset battery.
|
The battery comes partially charged, but you should charge it for a minimum of 10 hours before you use it for the first time. If you don't fully charge it, you may decrease the life of the battery. |
If you remove and replace the battery from the handset, you need to fully discharge and then fully charge the battery so that the battery indicator is accurate.
|
Charge the battery with the handset charger provided. If you use another method, you can damage the battery, the handset, or your surrounding area. |
Only charge the battery in environments where the temperature is between 32°F (0°C) and 104°F (40°C).
|
Don’t charge the battery in hazardous environments or where there’s explosion danger. |
When you place the handset into the charger, it turns on (if not already on) and displays a message that the handset is charging. The handset screen dims and turns off at the configured time.
If the LED on the handset starts to flash, the handset is updating its firmware.
Before you begin
Set up the cradle as described in Set Up the charging cradle.
Ensure that your handset charger is plugged into the electrical outlet.
|
Place the handset in the charger so that the contacts in the handset and the contacts in the charger match. The handset beeps, screen turns on, and displays a message that the handset is charging. If this doesn't happen, remove the handset from the charger and try again. |
Turn on your handset
|
Press and hold Power/End
|
Connect the handset to the base station
After you configure the handset to connect to the base station, it registers. You can make calls when the registration is complete.
If your users perform this procedure, then you need to give them the procedure and the access code.
Before you begin
-
The handset battery must be installed. See Install the battery in the handset.
-
The handset battery must be charged. See Charge the handset battery.
-
The handset must be configured on the base station as described in Add Handsets to the Base Station and you need the base station access code (AC).
| 1 |
Turn on the handset. See Turn on your handset. |
| 2 |
Press Menu |
| 3 |
Select . |
| 4 |
Press Select. |
| 5 |
(Optional) If prompted, enter the access code in the AC field. |
| 6 |
Press Ok. |


