Get started with Board, Desk, and Room Series
 Feedback?
Didn’t find the installation guide in the box? You can find them here.
Start collaborating
For placing calls using a Cisco device, you have a range of options at your fingertips. Whether it's your mobile device, the touch controller, or the integrated touch screen, you have the flexibility to choose. The Room Series devices come with the touch controller. As for the Board and Desk Series, you can easily make calls using the integrated touchscreen interface. For the Board Pro and Desk Pro, you can choose between the touch controller or the interactive touchscreen interface to effectively manage your calls and interactions.
Here is a list of articles in regards to calling:
User experience with RoomOS 11
See this article to learn more about the interface on your Cisco device with RoomOS 11.
In-meeting controls on RoomOS 11
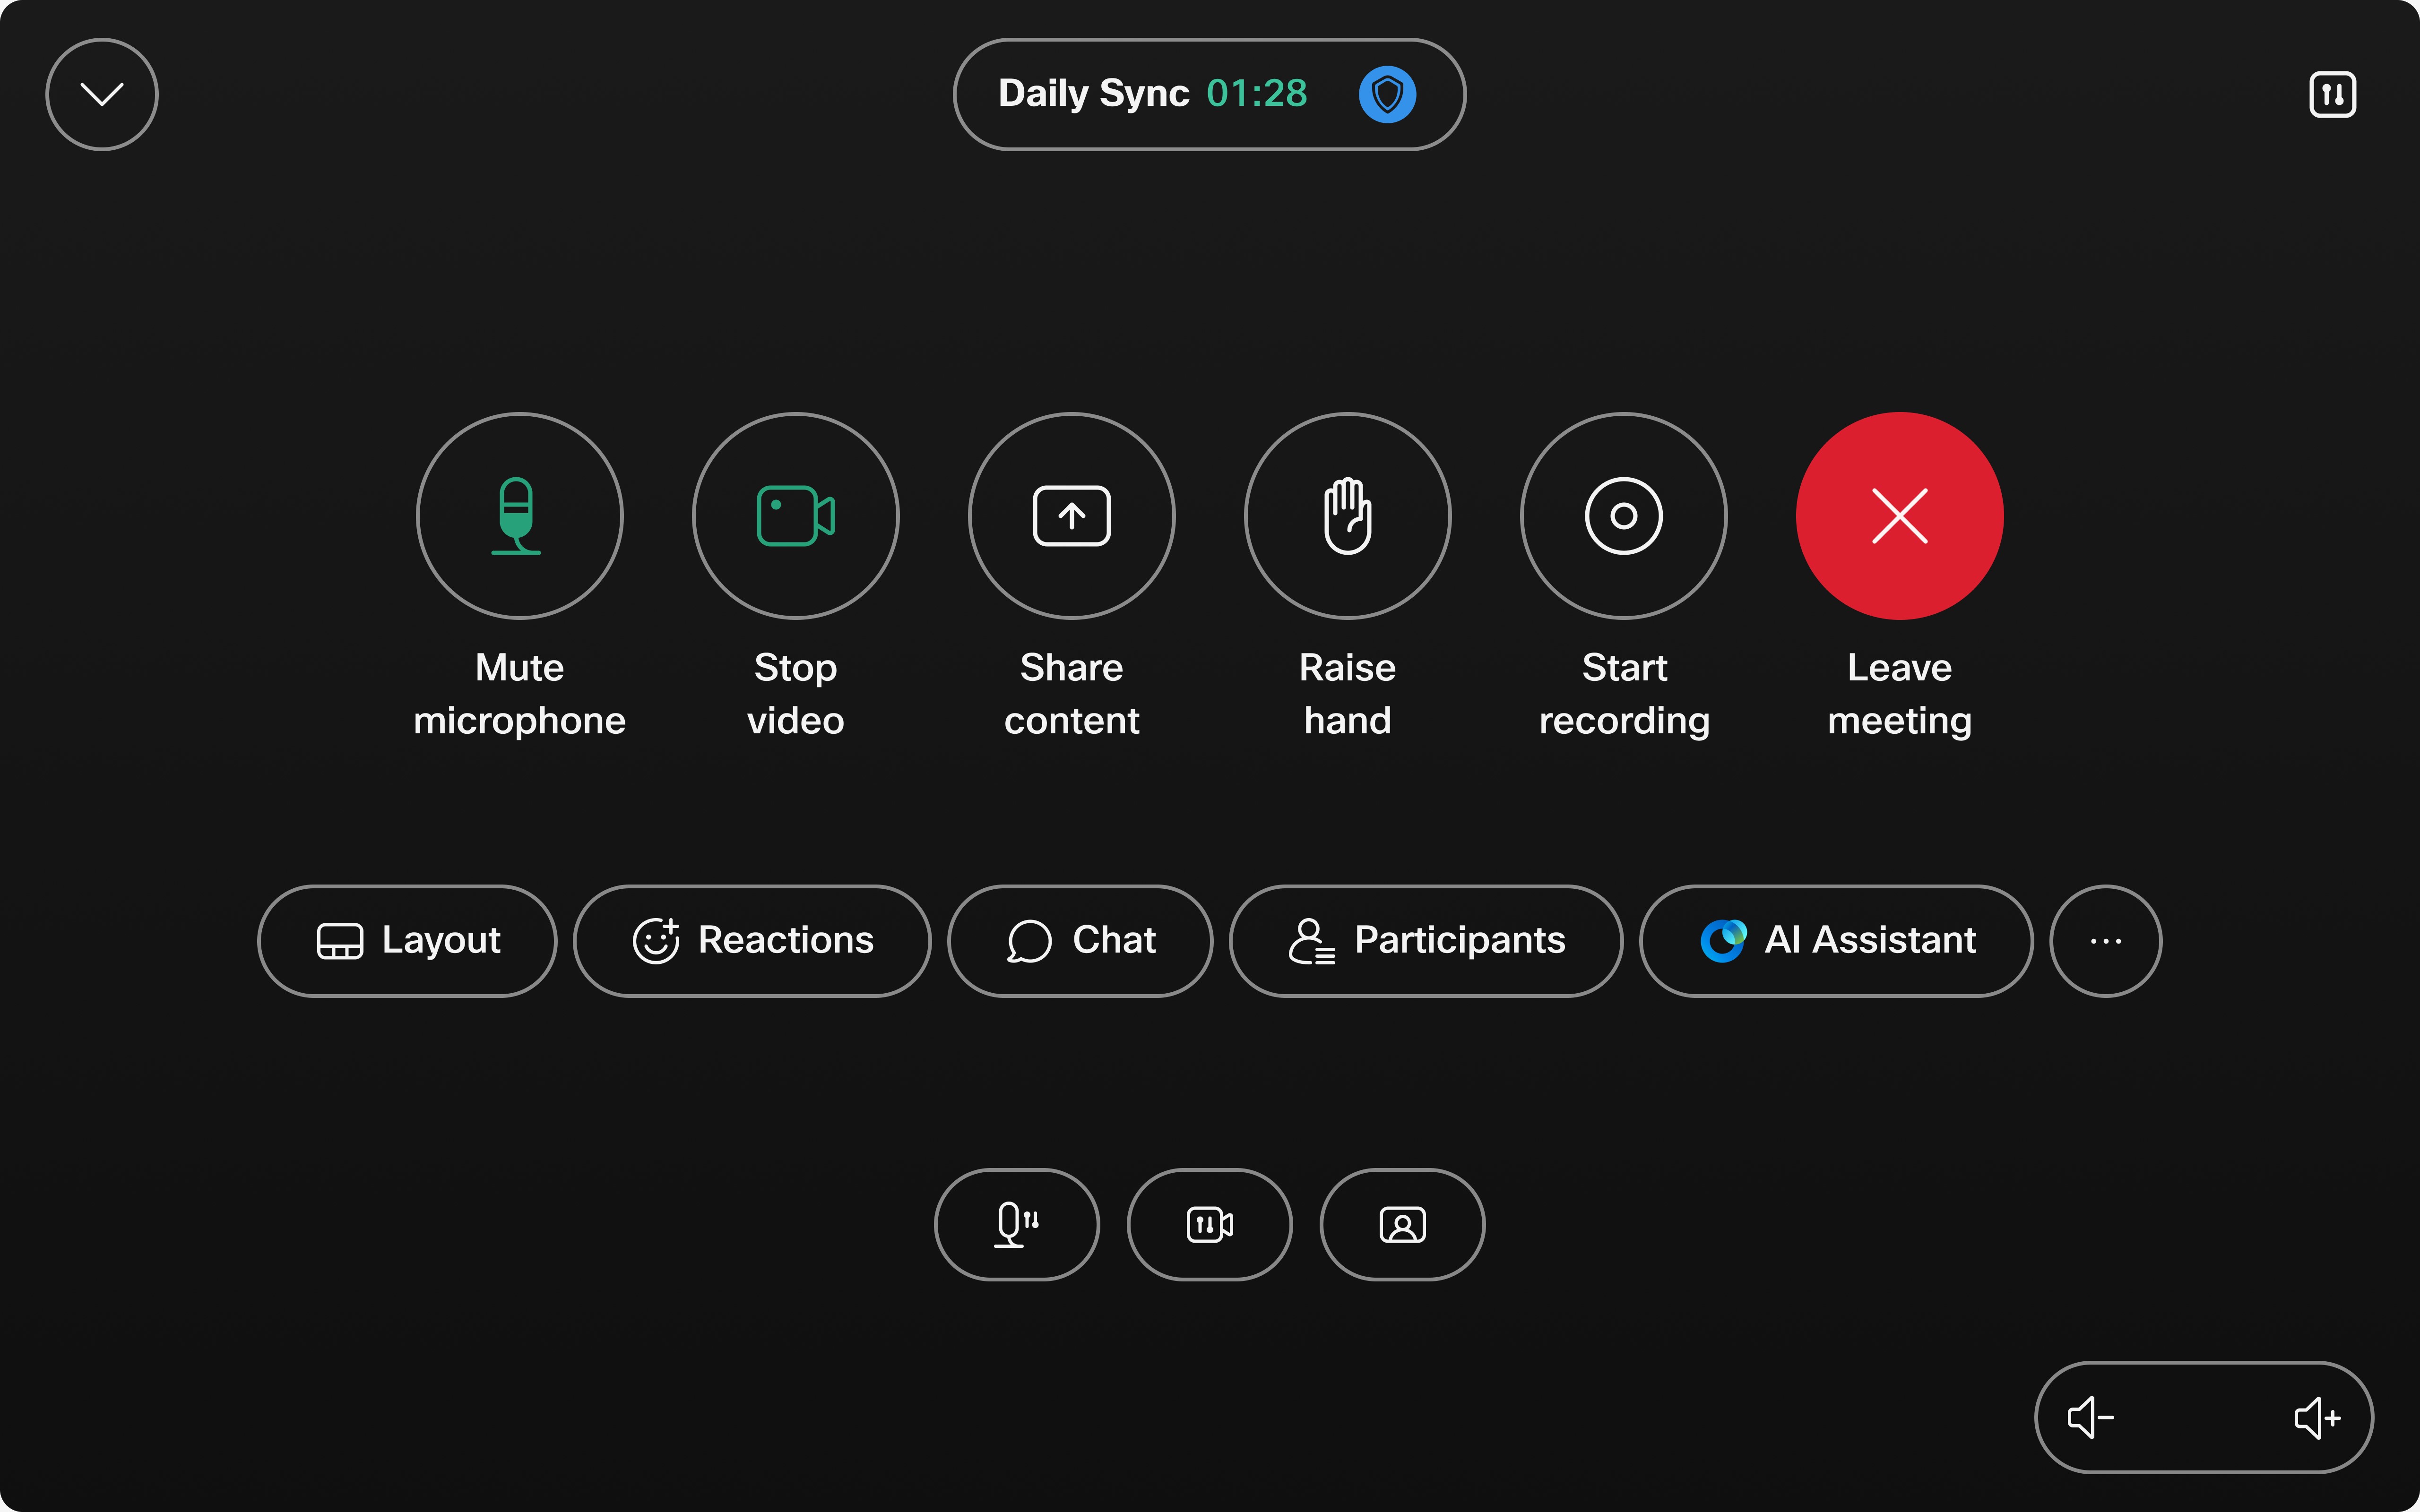
When using a Cisco device to join a meeting, it's crucial that the call and meeting controls are intuitive and easily accessible. That's why we've made significant enhancements to the in-call and meeting controls on RoomOS 11 enabled Board, Desk, and Room series devices.
These updates simplify the interface, providing you with a cohesive and user-friendly experience for managing your calls and meetings.
Key highlights are:
-
Streamlined access: The most frequently used call and meeting actions are now prominently displayed at the top level in a hierarchical UX design.
-
Consistency: Call and meeting features will consistently appear in the same location, ensuring a seamless experience.
-
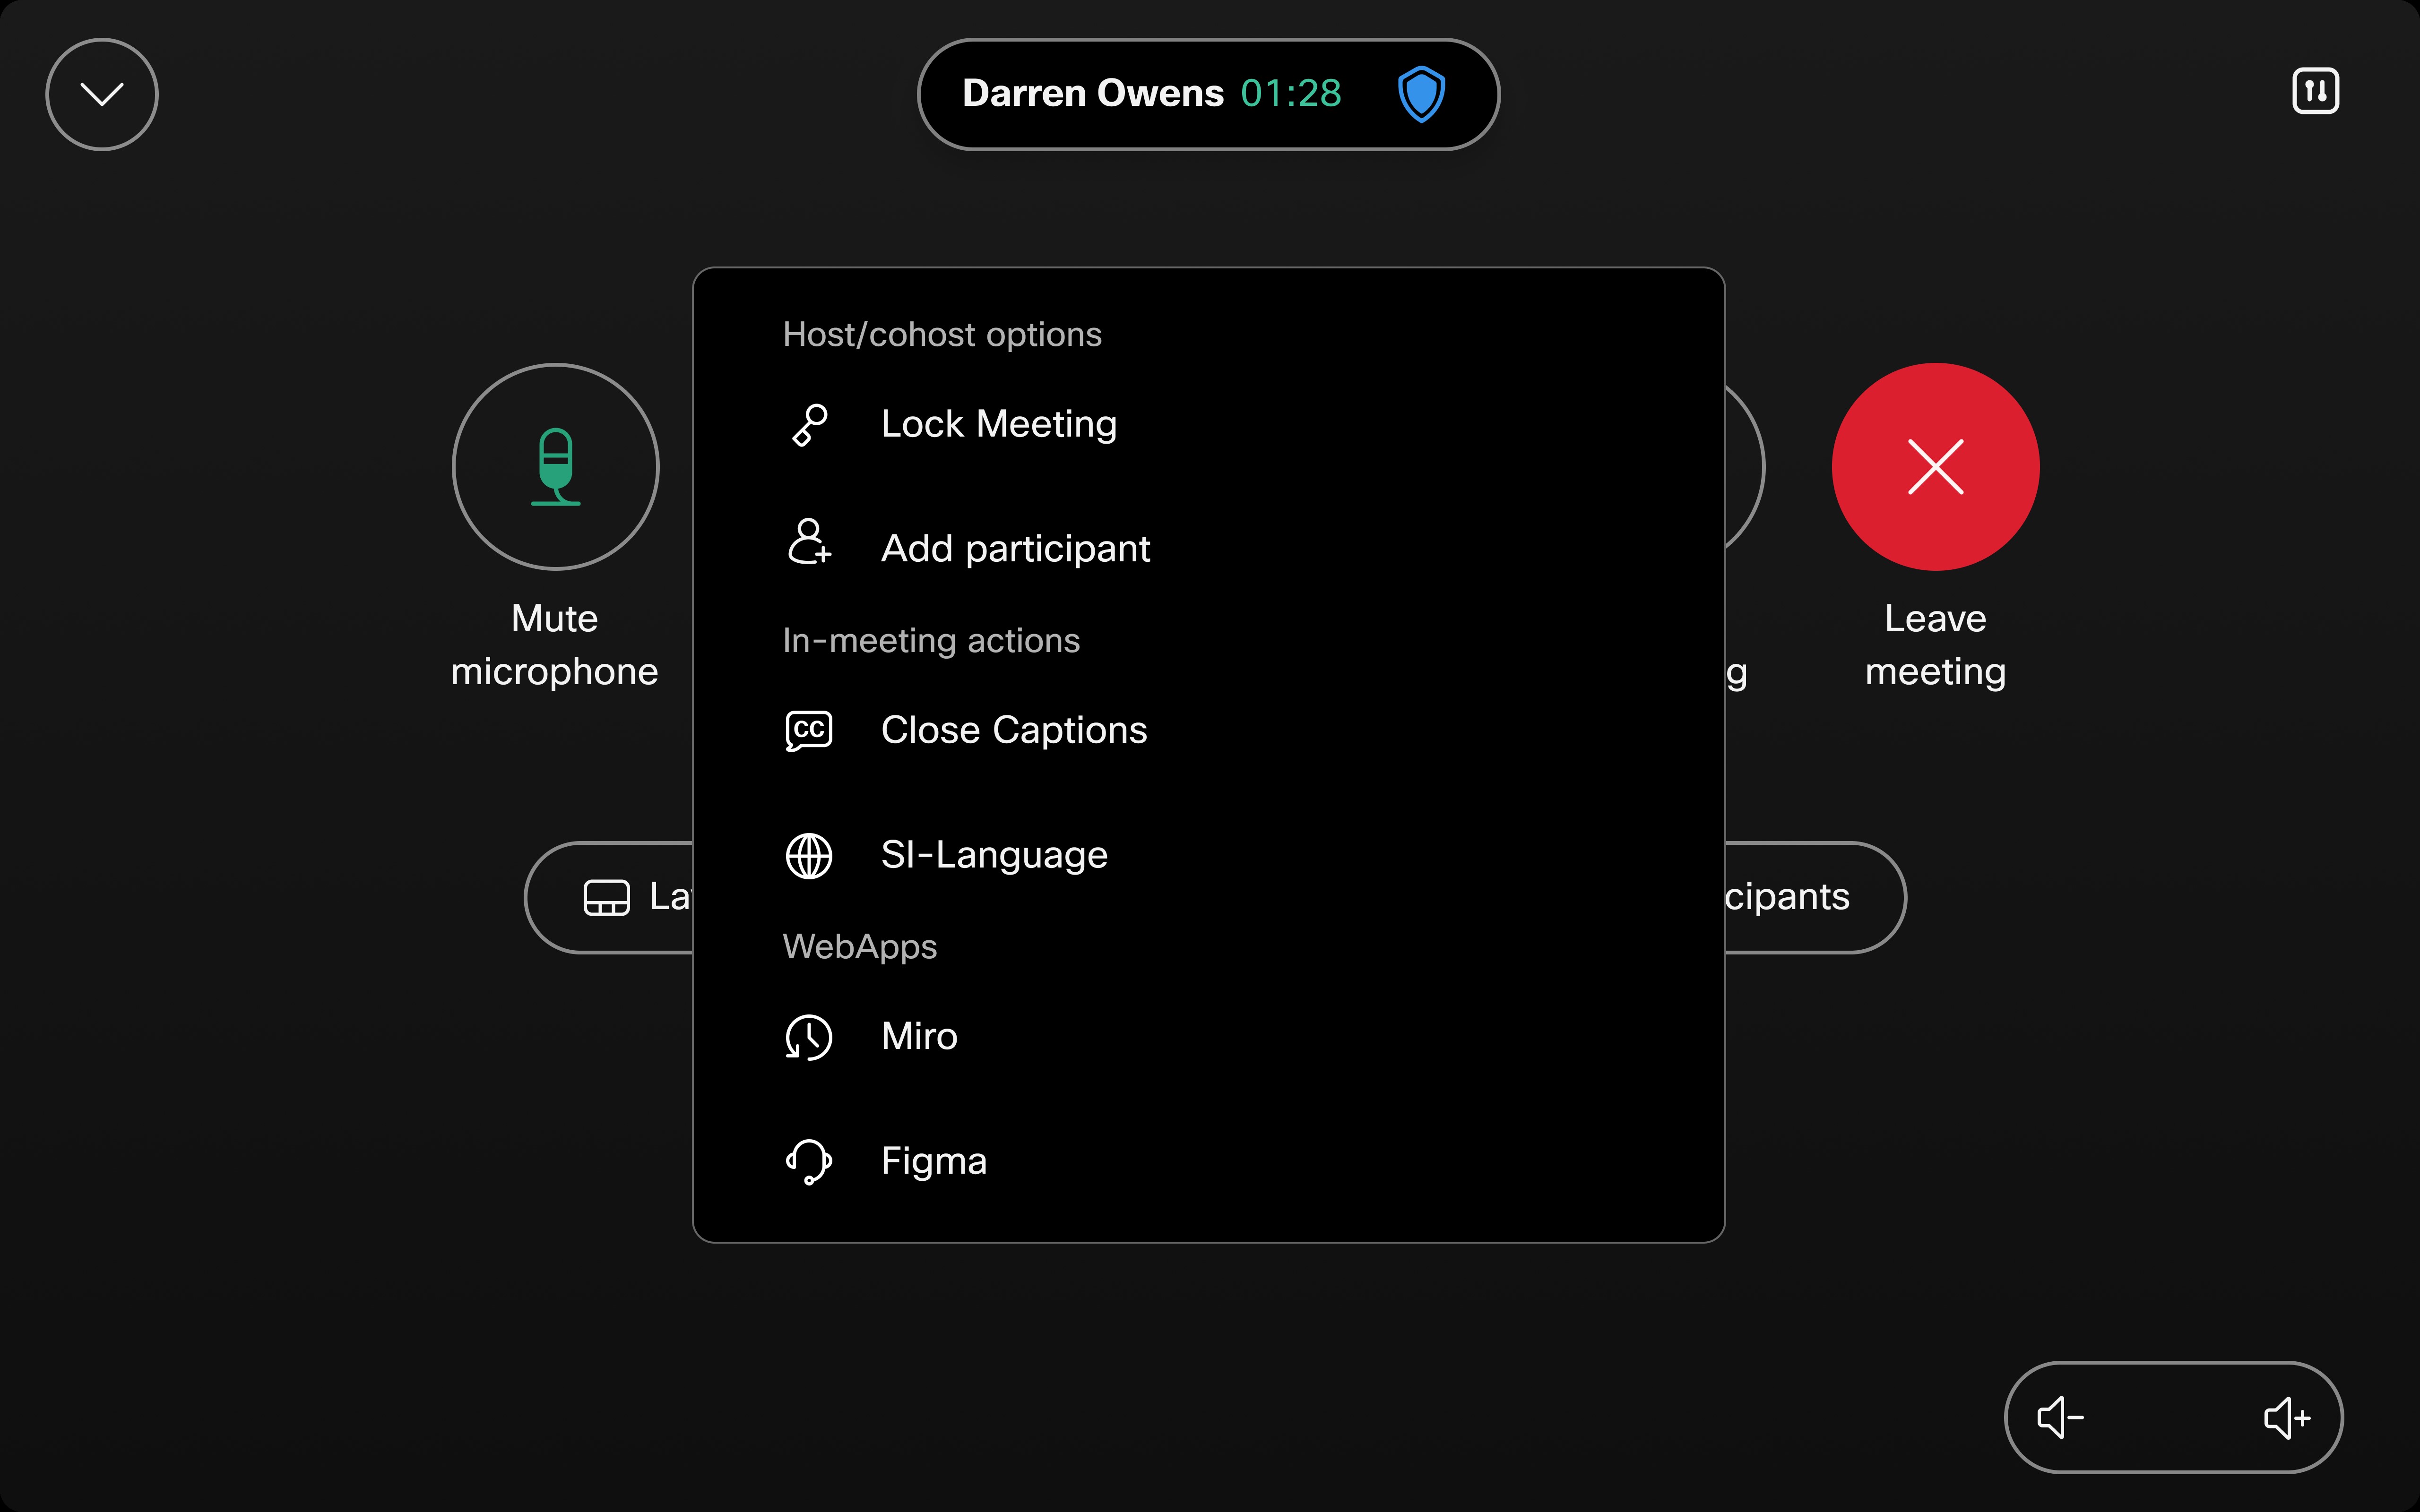
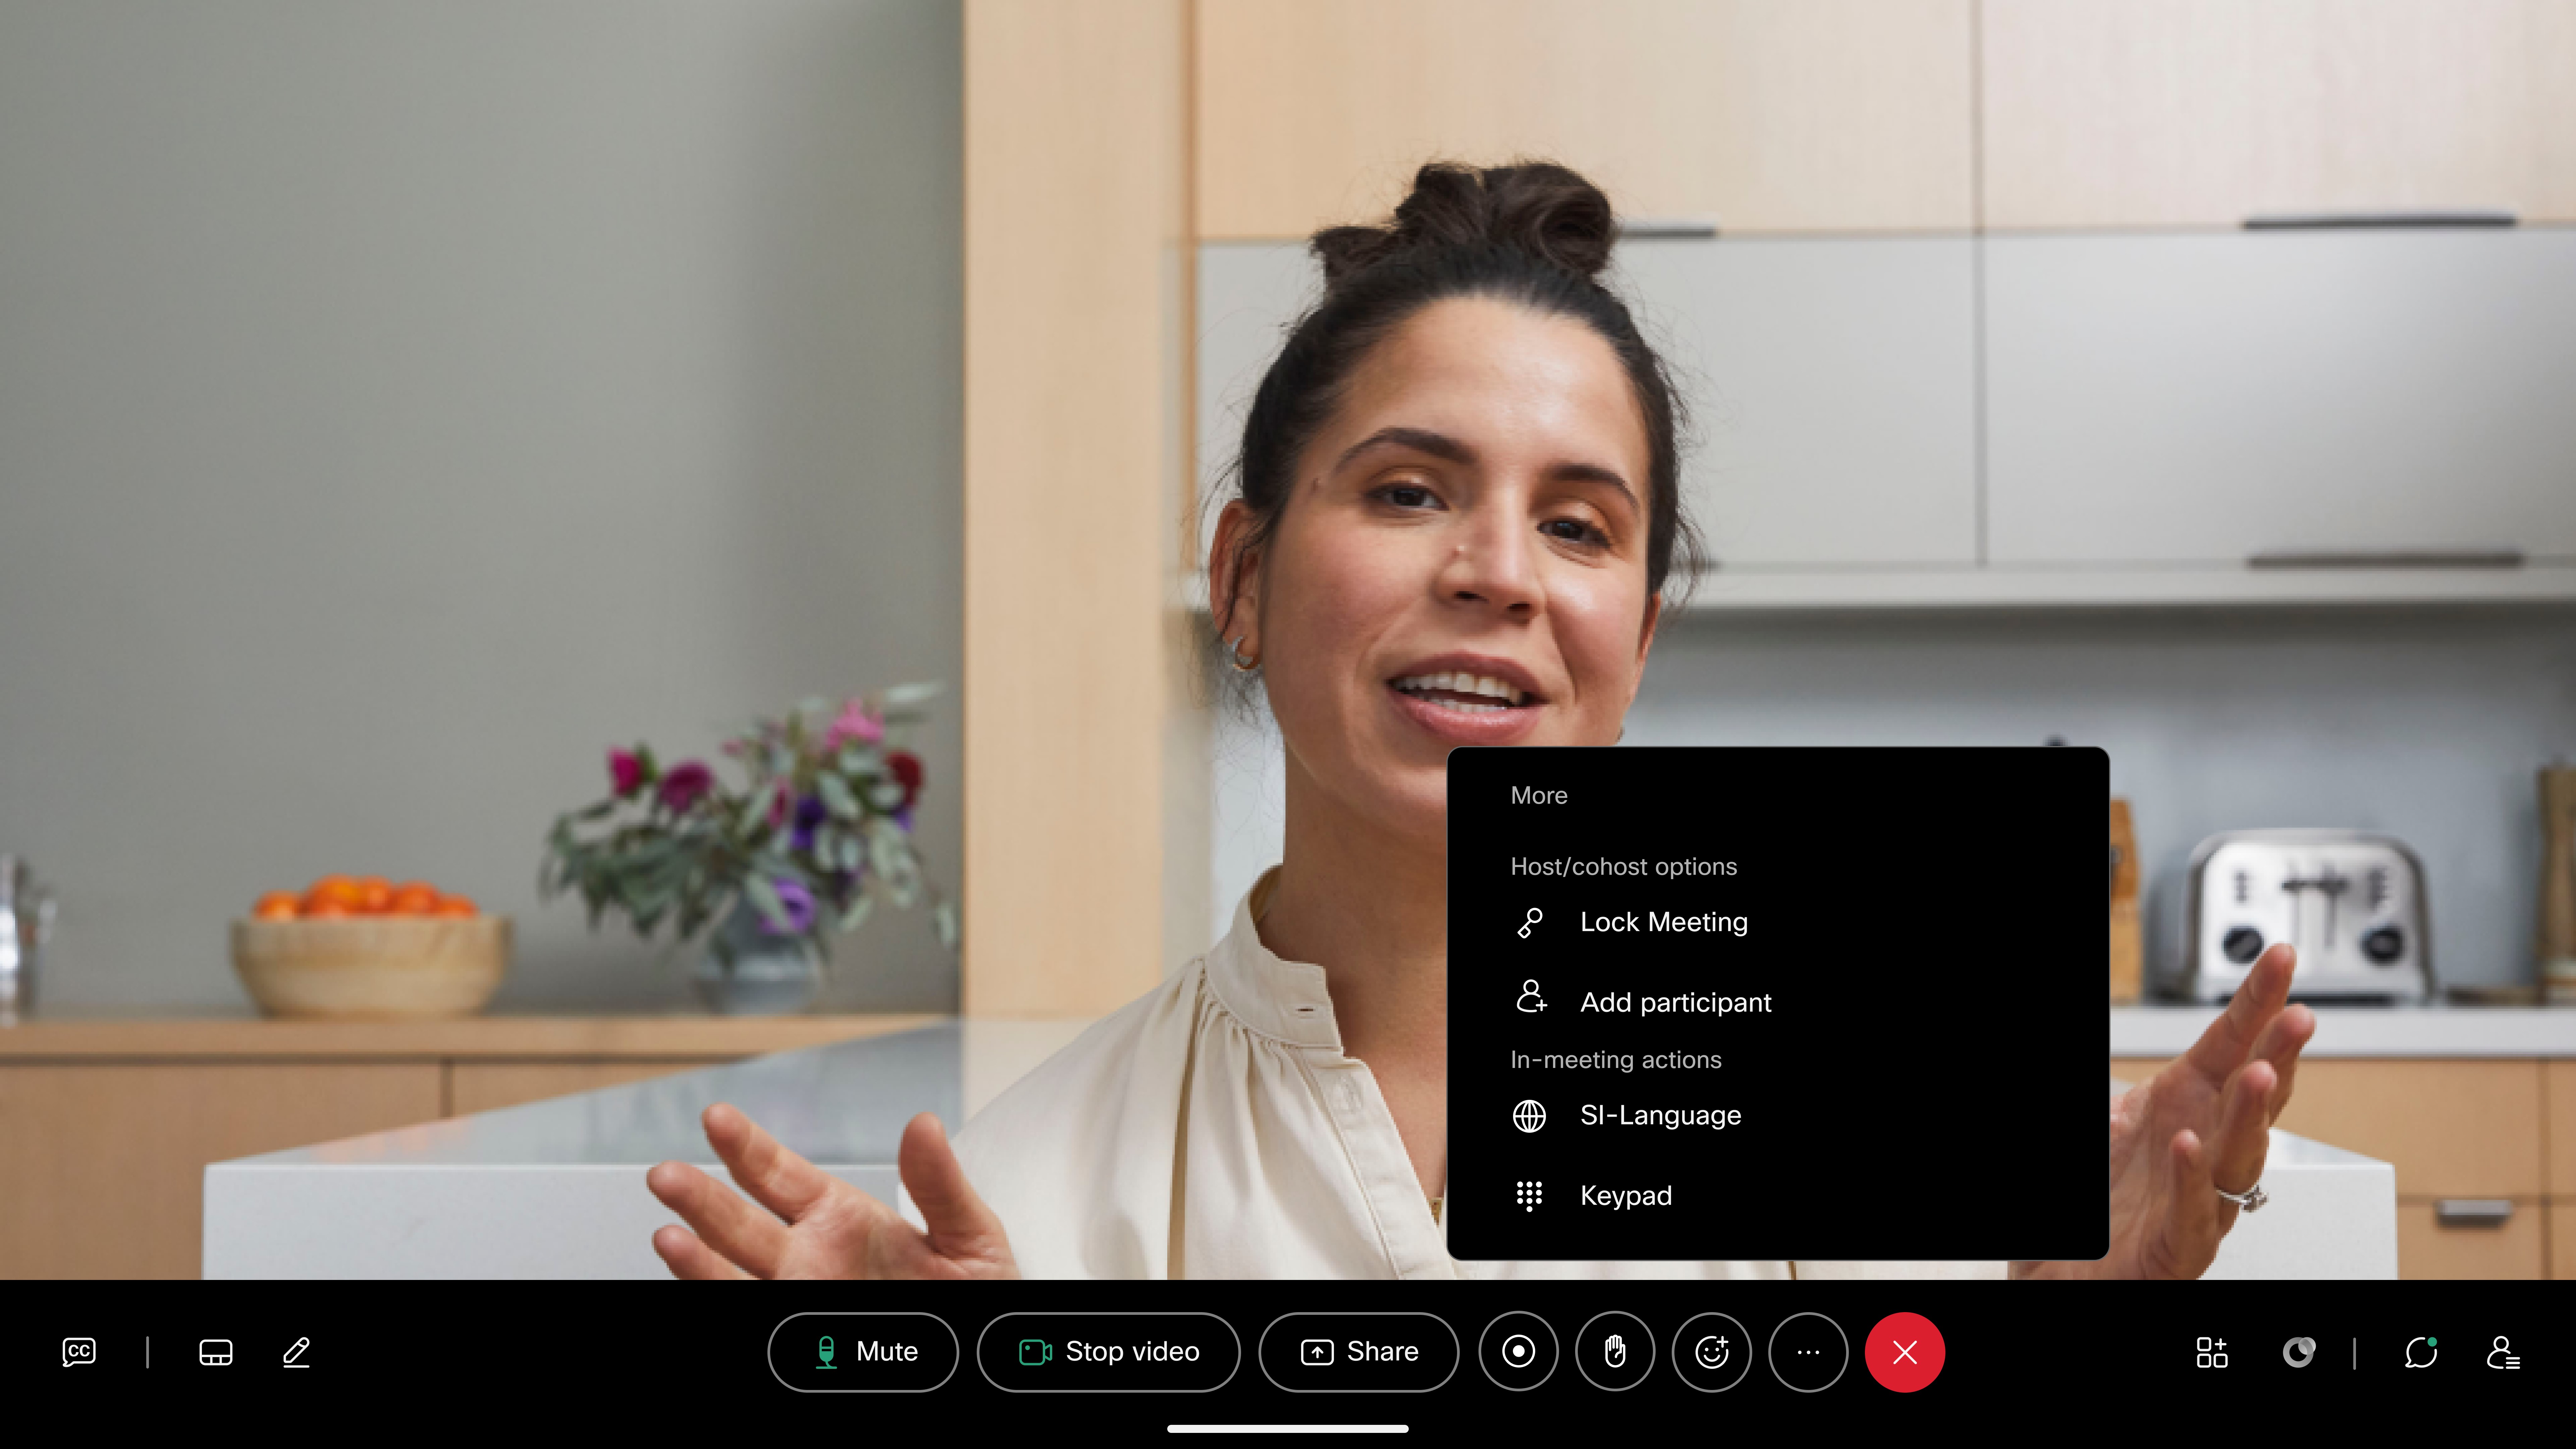
Organized "More" menu: The More menu is now neatly organized into sections, making it easier to quickly find what you need.
-
Webex alignment: For Webex meetings, the design now closely aligns with the Webex App, providing a unified experience.
-
Device control buttons: For Navigators and Touch 10s running RoomOS 11, in-call/meeting access to audio controls, camera controls, and self-view are on their own third row, making them easily accessible and distinguishable from other in-meeting actions.

Top row
-
Mute microphone
-
Start/stop video
-
Share content
-
Recording (host/cohost only)
Second row
-
Participants
Third row
Control Panel: Accessed on the top right corner of the in-meeting window, the Control Panel button allows you quick access to your device settings.
Volume Control: Adjust the volume output of your device.


Custom buttons and UI extensions
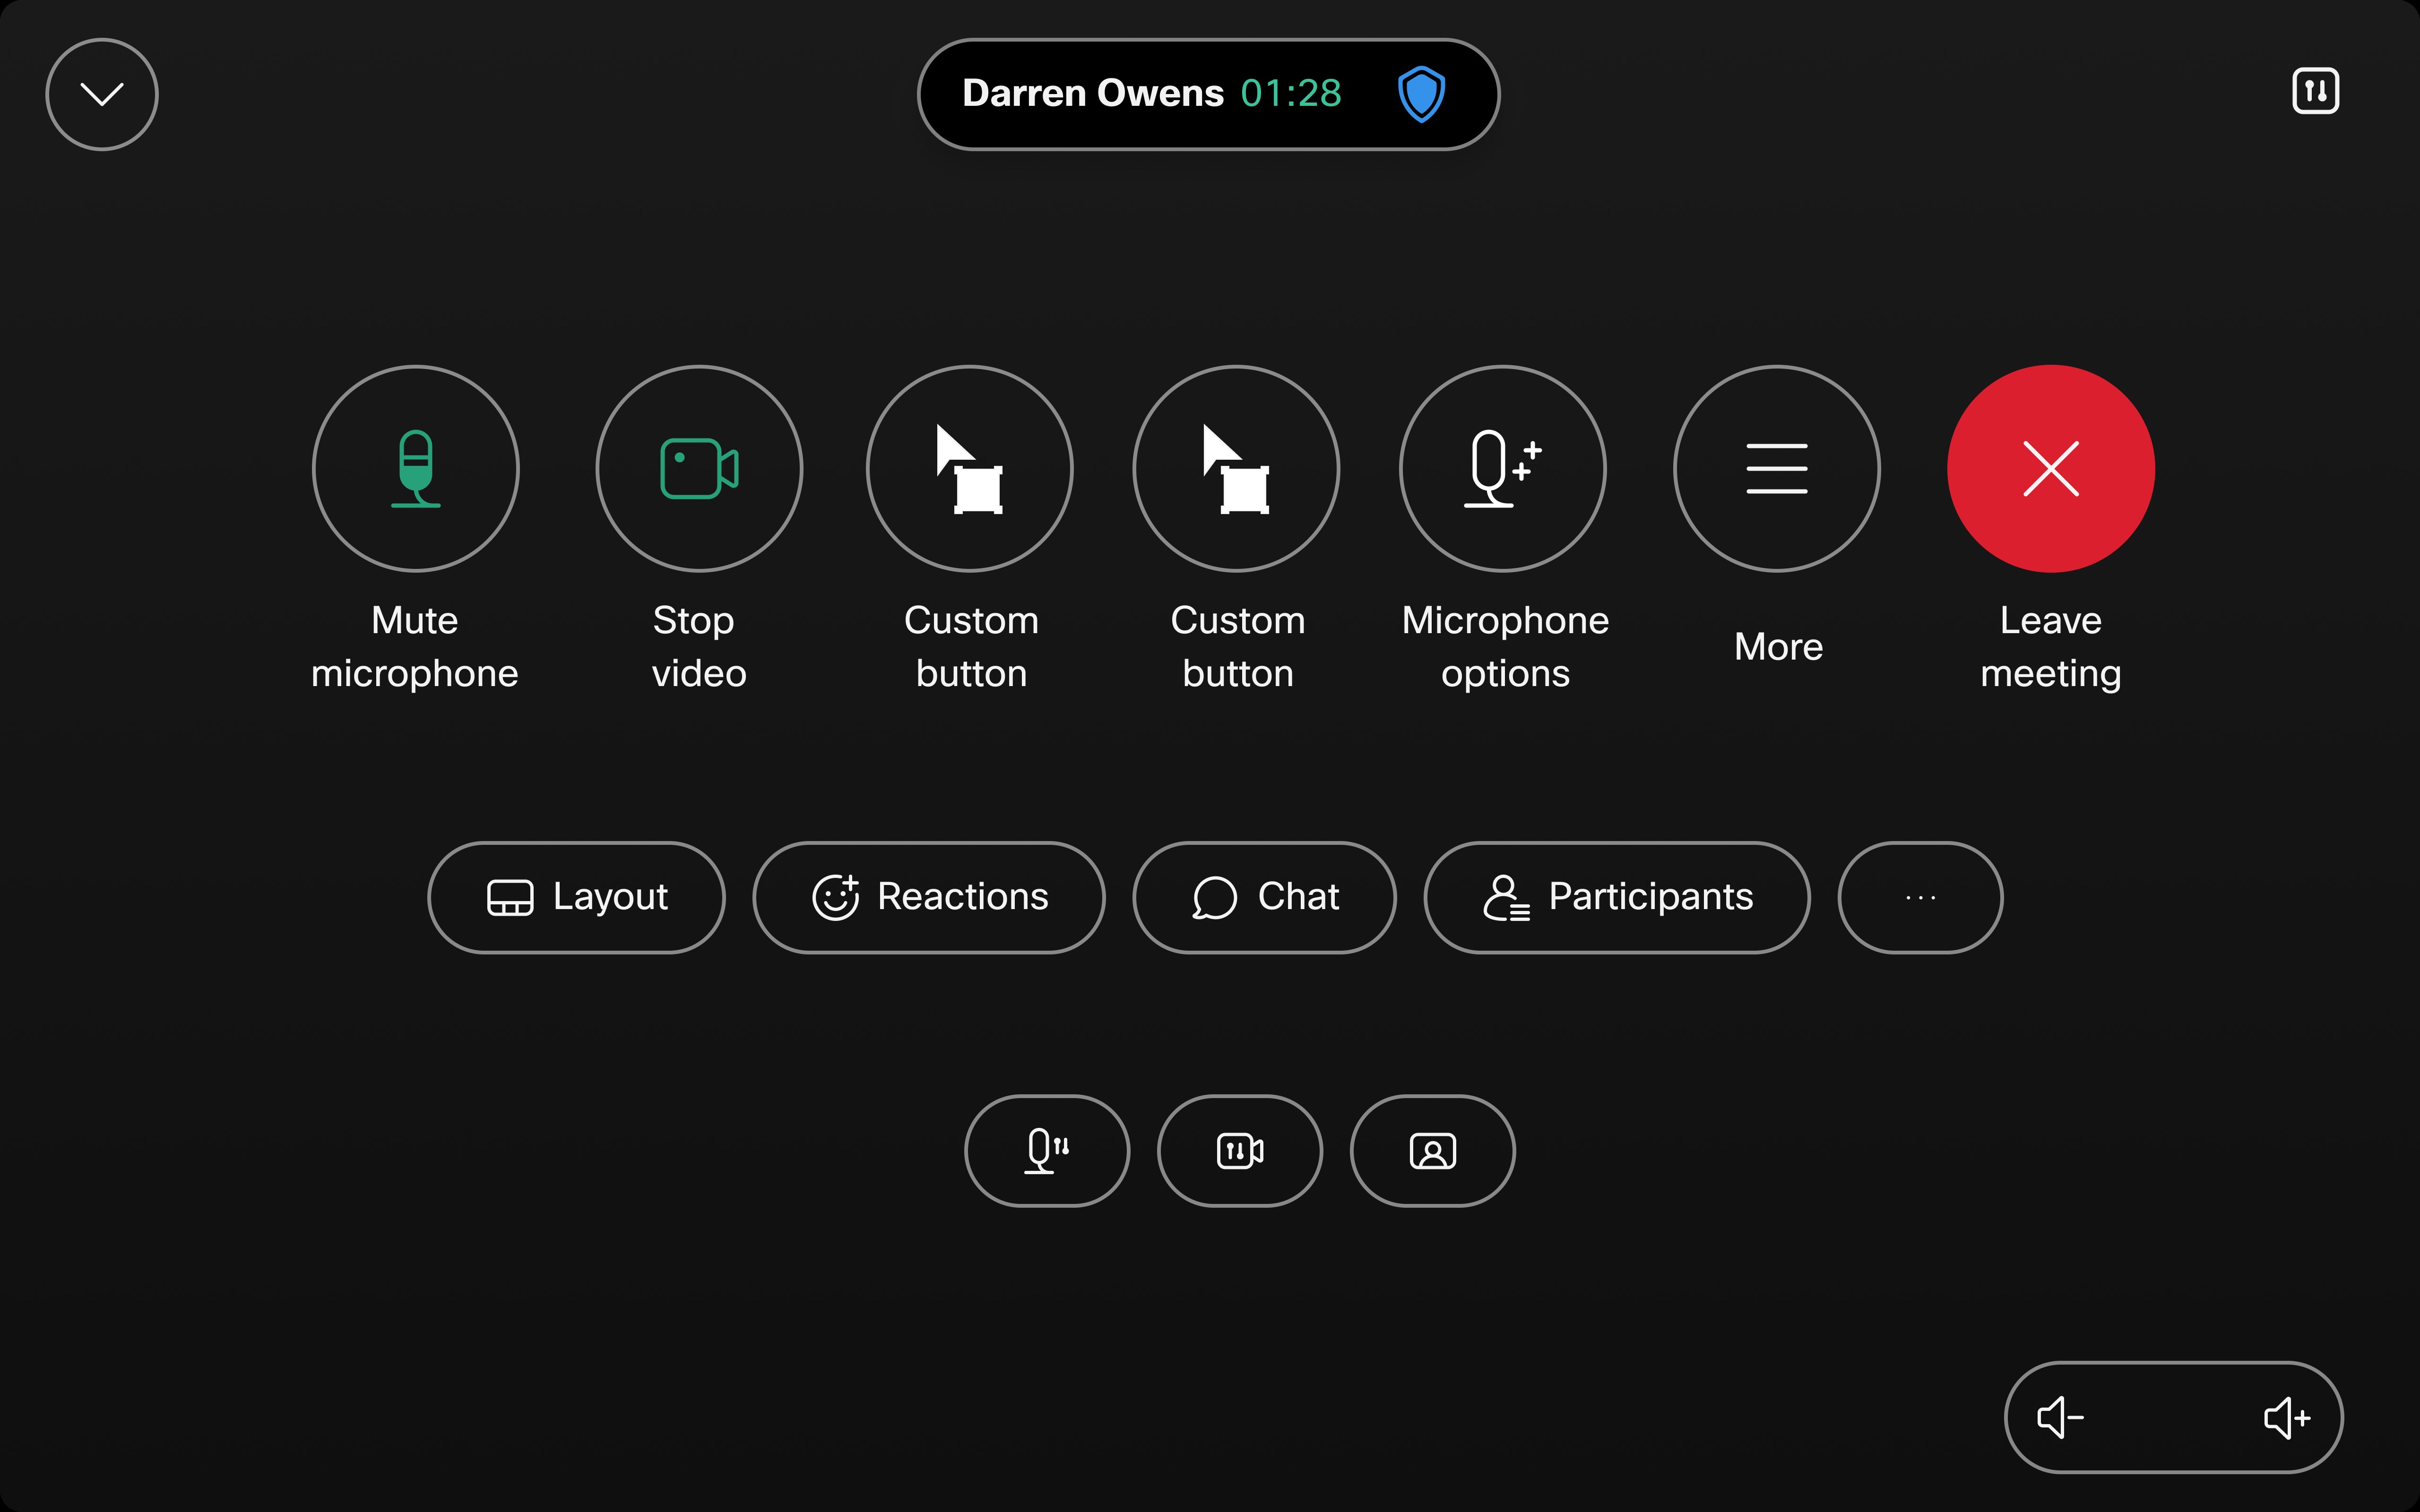
Custom buttons or UI Extensions appears in the top row if there's space, and if there are many, they will have their own dedicated More menu button at the top level for easier access.

Device settings
See this article to learn about the settings available on your device. Read here about Troubleshooting your device.
Make calls with your device and the Webex App
You can see if the device is connected when its name shows up on the Webex App. Start a call by tapping the green video call icon in a space and choose Call on Webex . You can also navigate to the Calling menu to find your contacts and select the green video button.
Make sure to turn on the automatic connection on your app if it has been turned off. Select your profile picture, and navigate to Settings and Devices. On the Desktop app, select Advanced settings and toggle on Automatically connect to devices. On the mobile app, toggle on Use Ultrasound or Use NFC. Note that for the automatic connection to work, you can only have one device that uses ultrasound in a room. Read more about connecting a device to the Webex App here.
Share your screen on the device with the Webex App
Select the device's name and Share on device to start sharing your desktop with others.

For more details, see this article.
More on sharing content
You have several options to share content with your device both locally and in meetings:Joining third-party meetings
Learn how your Cisco device simplifies connecting. Easily join Google Meet, Microsoft Teams, and Zoom meetings directly from your device.
Camera settings and Layouts
Before calling, you can check your self-view. See Access and adjust self-view.
On Room Series, the camera can automatically track the speaker, as explained here. The camera finds the best view of the room based on the number of participants. You can also adjust the camera manually to control the zoom, pan, and tilt of the camera.
Here are all the screen layouts available on your device. You can enable People focus or Frames to change the layouts dynamically and optimize each participant`s space on the screen
Whiteboarding
Use your Board or Desk Series device's whiteboard to enhance meetings and presentations with interactive visuals. Draw and write in all directions without ever running out of space. See this article.


