- Home
- /
- Article

Thanks for your feedback.

Webex App | Share meeting content to Microsoft Teams
 In this article
 Feedback?
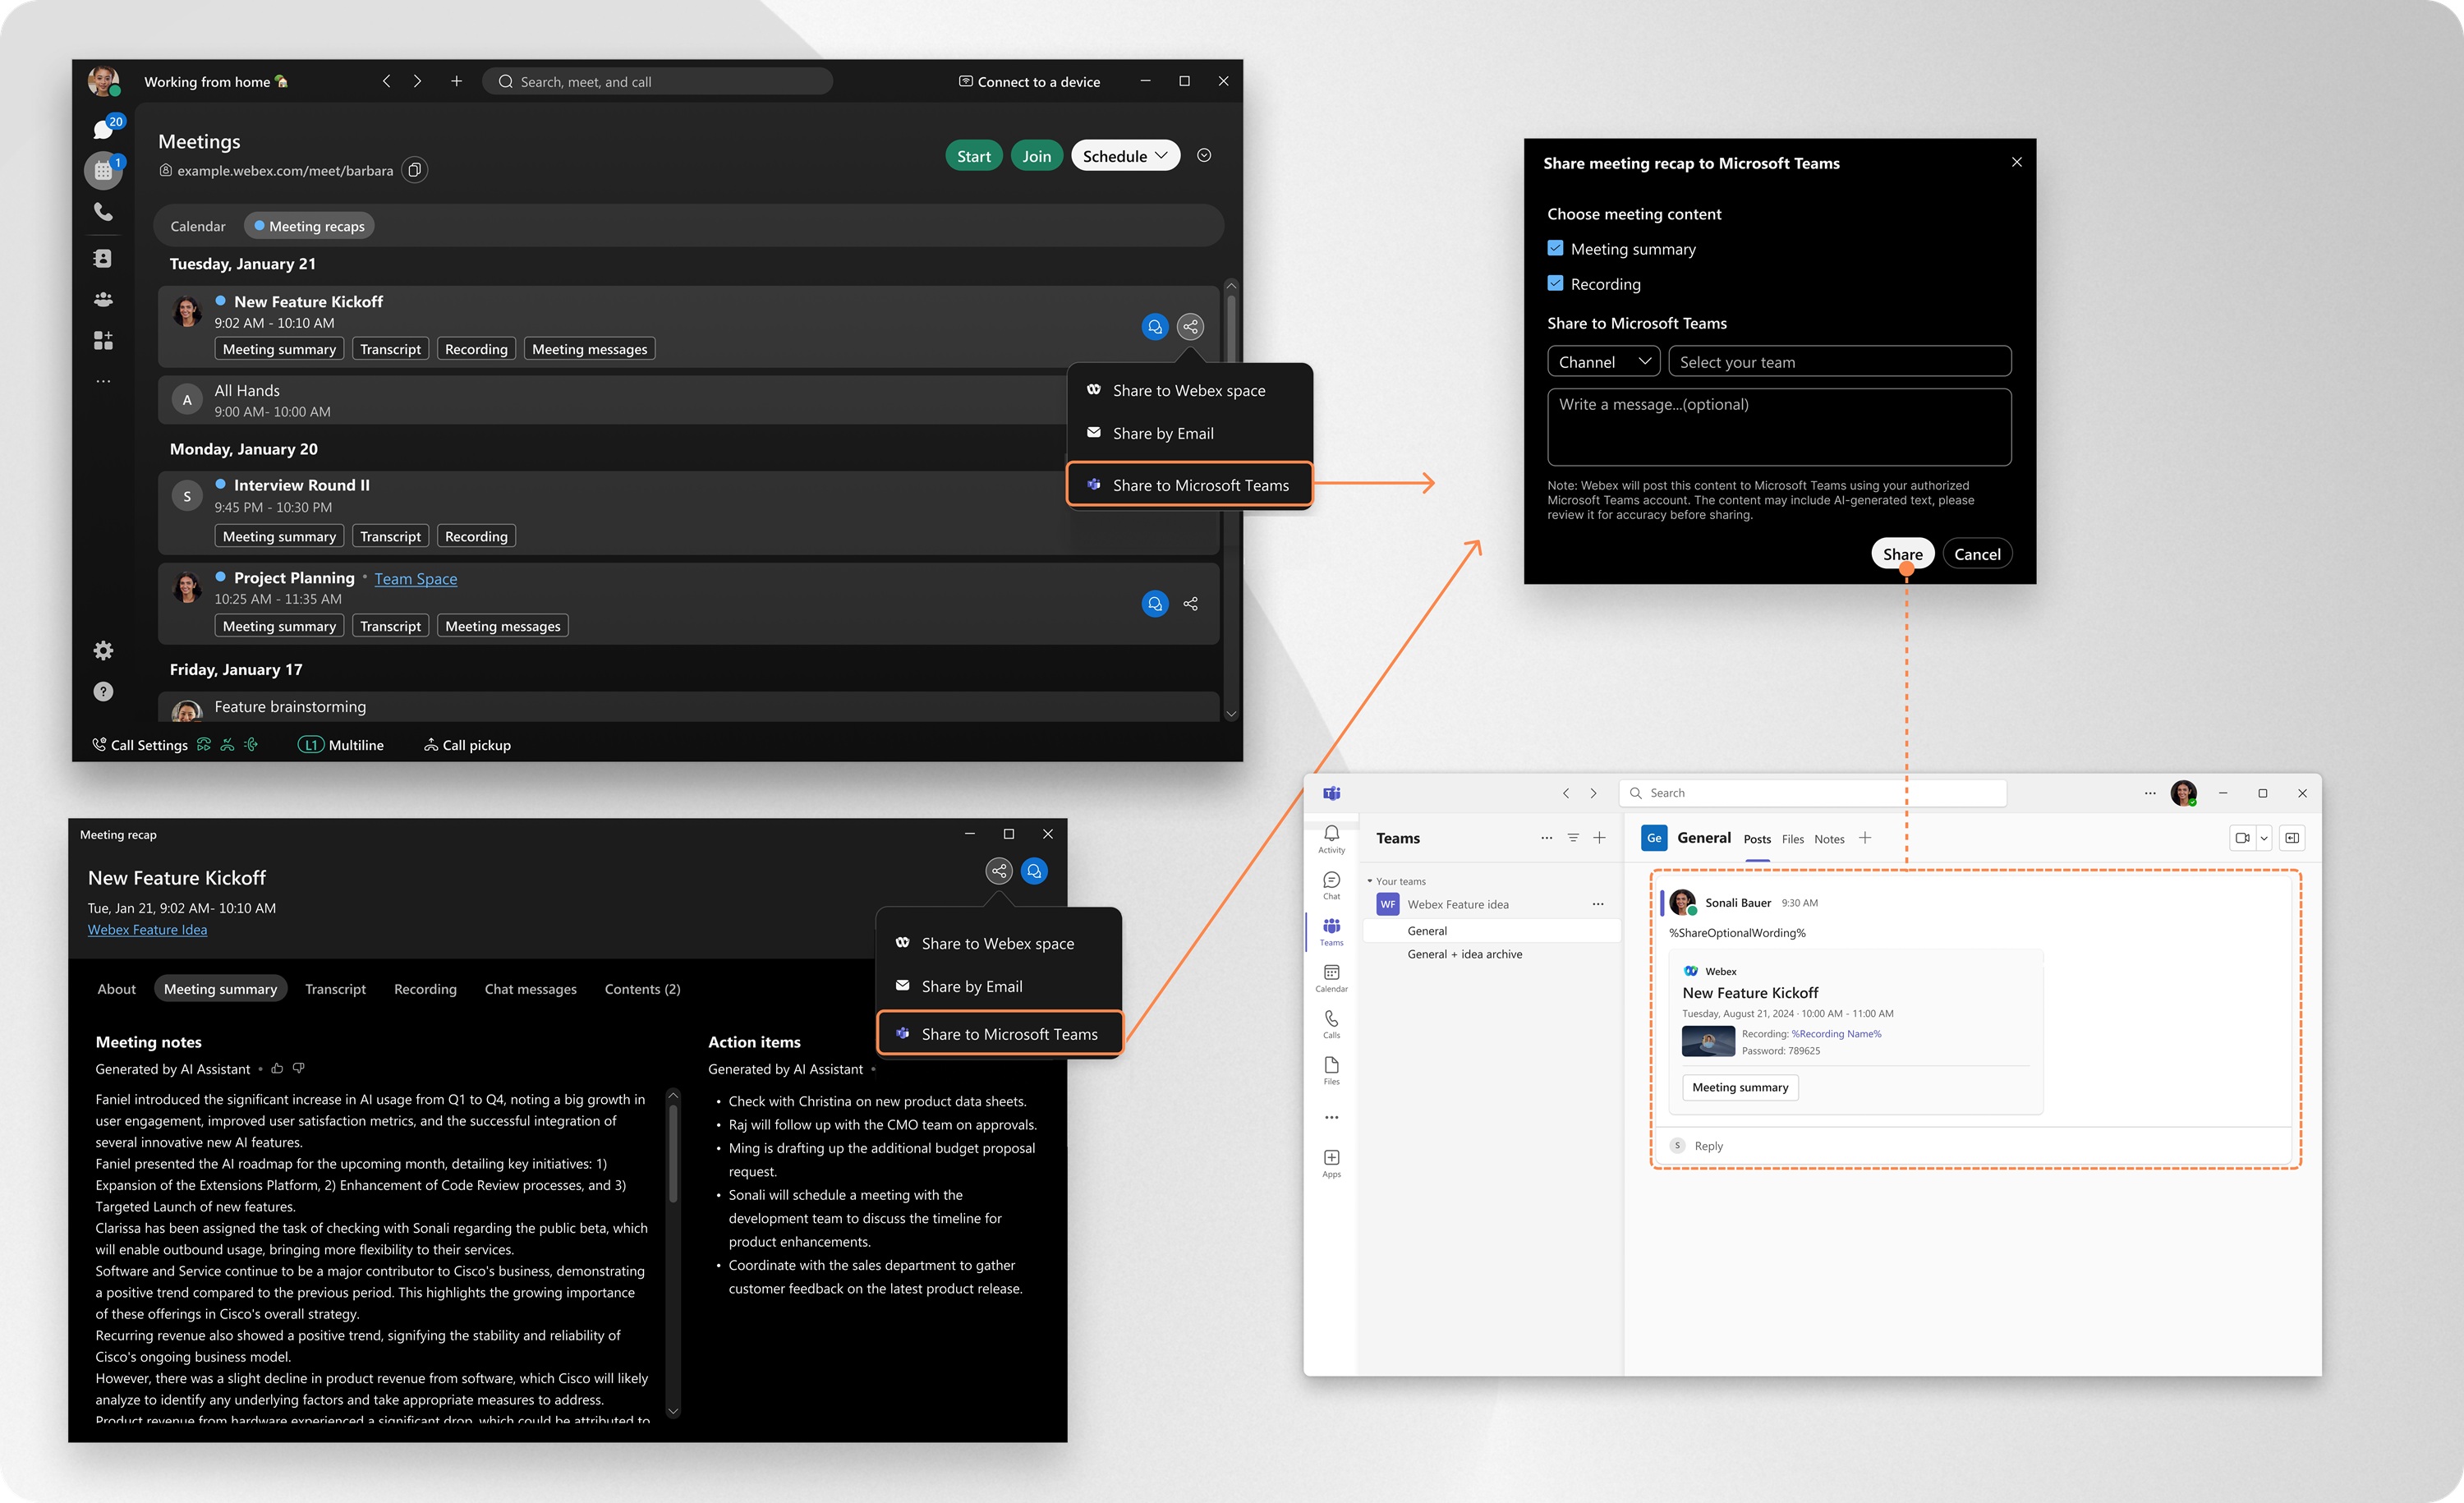
With a few clicks in the app, you can instantly share meeting content, including recordings, and summaries, directly to Microsoft Teams Channels or Chats. No more searching through emails or chasing down links. Your team gets everything they need, right where they already work.
Your organization administrator must enable this feature in Control Hub.
It's recommended that you use the latest version of Webex app, as it comes with all the new features and updates that are available. For more information, see Webex App support policy.
Manage your connected Microsoft Teams account
View and manage your connected Microsoft Teams accounts in Webex App.
| 1 |
Open Webex and sign in. |
| 2 |
Click Settings
|
 . Then, go to
 Share meeting content
| 1 |
Open Webex and sign in. |
| 2 |
Go to Meetings
|
| 3 |
Select the meeting content you want to share and click If you already have meeting content opened, click The first time you share, the app prompts you to sign-in to Microsoft Teams. You’ll also be asked to authorize Webex to post content on your behalf. |
| 4 |
Select the meeting content you want to share:
Then, click Share. |
 , and select
  , then select
 Data collection and retention
When you sign into your Microsoft Teams account, Webex App stores the following information:
-
Microsoft Teams account information, including channel names and people's email addresses.
-
The user token you authorized for use with Webex App.
Your data is encrypted and securely stored, and only used to:
-
Display and manage your connected Microsoft Teams account.
-
Enable the sharing of Webex App meeting content to Microsoft Teams Channels and Chats.
Data is retained for up to 90 days from the time of authorization. After 90 days, you will need to sign in with Microsoft Teams again, and re-authorize with Webex App.
If you manually disconnect your Microsoft Teams account, all related data is immediately and permanently deleted from Webex App.
For more information, see Cisco Online Privacy Statement Summary.
Microsoft account users
If your Microsoft account belongs to a tenant where user consent settings are configured as Do not allow user consent, then you cannot grant permission to Webex App on your own.
In this case, when you try to connect your non-administrator Microsoft account within Webex App, you'll see an Approval required notification. You can click Request approval, but the app will remain inaccessible until your Microsoft administrator reviews and approves the request.
Microsoft administrators
It's recommend that Microsoft administrators proactively complete the consent process in advance, for any tenant requiring administrator consent. This can be done in one of the following ways:
-
Webex App—When signing in with a Microsoft administrator account, check the Consent on behalf of your organization checkbox, before clicking Accept to complete consent.
-
Microsoft Entra Admin Center—Open Webex AI Assistant, go to Permissions, then click Grant admin consent for [your tenant name] to approve the required permissions.
For more details about user and administrator consent in Microsoft Entra ID, refer to: https://learn.microsoft.com/entra/identity/enterprise-apps/user-admin-consent-overview


