
Thanks for your feedback.
 Feedback?
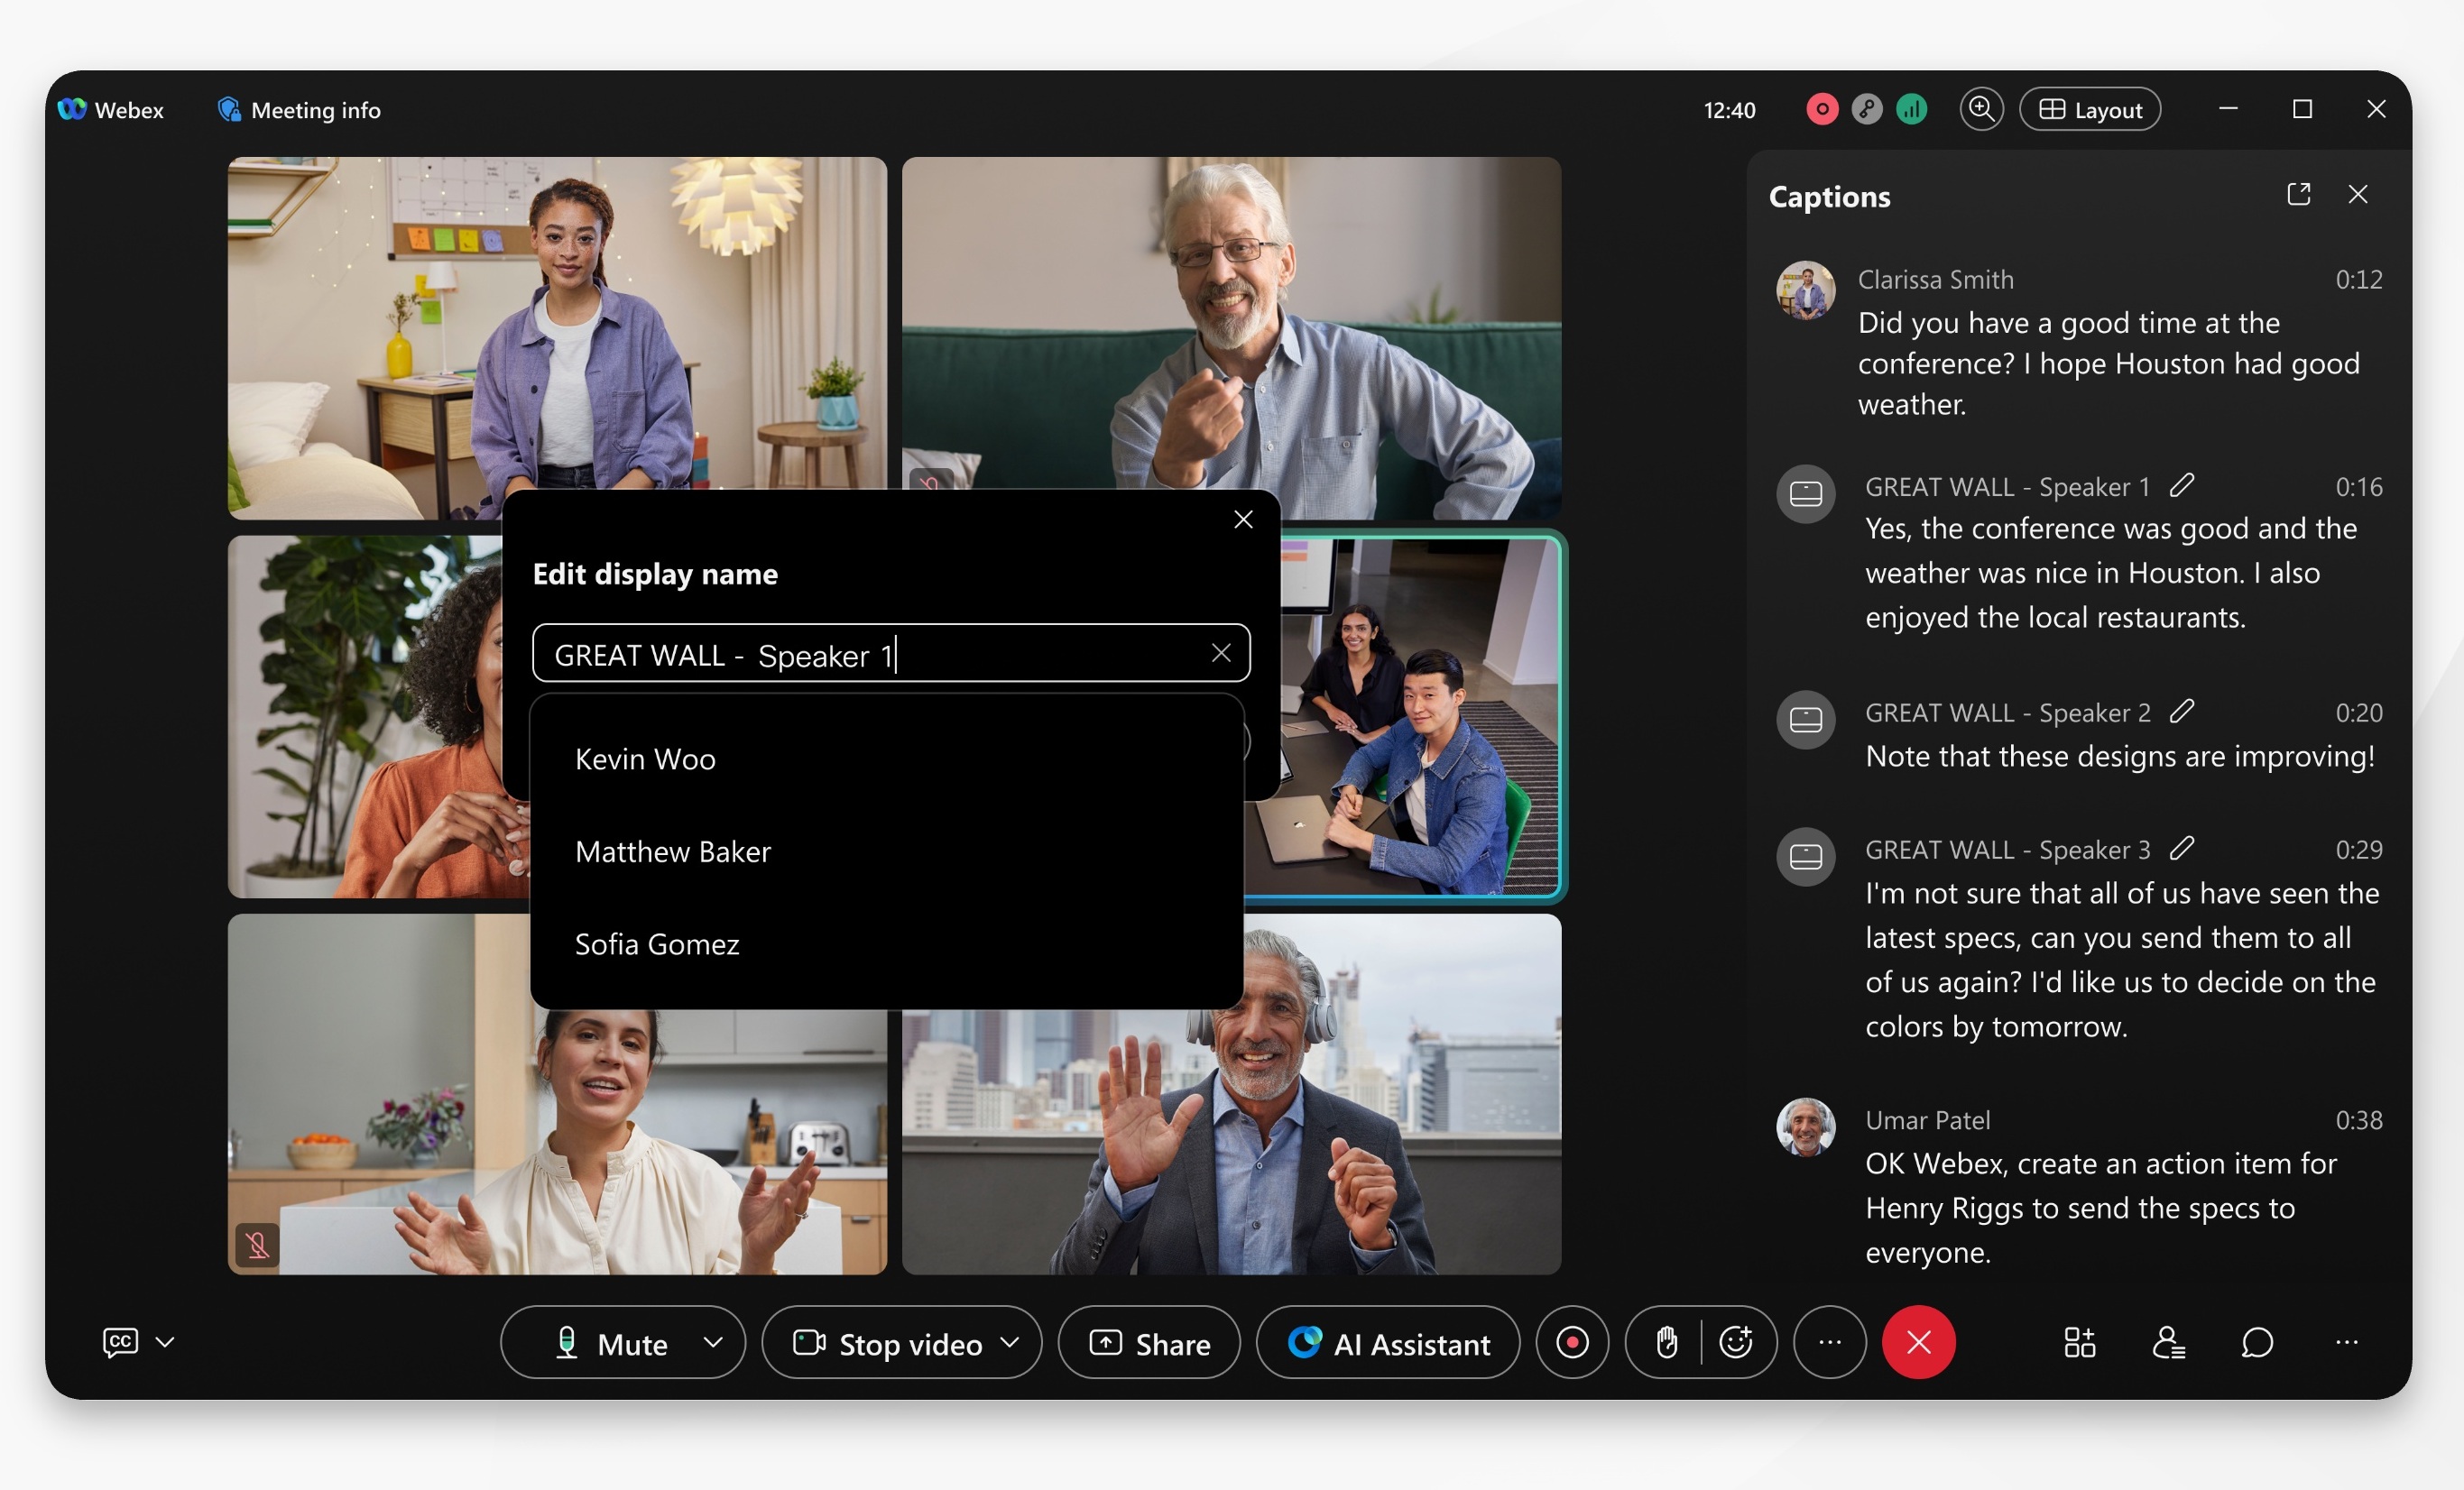
Tagging speakers in live meeting captions and transcripts, must be enabled by you organization administrator.
| 1 |
Sign in to Webex App, then start, or join a meeting. |
| 2 |
Click More panels
When Webex detects multiple speakers from the same room device it creates labels such as Speaker 1 and Speaker 2. If a label needs clarification, the host or cohost can enter a name, or choose someone from the participant list. The corrected name then appears in live captions and the transcript for everyone in the meeting. |
| 3 |
Next to the speaker label that you want to update, click Edit speaker
name
The updated speaker name is visible to all other meeting participants. When you edit the speaker's name it's reflected across the live captions and transcript for that speaker. While the transcript reflects the speaker tag updates, notes and action items remain unchanged and don't reflect the new speaker tags. After the meeting, review the meeting transcript to check that the speaker names are correct. If the meeting was recorded, you may also be able to tag speakers in the recording transcript. |
 and select
 .


