
Thanks for your feedback.
Comparison between Webex Productivity Tools and Webex Scheduler for Microsoft
 Feedback?
Features
Webex Productivity Tools is a plug-in and the Webex Scheduler is an add-in. This document shows the basic differences in features, capabilities, and deployment between the two. For more information, see Deploy and configure the Webex Scheduler for Microsoft Outlook.
|
Settings, Features, and Capabilities |
Webex Productivity Tools |
Webex Scheduler (Microsoft 365) |
Webex Scheduler (Microsoft Exchange) |
|---|---|---|---|
|
Display host PIN |
Yes |
Yes |
Yes |
|
One-time Webex meeting scheduling |
Yes |
Yes |
Yes |
|
Schedule Webex Personal Room |
Yes |
Yes |
Yes |
|
Attendees can join before host |
Yes |
Yes |
No Attendees can join before the host if you have Hybrid Calendar Service
deployed. |
|
Select alternate host from invitees |
Yes |
Yes |
Yes |
|
Anyone with a host account can be alternate host |
No |
Yes |
Yes |
|
Change audio type |
Yes |
Yes |
Yes |
|
Display global call-in number to attendees |
Yes |
Yes |
Yes |
|
Attendees can connect to audio before the start time |
Yes |
Yes |
Yes |
|
Enable and display toll-free number |
Yes |
Yes |
Yes |
|
Entry and exit tone |
Yes |
Yes |
Yes |
|
Exclude password from email invitation |
Yes |
Yes |
Yes |
|
Set default meeting template or change meeting template |
Yes |
Yes |
Yes |
|
Personal Conference Meeting scheduling |
Yes |
Yes |
Yes |
|
Schedule on behalf |
Yes |
Yes |
Yes |
|
Events scheduling |
Yes |
No |
No |
|
Training scheduling |
Yes |
No |
No |
|
Change auto-generated password |
Yes |
Yes |
Yes |
|
Tracking codes |
Yes |
Yes |
Yes |
|
Schedule meeting with registration |
No |
No |
No |
|
Choose meeting type from the icon drop-down menu |
Yes |
No* |
No* |
|
Webex Meeting scheduling icon shows in Calendar View |
Yes |
No* |
No* |
* The current Microsoft framework limits certain functionality of the Webex Scheduler. (For example, access to the Webex Meeting scheduling icon from the calendar appointment only and choosing a meeting type is moved from the icon drop-down to the opened side panel)
One button to push
When you schedule meetings from Microsoft Outlook, you can invite a room to provide one button to push (OBTP) for Webex video devices. The requirements for cloud-registered video devices in order to get the OBTP are listed in the table below. For more information, see One button to push with Microsoft 365 or One button to push with Microsoft Exchange.
|
One button to push |
Webex Productivity Tools |
Webex Scheduler |
|---|---|---|
|
Webex cloud-registered video devices |
Requires Webex Hybrid Calendar Service. |
Requires Webex Hybrid Calendar Service. |
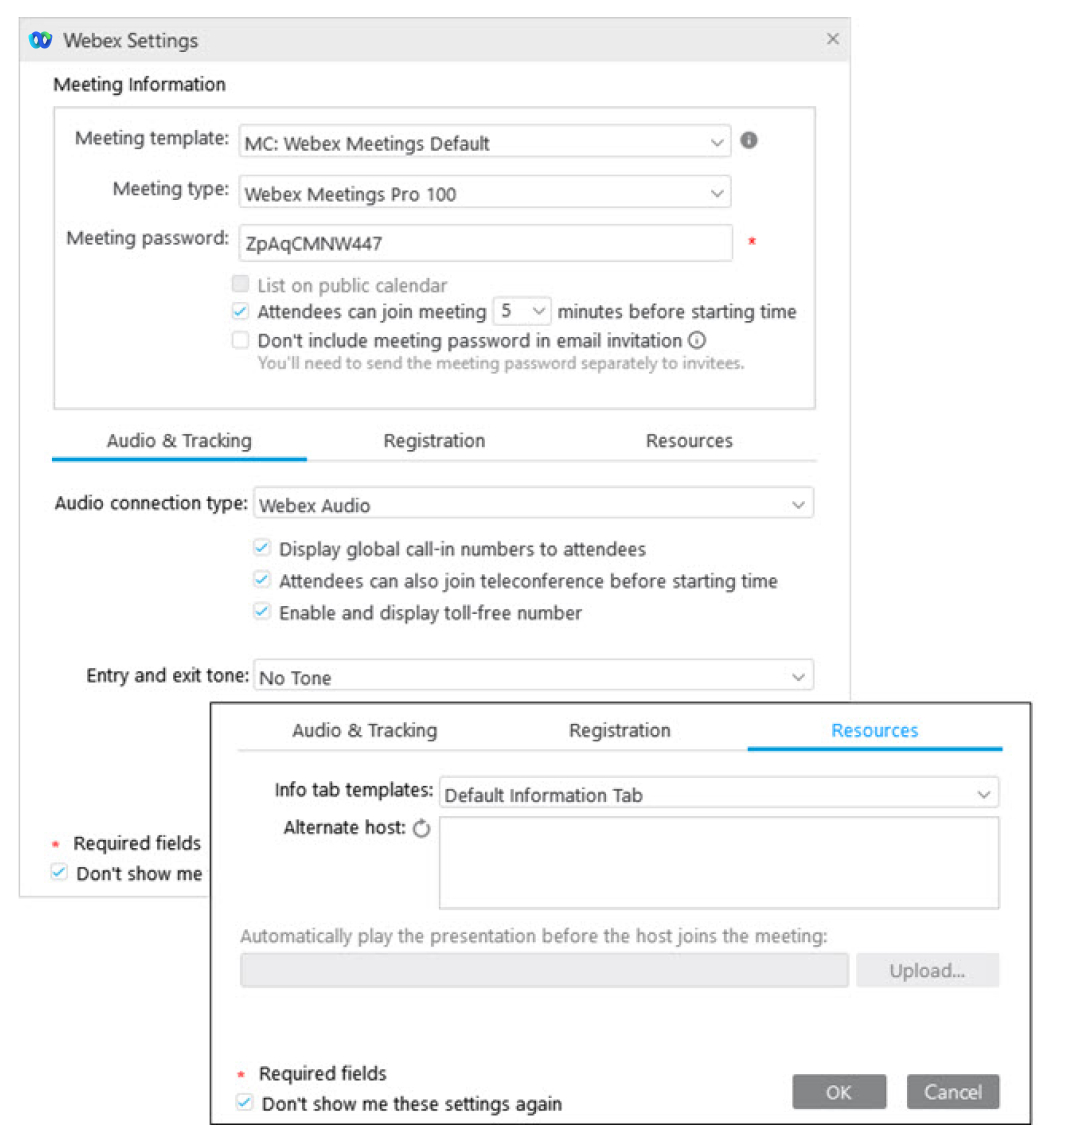
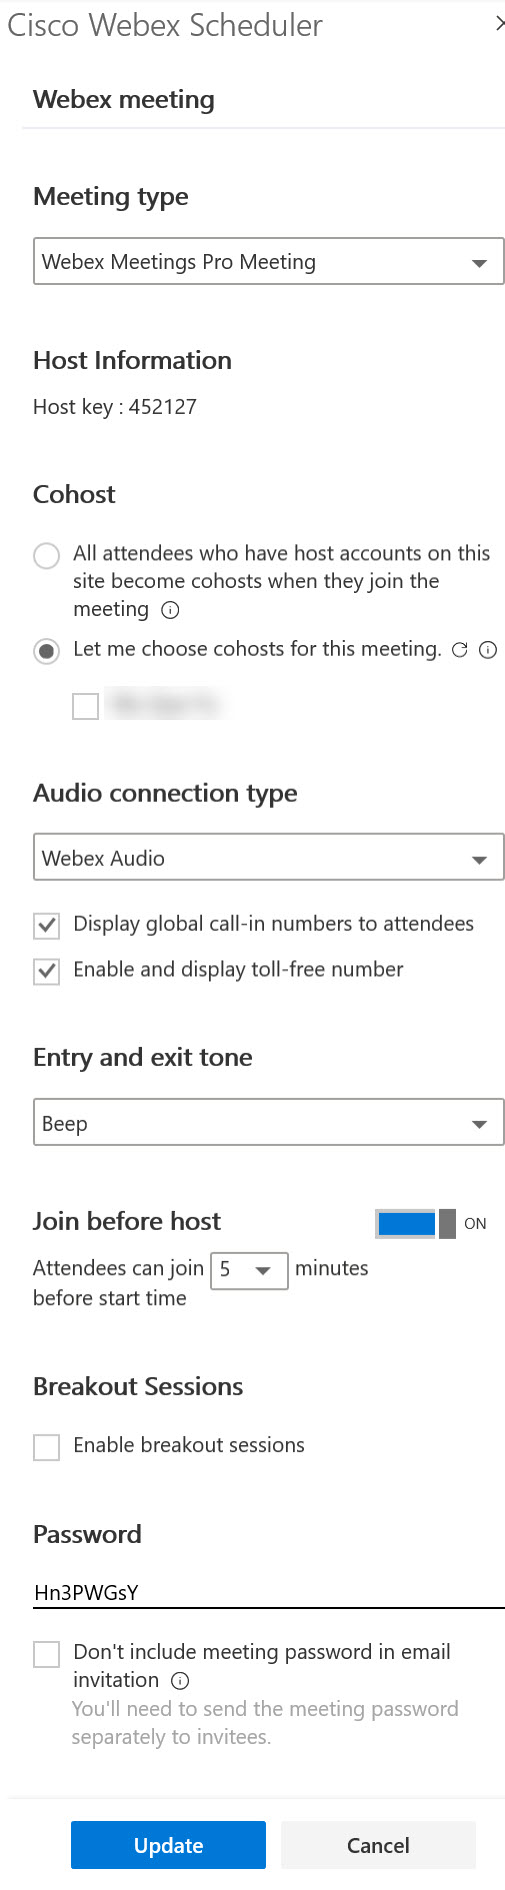
Preferences
When you schedule your Webex meeting using Webex Productivity Tools or the Webex Scheduler, you have the option to set your default meeting preferences and change them on a meeting-by-meeting basis. Below is a visual comparison of the meeting preferences settings within Microsoft Outlook using Webex Productivity Tools and Webex Scheduler. Webex Productivity Tools settings open in a pop-up window when you click Change Settings. The Webex Scheduler’s meetings preferences shows as a panel on the right when you click Webex Preferences. Not all the meeting settings/preferences are shown in this example.
|
Webex Productivity Tools |
Webex Scheduler |
|---|---|
|
|
|
|
|
|
Deployment
The current recommendation is for all Webex users to deploy the Webex Scheduler and migrate from Productivity Tools. Webex Scheduler is currently backward compatible with meetings scheduled using Productivity Tools.
In the event a transition from Webex Productivity Tools to the Webex Scheduler is necessary, note the following:
-
According to Microsoft documentation, the Webex Scheduler add-in may take up to 24 hours to appear. Therefore, uninstalling Productivity Tools prematurely may disrupt the ability for a host to schedule Webex meetings, if the Webex Scheduler hasn't yet appeared.
-
During this interim period, both the plug-in and the add-in may co-reside on the desktop and will be visible to the user.
-
When the Webex Scheduler add-in icon appears, the Webex Productivity Tools plug-in should be uninstalled.
Microsoft 365 allows for a much simpler deployment and upgrade process for the Webex Scheduler add-in. The table below shows the differences in deployment and update methods, options, and requirements between Webex Productivity Tools (plug-in) and the Webex Scheduler (add-in).
For the known issues and limitations, see Known issues and limitations for the Webex Scheduler for Microsoft Outlook.
|
Deployment |
Webex Productivity Tools |
Webex Scheduler |
|---|---|---|
|
Deployment process |
For on-premise-based and cloud-based Microsoft Exchange, deploy the Webex Productivity Tools plug-in for Microsoft Outlook. The plug-in can be installed by end users by downloading the file from the company Webex site. IT Administrators can remotely install the MSI (Windows) using a Mass push. Installed using MSI file or DMG file. |
For cloud-based Microsoft Exchange, deploy the Webex Scheduler add-in for Microsoft 365. Webex Site or Control Hub Administrator must enable the Webex Scheduler integration. The add-in can be installed by end users from the Microsoft AppSource store. IT Administrators can remotely deploy the add-in through the Microsoft 365 Administrator Center. No files installed on end users’ PC. |
|
Mass push installation of MSI |
This method requires IT administrator privilege. |
IT Administrators remotely deploy the add-in through the Microsoft 365 Administrator Center. |
|
Administrator managed updates |
Two methods:
|
Updates are controlled by Microsoft 365 Administrator Center. There are no Webex Site Administrator controls or settings for the add-in. |
|
End-user installation requires local PC/Mac administrator privilege |
Yes, user must have administrator rights to manually install the plug-in. |
Users are automatically updated through Microsoft 365 when a new version is available from Webex to Microsoft AppSource. |
|
End-user updates require local PC/Mac administrator privilege |
Windows – No Mac – Yes |
No |
|
Email address of Webex account and Microsoft 365 account must match |
No |
Yes |


