
Thanks for your feedback.
Webex App | Change your caller ID
 Feedback?
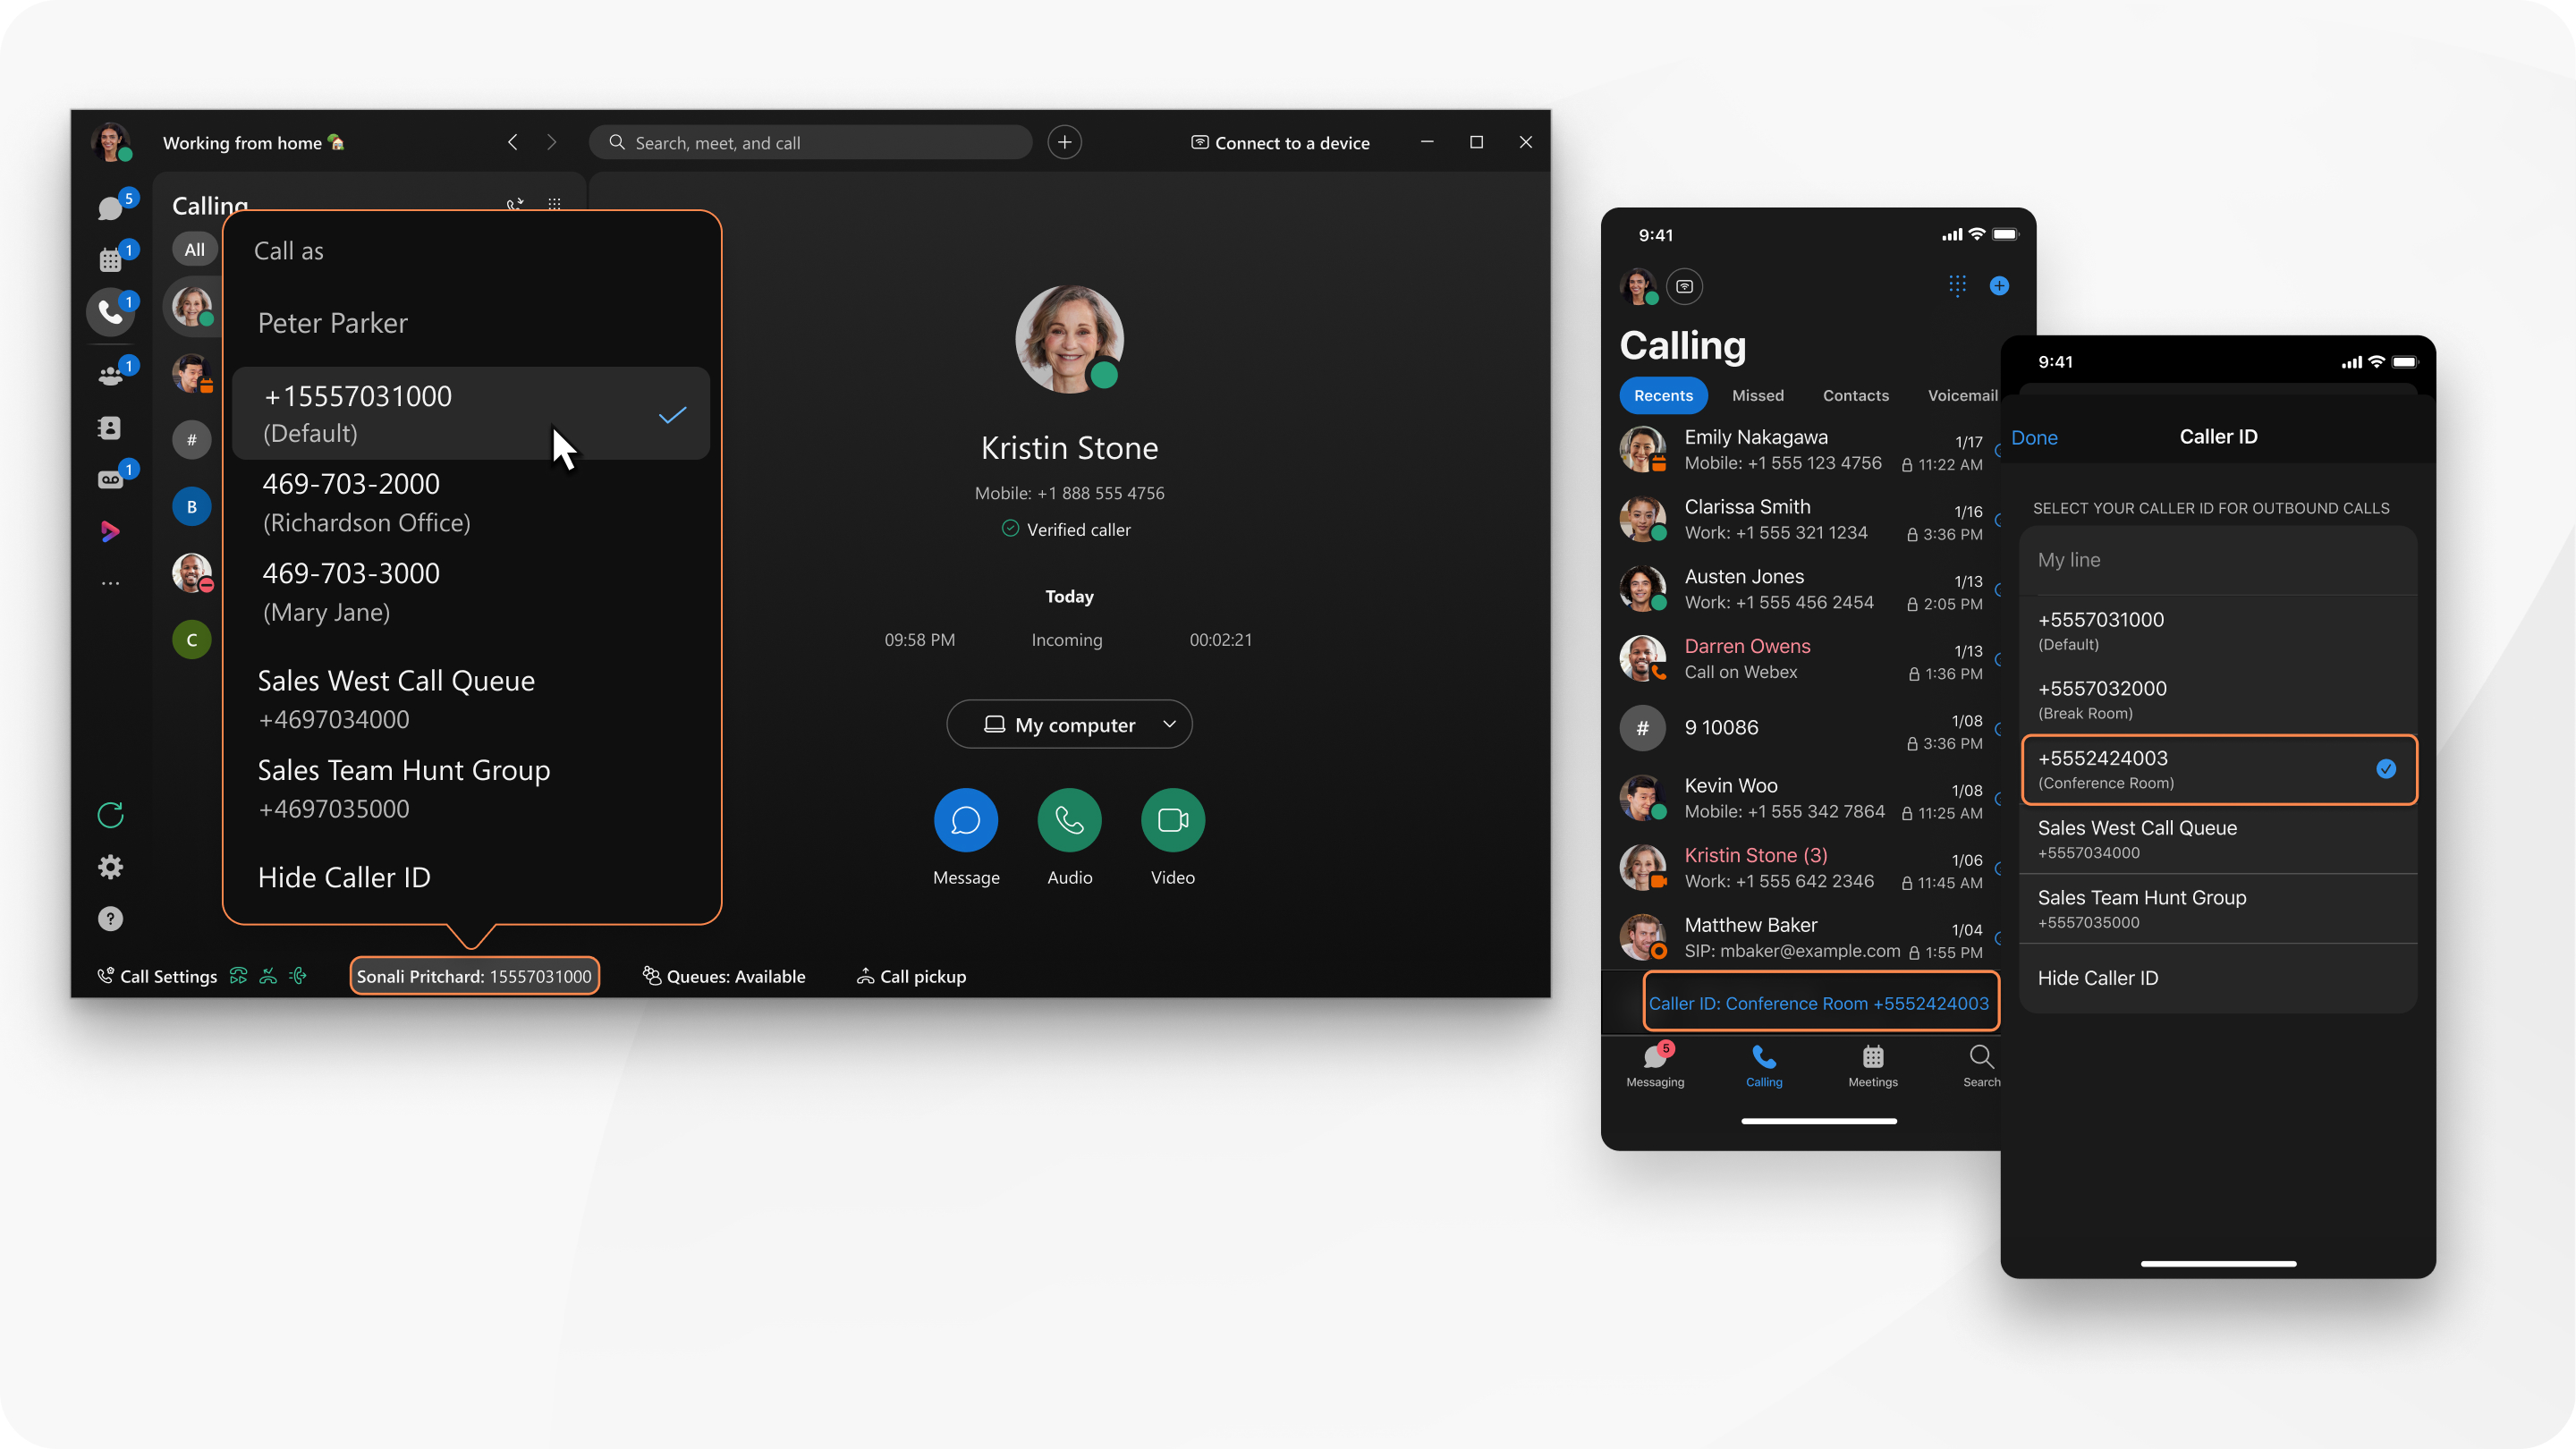
After your call, the caller ID that you used appears in your call history.
| 1 |
Open Webex and sign in. |
| 2 |
From the footer of your app, click the line number selector. |
| 3 |
Choose a caller ID from the available list. The caller ID can be a direct line number, location number, call queue number, hunt group number, or any other number within your organization. When you make a call to somebody, they see this caller ID. Currently, the Hunt Group option only applies to Webex Calling. |
This applies to Webex Calling and Calling hosted by a Service Provider. Your administrator must enable the option for you.
| 1 |
Open Webex and sign in. |
| 2 |
Go to Calling
You'll see your current caller ID and number displayed at the bottom of the screen. You can also see it on the dialpad view. |
| 3 |
Click Caller ID: and then on the caller ID screen, choose a caller ID from the available list. The caller ID can be a direct line number, location number, call queue number, hunt group number, or any other number within your organization. When you make a call to somebody, they see this caller ID. Currently, the Hunt Group option only applies to Webex Calling. |
 .
.


