- Home
- /
- Article

Thanks for your feedback.

Configure single number reach (office anywhere)
 In this article
 Feedback?
Allow calls to user's work number to ring any phone numbers. Users can make, receive, and move calls to or from any desk or mobile phone with single number reach numbers.
With the Single Number Reach (SNR) or Office Anywhere feature, you can set up any phone numbers as single number reach numbers. Once set up, incoming calls to the user’s work number ring other devices, such as desk phone or mobile phone, associated with the single number reach numbers. Users can also place calls from those devices, and push or pull calls between different devices. For example, when a user is on a call using their desk phone, they can push or pull that call to or from their IP phone, mobile phone, or Webex App.
When users place long-distance or international calls from a single number reach phone, usage is tracked and reflected on your invoice.
If an administrator wants to enable users to call into a Single Number Reach (SNR) portal and then make outbound calls from their SNR number through the portal, the administrator should create an SNR portal.
For example, an administrator can allow a user to make calls using their Webex Calling profile when traveling and with no access to the Webex App. In this scenario, with an SNR portal set up, the user can dial into the SNR portal to place calls.
Create single number reach for a location
The single number reach feature isn’t automatically set up when the service is provisioned. Before users can start using the single number reach feature, you must first create a single number reach for a location, and then assign a phone number. Users can use the assigned phone number to place business calls to and from any phone, and to transfer active calls to or from their mobile or desk phones.
| 1 |
Sign in to Control Hub. |
| 2 |
Go to . |
| 3 |
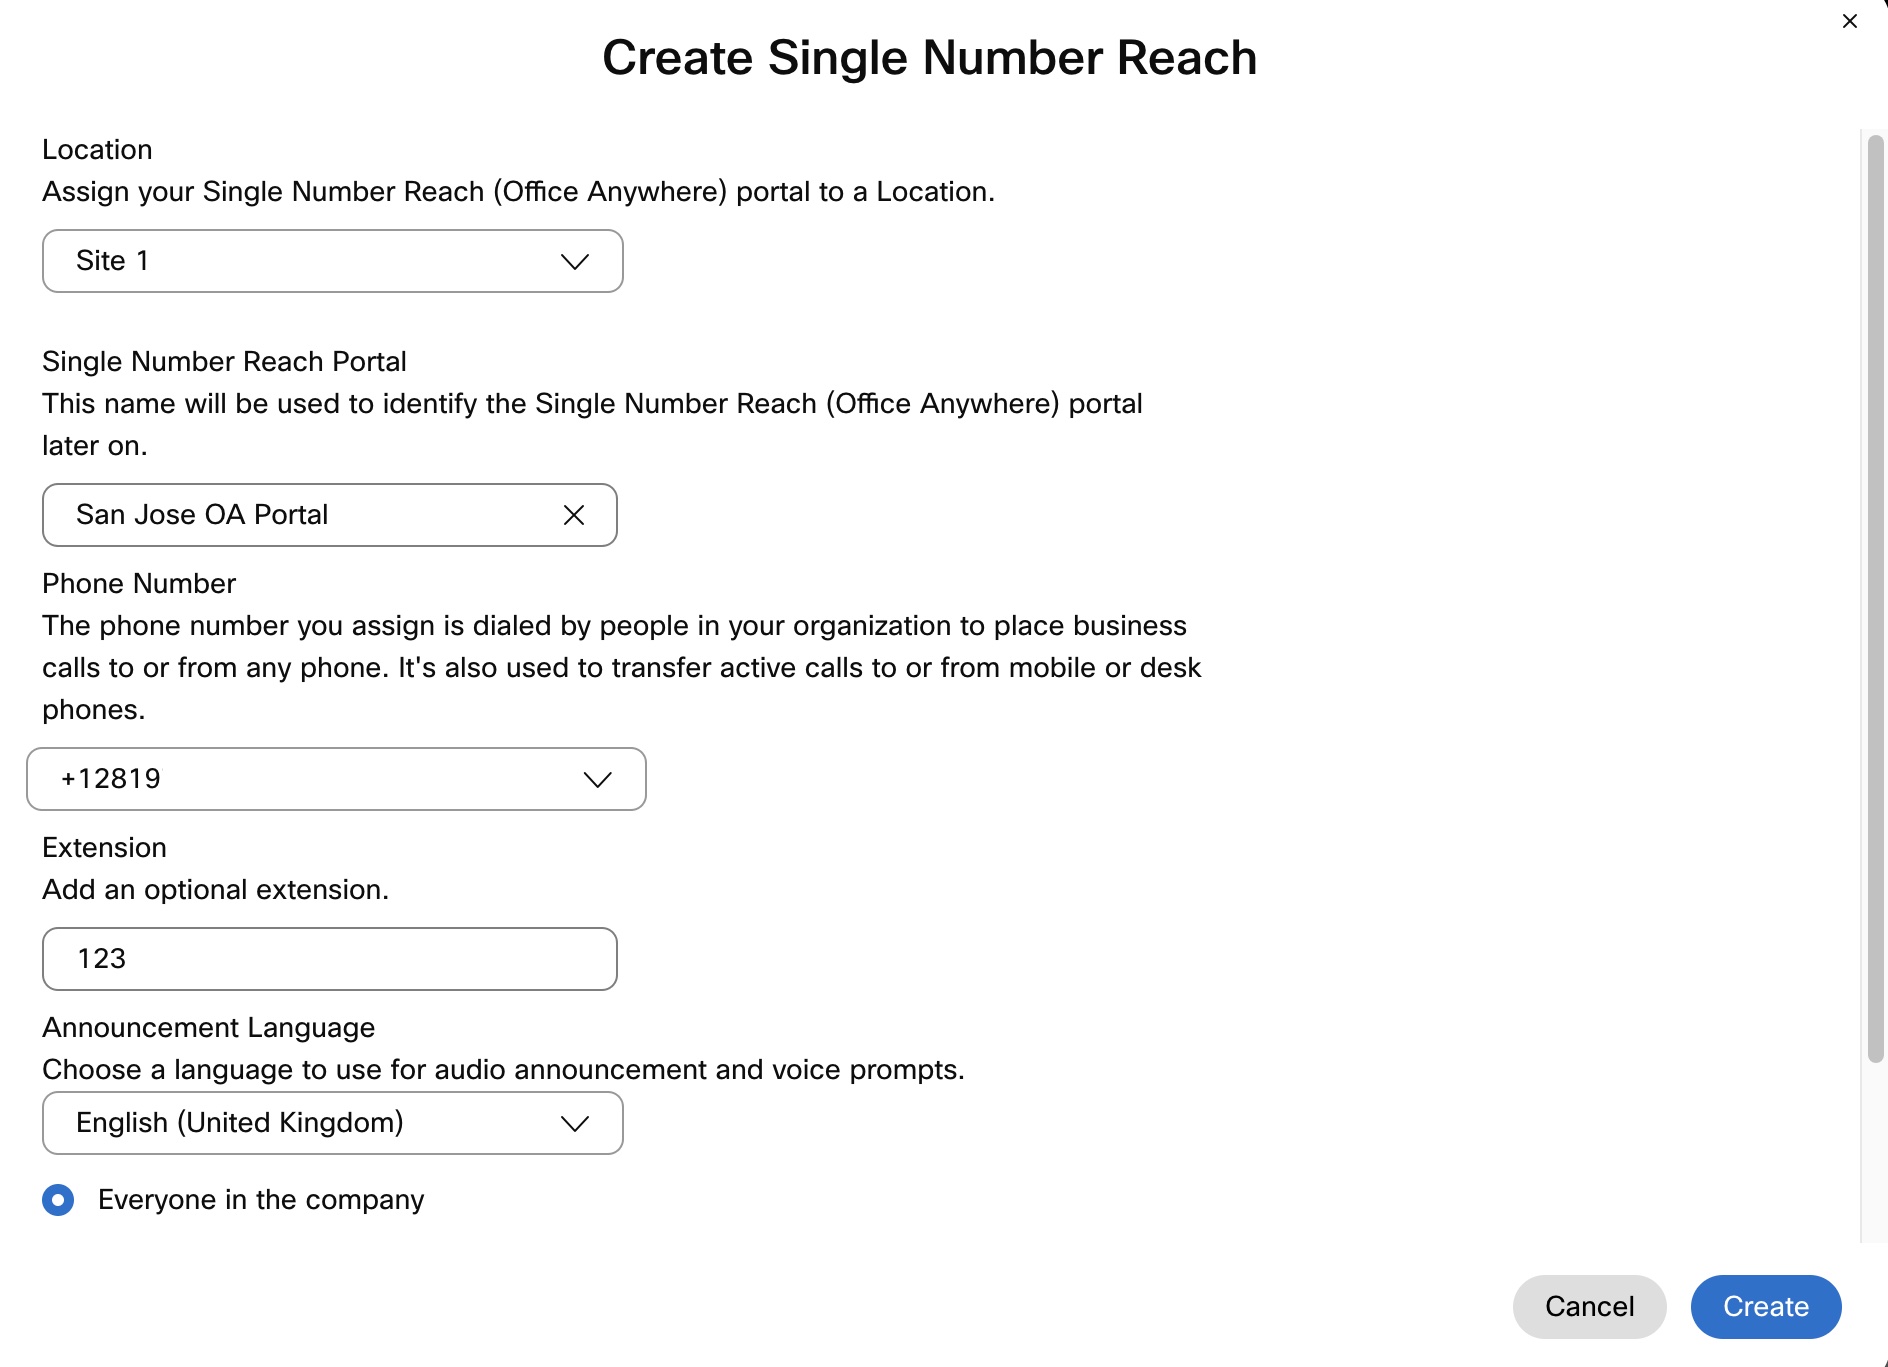
Go to the Single Number Reach card and click Add new. |
| 4 |
Enter the following information:
|
| 5 |
Choose who can use the Single Number Reach portal - Everyone in the company or Only the users within this location. |
| 6 |
To allow silent prompt mode, check Silent Prompt Mode. If enabled, callers don't hear any audio prompts, but they still need to enter the calling number, passcode, and destination number at the right times. Mostly, the automatic dialing systems use this feature. |
| 7 |
Click Create. |
What to do next
Once a single number reach number is created for a location, the administrator or the users within that location can configure the service.
Configure single number reach for users
You can add the user's personal numbers as single number reach numbers. The added numbers ring when the user receives a call on their Webex Calling primary number. The user can use either the primary number or any of the added numbers to make outgoing calls. When the user makes outgoing calls, the caller ID setting of the Webex Calling primary number is used for identity.
Before you begin
Single number reach must be set up for the user's location.
| 1 |
Sign in to Control Hub. |
| 2 |
Go to . |
| 3 |
Select a user and click Calling. |
| 4 |
Go to User call experience and click Single number reach (office anywhere). |
| 5 |
Turn on the toggle. |
| 6 |
If you want to ring the assigned single number reach numbers when this user initiates a click to dial call, check Enable alerting single number reach numbers for click to dial calls. When this user answers the call from one of their ringing devices associated with the single number reach number, the call then proceeds as an originating call from that device to the destination number. |
| 7 |
Enter the Name and Phone Number to be used as the user's single number reach number and check the check box. Once you've added a phone number, the number gets activated. To deactivate, uncheck the check box. |
| 8 |
Click Incoming call options to enable any of the following settings for the phone number:
You can also add another personal number by clicking Add Personal Number and then following the previous steps. 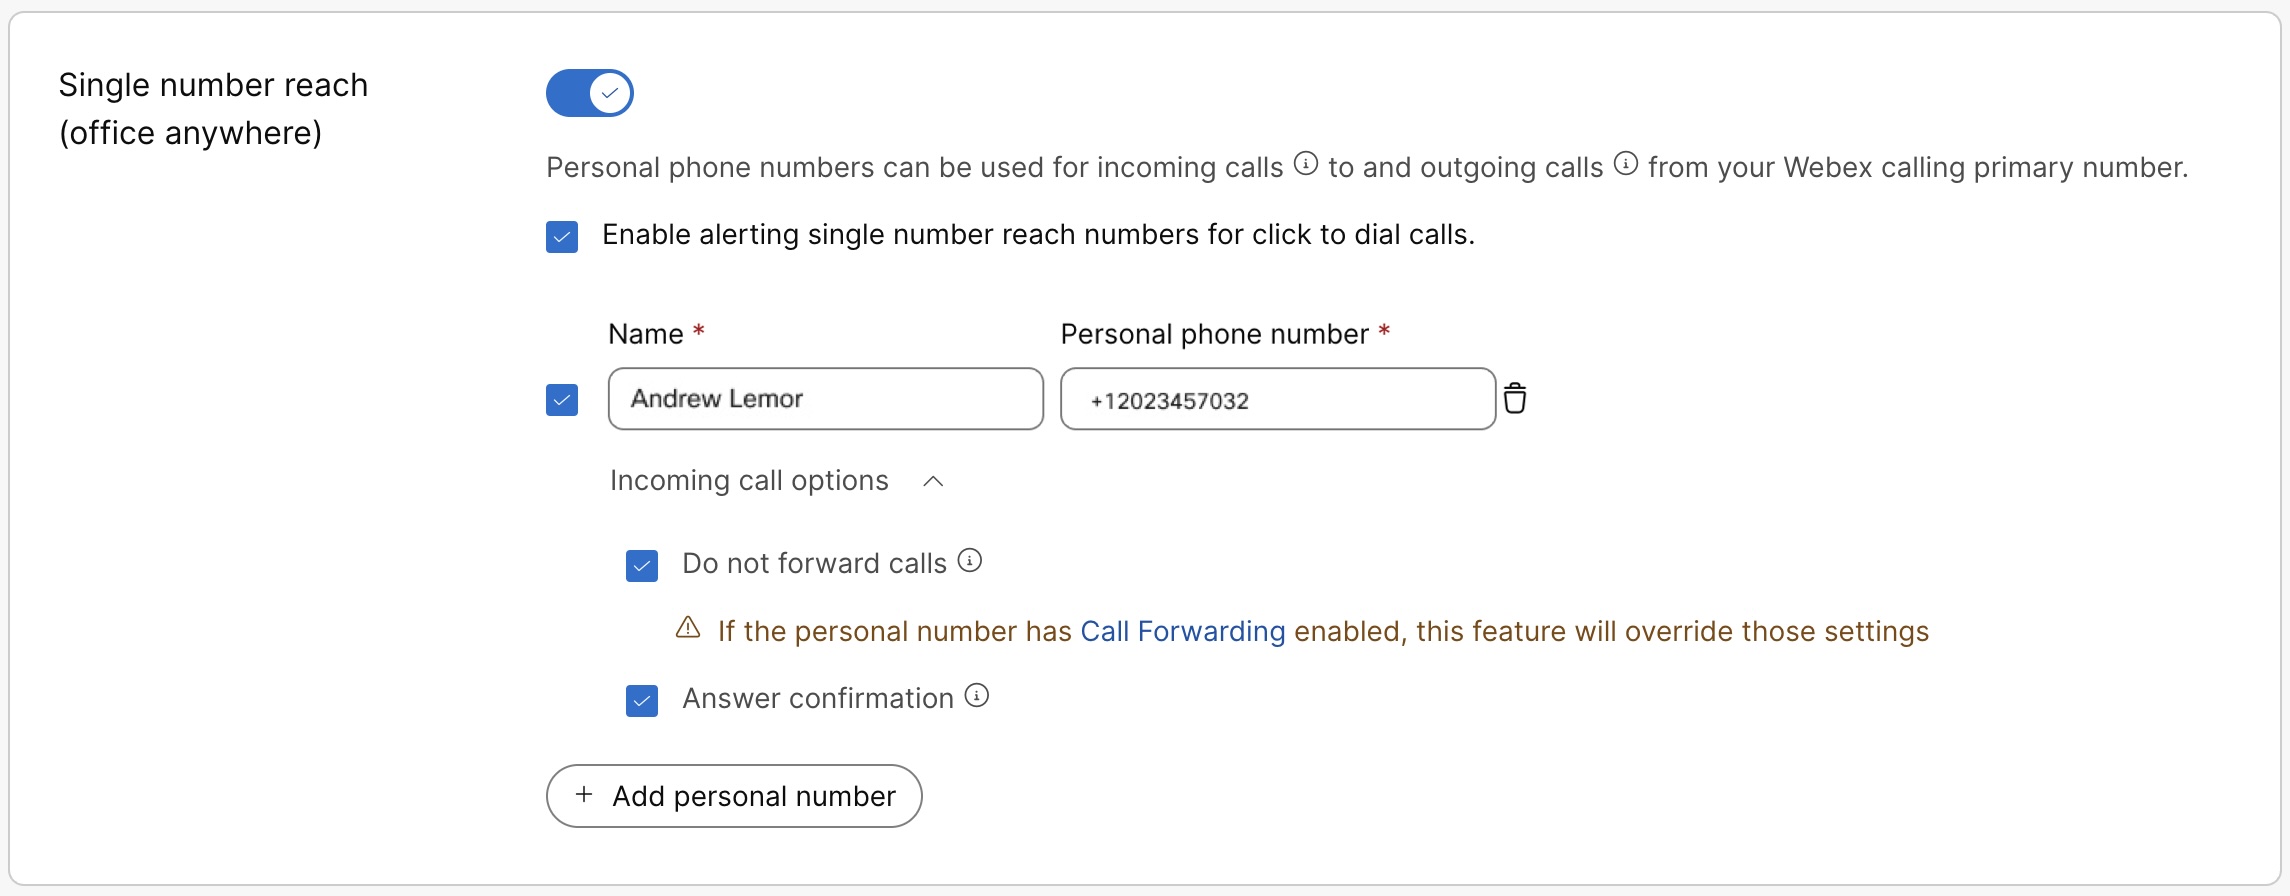
|
| 9 |
Click Save. A user can also configure and manage the single number reach on their own in the User Hub. For more details, see Configure single number reach (office anywhere). Any changes made to these settings by the user will be reflected in both the User Hub and Control Hub. |
Get a list of your single number reach phone numbers
| 1 |
Sign in to Control Hub. |
| 2 |
Go to . |
| 3 |
Go to the Single Number Reach card and click Manage. |
| 4 |
From the Manage drop-down, select Export to download a CSV file with the list of single number reach numbers. To narrow the export list to location, you can select the location from the drop-down list before clicking export. |


