- Home
- /
- Article

Thanks for your feedback.

Customize reminders in Webex Webinars
 In this article
 Feedback?
Hosts and cohosts can customize templates for reminder, thank you, and cancellation emails sent out to attendees. These customized templates can be saved in your email template library for future use, so you don't have to enter the same settings each time.
Customize email templates
Before you begin
Custom email templates are not available for *.my.webex.com sites.
| 1 |
After scheduling a webinar, under the Host tab, in the Email messages section, click Customize email template. You can also select your webinar from the list under Calendar.
|
| 2 |
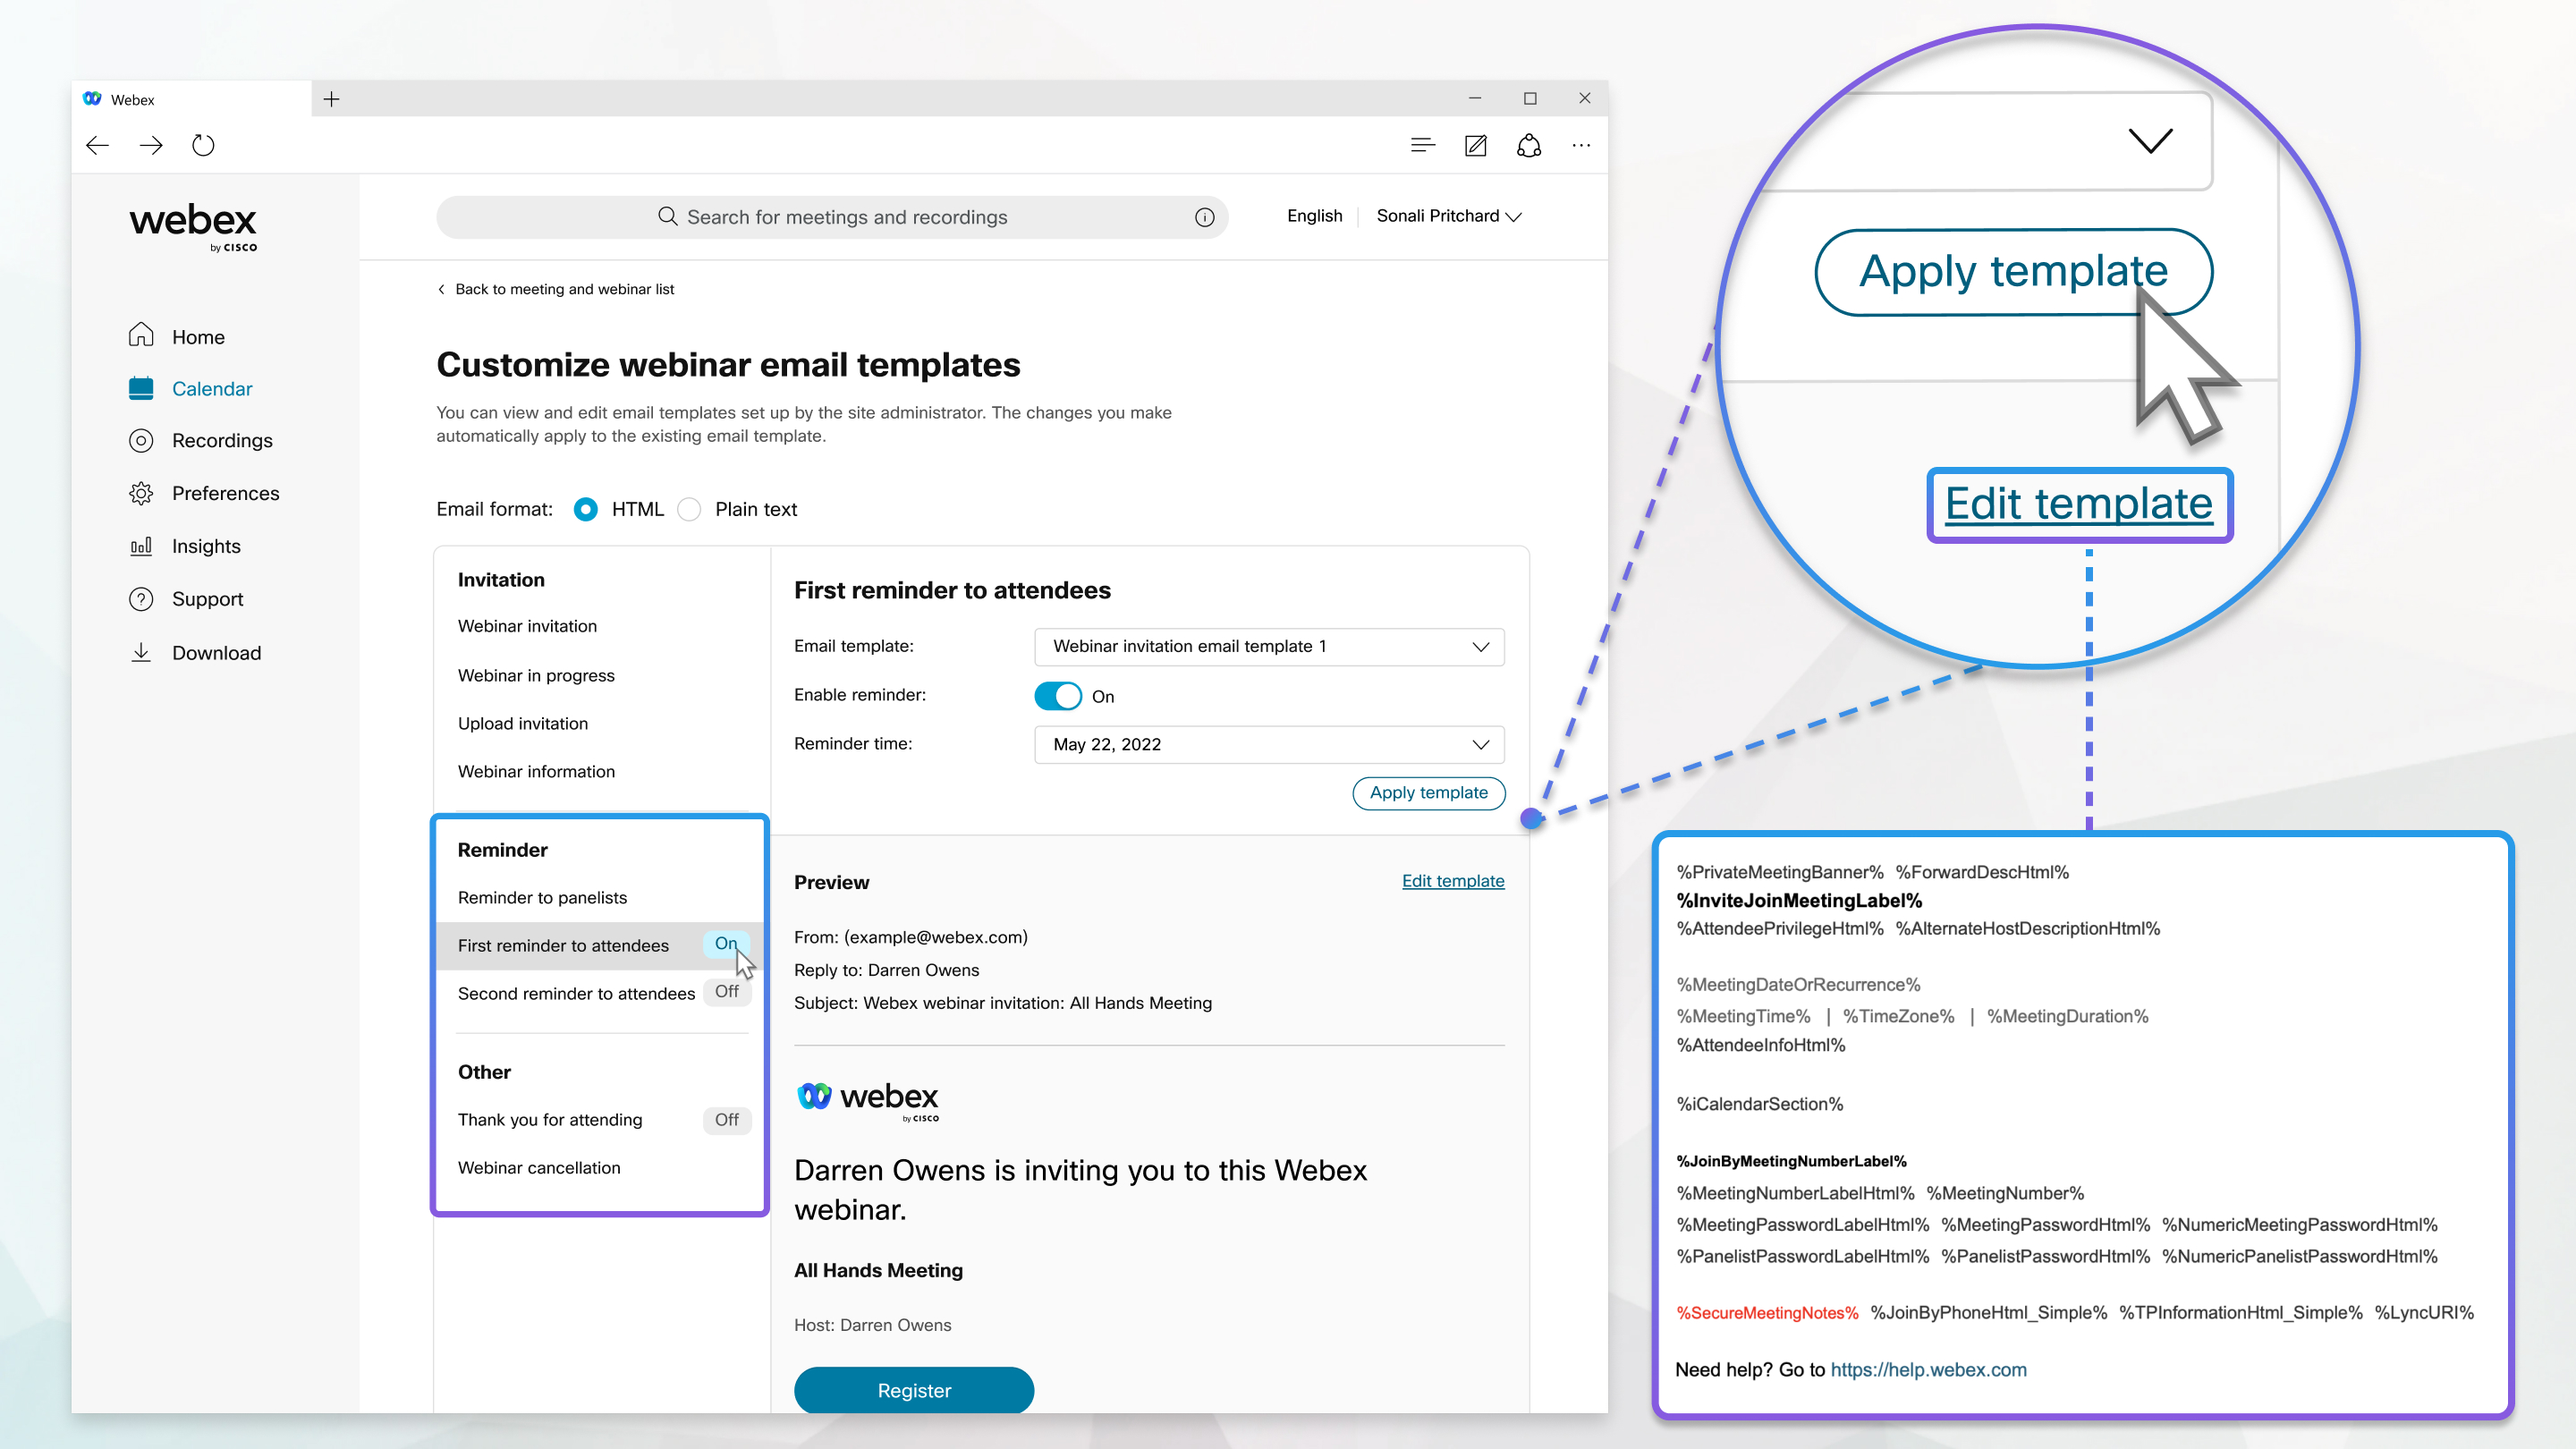
In the Reminders or Other section, click the reminder you want to customize. |
| 3 |
To turn the reminder on or off, move the slider next to Enable reminder to On or Off. |
| 4 |
Select the email template you want to use or customize from the drop-down list. Then select the date and time that you want to send the reminder and click Apply template. Reminders for webinars with lots of attendees require a minimum of 12 hours lead time to ensure all
attendees receive the reminder. If you have a license for 10,000 attendees or more, you
can only schedule reminders 12 or more hours before the start date and time. |
| 5 |
To alter the template that you've applied, click Edit template. You can delete or rearrange variables, but never change the text in a variable. For
example, in You can move variables within a template, but not between templates. |
| 6 |
Click Save, then Back to customize email templates page. |
| 7 |
Make any changes to other reminders, then click Back to webinar details page. |
| 8 |
To send your reminders now, in the Email messages section, click Send emails. |
| 9 |
Check the check boxes next to the recipients, then click Send. |
| 10 |
Click Done. |


