- Home
- /
- Article

Thanks for your feedback.

Add your organization branding to Webex
 In this article
 Feedback?
Customer administrators can customize how the Webex App looks for users in their organization. You can add customized colors and logos that reflect your brand and corporate identity.
Customize branding for Webex
Before you begin
| 1 |
Sign in to Control Hub. |
| 2 |
Go to |
| 3 |
Select |
| 4 |
For Basic customization, add your company logo and primary color and click Save. |
| 5 |
For Advanced customization, click View Branding and edit the following settings: |
 next to
 Advanced branding color settings
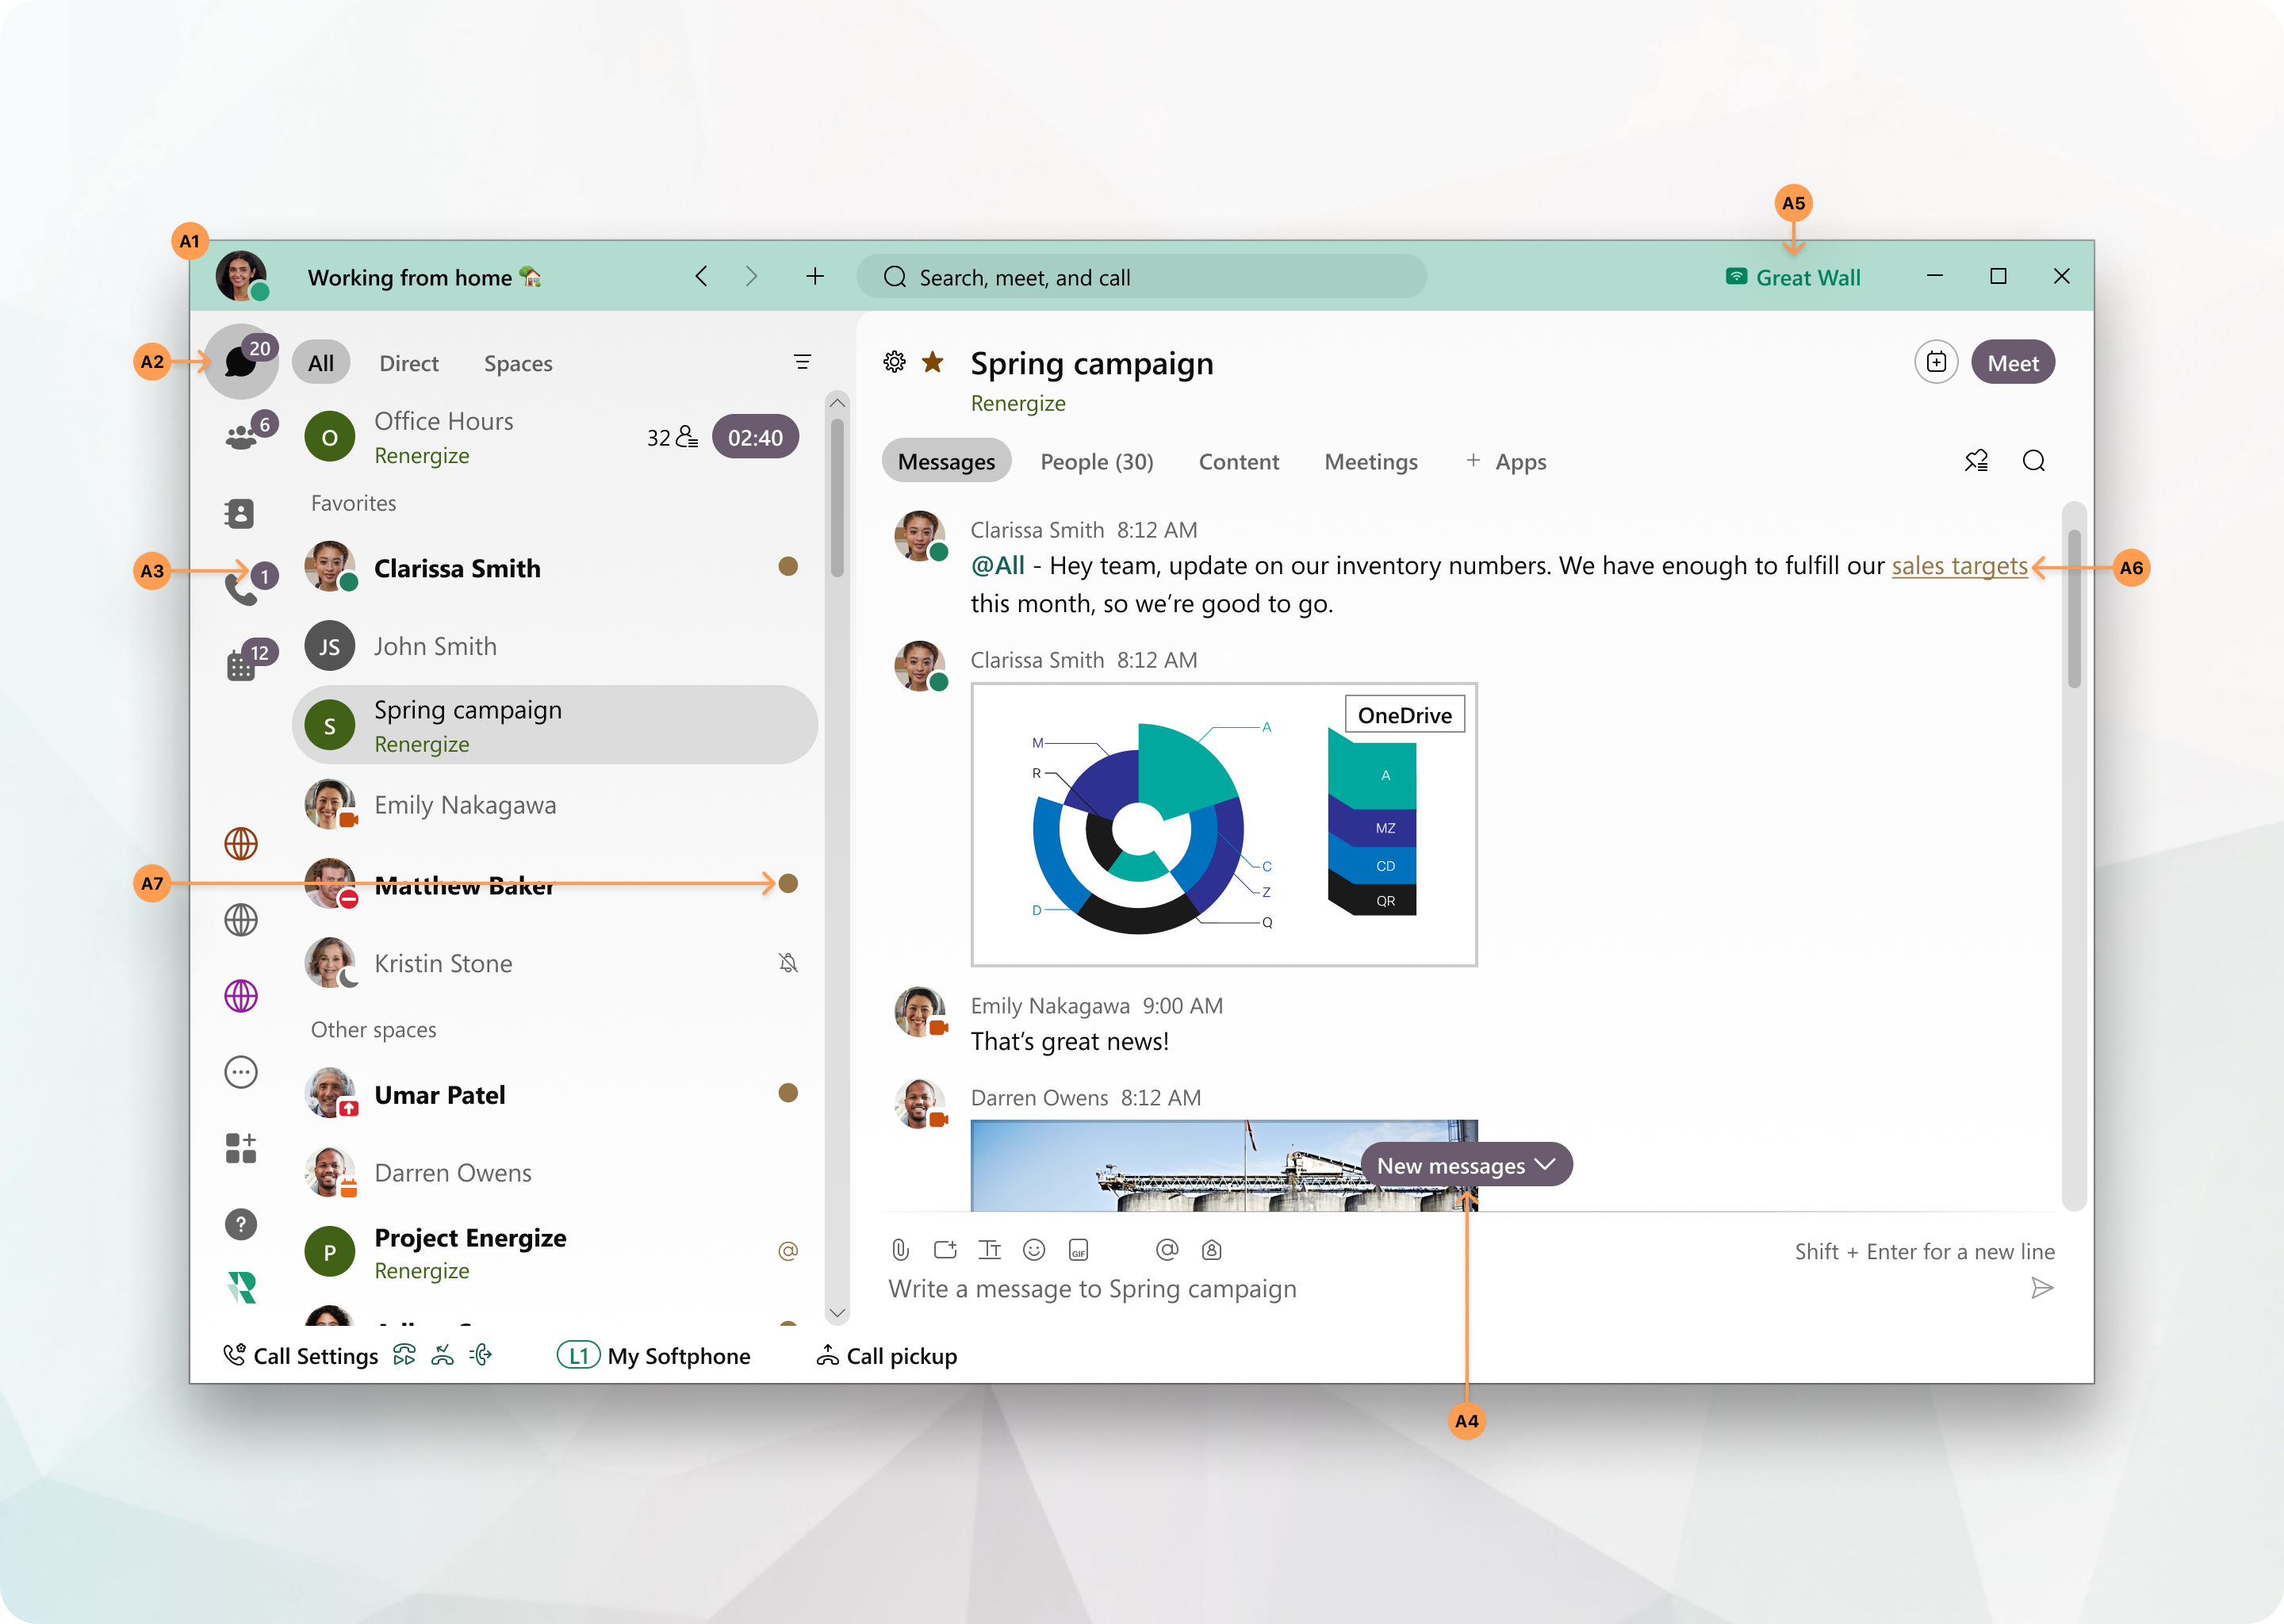
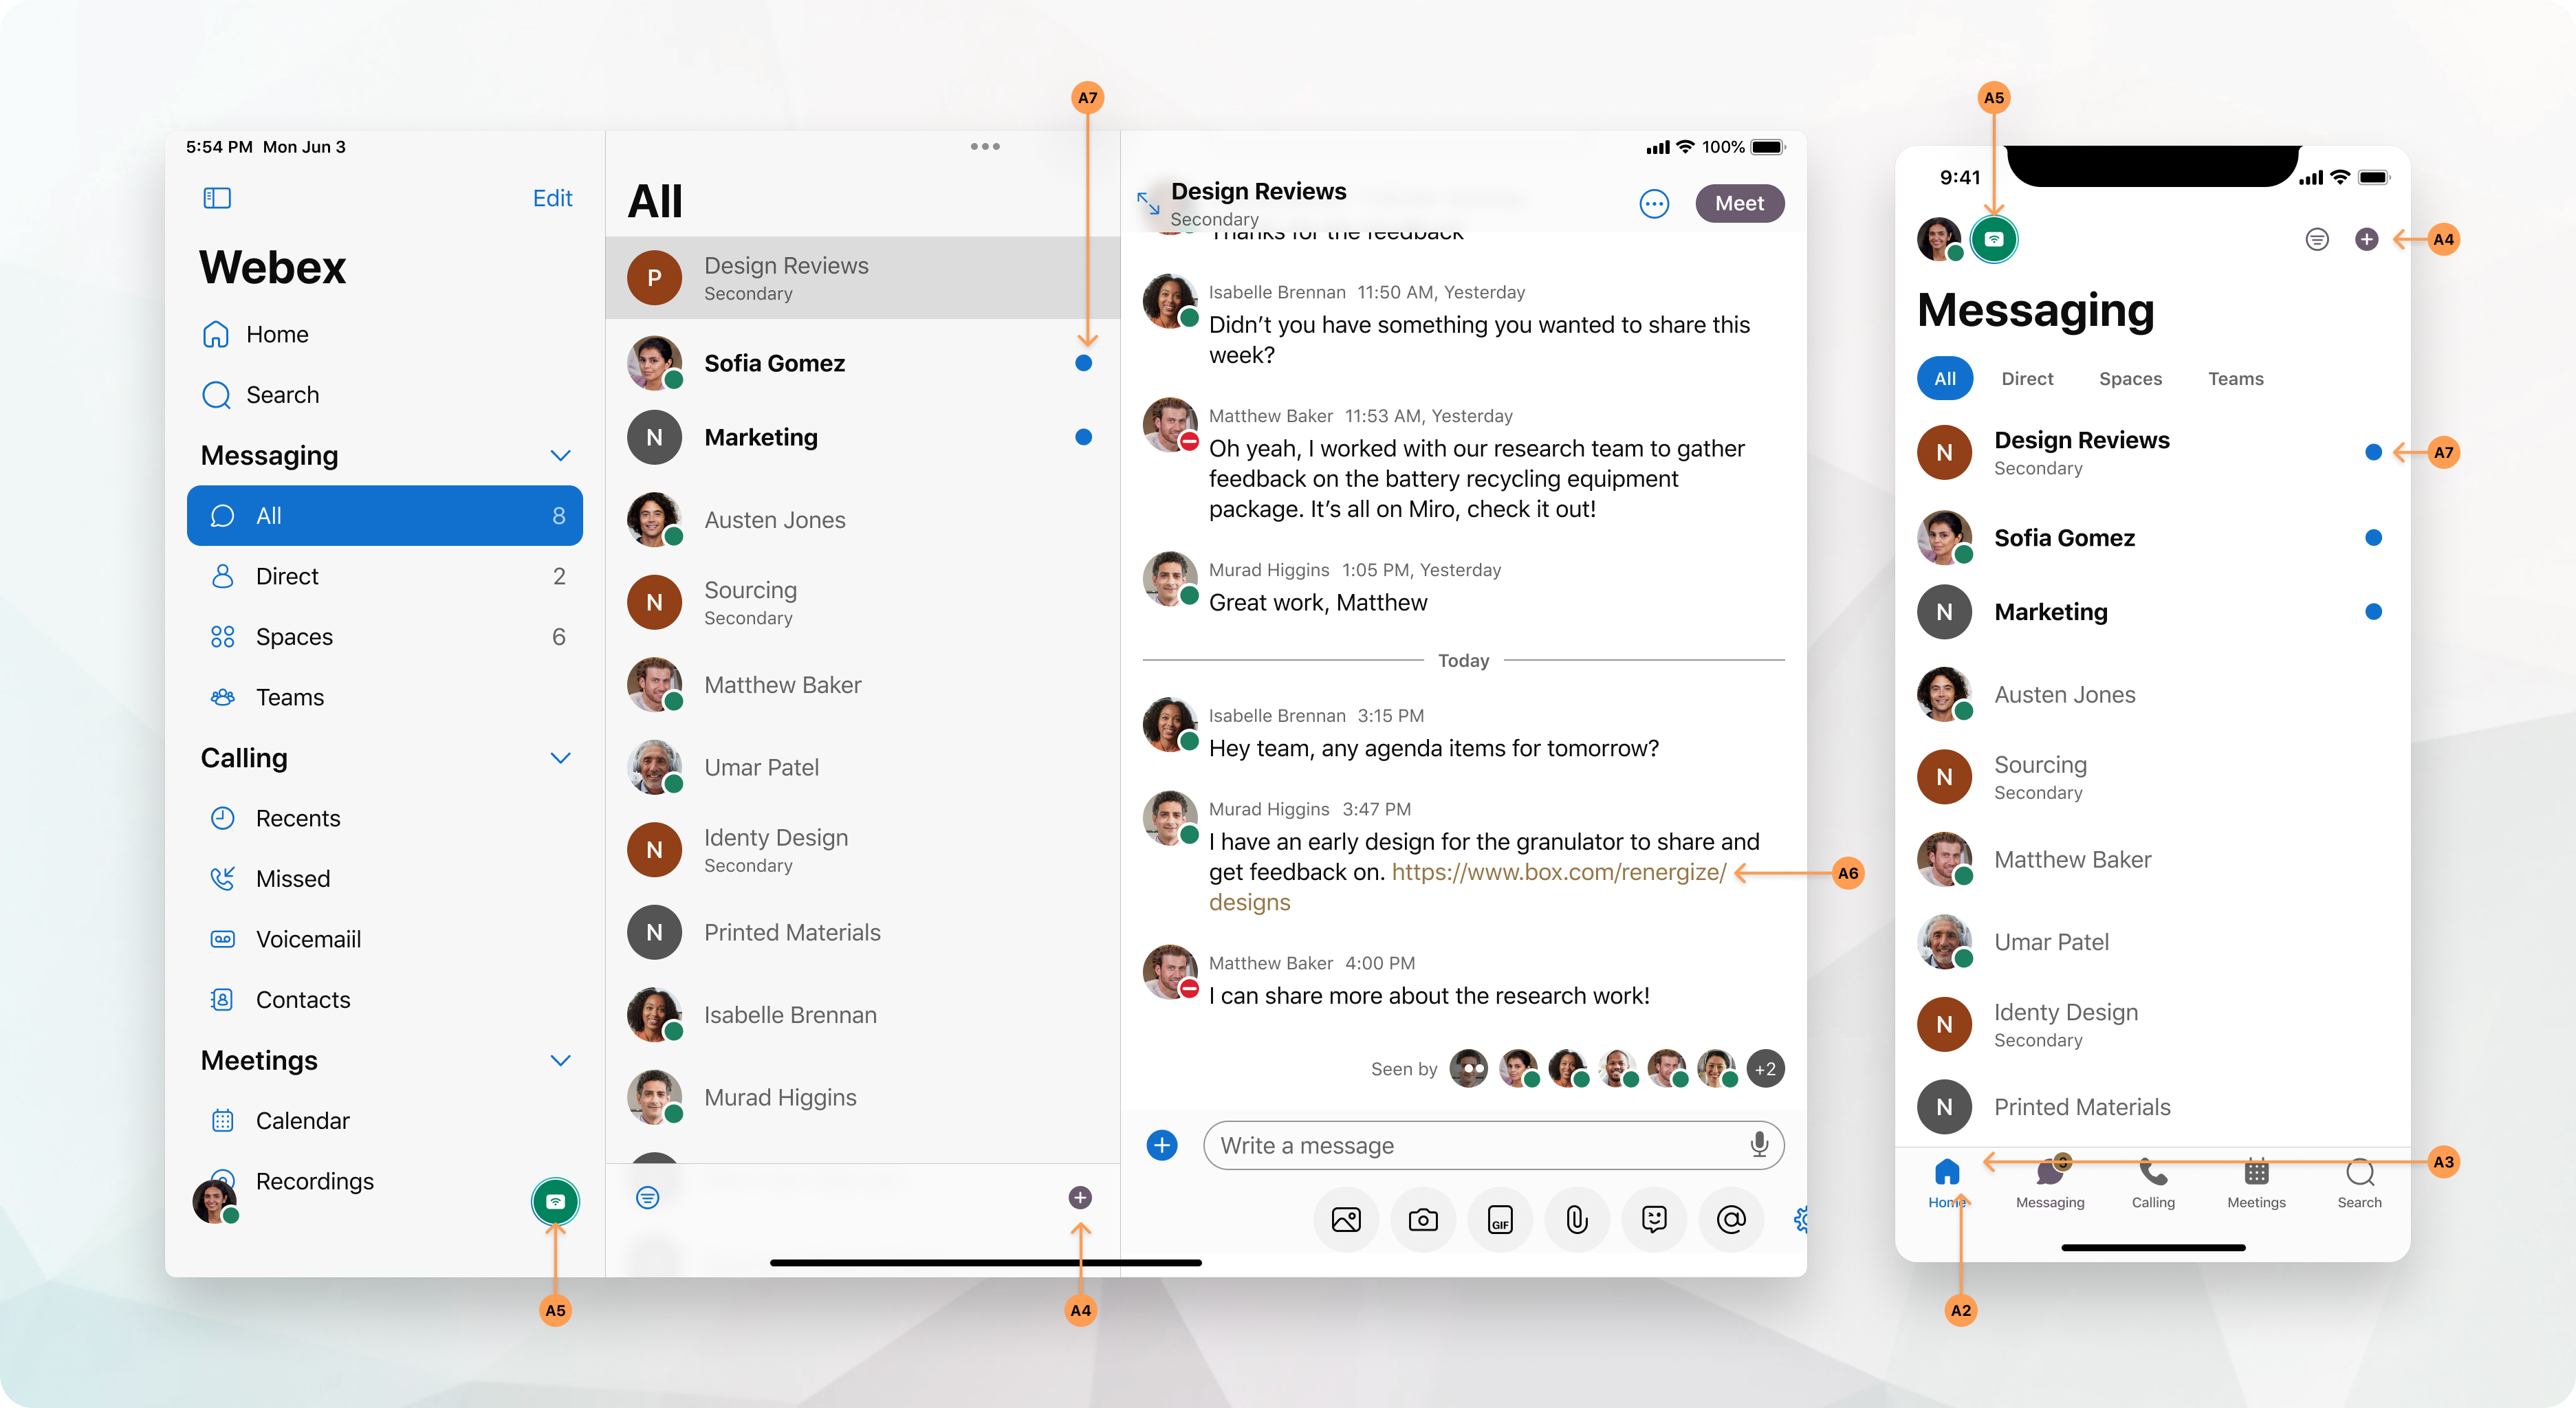
The following table summarizes the color settings from the sample color palettes. Refer to the sample color palettes to see these settings on Webex App.
|
Image Reference |
Setting |
|---|---|
|
A1 |
Primary Color |
|
A2 |
Buttons This control applies only to primary buttons, such as Add and Save. |
|
A3 |
Navigation icons (active) |
|
A4 |
Navigation badges |
|
A5 |
Connect to a device |
|
A6 |
Hyperlinks |
|
A7 |
Indicators |
Add Help and support information
| 1 |
Sign in to Control Hub. |
| 2 |
Go to , then scroll to Help and support information. |
| 3 |
To provide direct support to your users through your organization's support team, turn on Redirect user support.
|
| 4 |
In the Contact support section, you can change: Your URL and description show in the Support
option on your Webex site.
|
| 5 |
In the Help Site section, enter the URL to your company's knowledge base, where users can access self-help resources. If you use internal links for Contact support and/or Help Site, then Webex App users must be on the network (or VPN) to use these resources. |
| 6 |
Click Save. |


