- Home
- /
- Article

Thanks for your feedback.

 In this article
 Feedback?
The monitoring feature lets you create monitored lines, call park extensions, and speed dials, and arrange them for display on Open Programmable Line Keys (PLKs) on the device.
Configure Monitoring
You can configure the following monitoring items:
-
Monitored Line—Monitored lines allow you to track the line status of other users, workspaces, or virtual lines. You can see the monitored line status as
Available,In a call, orReceiving a call(line is ringing). -
Call Park Extension—Add a call park extension to park and retrieve calls for the selected call park extension. The phone shows a
Parkedstatus on the line where the call is parked. -
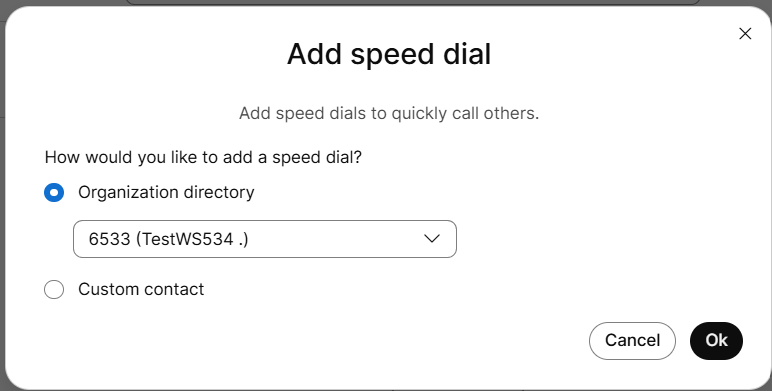
Speed Dials—Speed dials allow you to have your most important contacts readily available for dialing.
You can configure a maximum of 50 monitored entries, which includes monitored lines, call park extensions, and speed dial numbers. Do not configure more monitored lines than the number of lines available on the user's device and any attached Key Expansion Modules (KEMs).
Monitored lines send messages to the phone when monitored lines go on hook and off hook. To minimize the bandwidth impact between Webex Calling and your network, it is advised not to configure more monitored line entries than necessary. Instead, if you only need speed dial functionality without activity monitoring, you can use speed dials as an alternative. This approach helps limit the number of monitoring messages and reduces bandwidth usage while still providing quick dialing capabilities.
Before you begin
If monitored lines do not show on a non-primary device, ensure that the 'Monitor List' is enabled in Device settings or in All configurations. However, PhoneOS devices show monitored lines on primary and non-primary devices by default.
| 1 |
Sign in to Control Hub. |
| 2 |
Go to Management and then click Users. Same configuration steps are applicable when managing Workspaces. |
| 3 |
Select the user you want to modify and click Calling. |
| 4 |
Go to Between-user Permissions section, and select Monitoring. 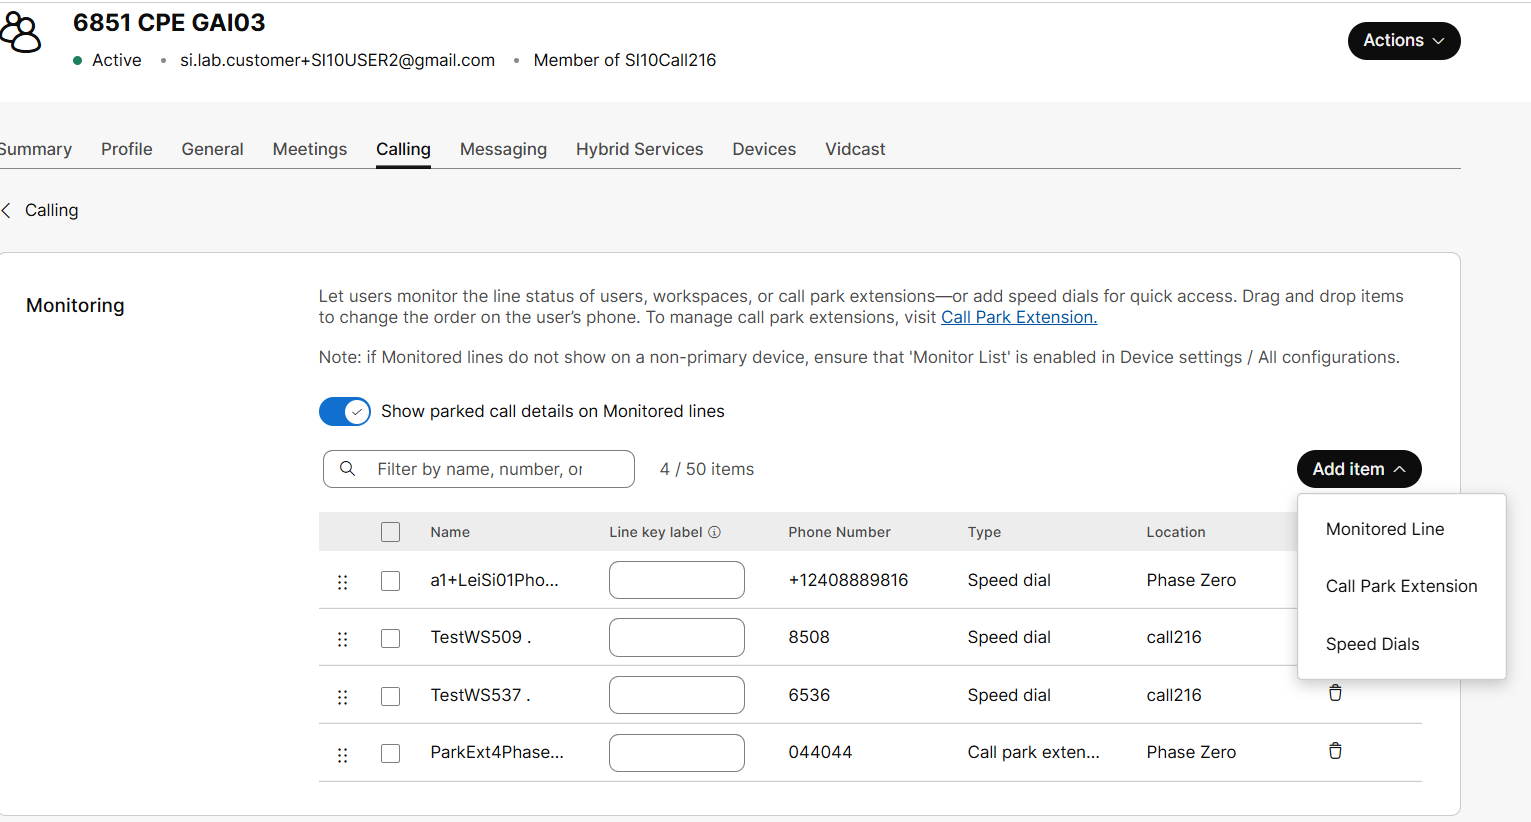
|
| 5 |
Turn on the Show parked call details on Monitored lines button, to notify the users about parked calls. This notification is only applicable for monitored users, workspaces, and virtual lines, and not for call park extensions and speed dials. |
| 6 |
To add a Monitored Line, click . 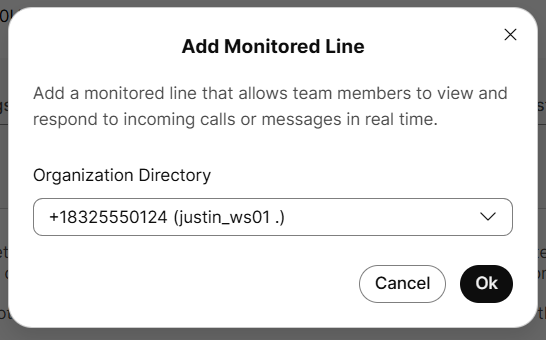
|
| 7 |
To add a Call Park Extension, click 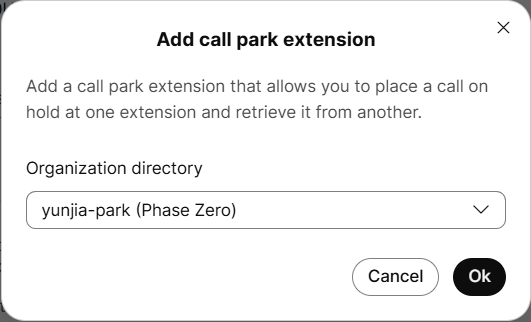
|
| 8 |
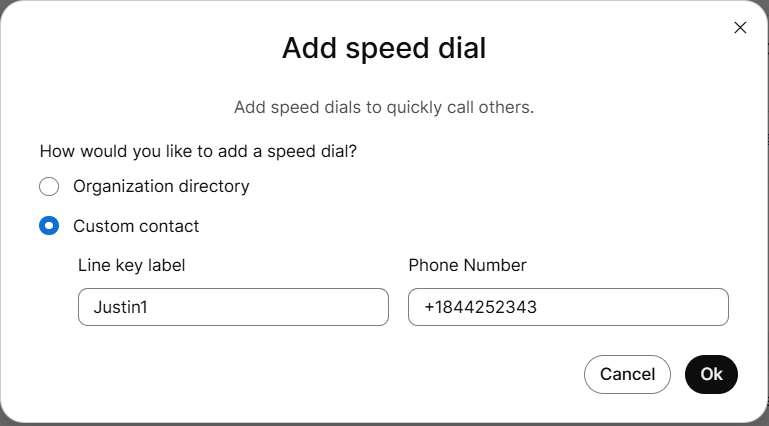
To add a Speed Dial, click . There are the following two ways to add speed dial contact:
|
| 9 |
Click Ok. |
| 10 |
Click Save. The name that appears for the monitored line is the name entered in the profile First Name and Last Name fields for users and virtual lines. For a workspace, monitored line shows Name field. You can override the name of the user, workspace, or virtual line that is displayed on the line key by adding a Line Key label. You can add a line key label for the monitored line, call park extension, and Organization directory speed dial. You can also set line key label for speed dial using your phone, see article Use speed dials on your phone. |
Reorder monitoring list
Define the order of the monitored lines, call park extensions, and speed dials that show on the open lines on the user’s device.
| 1 |
Sign in to Control Hub. |
| 2 |
Go to Management and then click Users. Same configuration steps are applicable when managing Workspaces. |
| 3 |
Select the user you want to modify and click Calling. |
| 4 |
Go to Between-user Permissions section, and select Monitoring. |
| 5 |
Drag and drop items to reorder monitored lines, call park extensions, and speed dials in the list. |
| 6 |
Click Save. |
Directed call pickup in a monitored group
When a call is made to a monitored line you have added, the call is indicated on the user's phone and on the Webex App.
-
In Webex App version 43.11 and later: The users who are part of the monitoring group receive a call notification on the Webex App. Users can pick up the call from the notification. Users can also monitor and pick up the call from the multi-call window. For more information, see Pick up someone else's phone call.
-
On the phone: The Programmable Line Key (PLK) button on the phone that has this Monitored line configured will go red to indicate a call in progress. If it has not been picked up elsewhere, selecting that PLK will pick up the call.
Known issues and workaround
|
Known Issue |
Workaround |
|---|---|
|
For a speed dial org contact, if the contact number has no extension then the number is functional only when the following conditions are met:
This issue affects Cisco MPP and PhoneOS devices. |
No workarounds for the speed dial org contact are possible other than adding an extension. |
|
For a speed dial custom contact, E.164 contacts are functional only when the following conditions are met:
This issue affects Cisco MPP and PhoneOS devices. |
To use speed dial for a custom contact, add the number in national format if it's from your country, or in international format (like 011 in the U.S.) if it's from another country. |


