- Home
- /
- Article

Thanks for your feedback.

Configure and manage voicemail settings for a Webex Calling user
 In this article
 Feedback?
Enable a user's voicemail and voicemail settings in Control Hub by giving them the ability to send calls to voicemail when they're busy or can't get to the phone, to enable voicemail notifications via email or text, or store voice messages in a preferred location.
Configure organizational settings for voicemail
Configure your organizational settings before managing the users’ voicemail settings. These configurations determine the users’ voicemail settings that you can set.
Before you begin
For the voicemail feature to work, you must set up the voice portal extension for the location. For details, see Configure voice portals for Webex Calling.
| 1 |
Sign in to Control Hub. |
| 2 |
Go to . |
| 3 |
Go to the Voicemail section, and configure the following settings:
|
Voicemail forwarding
When enabled, the settings allow users to forward a voicemail to another users’ number or extension. If disabled, this prohibits the user to forward voicemail, using an external mailbox, or sending a copy of the voicemail to a specified email address.
-
To enable this setting, click the toggle.
Voicemail deletion
Voicemails over 180 days old are archived automatically. If you require access to archived voicemails, you’re requested to raise a service request with Cisco.
Voicemail deletion allows you to set conditions for expired messages. When enabled, admins can specify the time frame when messages expire. You can enter the days (1-180) in the provided field. Admins can also set conditions for message deletion.
To enable this setting, click the toggle and choose one of the following options:
-
Permissive Deletion—This keeps all unread voicemails and deletes those voicemails that have expired when a user accesses their mailbox.
-
Strict Deletion—This deletes all read and unread voicemails based on the time frame you set.
Voicemail passcode
Before setting up the default passcode for the organization to access the voicemail, remember the following security risks/concerns for end users:
-
Setting up a default passcode for the organization allows access to any user’s mailbox and services.
-
The default passcode gives access to another users’ services such as:
-
Voicemail, including message playback, personalization of names, and greetings
-
Single number reach portal
-
Hoteling
-
-
The default passcode disables hot desk sign in using the voice portal option.
It’s important that users update their passcode to maintain security. Users can set up their personal voicemail PIN through User Hub, or you can assign a temporary passcode. See the section Reset/Set a temporary user's voicemail PIN in this article to set the temporary passcode for users. Users can refer Set or reset your voicemail PIN for setting up their passcode.
To set up the default passcode for your organization:
- Enable the Voicemail Passcode toggle.
- Enter the passcode in the Create default passcode.
- Confirm the passcode in the Confirm default passcode.
You can also create a time frame in which a person has to change their passcode and how often they can change their passcode again (once it’s changed):
-
You can set the minimum number of days (1–7) when a passcode can be changed by the user when enabled. When the toggle is off, they can change their passcode multiple times on the same day.
Webex Calling prevents the user from setting one of the older passcodes making the users' passcode more secure.
-
You can set the number of days in which a passcode expires (between 15 and 180) when enabled. When the toggle is off, the passcode never expires.
This feature also extends the passcode history 10–24. That is, it can store each user’s last 24 passcodes and prevent the user from reusing one of those stored passcodes.
Enable voicemail for a user
If you have call forwarding enabled, then those call forward settings override the voicemail settings you configured.
| 1 |
Sign in to Control Hub. |
| 2 |
Go to . |
| 3 |
Select a user and click Calling. |
| 4 |
Go to Voicemail, fax, announcement language and timezone section and click Voicemail. |
| 5 |
Turn on the Voicemail toggle, and enable the settings that you want. Some voicemail features may be unavailable due to organizational settings set. |
Send a user's calls to voicemail
Configure these voicemail settings to direct incoming calls to users' voicemail.
| 1 |
Sign in to Control Hub. |
| 2 |
Go to . |
| 3 |
Select a user and click Calling. |
| 4 |
Go to Voicemail, fax, announcement language and timezone section and click Voicemail. |
| 5 |
Turn on the Voicemail toggle. |
| 6 |
Go to Send calls to voicemail section and choose from any of the following options:
Once you've uploaded the file or recorded the greetings, you can update it by selecting Replace File or recording another message. Recording a new message or uploading a new file overrides the previous greetings. The audio (WAV) file must be 8Khz, 8-bit mono, CCITT µ-law, 2MB max, .wav file format. If you select Send all calls to voicemail, you can’t select the other two options. You can choose to direct to voicemail with both Send calls to voicemail during a busy line and Send calls to voicemail when unaswered options are selected together. |
| 7 |
Click Save. |
Reset/Set a temporary voicemail PIN for a user
If you've enabled the default voicemail PIN for your organization, you can reset a user’s voicemail PIN. For more information about how to set up a default voicemail PIN for your organization, see Configure a Default Voicemail PIN for All New Users.
| 1 |
Sign in to Control Hub. |
| 2 |
To reset a voicemail PIN for a user: |
| 3 |
To set a temporary passcode for a user: |
| 4 |
To set a temporary passcode for virtual lines: Users can also reset their voicemail PIN in User Hub following the specified criteria set at the organization level. For details, see Set or reset your Voicemail PIN. |
Enable voicemail notifications for a user
Enable a user's voicemail and settings in Control Hub to send calls to voicemail when busy or unavailable, receive voicemail notifications through email or text, and store voice messages.
For more information on email branding customizations specific to Webex Calling, see Configure Advanced Branding Customizations.
| 1 |
Sign in to Control Hub. |
| 2 |
Go to . |
| 3 |
Select a user and click Calling. |
| 4 |
Go to Voicemail, fax, announcement language and timezone section and click Voicemail. |
| 5 |
Turn on the Voicemail toggle. |
| 6 |
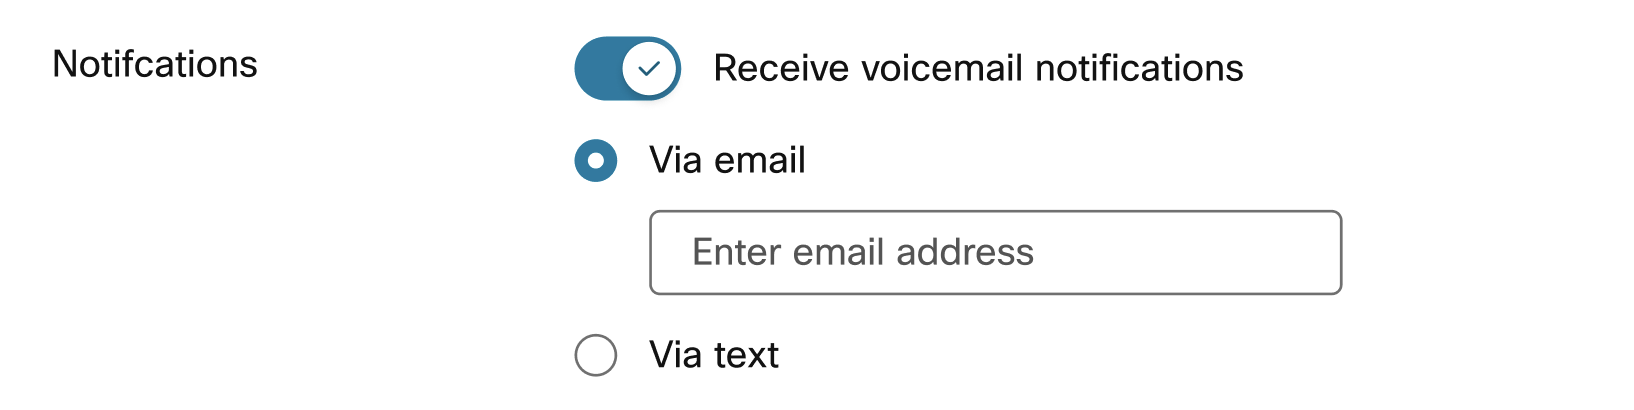
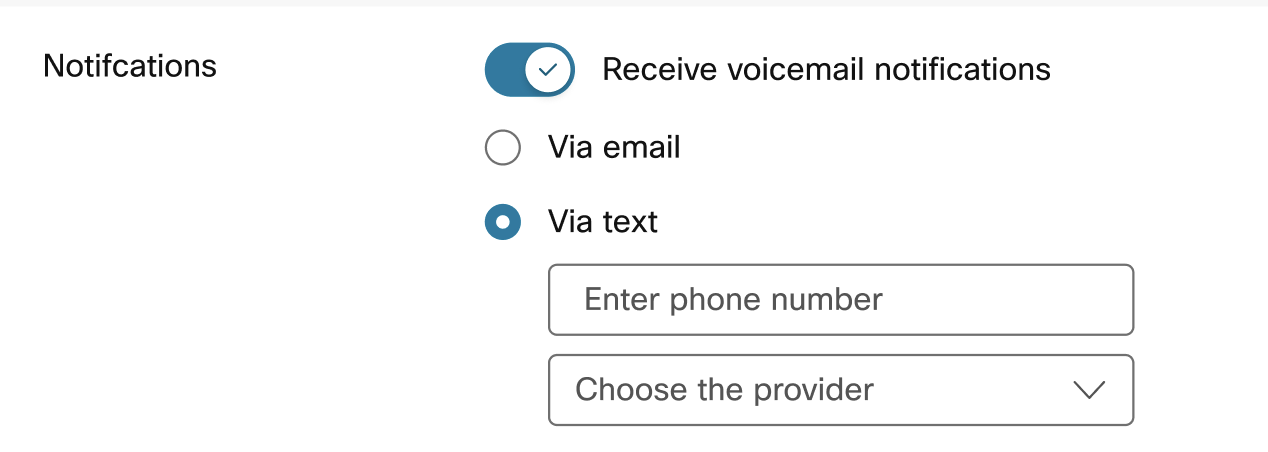
Go to Notifications section and turn on the Receive notification of any new voice messages toggle. |
| 7 |
Choose one of the following options:
|
| 8 |
Click Save. |
Manage a user's voicemail message storage
You can specify where users can access their voicemail—on their phone, in the User Hub or through a specified email address as a .tiff file.
If the location assigned to the user has voicemail transcription enabled and you'd like the user to receive voicemail transcriptions, email a copy of the message and select the Use the internal mailbox option. For details on turning on the voicemail transcription for your location, see Enable or Disable Voicemail Transcription for a Location.
| 1 |
Sign in to Control Hub. |
| 2 |
Go to . |
| 3 |
Select a user and click Calling. |
| 4 |
Go to Voicemail, fax, announcement language and timezone section and click Voicemail. |
| 5 |
Turn on the Voicemail toggle. |
| 6 |
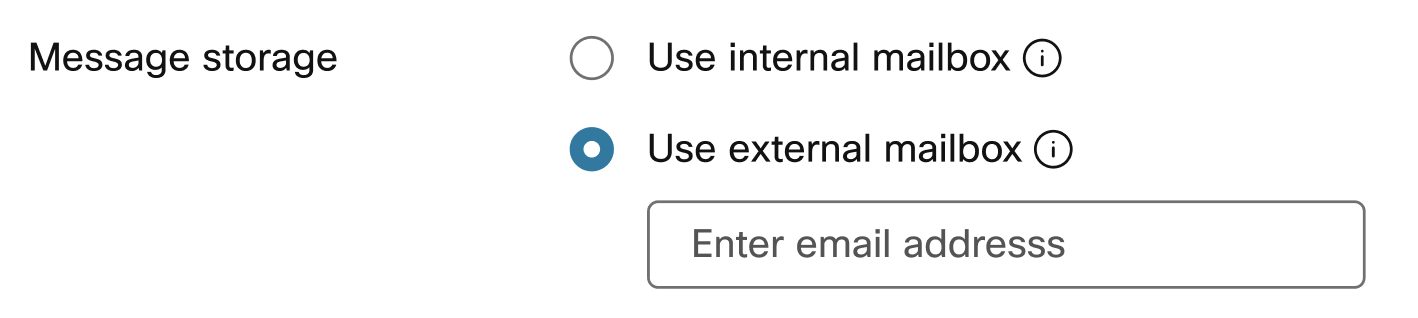
Go to Message Storage section and choose one of the following options:
This option may be unavailable if voicemail forwarding is disabled. |
| 7 |
Click Save. |
Configure additional voicemail settings for a user
These additional settings can be configured with other voicemail settings for users in the Control Hub.
| 1 |
Sign in to Control Hub. |
| 2 |
Go to . |
| 3 |
Select a user and click Calling. |
| 4 |
Go to Voicemail, fax, announcement language and timezone section and click Voicemail. |
| 5 |
Turn on the Voicemail toggle. |
| 6 |
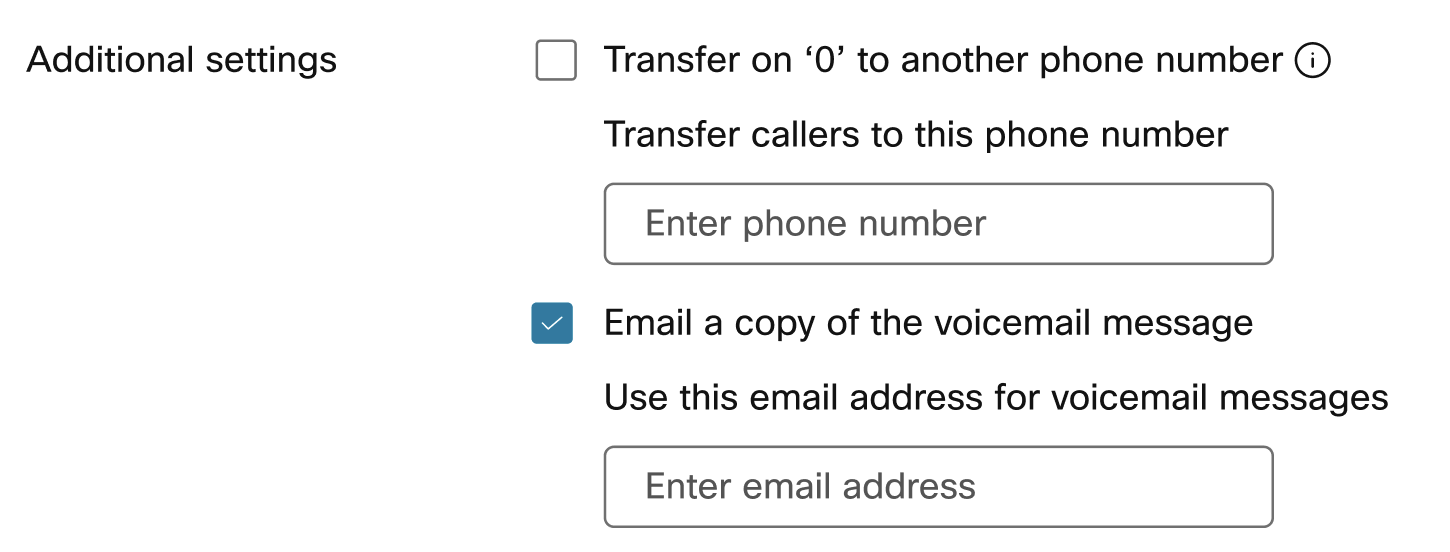
Go to Additional Settings section and choose one or both of the following options:
This option may be unavailable if voicemail forwarding is disabled. If the location assigned to the user has voicemail transcription enabled, select the Email a copy of the message option for the user to receive voicemail transcriptions. |
| 7 |
Click Save. |
Configure fax messaging settings for a user
Fax messaging allows a user to receive direct inbound faxes from their voicemail service.
Before you begin
Consider the following pointers before you configure this feature:
-
Faxes are collected by the Webex Calling platform and stored in a shared storage area along with voicemail messages. Storage capacity is 100 minutes of voicemail, or 1000 pages of fax messages. Make sure that users are aware of the space available, and must allocate space for new fax messages and archive wisely.
-
Fax messages are stored for an unlimited amount of time.
| 1 |
Sign in to Control Hub. |
| 2 |
Go to . |
| 3 |
Select a user and click Calling. |
| 4 |
Go to Voicemail, fax, announcement language and timezone section and click Voicemail. |
| 5 |
Turn on the Voicemail toggle. |
| 6 |
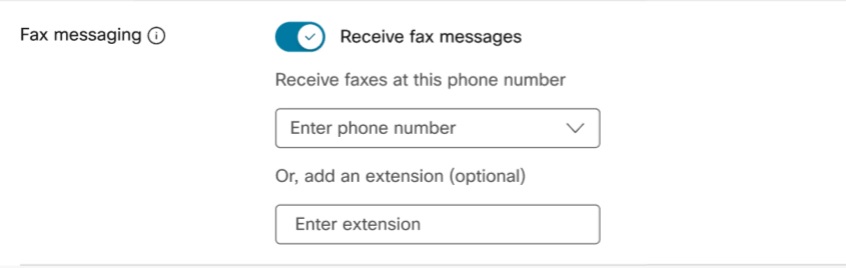
Go to Fax Messaging section and turn on the Receive fax messages toggle. |
| 7 |
Enter the phone number assigned for fax messaging. |
| 8 |
Enter an extension, if needed.
|
| 9 |
Click Save. |
Enable voicemail transcription for a user
With voicemail transcription, the user receives an email with the voicemail transcription in the body of the email and .WAV file as a voicemail attachment.
For a user to have voicemail transcription, the following conditions apply:
-
Enable voicemail transcription for the user’s location. For details, see Voicemail transcription for Webex Calling.
-
Select Email a copy of voicemail message and Use internal mailbox in the user’s voicemail settings area of the Calling profile.

A user can also configure all the voicemail settings on their own in the User Hub. For details, see Configure your voicemail settings. Any changes made to these settings by the user reflect in both the User Hub and Control Hub.


