- Home
- /
- Article

Thanks for your feedback.

Get started with your Receptionist Client
 In this article
 Feedback?
The Receptionist Client is a web-based tool that combines your desk phone with a desktop interface and enables you to process calls to users within your organization. You can screen incoming calls, manage calls and contacts, and monitor calls in a queue.
End of Support announcement
The Receptionist Client is retired and July 8, 2024 is the end of support. All existing Receptionist Client users can migrate to the Webex Attendant Console. However, you can continue to use the Receptionist Client until the end of the subscription term. Cisco won’t release any new functionality for the Receptionist Client unless Cisco deems any issue as severity 1 or critical security vulnerabilities. If you choose to continue using the Receptionist client, ensure to plan the migration to Webex Attendant Console before the end of your current contract.
For details, see Webex Receptionist Client Retirement FAQ and Get started with the Attendant Console.
Sign in to the dashboard
Access Receptionist from User Hub. Once signed in, the display panes in the dashboard allow you to:
-
View global messages, application settings, and information about your user account and call state.
-
View and change your current settings.
-
View and manage active calls from the calls console.
-
Create and manage contacts.
-
Monitor and manage queued calls from the queued calls pane.
Before you begin
You require a desk phone or Webex App to place and/or receive calls.
| 1 |
Sign in to User Hub, then click |
| 2 |
Choose the Cisco sign-in option. 
|
What to do next
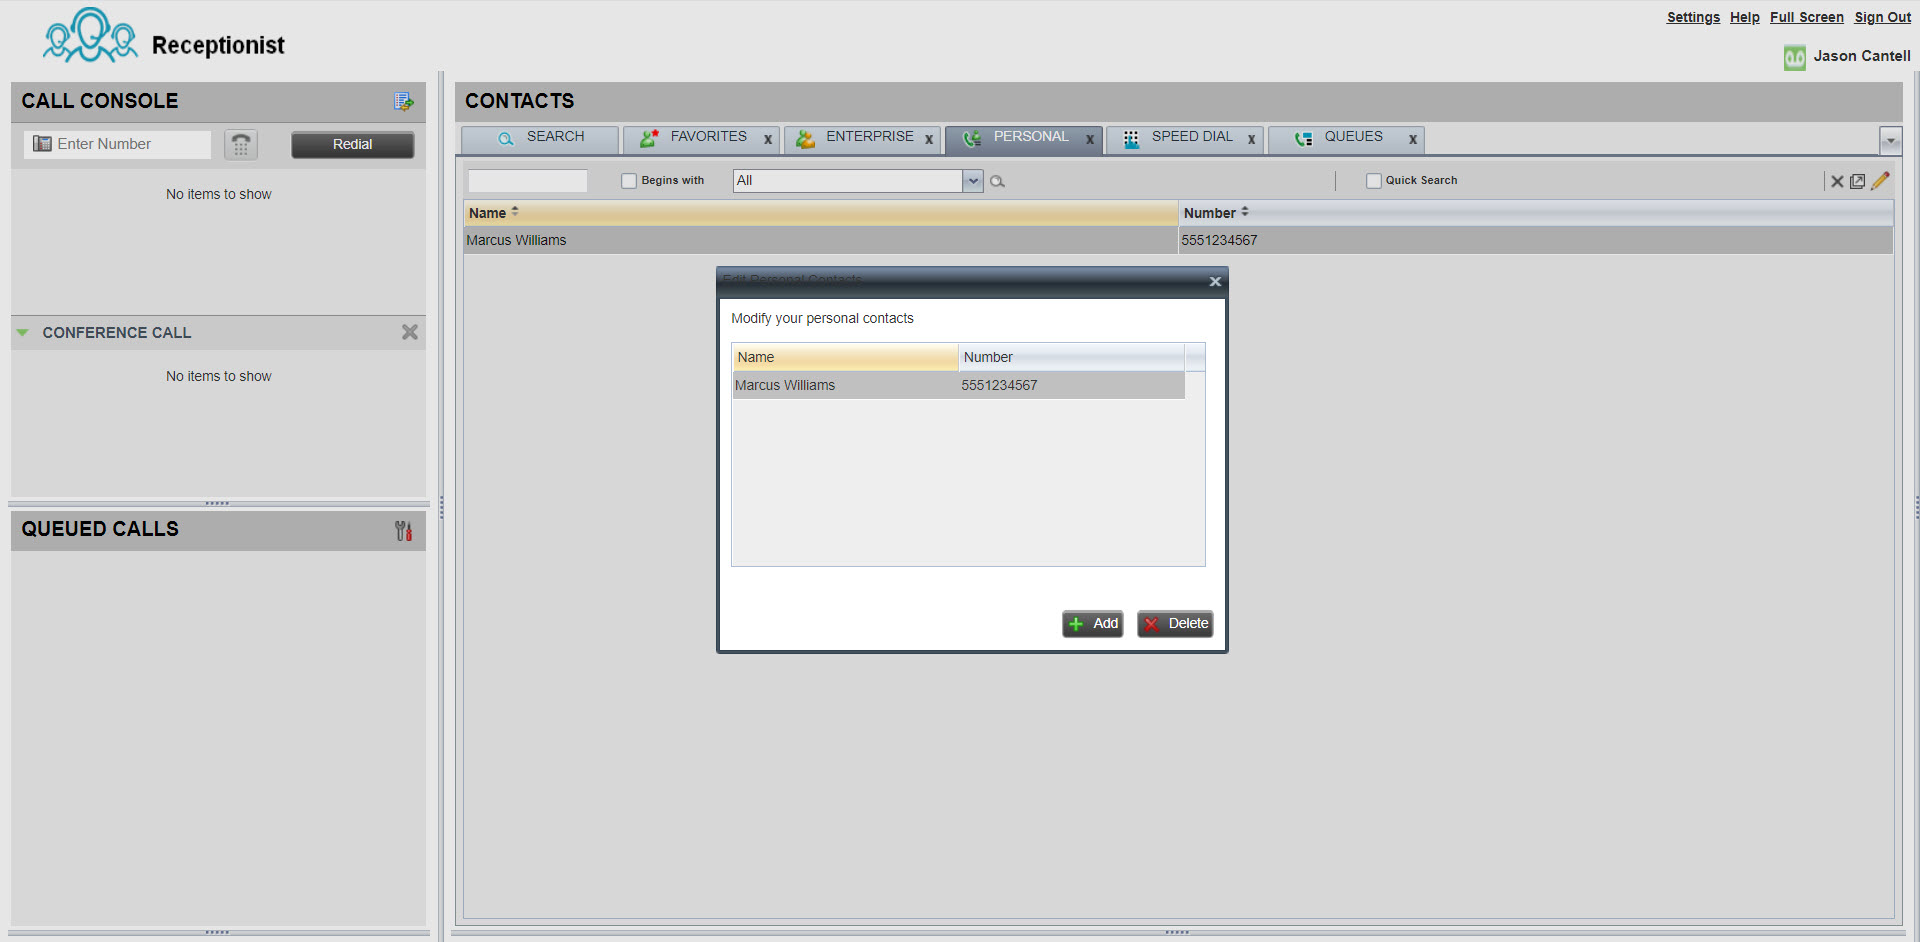
Manage your contacts
You can create and manage contacts within Receptionist to easily make calls to stored numbers. Once you create a contact, you can update, delete, monitor a contact statically (used if you monitor the same contacts daily), monitor a contact dynamically (used to view selected contacts on an as needed basis), and add a note to the contact.
The maximum number of contacts you can monitor statically is 200. The maximum number of contacts that can be monitored dynamically is 100.
| 1 |
From the contacts pane, select the Personal tab. |
| 2 |
Click the Edit icon to add, update, or delete a personal contact. |
| 3 |
To add a note to a contact, select the contact and click Notes. |
Place a call
| 1 |
From the call console pane, use the dialer, or click Redial. |
| 2 |
From the contacts pane, select a contact to dial. From here, you can also choose to view the call history or search for a specific contact. |
| 3 |
Click CALL. 
|
Place a conference call
Before you begin
Access Receptionist from the Calling User Portal. For steps on how to sign in, see Sign In to the Dashboard.
| 1 |
When on an active call, place a second call (either from the dialer or from the contacts pane). |
| 2 |
After the call connects, click CONF. 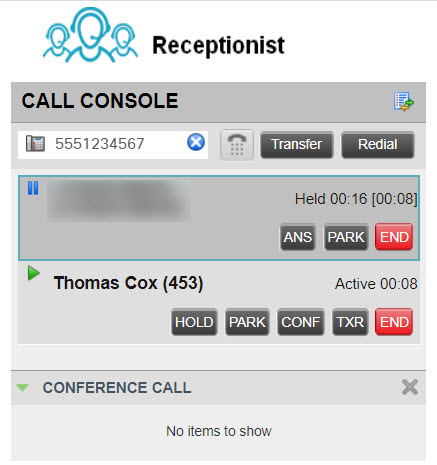
|
| 3 |
(Optional) To remove a specific call from the conference, hover over the call you want to remove, then click End. |
| 4 |
(Optional) To exit the call, click Leave Conference. If you are the initiator of the conference then the call will end for all participants, unless the call is a 3 party call, then the other 2 parties will revert to a direct call. If you are a participant in the conference, the conference will leave the other parties connected if you leave the conference. You can start a conference call with two calls that are already active by selecting one of the calls and then hovering over the call to add and clicking Conference. |
Want to see how it's done? Watch this video demonstration on how to place a conference call using Receptionist.
Answer a call
From the console pane, click Answer.
Auto-answer calls in receptionist client
Outbound Calls
For outbound calls, the initial call to the receptionist client’s phone is automatically answered and the outbound call is placed to the destination.
This removes the need for a receptionist to answer the initial call to themselves before the outbound call is placed.
-
Use the dialer or select the contact, to call the person you’d like.
-
Click Dial to place the call.
-
The initial call to the reception is automatically answered and the call is placed to the destination number or extension.
-
Inbound Calls
For inbound calls to the receptionist, the auto-answer button is exposed in the receptionist client. You can either toggle this button on or off.
The auto-answer button enables or disables auto-answer for calls made to the receptionist client.
-
OFF (Default) - You have to manually answer each incoming call.
-
ON - Incoming calls to the receptionist are answered automatically.
Place an active call on hold
The Receptionist Client allows you to manage multiple calls simultaneously. You can place an active call on hold. Or, you can answer an incoming call, while on an active call, and your first call is automatically placed on hold.
-
From the console pane, while on an active call, click HOLD on the call that you want to place on hold.
-
Click Answer to resume the call.
You can manage multiple calls from the call console. If you’re on an active call and receive a new call, click Answer to take the new call. Your first call is automatically placed on hold.
Transfer a call
| 1 |
While on an active call, use the dialer or select the contact, to call the person you’d like to transfer to. Your first call is automatically placed on hold. |
| 2 |
(Optional) Announce the call. |
| 3 |
To transfer the call without an announcement (blind transfer), click Transfer after dialing the transfer destination. |
| 4 |
Hover over the active call, then click Transfer. 
|
Monitor calls in queue
Before you begin
Access Receptionist from the Calling User Portal. For steps on how to sign in, see Sign In to the Dashboard.
| 1 |
From the Queued Calls pane, select the queues you want to monitor. |
| 2 |
Select . |
| 3 |
Select the queue that you want to monitor. |
| 4 |
Click Save. |
| 5 |
To pick up a call waiting in the queue, hover over the call in the Queued Calls pane and click on the pane, and click Retrieve. |
| 6 |
To view and prioritize calls in a queue, hover over the call in the Queued Calls pane and click Reorder. The call is moved to the front of the queue. 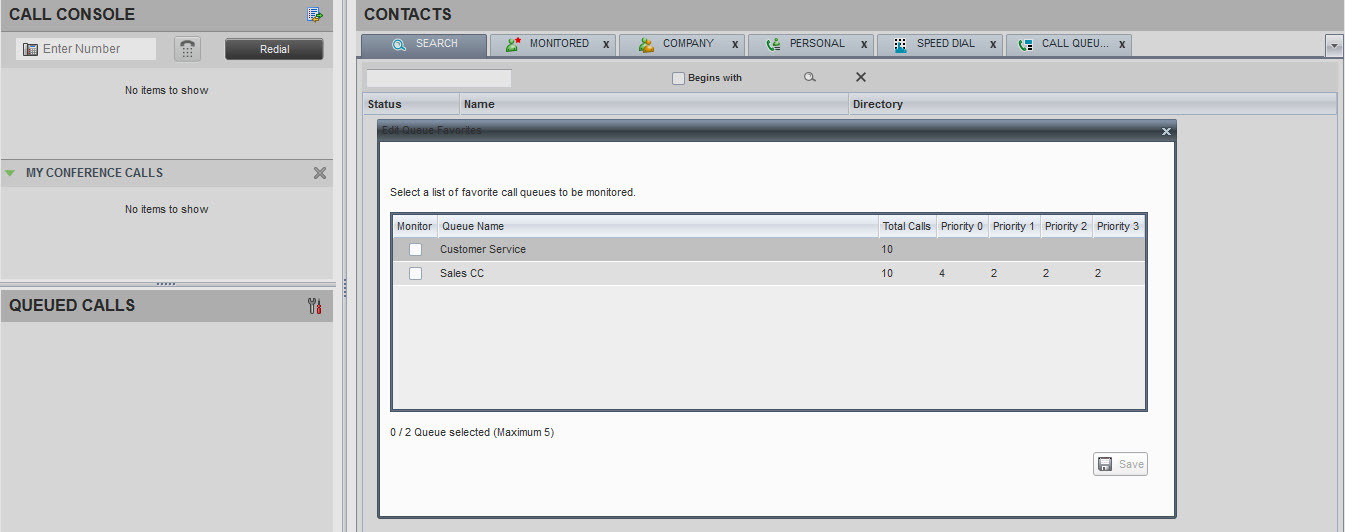
|
Want to see how it's done? Watch this video demonstration on how to monitor calls in a queue in Receptionist.
Transfer a call directly to voicemail
Before you begin
Access Receptionist from the Calling User Portal. For steps on how to sign in, see Sign In to the Dashboard.
| 1 |
While on an active call, use the dialer to call the person you'd like to transfer to or click the contact. |
| 2 |
From the contacts pane, select the destination contact. |
| 3 |
Hover over the contact and click VM. This option is only available if the contact has voice messaging assigned and enabled. 
|


