
Grazie per il feedback.
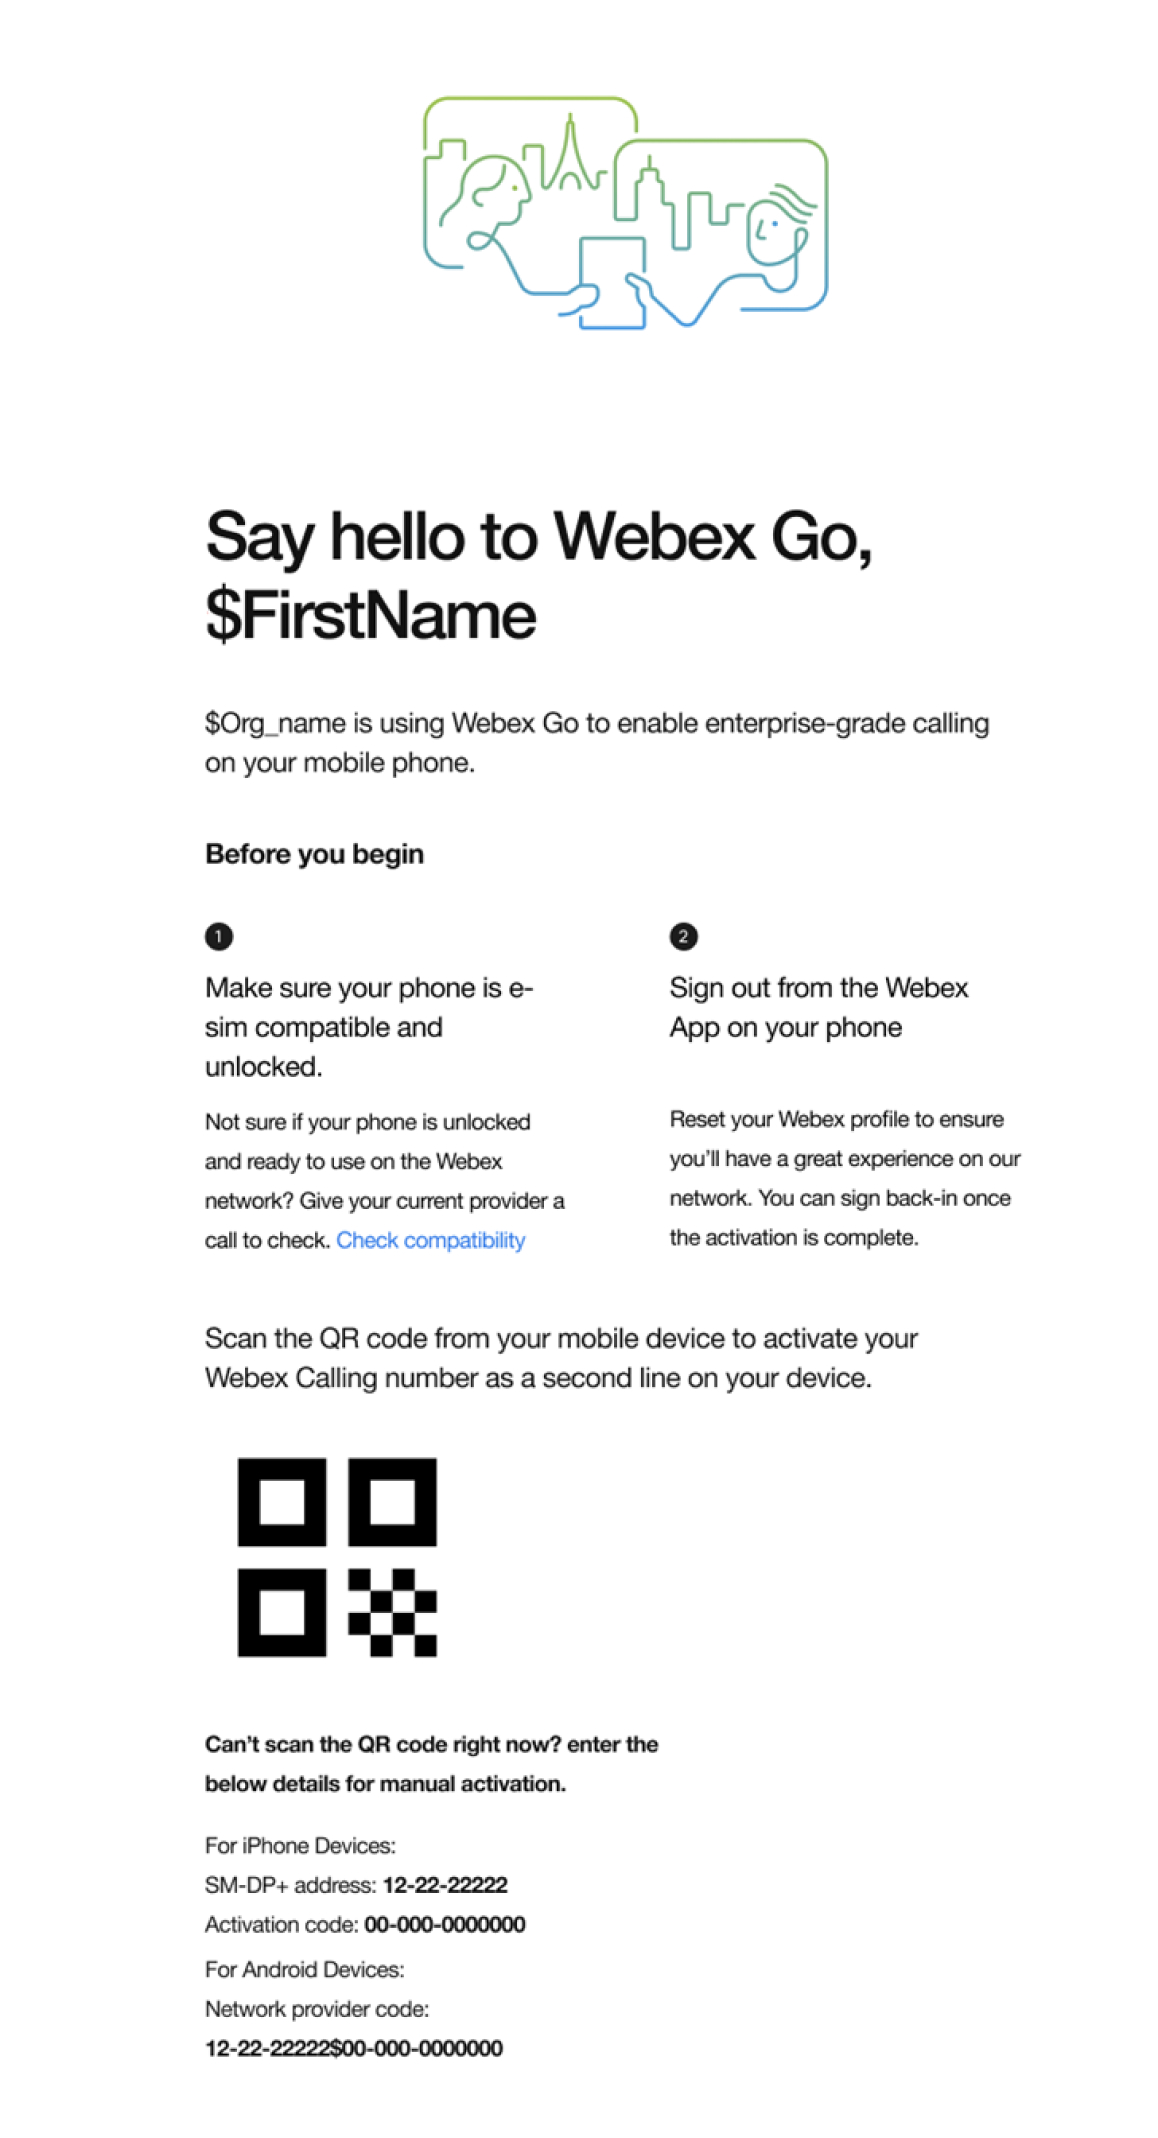
Attiva Webex Go sul tuo cellulare
 Feedback?
Operazioni preliminari
-
Verificare che il telefono sia il vettore sbloccato, compatibile con la doppia SIM e che sia in grado di supportare un profilo eSIM attivo.
-
Webex Go è abilitato attraverso eSIM e richiede la disponibilità di un profilo eSIM attivo sul dispositivo. Fare riferimento ai modelli di dispositivo supportati e al numero di eSIM attive supportate dal dispositivo.
I criteri di blocco dei dispositivi si applicano solo negli Stati Uniti
-
-
Per configurare le impostazioni della modalità di chiamata, disconnettersi dall'applicazione Webex sul cellulare.
-
Accertarsi di disporre di una rete Wi-Fi attiva.
Modelli iPhone supportati
-
iPhone Xr
-
iPhone Xs
-
iPhone Xs Max
-
iPhone SE 2020
-
iPhone 11
-
iPhone 11 Pro
-
iPhone 11 Pro Max
-
iPhone 12
-
iPhone 12 Pro Max
-
iPhone SE 2022
-
iPhone 13
-
iPhone 13 Pro
-
iPhone 13 Pro max
-
iPhone 14
-
iPhone 14 Plus
-
iPhone 14 Pro
-
iPhone 14 Pro Max
Versione OS/software richiesta: iOS 15.4 o versioni successive
Stato blocco dispositivo
Si applica solo ai clienti negli Stati Uniti
-
Vai a Impostazion i → General e → Informazioni su
-
In Blocco vettore non dovrebbe essere presente alcuna limitazioneSIM. Se il messaggio non viene visualizzato, contattare:
-
L'amministratore IT (se sei nel piano aziendale)
-
Gestore telefonico (se si utilizza un piano personale)
-
Scansione codice QR
In base alla lingua impostata nel dispositivo mobile, i termini Dati mobil i e Piano mobil e possono essere utilizzati in sostituzione dei Dati cellular i e del Piano cellulare.
-
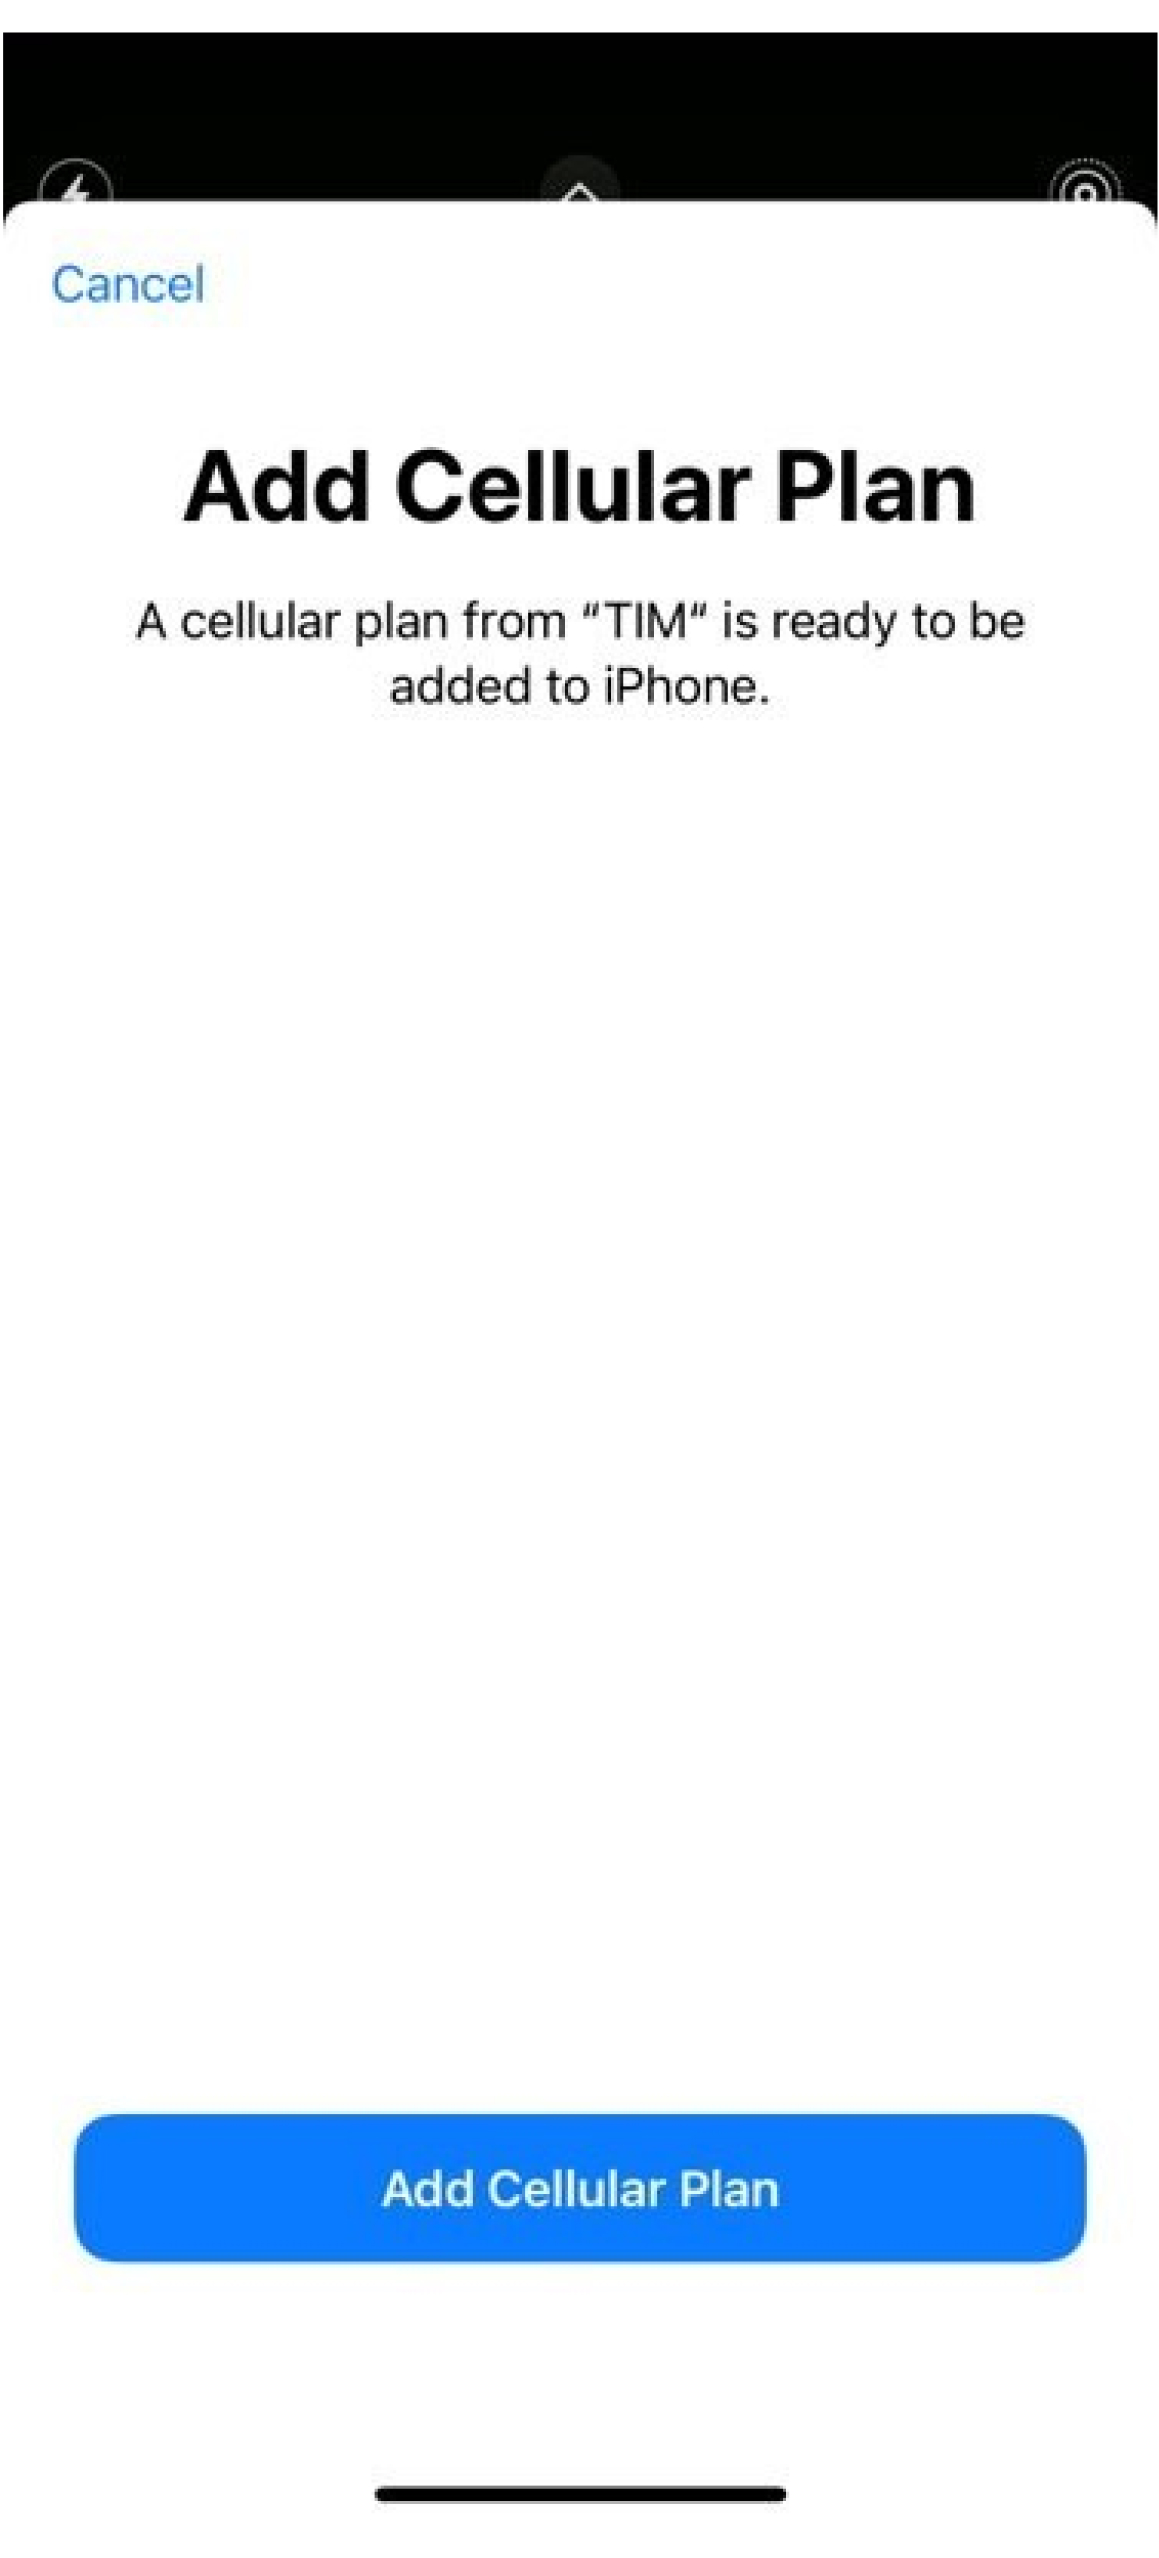
Andare a Impostazioni → sistema dati cellulare → il piano di aggiunta del cellulare.
-
Eseguire la scansione del codice Q R incluso nell'e-mail di attivazione.
-
Toccare Aggiungi piano cellulare.
-
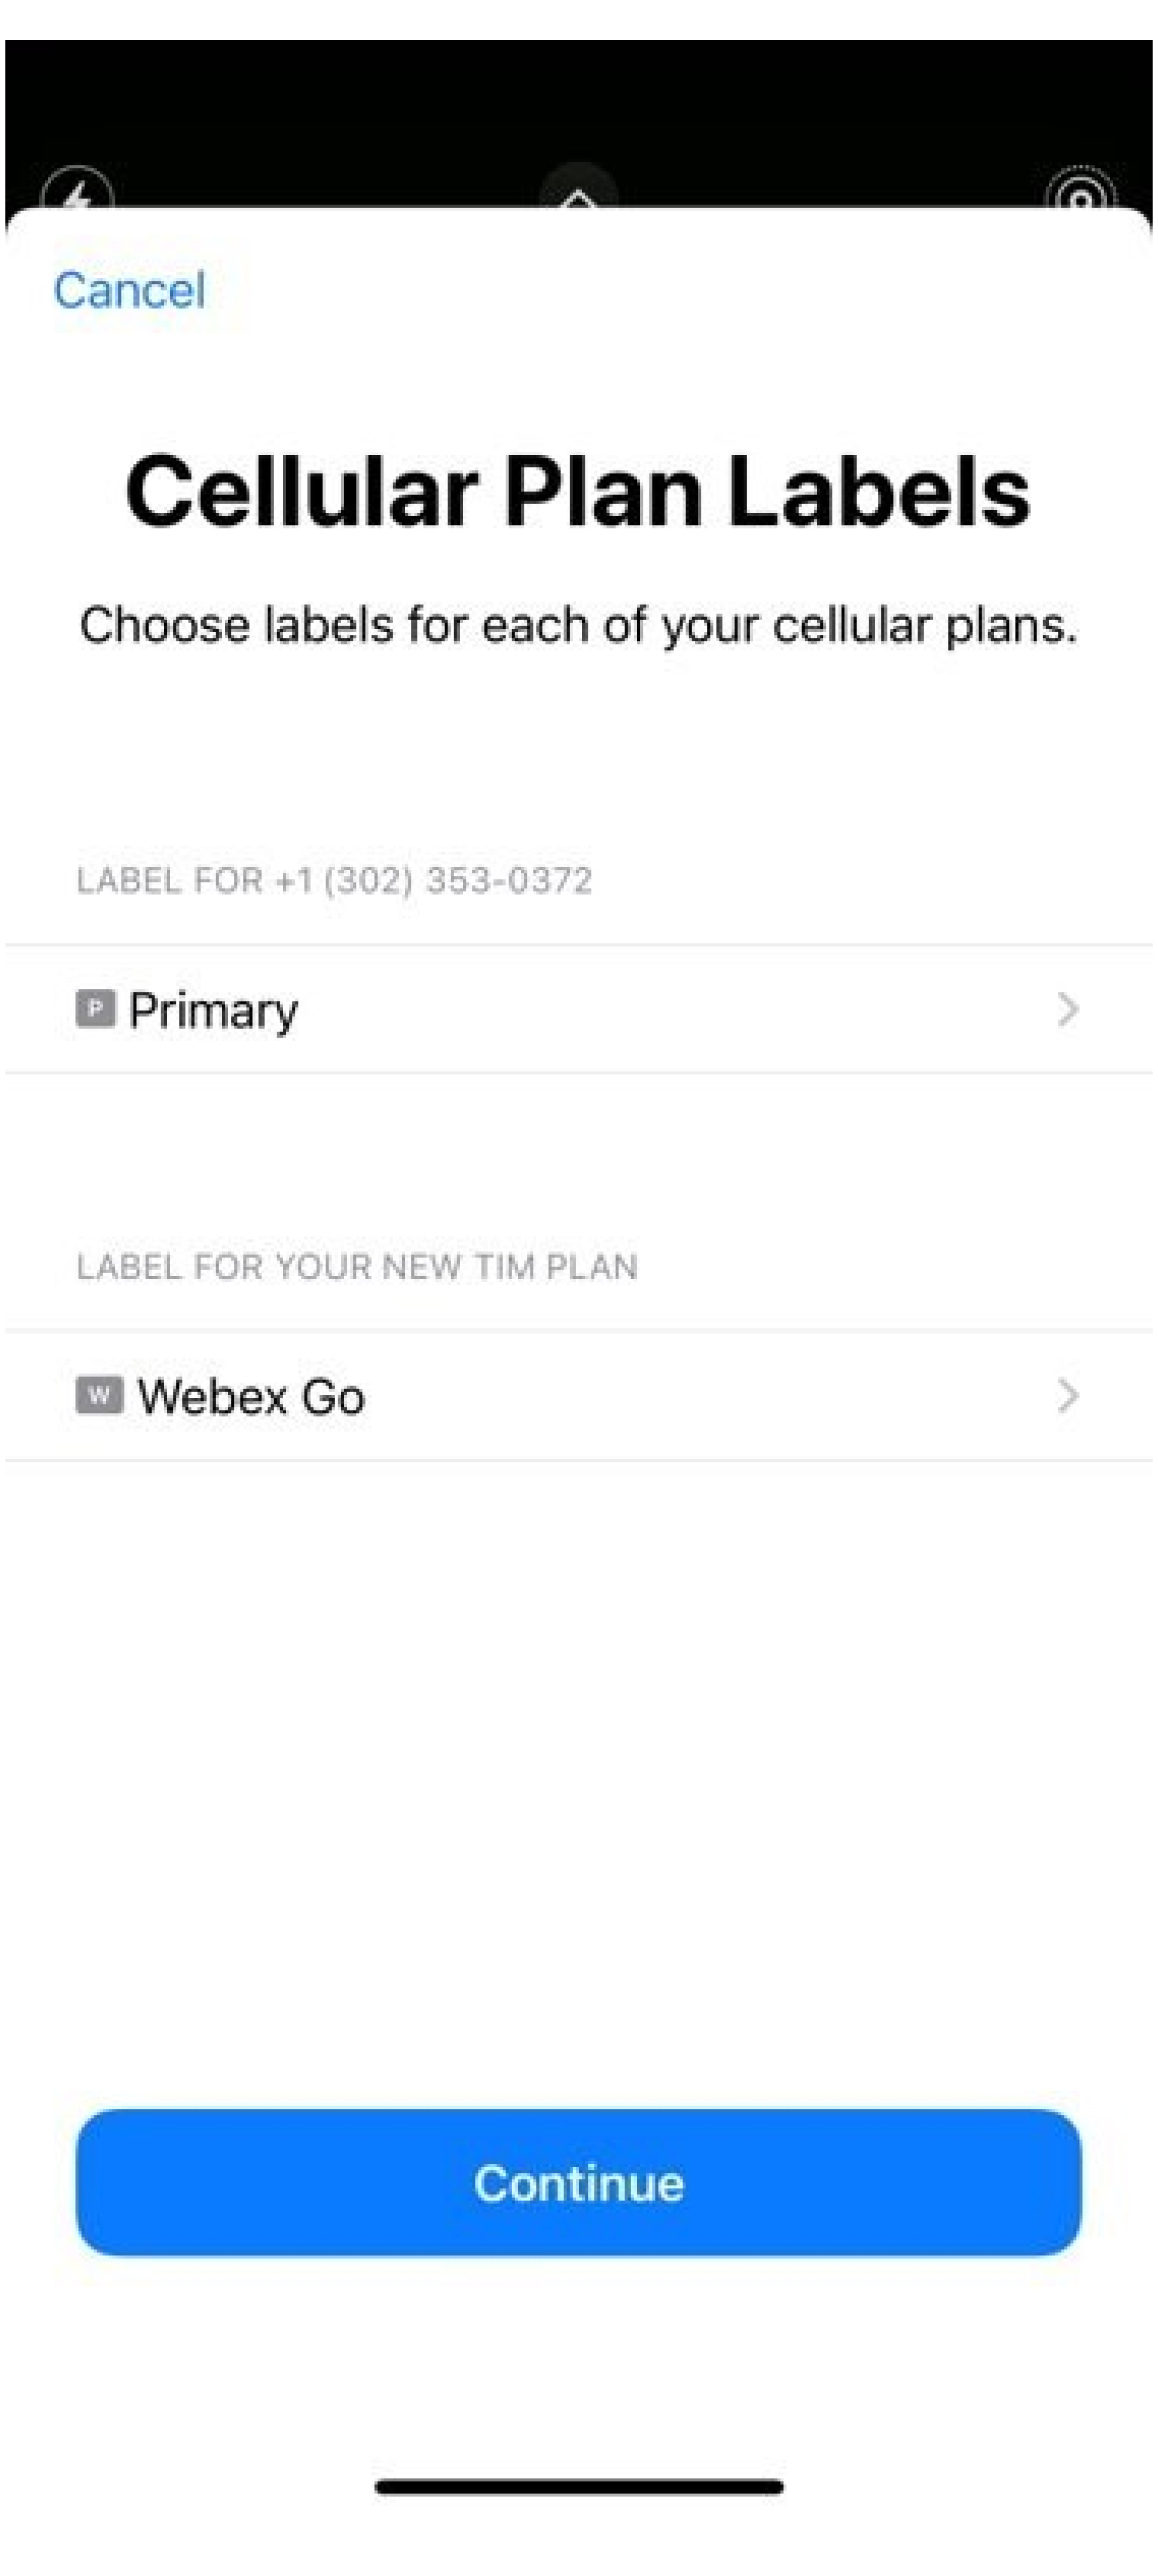
Etichetta il tuo piano: Selezionare un'etichetta esistente o creare un'etichetta personalizzata e fare clic su Continua.
-
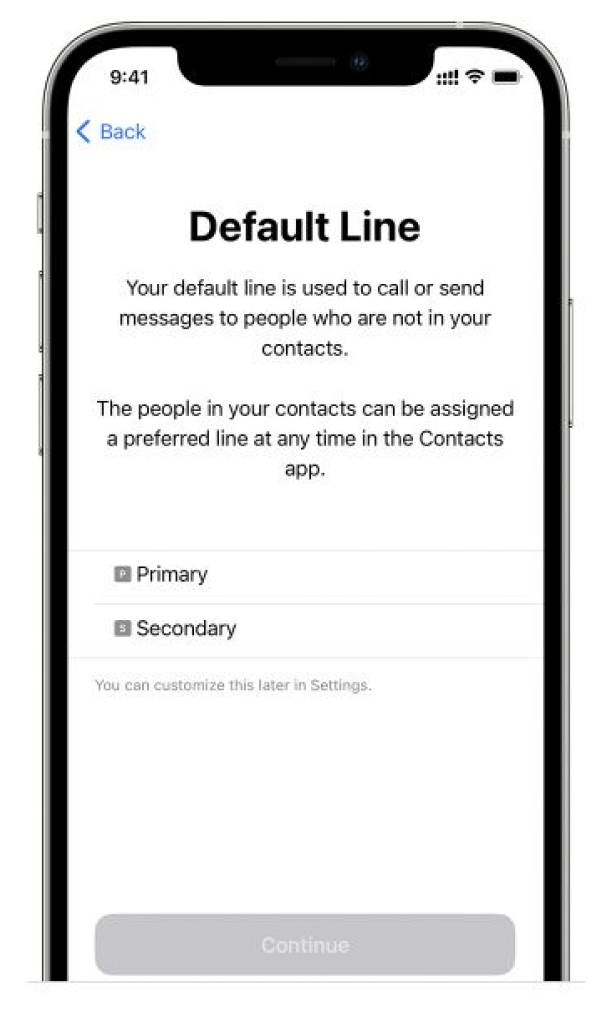
Impostare il numero predefinito: La linea predefinita viene utilizzata quando si chiama o si invia un messaggio a qualcuno che non è presente nell'applicazione Contatti.
Se selezioni Webex come linea predefinita, le chiamate verranno acquisite nel Record dettagliato chiamata (CDR) per Webex Calling. Tieni presente che i criteri di sicurezza e conformità della tua organizzazione relativi a Webex Calling ora si applicano a questo numero che sta utilizzando un piano mobile eSIM su un dispositivo mobile personale. Inoltre, la funzione SMS aziendale non è attualmente disponibile con i numeri Webex Go e deve essere abilitata separatamente con il provider Cloud Connect.
-
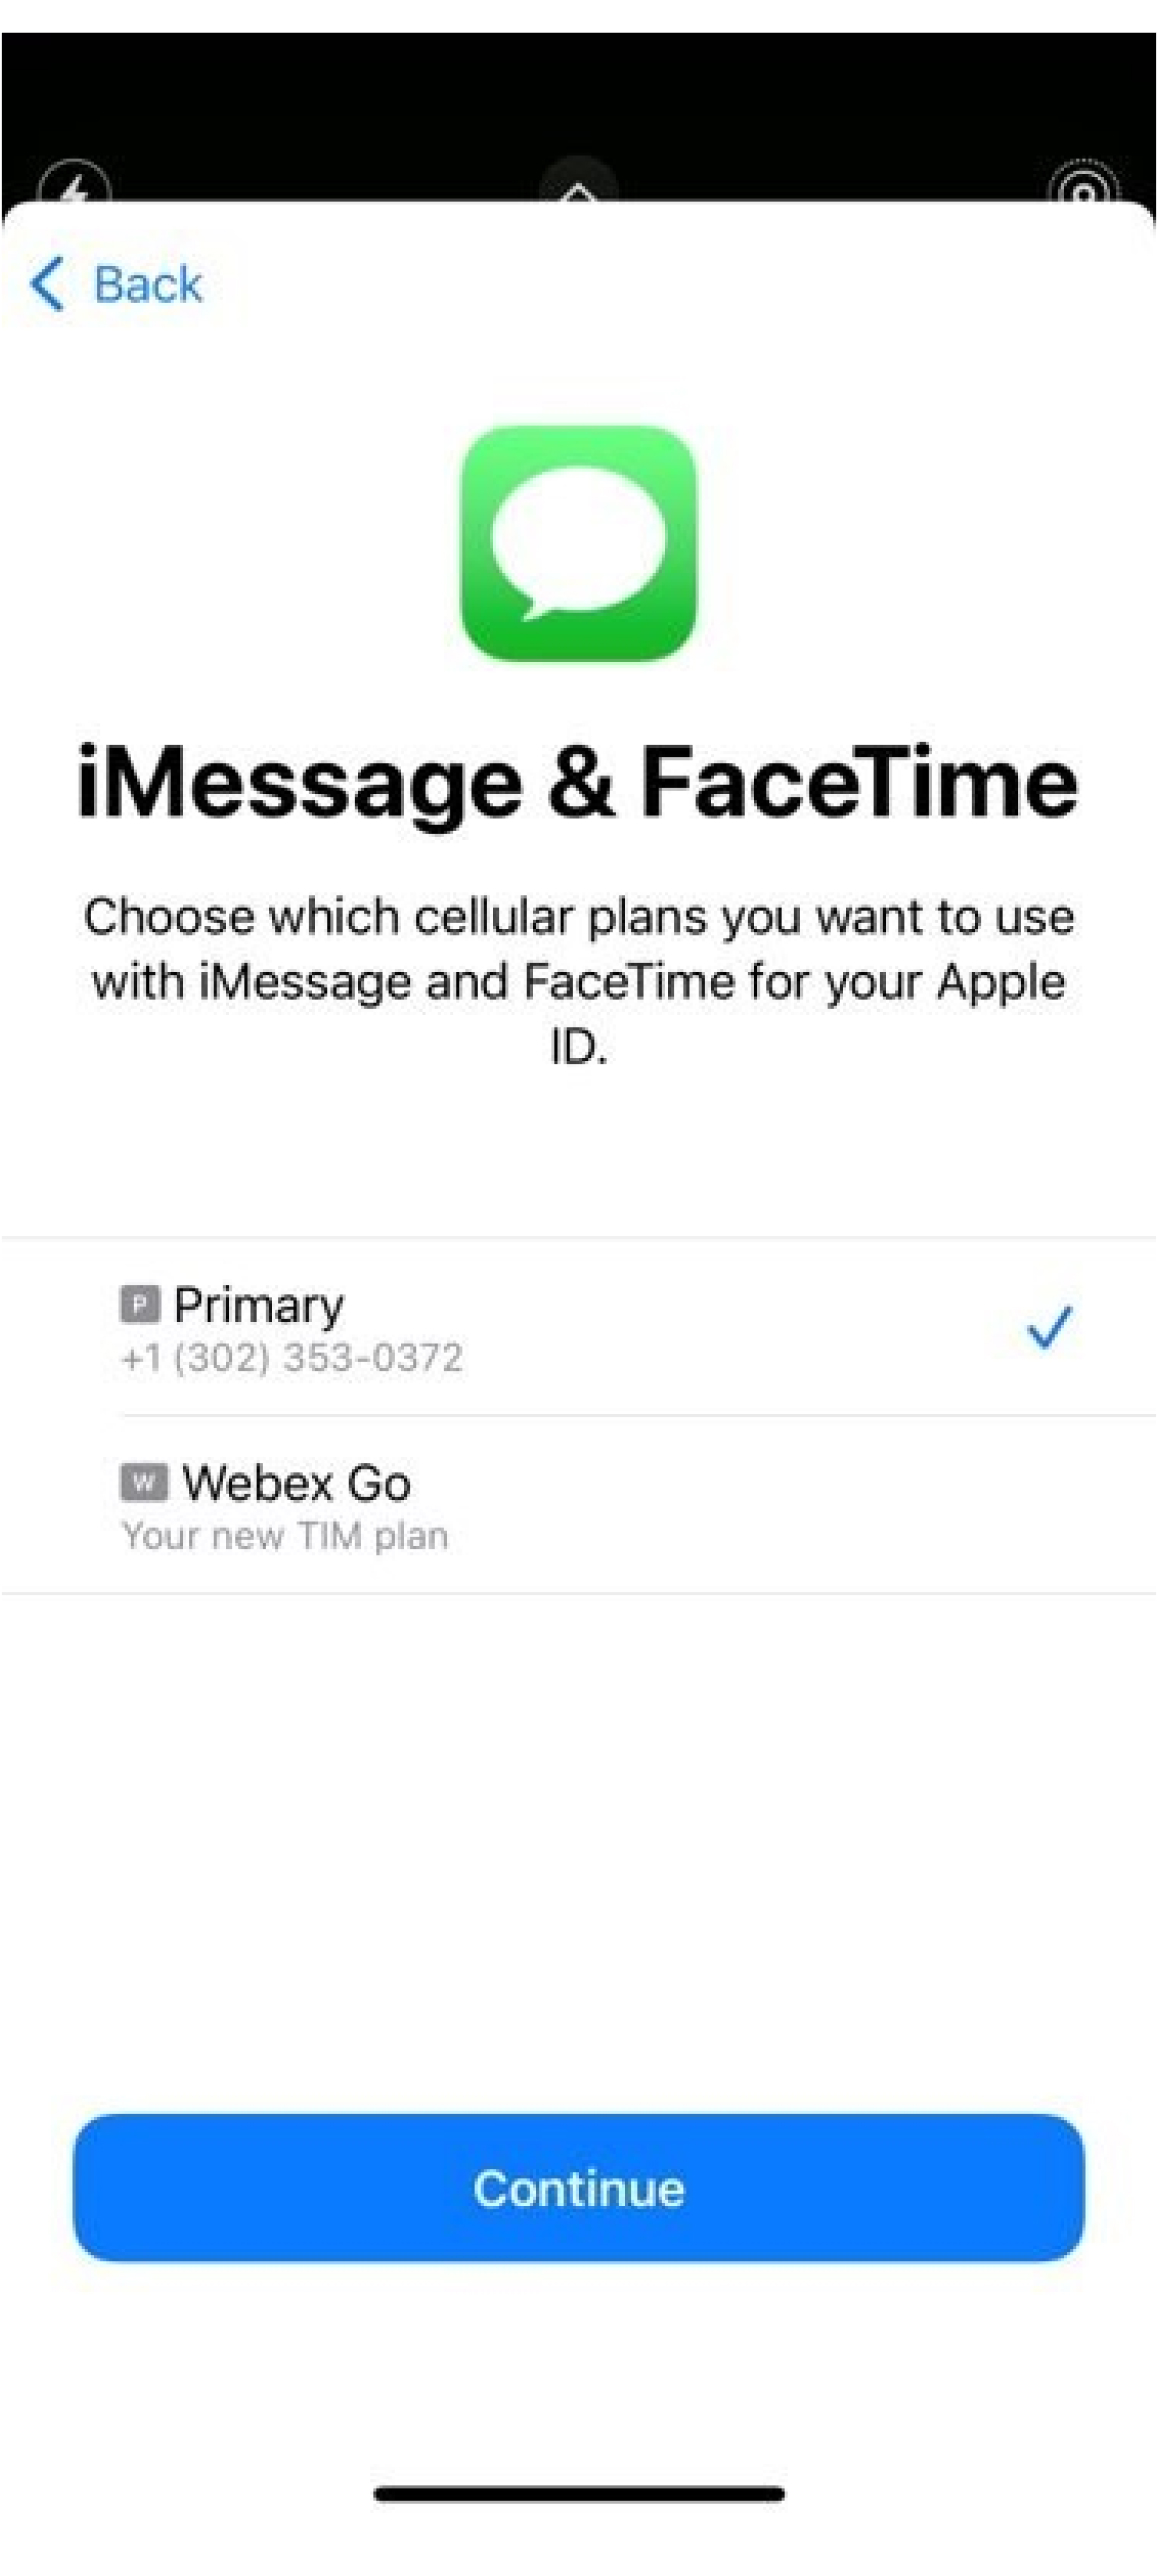
Imposta piano cellulare per iMessage e FaceTime: Se si utilizza iOS 13 e versioni successive, è possibile scegliere il piano cellulare che si desidera utilizzare per iMessage e FaceTime. Si consiglia di impostarlo sul piano esistente attivo sul dispositivo.
-
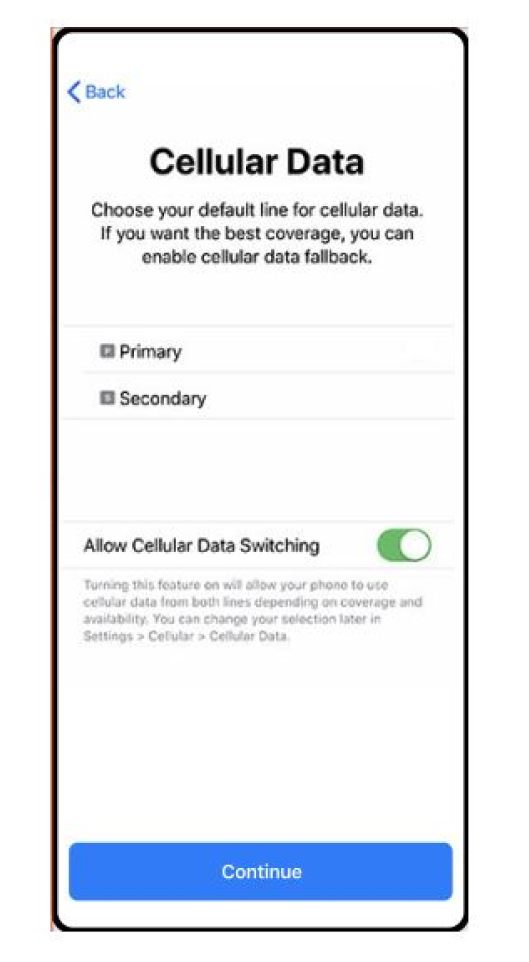
Imposta linea predefinita per dati cellulare: Si consiglia di impostarlo sul piano esistente attivo sul dispositivo. Tuttavia, attivare Consenti passaggio dati cellulare per accedere alle applicazioni quando è attiva una chiamata sulla linea aziendale.
-
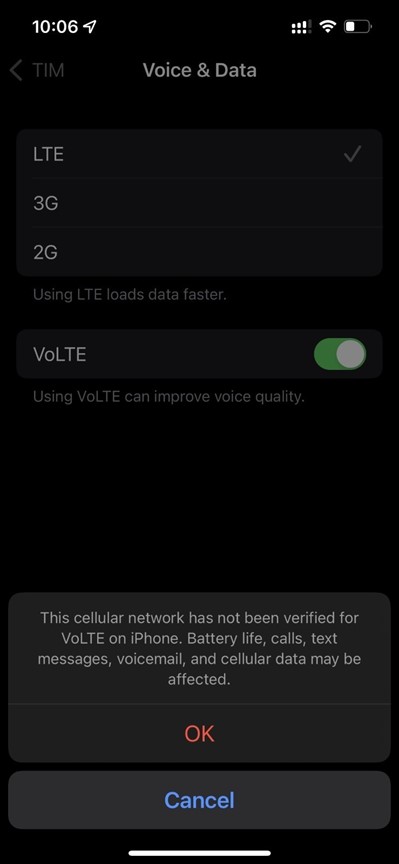
Webex Go sfrutta la rete mobile VoLTE per l'indirizzamento delle chiamate. Verificare che le seguenti impostazioni siano abilitate e riavviare il telefono cellulare per utilizzare il servizio.
In Voce e dati, assicurarsi che sia selezionato 4G o LTE per i dati e che VoLTE sia abilitato per la voce.
Dispositivo di scorrimento del roaming dati abilitato.
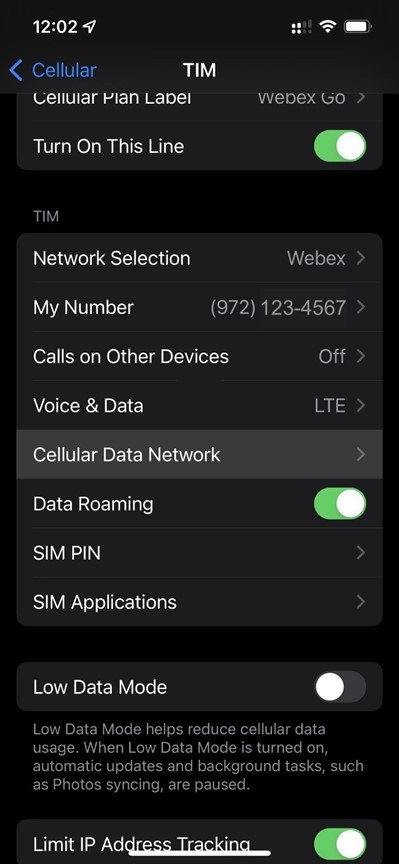
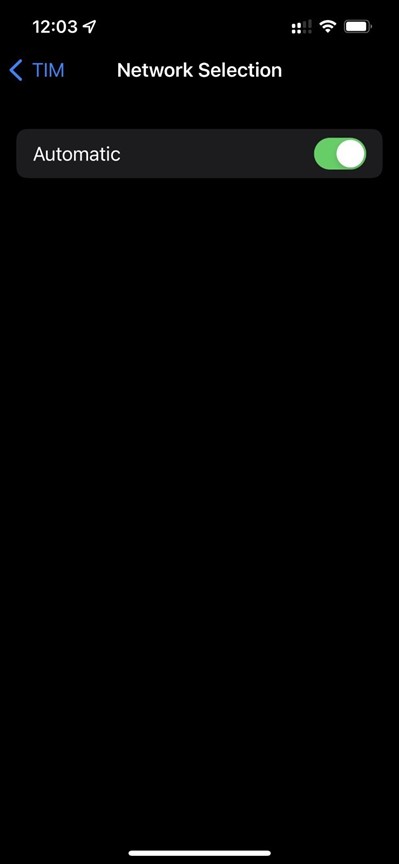
Il dispositivo di scorrimento Selezione rete è impostato su Automatico.
-
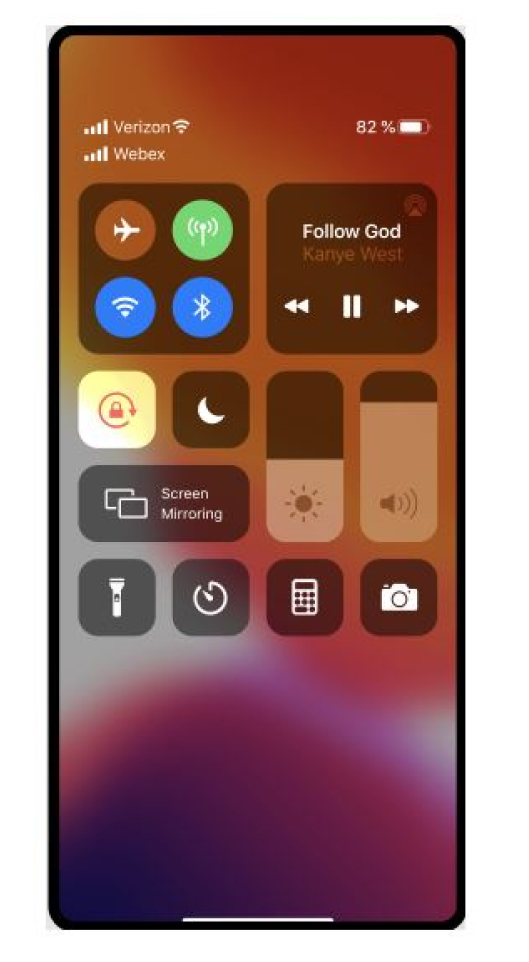
Al termine dell'impostazione, riavviare il telefono cellulare. È necessario visualizzare la rete Webe x nel centro di controll o . Per aprire il centro di controllo, scorrere verso il basso dall'angolo superiore destro dello schermo dell'iPhone.
Inserire manualmente il piano
-
Andare a Impostazioni.
-
Toccare Cellulare o Dati mobili.
-
Toccare Aggiungi piano cellulare.
-
Toccare Inserisci manualmente i dettagli, nella parte inferiore dello schermo dell'iPhone, quindi inserire SM-DP+indirizz o e codice di attivazion e forniti nel messaggio e-mail. Seguire i passaggi da 5 a 9 della procedura Scansione codic e QR per completare l'impostazione.
Per informazioni sull'uso di dual SIM con e SISTEMA e SISTEMA ERE, vedere https://support.apple.com/en-us/HT209044.
Desideri vedere come è possibile farlo? Guarda questa dimostrazione vide o su come attivare Webex Go sull'iPhone.Operazioni preliminari
-
Verificare che il telefono sia il vettore sbloccato, compatibile con la doppia SIM e che sia in grado di supportare un profilo eSIM attivo.
-
Webex Go è abilitato attraverso eSIM e richiede la disponibilità di un profilo eSIM attivo sul dispositivo. Fare riferimento ai modelli di dispositivo supportati e al numero di eSIM attive supportate dal dispositivo.
I criteri di blocco dei dispositivi si applicano solo negli Stati Uniti
-
-
Disconnettersi dall'applicazione Webex sul telefono cellulare per configurare le impostazioni della modalità di chiamata.
-
Accertarsi di disporre di una rete Wi-Fi attiva.
Modelli Samsung supportati
-
Galassia S20 FE 5G
-
Galassia S21 5G
-
Galassia S21 + 5G
-
Galassia S22
-
Galassia S22+
-
Galassia S22 Ultra
-
Galassia S23
-
Galassia S23+
-
Galassia S23 Ultra
-
Galaxy XCover 6 Pro
-
Galaxy Z Flip4
Versione OS/software richiesta: 13 Una Ui 5.1 o successiva
Stato blocco dispositivo
Si applica solo ai clienti negli Stati Uniti
-
Se sei in un piano aziendale, collabora con l'amministratore IT per sbloccare il tuo dispositivo.
-
Se si utilizza un piano personale, contattare il proprio provider di servizi. Collegamenti agli strumenti IMEI offerti dai provider di servizi:
Scansione codice QR
-
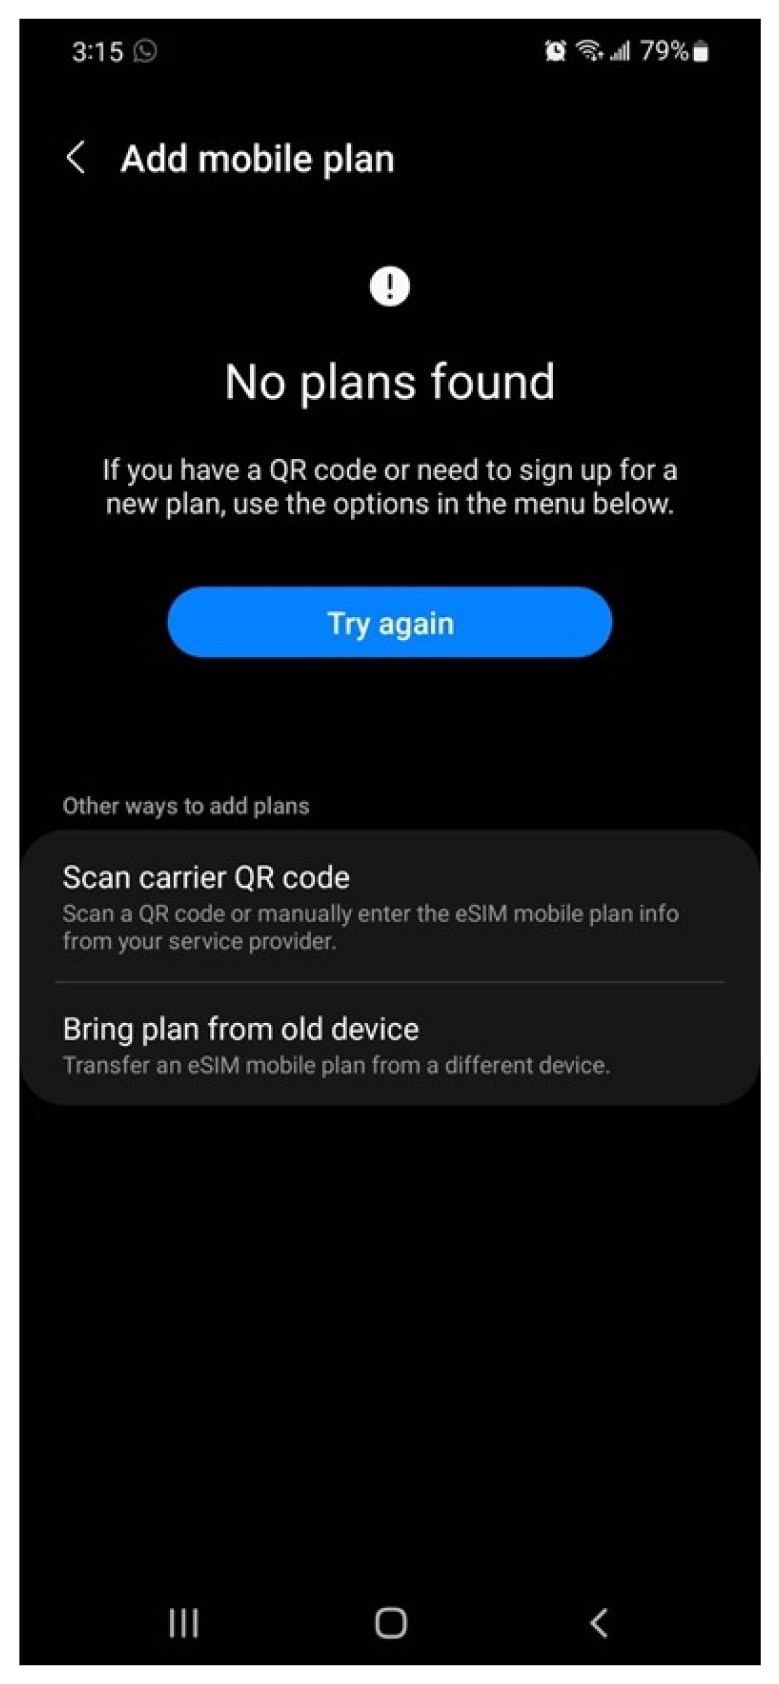
Andare a Impostazioni → Connessioni → manager schedaSIM.
Toccare Aggiungi piano mobile e selezionare Esegui scansione vettore codice QR.
-
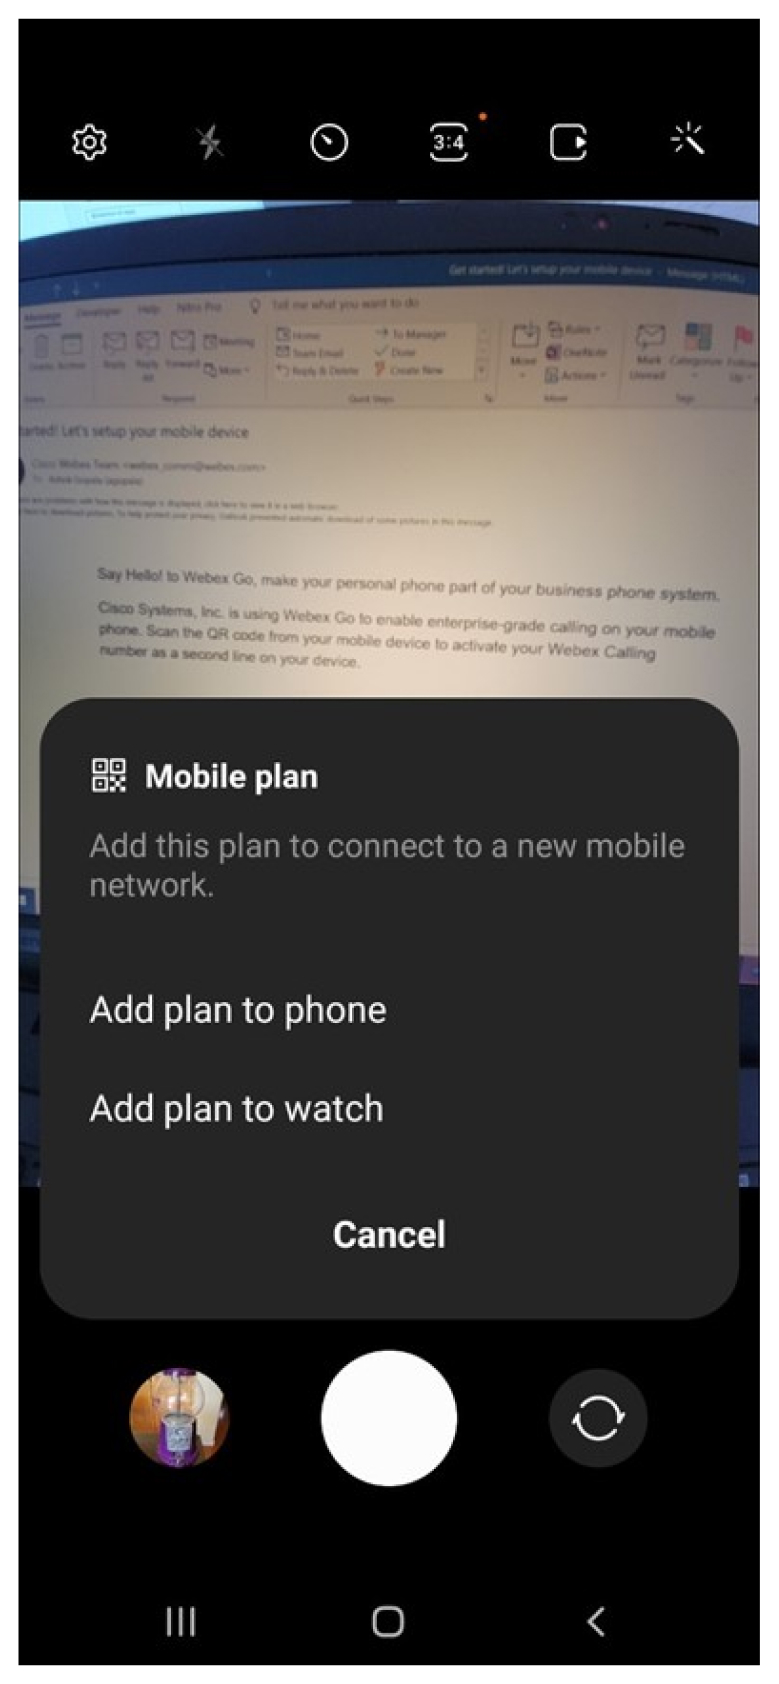
Eseguire la scansione del codice QR inviato tramite e-mail.
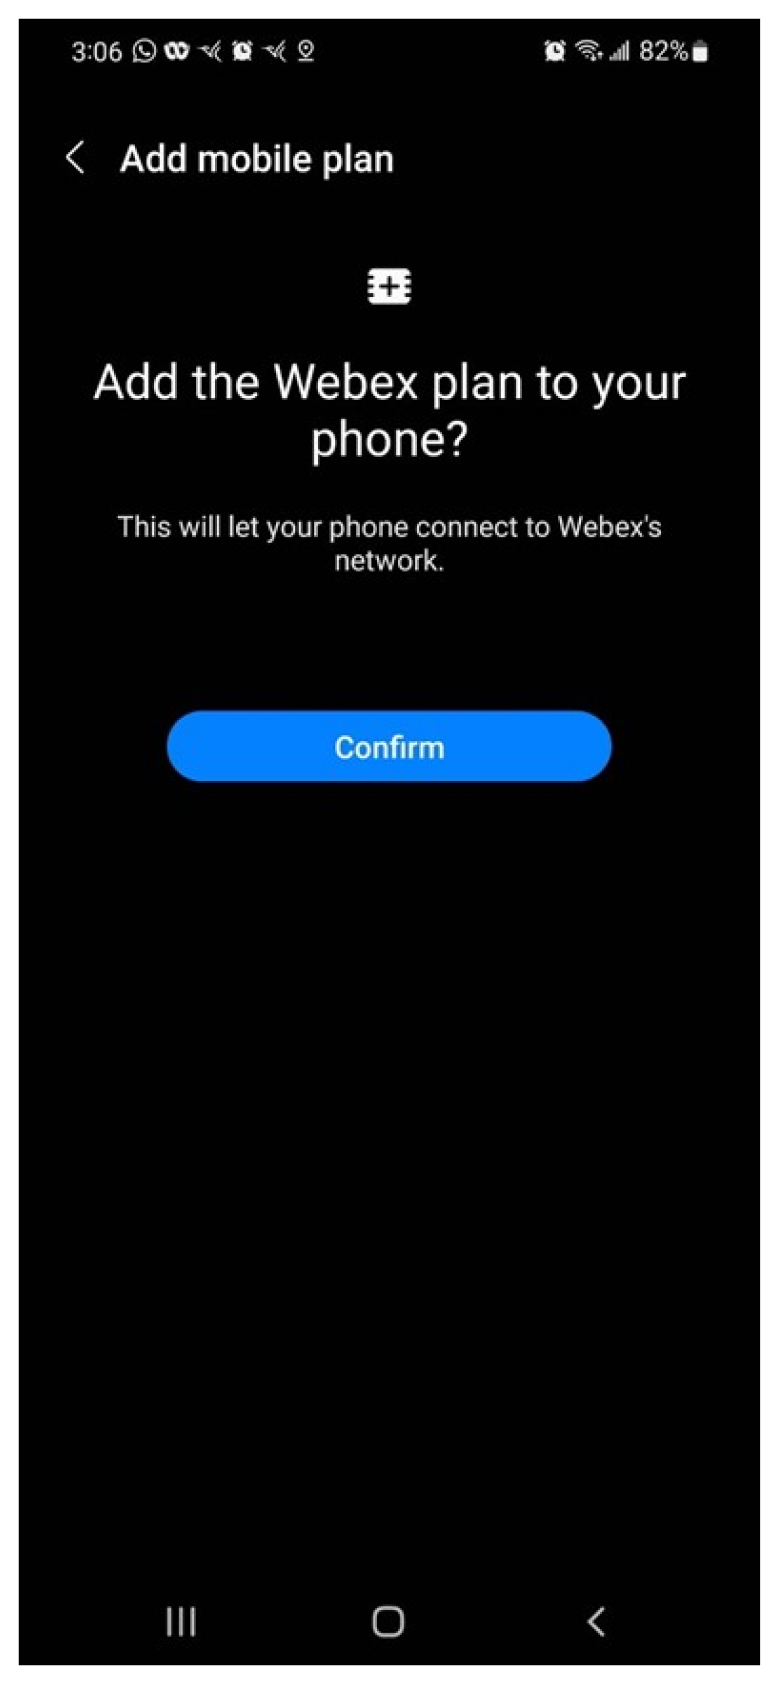
Selezionare Aggiungi piano al telefon o se viene visualizzato il messaggio Aggiungi questo piano a una nuova rete mobil e.
Fare clic su Confir m (Conferma) nella schermata successiva per aggiungere il piano al dispositivo
Fare clic su Consenti quando viene richiesto di consentire l'uso secondario di SIM durante le chiamate.

-
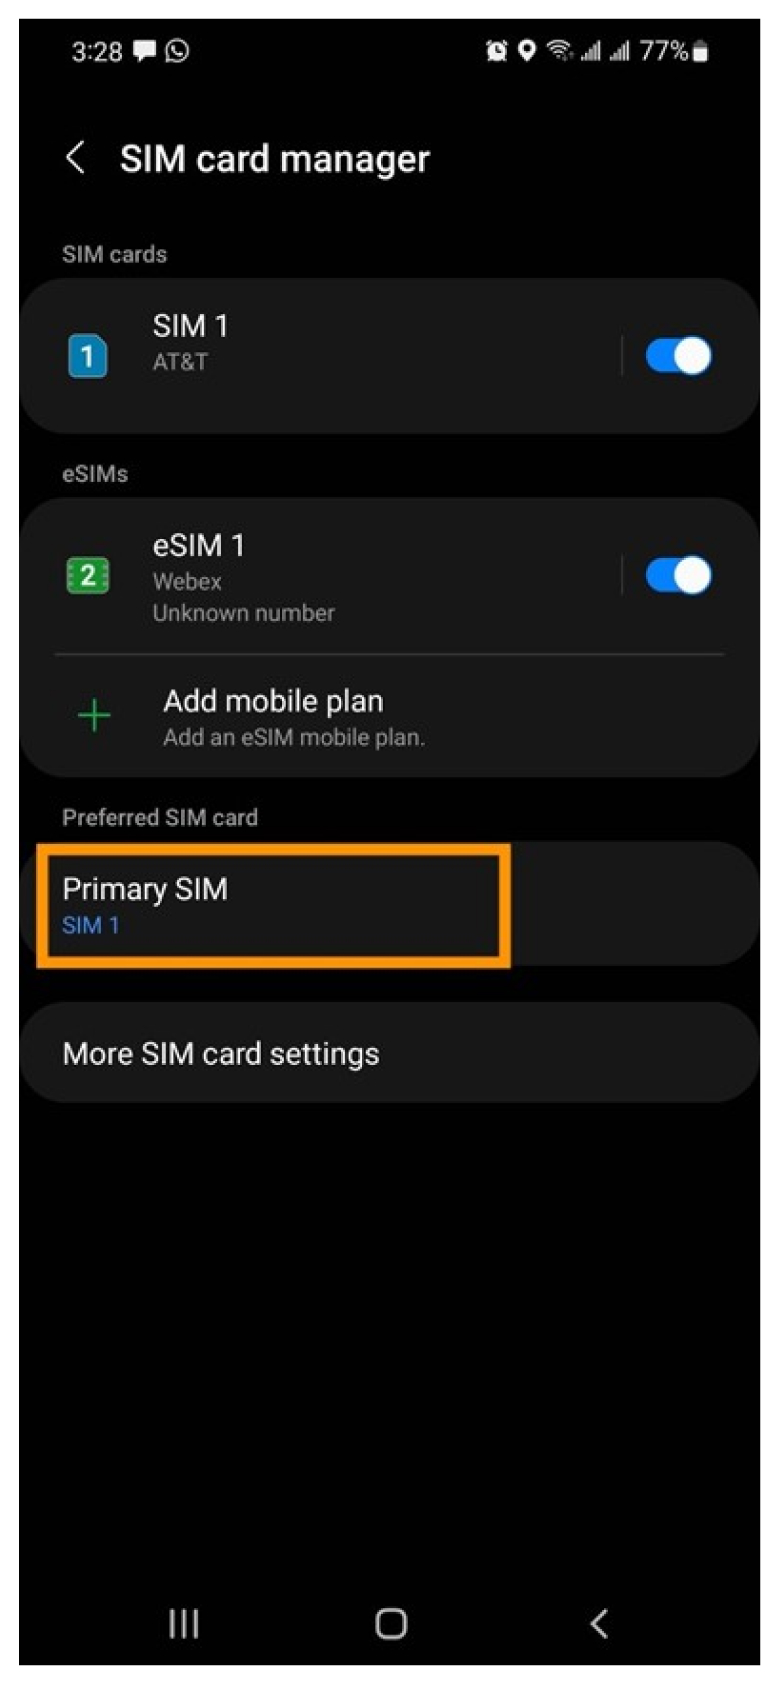
Impostare la SIM preferita: La SIM preferita è il piano cellulare predefinito utilizzato per chiamate, SMS e dati.
Se si seleziona Webex come SIM principale, le chiamate vengono registrate. Tieni presente che i criteri di sicurezza e conformità della tua organizzazione si applicano per le chiamate che passano attraverso il piano cellulare aziendale. Inoltre, SMS non è attualmente disponibile con il piano aziendale.
Aggiungi manualmente il piano
In caso di problemi con il codice QR, aggiungere manualmente il piano inserendo il codice del provider di rete nel messaggio e-mail.
Operazioni preliminari
-
Verificare che il telefono sia il vettore sbloccato, compatibile con la doppia SIM e che sia in grado di supportare un profilo eSIM attivo.
-
Webex Go è abilitato attraverso eSIM e richiede la disponibilità di un profilo eSIM attivo sul dispositivo. Fare riferimento ai modelli di dispositivo supportati e al numero di eSIM attive supportate dal dispositivo.
I criteri di blocco dei dispositivi si applicano solo negli Stati Uniti
-
-
Disconnettersi dall'applicazione Webex sul telefono cellulare per configurare le impostazioni della modalità di chiamata.
-
Accertarsi di disporre di una rete Wi-Fi attiva.
Modelli Google Pixel supportati
-
Pixel 6
-
Pixel 6a
-
Pixel 6 pro
-
Pixel 7
-
Pixel 7 pro
Versione OS/software richiesta: Android 13 o versioni successive
Stato blocco dispositivo:
-
Se si utilizza un piano aziendale, collaborare con l'amministratore IT per sbloccare il dispositivo.
-
Se si utilizza un piano personale, contattare il provider del servizio. Collegamenti agli strumenti IMEI offerti dai provider di servizi:
Esegui la scansione del codice QR
-
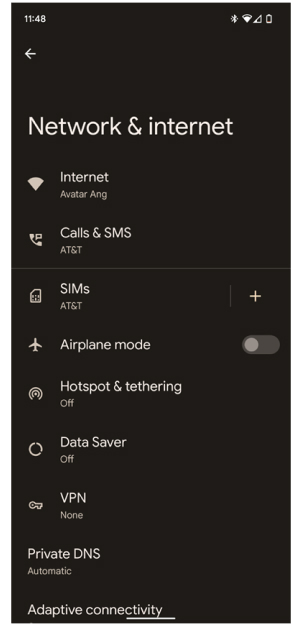
Andare a Impostazioni : > Rete e Internet.
-
Toccare il segno + accanto ai SIM.
-
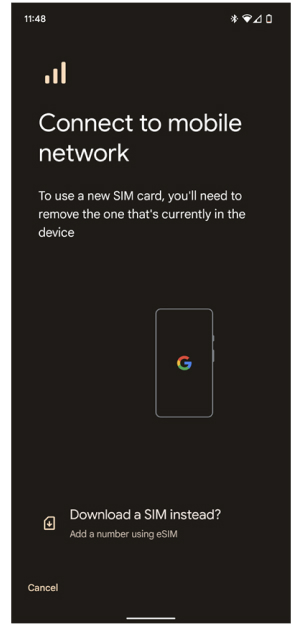
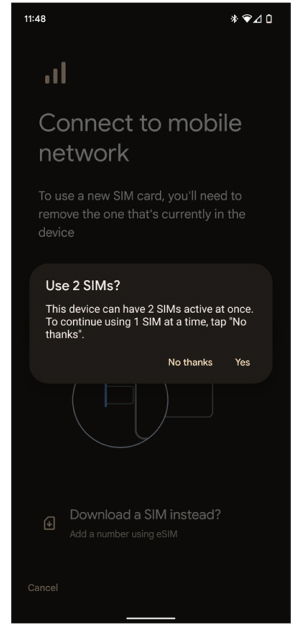
Nella schermata Connetti alla rete mobile , toccare Il download di una SIM.
-
Toccare Sì nella schermata Usa 2 SIMS? per impostare due SIM attivi contemporaneamente.
-
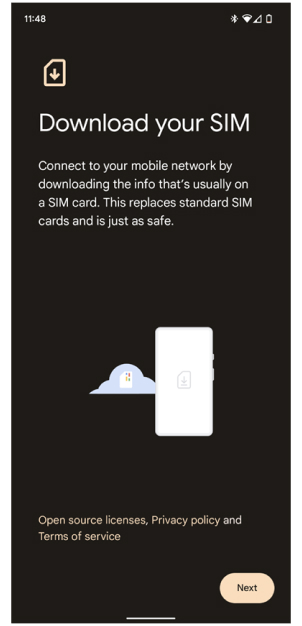
Fare clic su Avanti su Scarica la schermata SIM .
-
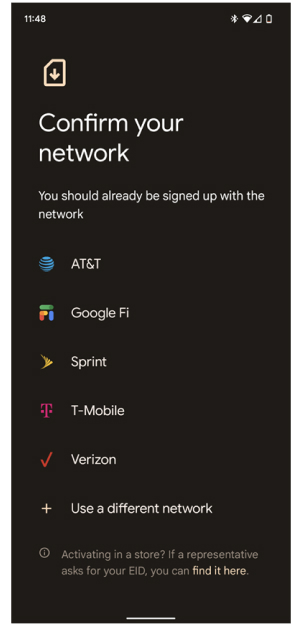
Fare clic su + sign (accedi) accanto a Use a different network (Usa una rete diversa ) in Confirm your network screen (Conferma schermata di rete).
-
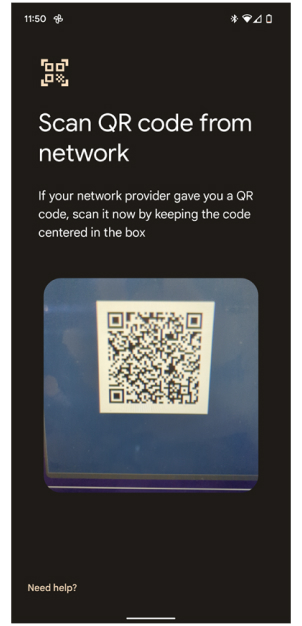
Eseguire la scansione della codice QR.
-
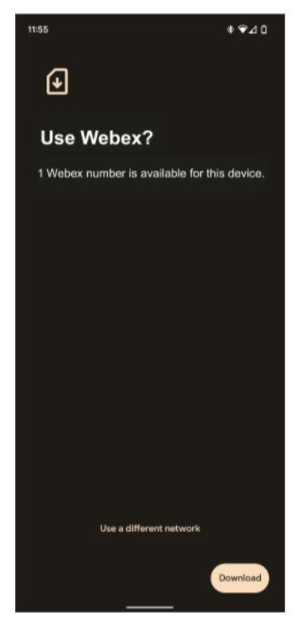
Confermare che si desidera utilizzare il numero Webex facendo clic su Scarica nella schermata Usa Webex ?.
-
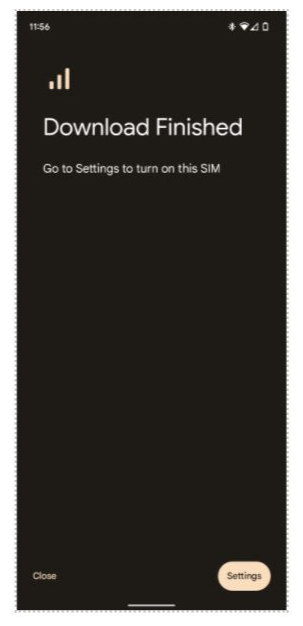
Al termine del download, fare clic su Settings (Impostazioni ) per attivare la SIM.
-
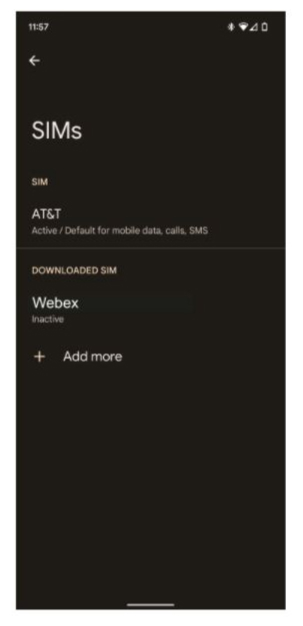
Selezionare Webex sotto SIM scaricata.
-
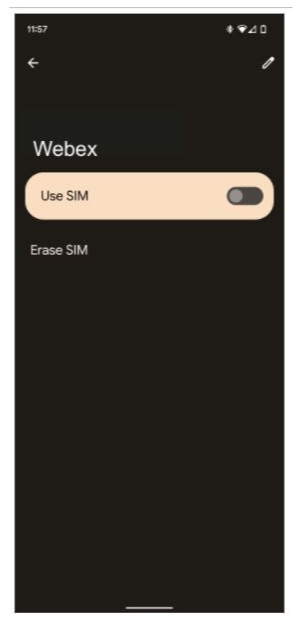
Attivare l'interruttore e selezionare Sì quando viene richiesto di confermare.
-
-
Abilitare Roaming per utilizzare i dati sulla connessione e ROAMING.
-
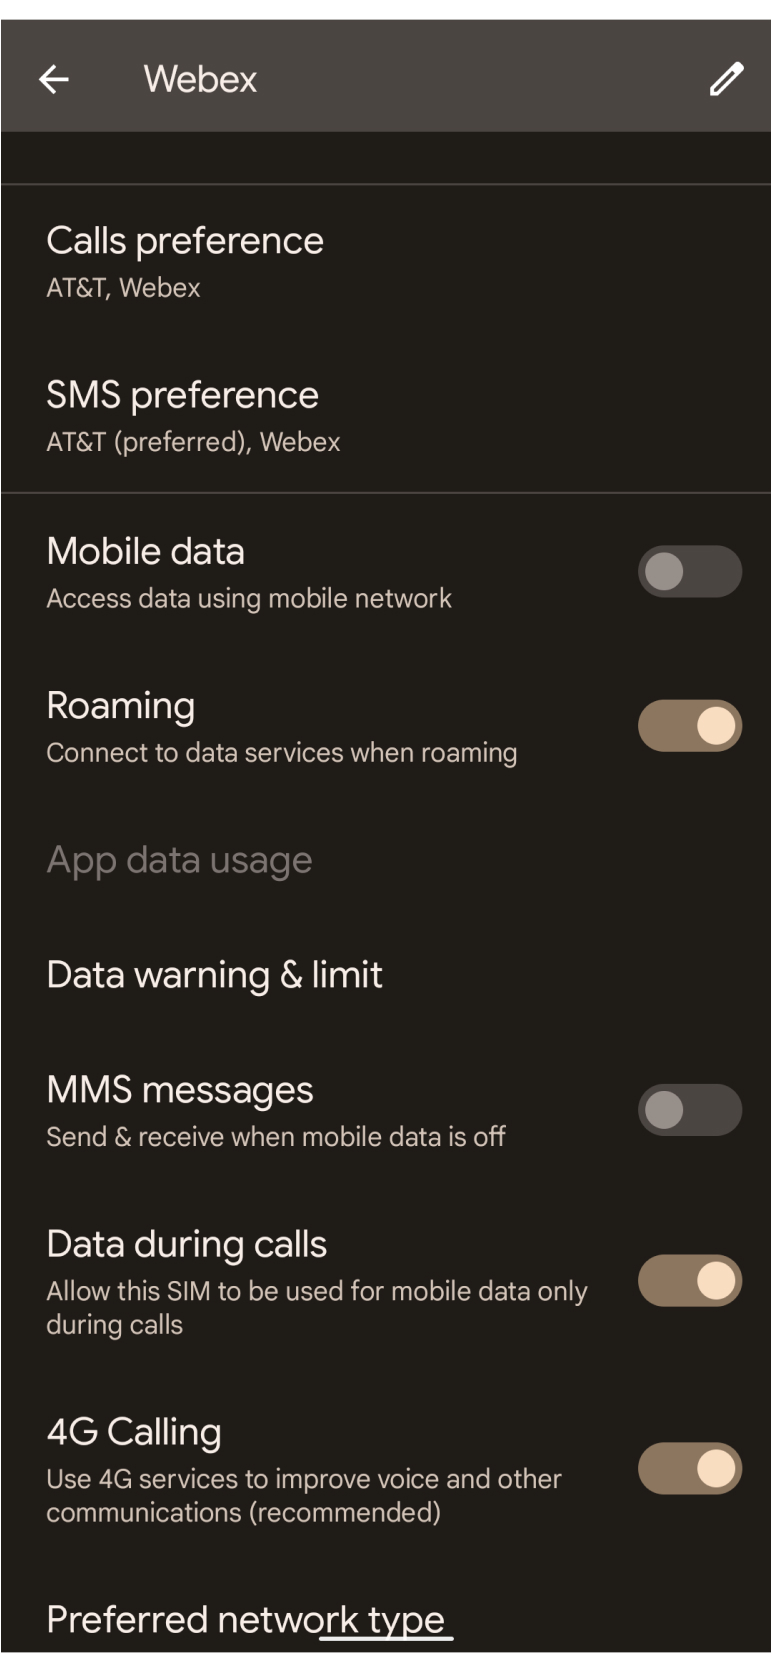
Impostazione delle preferenze Dual SIM:
-
Solo una SIM può essere il valore predefinito per i dati. Se si dispone già di un set impostato, si otterrà una notifica. Si consiglia di utilizzare come valore predefinito per i dati il SIM installato in precedenza. Tuttavia, accertarsi che l'opzione Dati durante chiamate sia abilitata per Webex SIM.
-
Per le chiamate, impostare le preferenze su Chiedi ogni volta.
-
Per SMS, impostare le preferenze in SIM installate in precedenza.
-
Inserire manualmente il piano
-
Se si sta attivando manualmente Webex Vai, seguire le istruzioni dal punto 1 al punto 6 precedente. Nella schermata Scansione del codice QR , fare clic su Need help (Occorre assistenza) nella parte inferiore dello schermo e inserire manualmente il codice del provider di rete incluso nel messaggio e-mail di attivazione.
-
Dopo aver inserito il codice, seguire il punto 8 fino al punto 11 precedente.
Per ulteriori informazioni sull'articolo google pixel.
L'operatore mobile Webex Go non richiede un codice QR per l'attivazione. L'attivazione è gestita dall'amministratore. Per ulteriori informazioni sul processo di aggiunta dei numeri mobili e di assegnazione agli utenti in Control Hub, vedi Provisioning di Webex Go. Una volta eseguito il provisioning dall'amministratore, AT&T Cloud Voice per Webex Go Bolt-on o per il codice operativo del servizio viene automaticamente abilitato sul retro e deve essere immediatamente abilitato quando il numero di cellulare viene assegnato in Control Hub. Nessuna azione richiesta dall'utente.
Una volta assegnato il numero di cellulare dall'amministratore, tutti i dispositivi Webex, inclusi il cellulare AT&T, il telefono fisso Webex, il sistema da scrivania o da sala e il laptop con l'app Webex, condividono il numero di telefono cellulare AT&T. Viene eseguito anche l'aggiornamento alla casella vocale Webex e si dispone dell'accesso a tutte le funzioni di Webex Calling.
Per gli amministratori:
L'operatore mobile Webex Go viene attivato/predisposto richiedendo l'autenticazione e l'attivazione dei numeri di cellulare dall'operatore mobile, quindi assegnandoli a un utente come linea principale (sostituendo il numero fisso aziendale). Per informazioni su come aggiungere numeri mobili in Control Hub e assegnarli a un utente, vedi Provisioning Webex Go.


