
Merci pour votre commentaire.
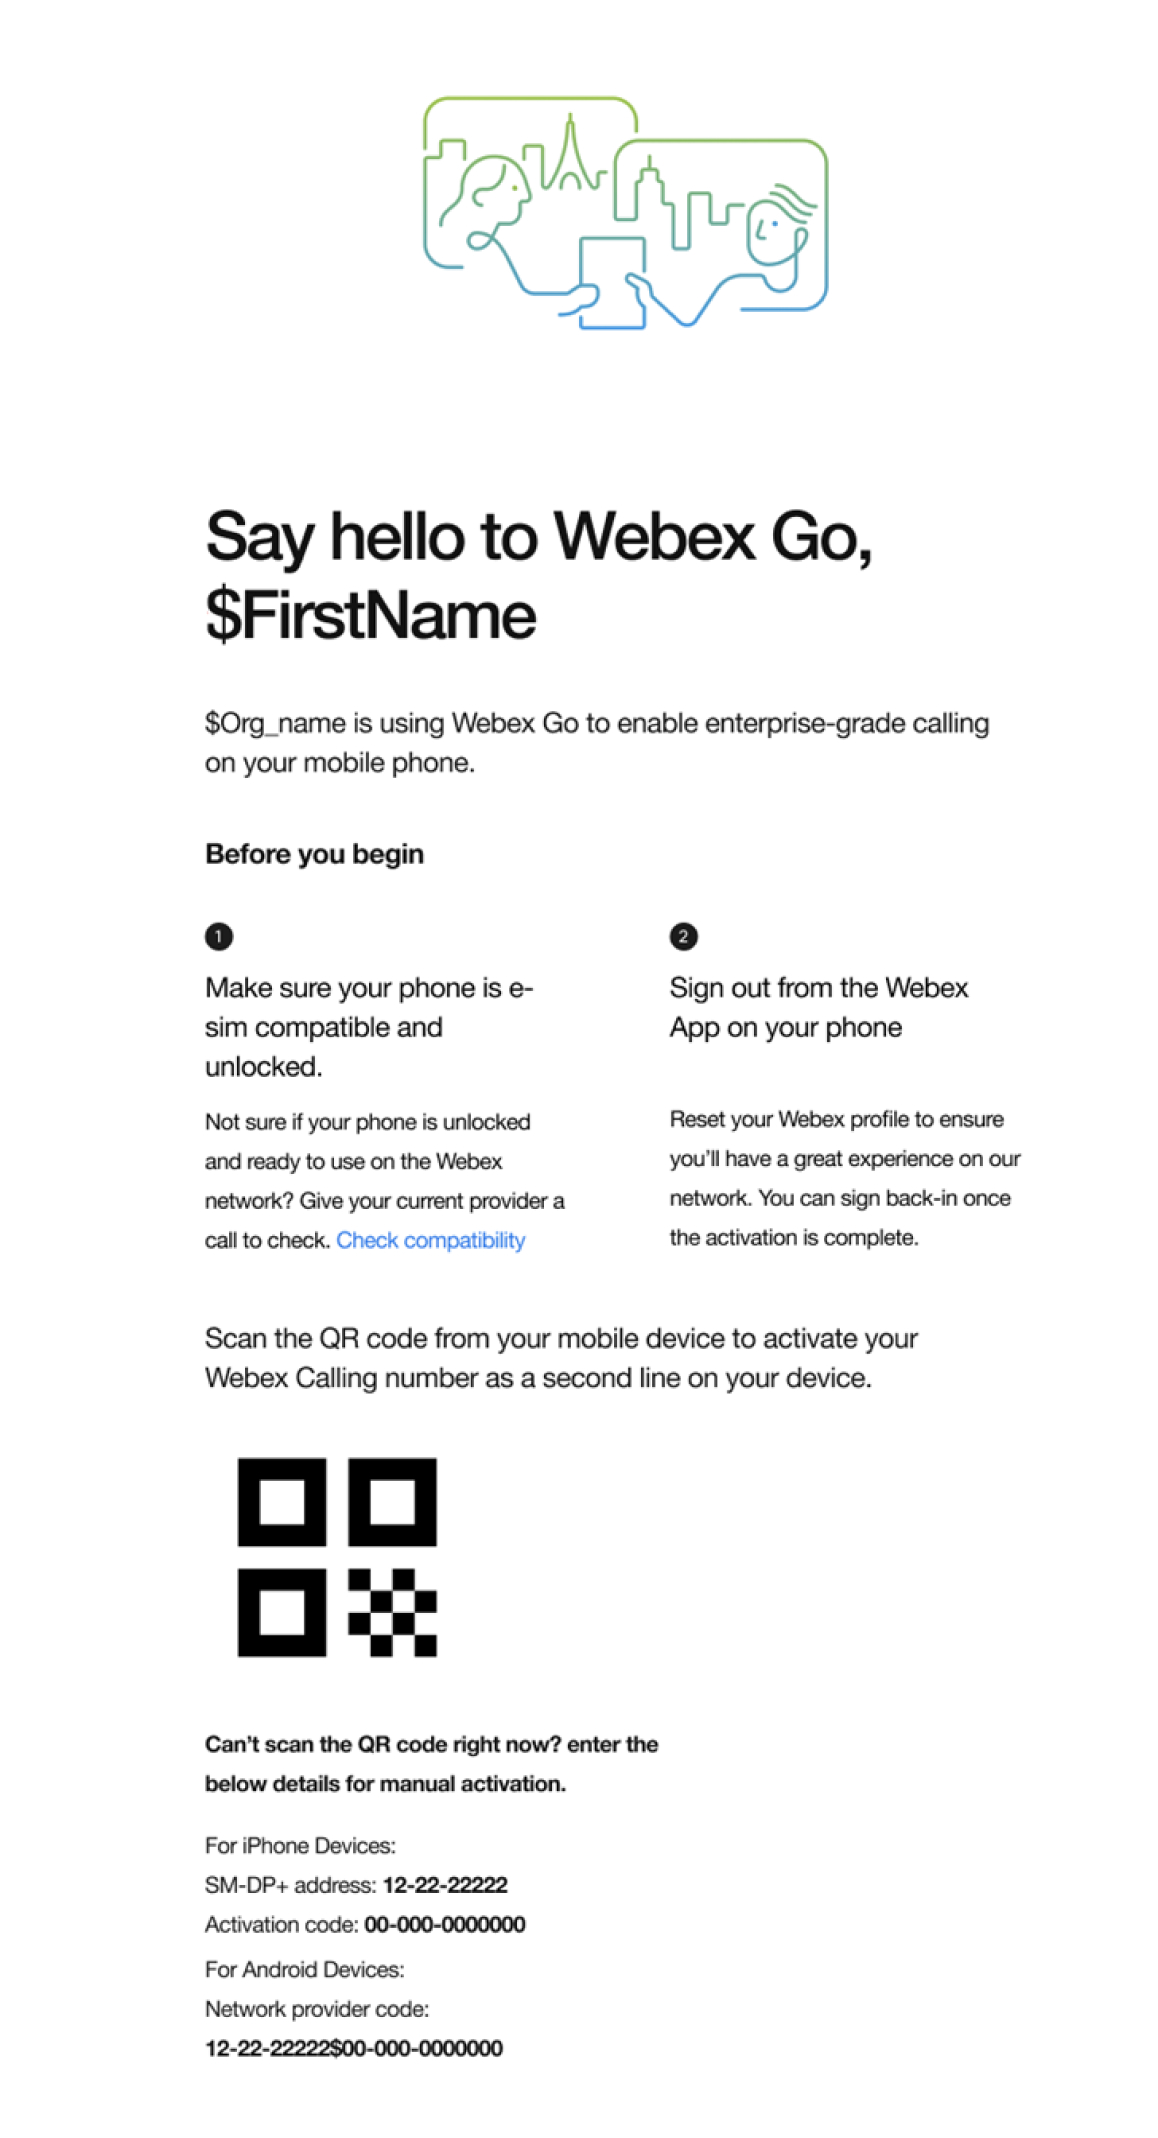
Activez Webex Go sur votre téléphone portable
 Un commentaire ?
Avant de commencer
-
Vérifiez que votre téléphone est déverrouillé, compatible avec la double SIM et peut prendre en charge un profil eSIM actif.
-
Webex Go est activé via eSIM et nécessite un profil eSIM actif sur le périphérique pour être disponible. Reportez-vous aux modèles de périphériques pris en charge et au nombre d'eSIM actives prises en charge par le périphérique.
Les politiques de verrouillage des périphériques s’appliquent uniquement aux États-Unis
-
-
Déconnectez-vous de l'application Webex sur votre téléphone portable pour configurer les paramètres du mode d'appel.
-
Assurez-vous que vous avez un réseau Wi-Fi actif.
Modèles iPhone pris en charge
-
iPhone Xr
-
iPhone Xs
-
iPhone Xs Max
-
iPhone SE 2020
-
iPhone 11
-
iPhone 11 Pro
-
iPhone 11 Pro Max
-
iPhone 12
-
iPhone 12 Pro Max
-
iPhone SE 2022
-
iPhone 13
-
iPhone 13 Pro
-
iPhone 13 Pro max
-
iPhone 14
-
iPhone 14 Plus
-
iPhone 14 Pro
-
iPhone 14 Pro Max
Version du système d’exploitation/logiciel requise : iOS 15.4 ou version plus récente
État du verrouillage du périphérique
S’applique uniquement aux clients aux États-Unis
-
Allez dans Paramètre s → Généra l → À propos
-
Sous Verrouillage du fournisseur vous ne devriez voir aucune restriction de carte SIM. Si vous ne voyez pas le message, contactez :
-
Votre administrateur informatique (si vous êtes sur un plan d’entreprise)
-
Fournisseur (si vous avez un forfait personnel)
-
Scan du QR code
Selon la langue définie dans votre appareil mobile, les termes Données mobile s et Forfait mobil e peuvent être utilisés à la place des Données cellulaire s et Forfait cellulaire.
-
Accédez aux Paramètres → 'utilisation des → d’un forfait cellulaire.
-
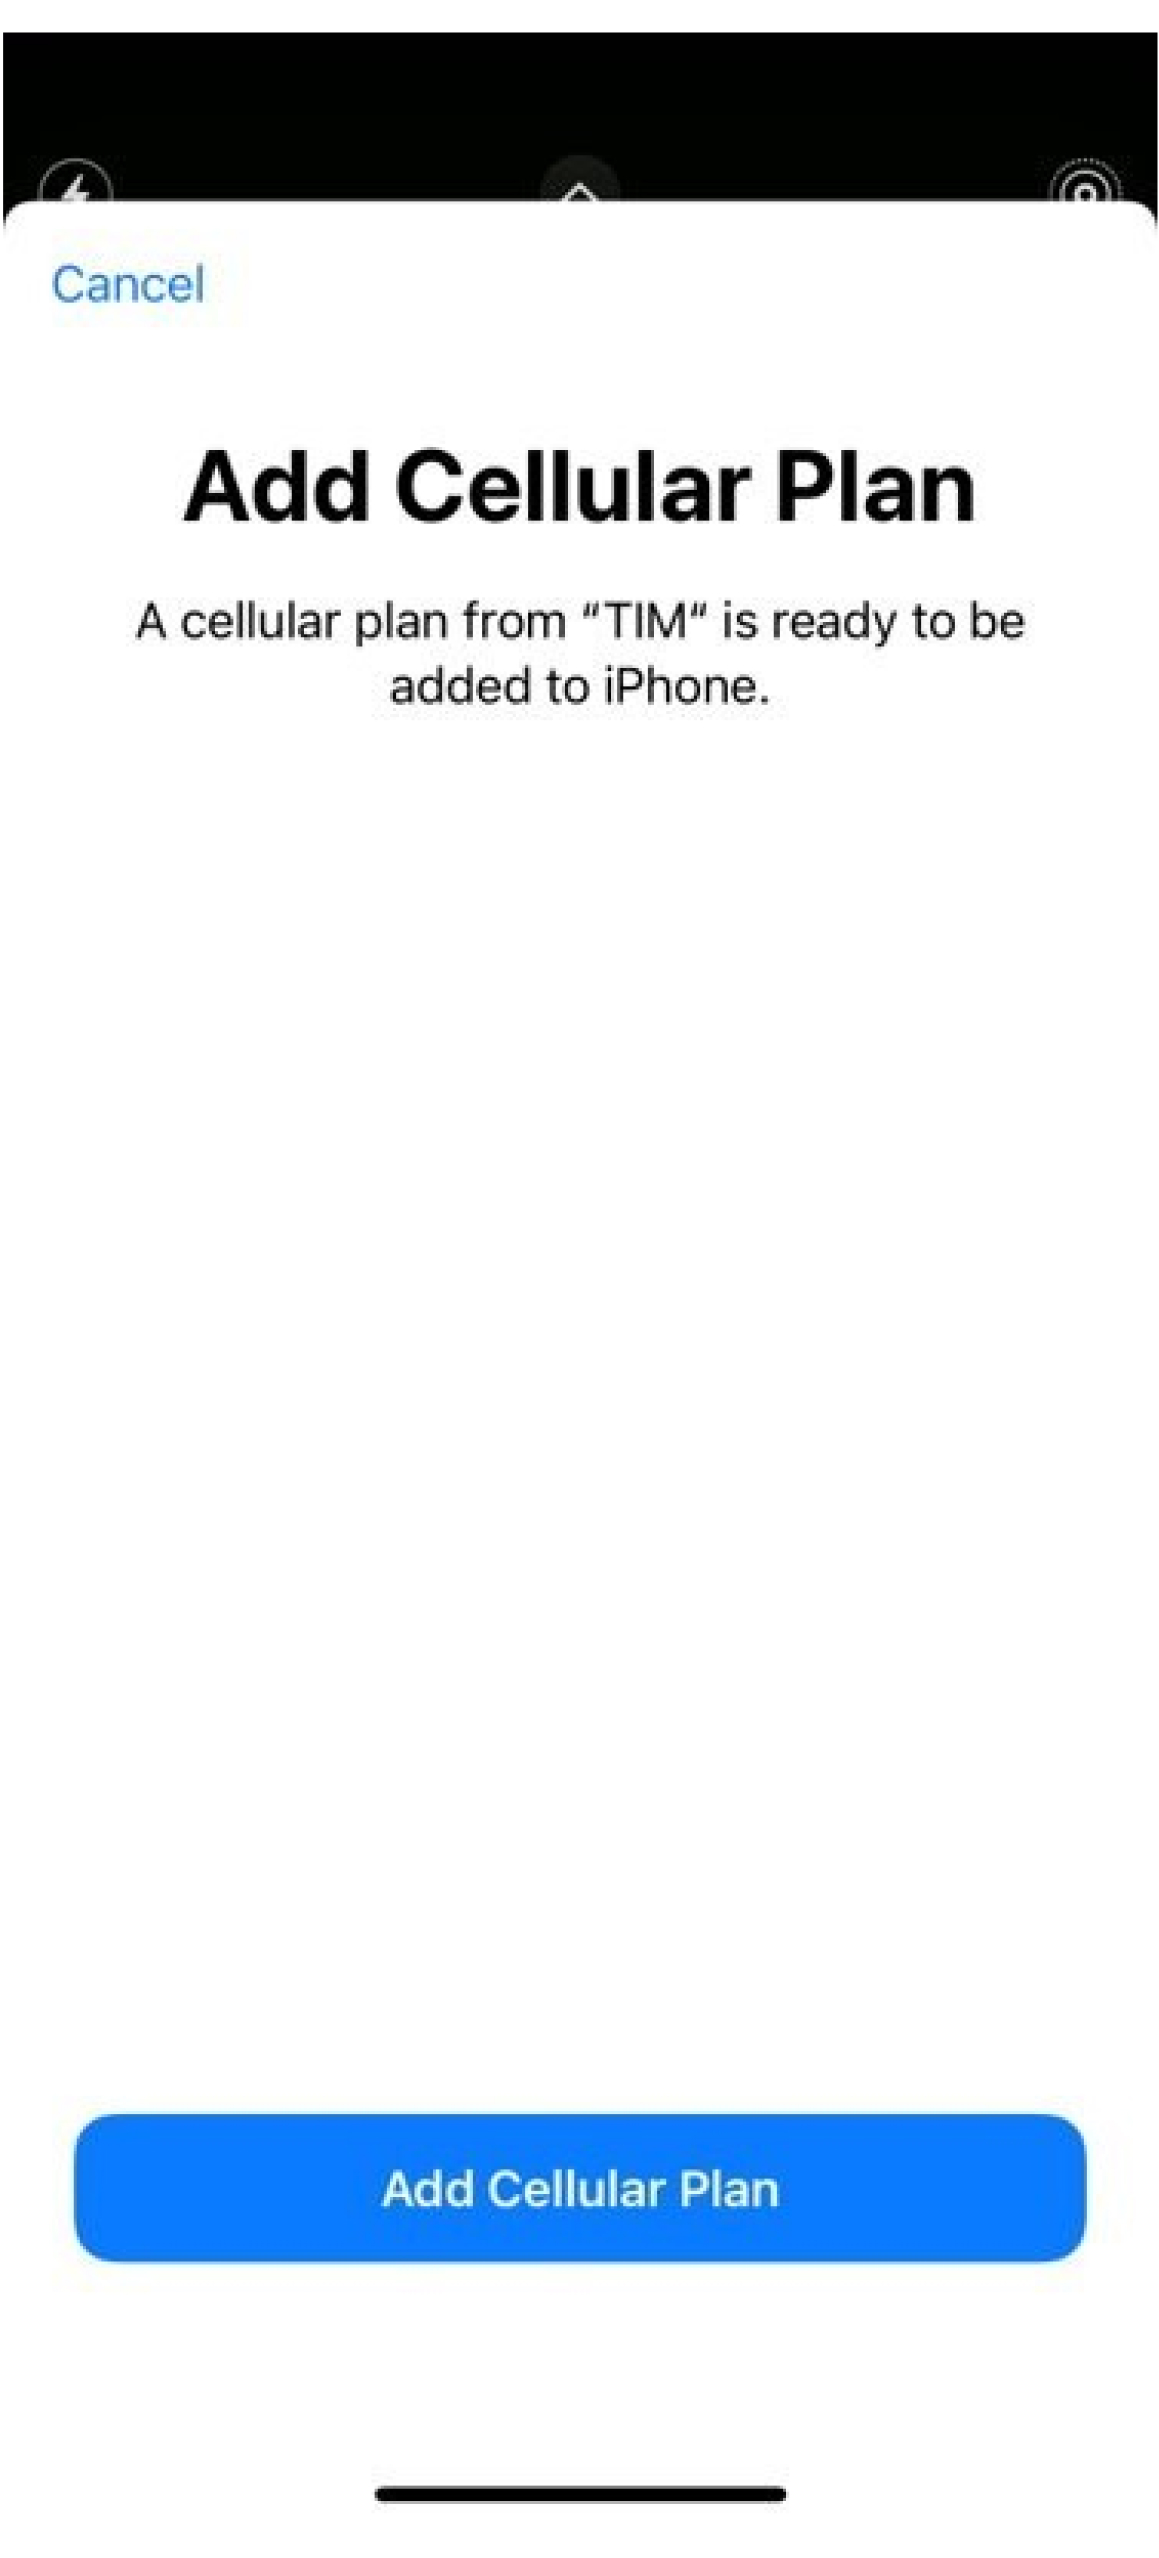
Scannez le code Q R inclus dans le courrier électronique d’activation.
-
Tapez sur Ajouter un forfait cellulaire.
-
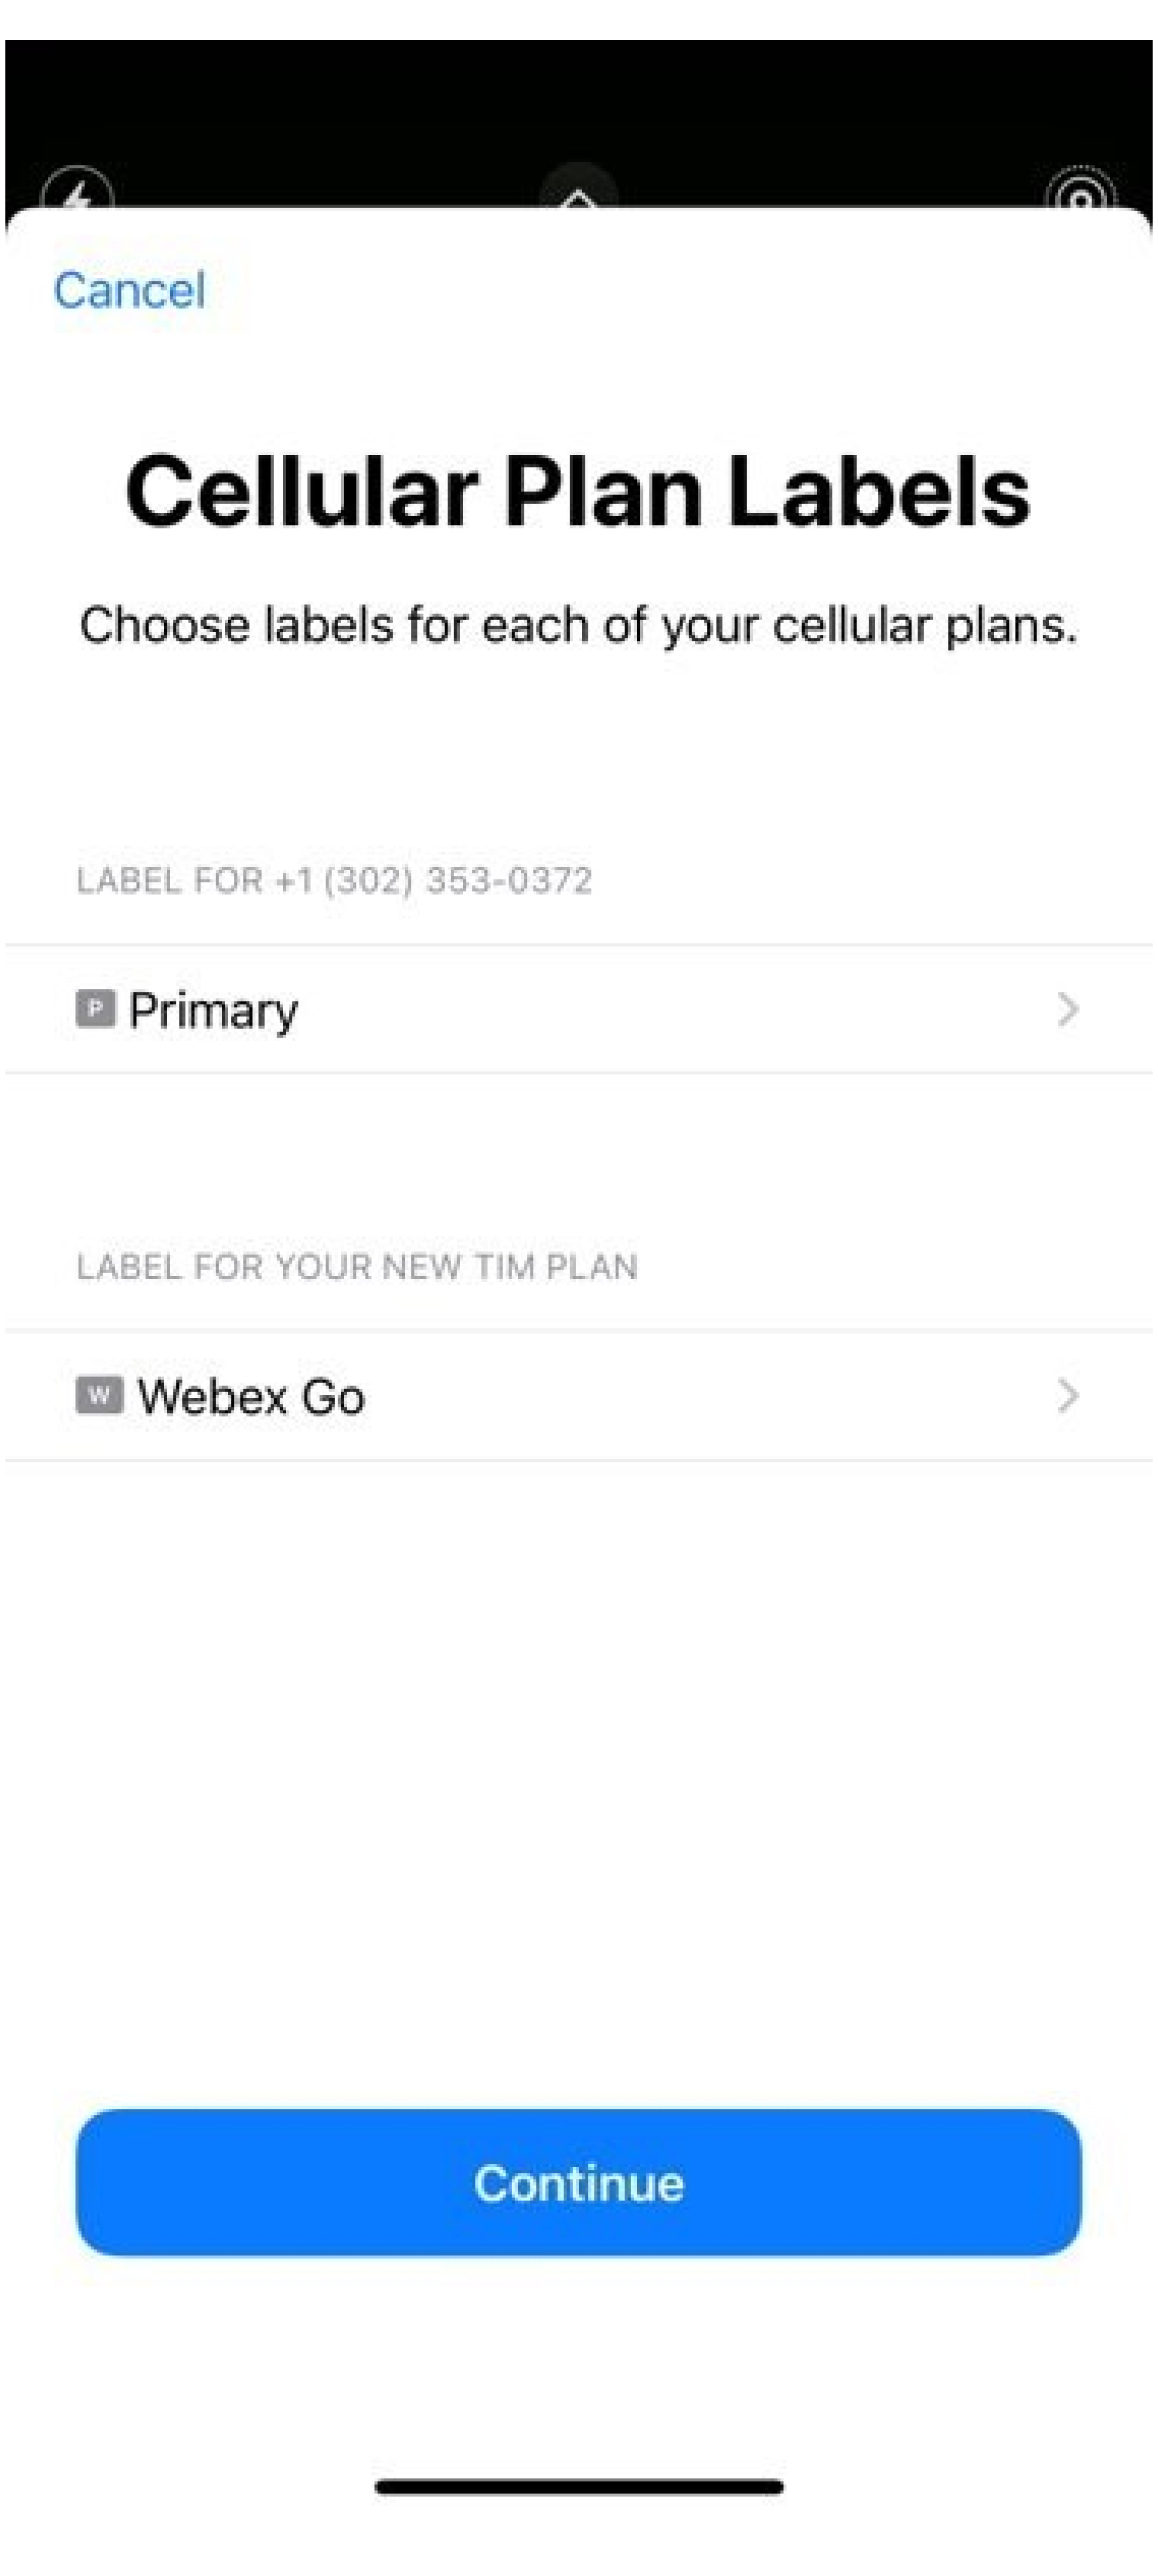
Étiquetez votre forfait : Sélectionnez un label existant ou créez un label personnalisé et cliquez sur Continuer.
-
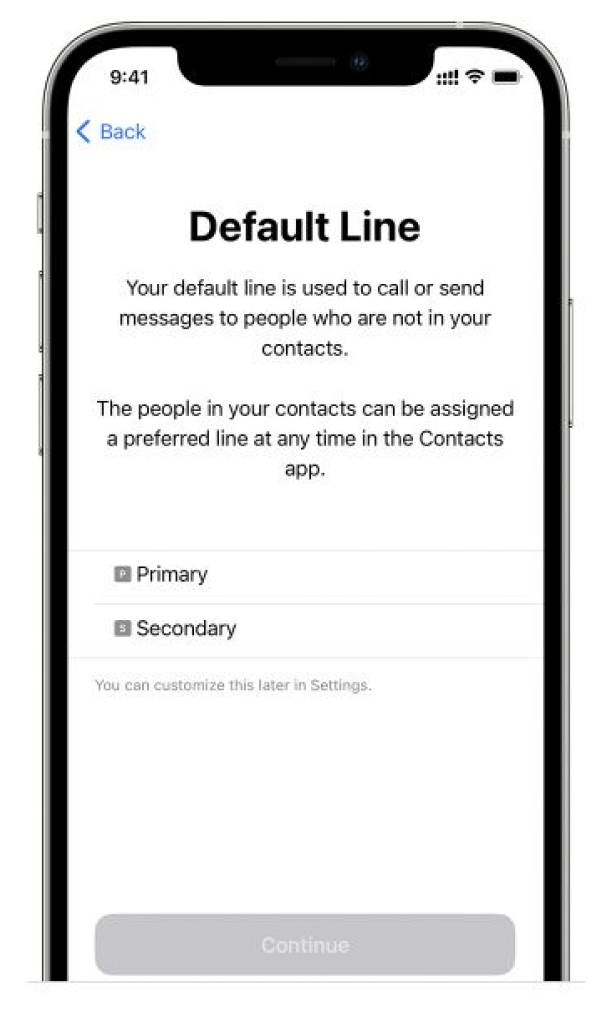
Configurez votre numéro par défaut : La ligne par défaut est utilisée lorsque vous appelez ou envoyez un message à une personne qui ne figure pas dans votre application Contacts.
Si vous sélectionnez Webex comme ligne par défaut, les appels seront capturés dans l’enregistrement détaillé des appels (CDR) pour Webex Calling. Notez que les politiques de sécurité et de conformité de votre organisation relatives à Webex Calling s’appliquent désormais à ce numéro qui utilise un abonnement mobile et une carte électronique (eSIM) sur un appareil de téléphone mobile personnel. De plus, les SMS professionnels ne sont actuellement pas disponibles avec les numéros Webex Go et doivent être activés séparément avec le fournisseur Cloud Connect.
-
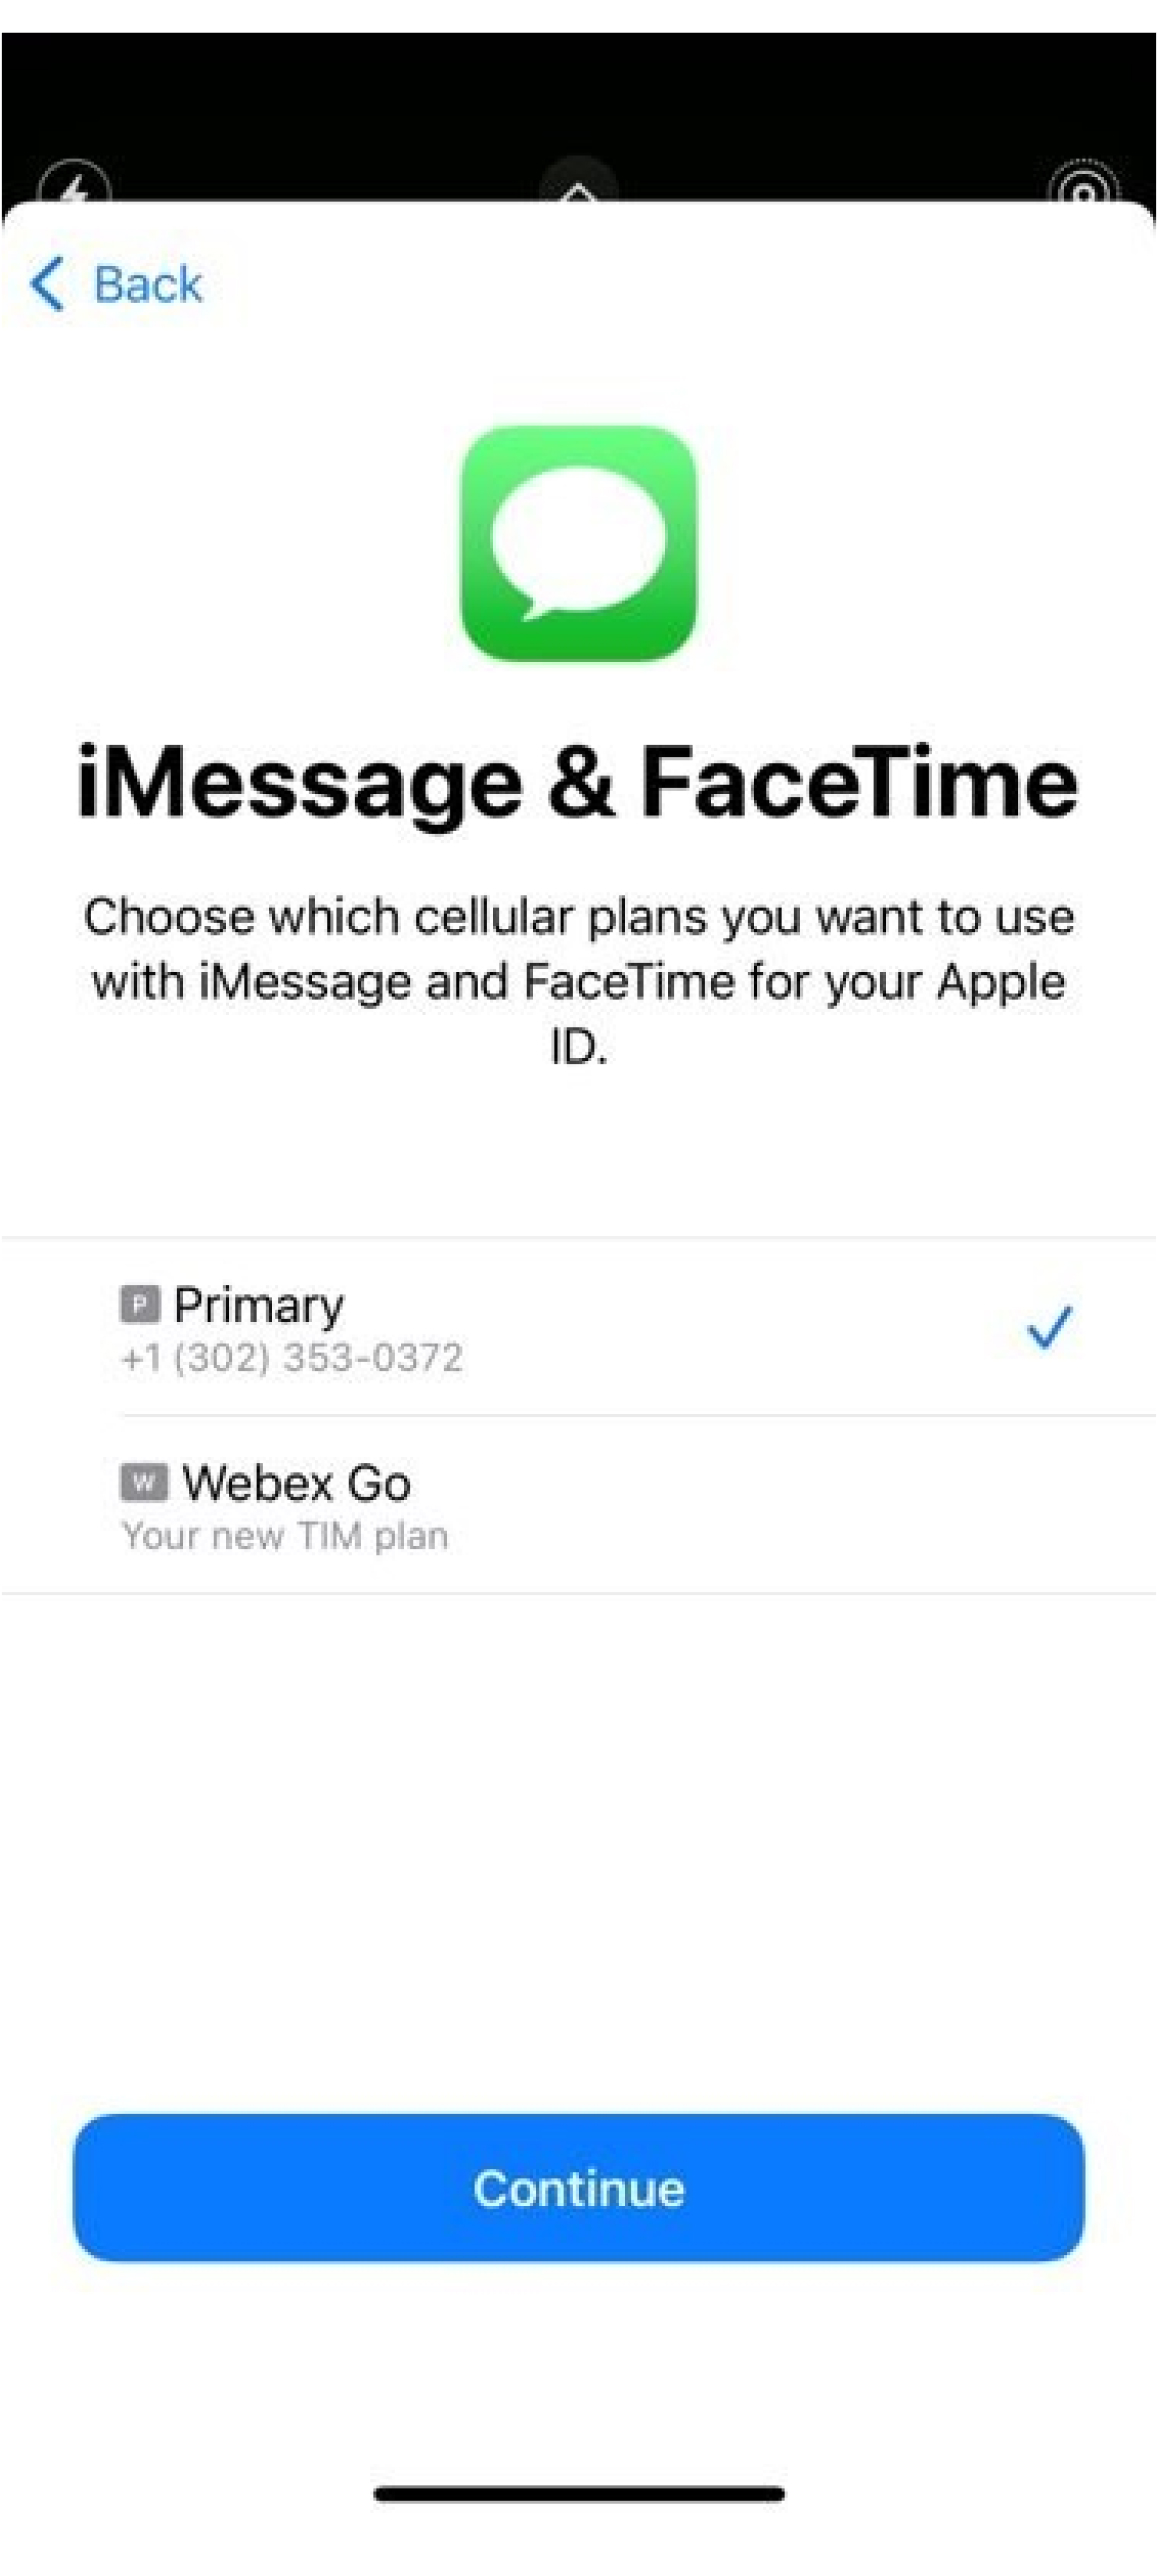
Définir l'abonnement cellulaire pour iMessage et FaceTime : Si vous êtes sur iOS 13 et une heure ultérieure, vous pouvez choisir le forfait cellulaire que vous souhaitez utiliser pour iMessage et FaceTime. Il est recommandé de le configurer sur le plan existant actif sur votre appareil.
-
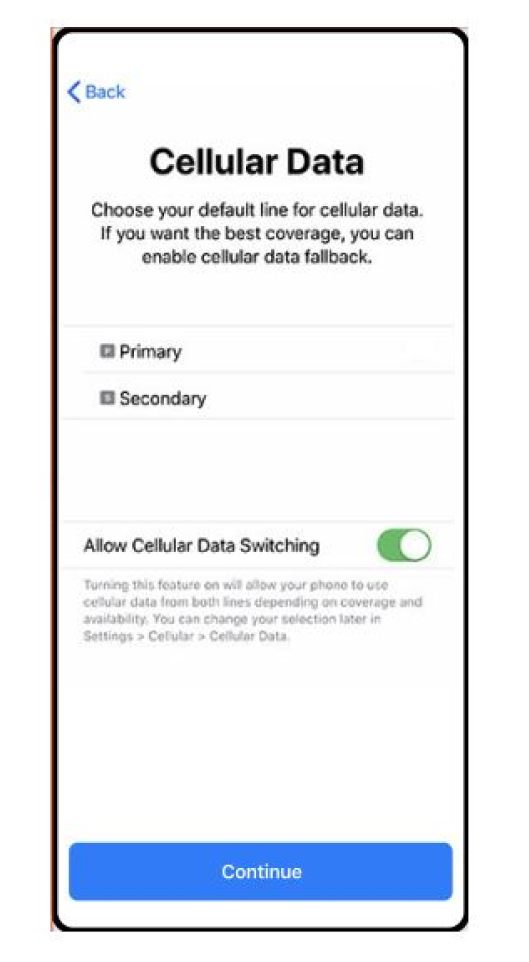
Définir la ligne par défaut pour les données cellulaires : Il est recommandé de le configurer sur le plan existant actif sur votre appareil. Cependant, activer Autoriser la commutation des données cellulaires pour accéder aux applications lors d’un appel sur votre ligne professionnelle.
-
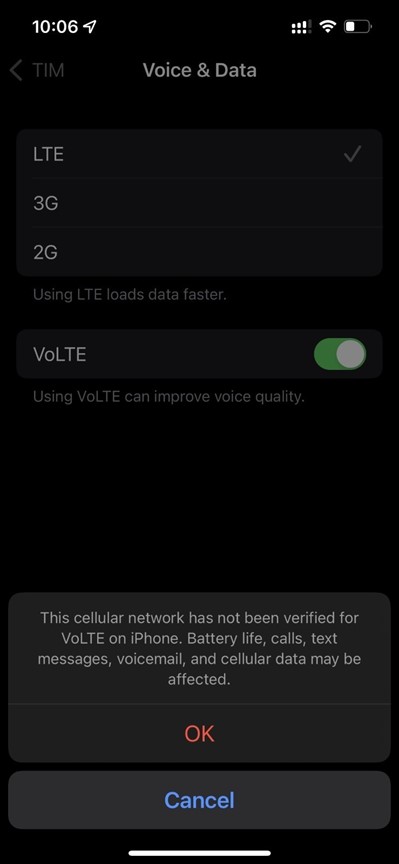
Webex Go utilise le réseau mobile VoLTE pour le routage des appels. Confirmez que les paramètres suivants sont activés et redémarrez le téléphone mobile afin d'utiliser le service.
Sous Voix & Données, assurez-vous que 4G ou LTE est sélectionné pour les données et que la VoLTE est activée pour la voix.
Le curseur Itinérance des données est activé.
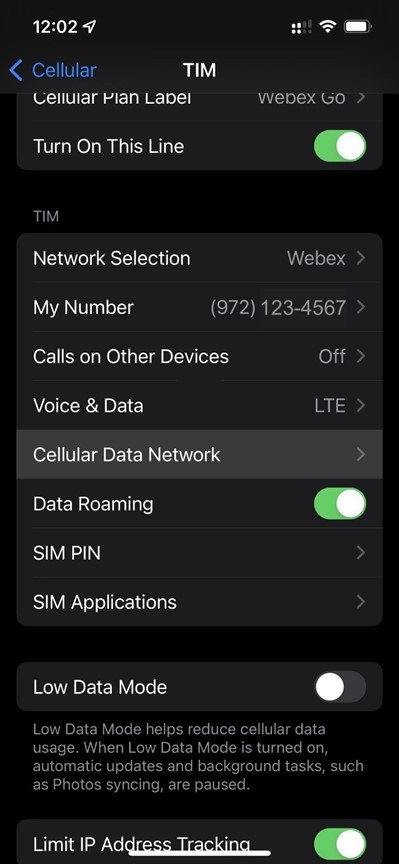
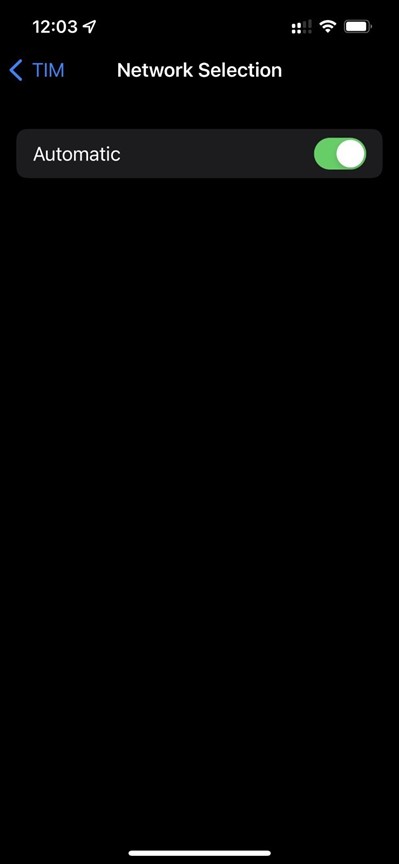
Le curseur de sélection réseau est défini sur Automatique.
-
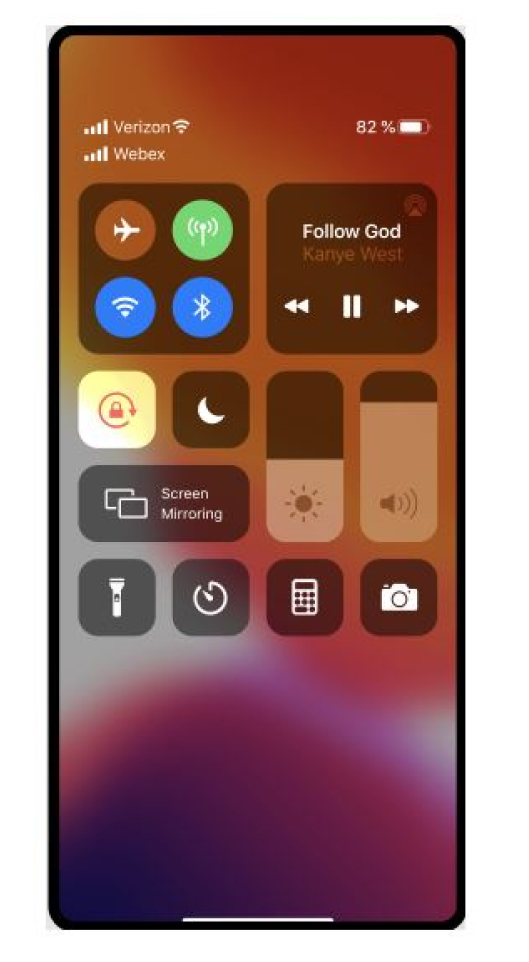
Redémarrez votre téléphone portable une fois l'installation terminée. Vous devriez voir le réseau Webe x dans le centre de contrôl e. Pour ouvrir le centre de contrôle, balayez vers le bas à partir du coin supérieur droit de l'écran de votre iPhone.
Saisir le plan manuellement
-
Aller dans Paramètres.
-
Tapez sur les données cellulaires ou mobiles.
-
Tapez sur Ajouter un forfait cellulaire.
-
Appuyez sur Saisir les détails manuellement, au bas de l'écran de votre iPhone et saisissez SM-DP+adress e et code d'activatio n fournis dans le courrier électronique. Suivez les étapes 5 à 9 de la procédure Scanner le code Q R pour terminer la configuration.
Pour plus d’informations sur l’utilisation de la double carte SIM avec un ESIM, consultez https://support.apple.com/en-us/HT209044.
Vous souhaitez voir comment cela s’est passé ? Regardez cette démonstration vidé o sur la façon d’activer Webex Go sur votre iPhone.Avant de commencer
-
Vérifiez que votre téléphone est déverrouillé, compatible avec la double SIM et peut prendre en charge un profil eSIM actif.
-
Webex Go est activé via eSIM et nécessite un profil eSIM actif sur le périphérique pour être disponible. Reportez-vous aux modèles de périphériques pris en charge et au nombre d'eSIM actives prises en charge par le périphérique.
Les politiques de verrouillage des périphériques s’appliquent uniquement aux États-Unis
-
-
Connectez-vous à l’application Webex sur votre téléphone mobile pour configurer les paramètres du mode d’appel.
-
Assurez-vous que vous avez un réseau Wi-Fi actif.
Modèles Samsung pris en charge
-
Galaxy S20 FE 5G
-
Galaxy S21 5G
-
Galaxy S21 + 5G
-
Galaxy S22
-
Galaxy S22+
-
Galaxy S22 Ultra
-
Galaxy S23
-
Galaxy S23+
-
Galaxy S23 Ultra
-
Galaxy XCover 6 Pro
-
Galaxy Z Flip4
Version du système d’exploitation/logiciel requise : 13 Une Interface Utilisateur 5.1 ou version ultérieure
État du verrouillage du périphérique
S’applique uniquement aux clients aux États-Unis
-
Si vous êtes sur un plan d’entreprise, contactez votre administrateur informatique pour déverrouiller votre appareil.
-
Si vous êtes sur un plan personnel, contactez votre fournisseur de services. Liens vers les outils I LINKS offerts par les fournisseurs de service :
Scan du QR code
-
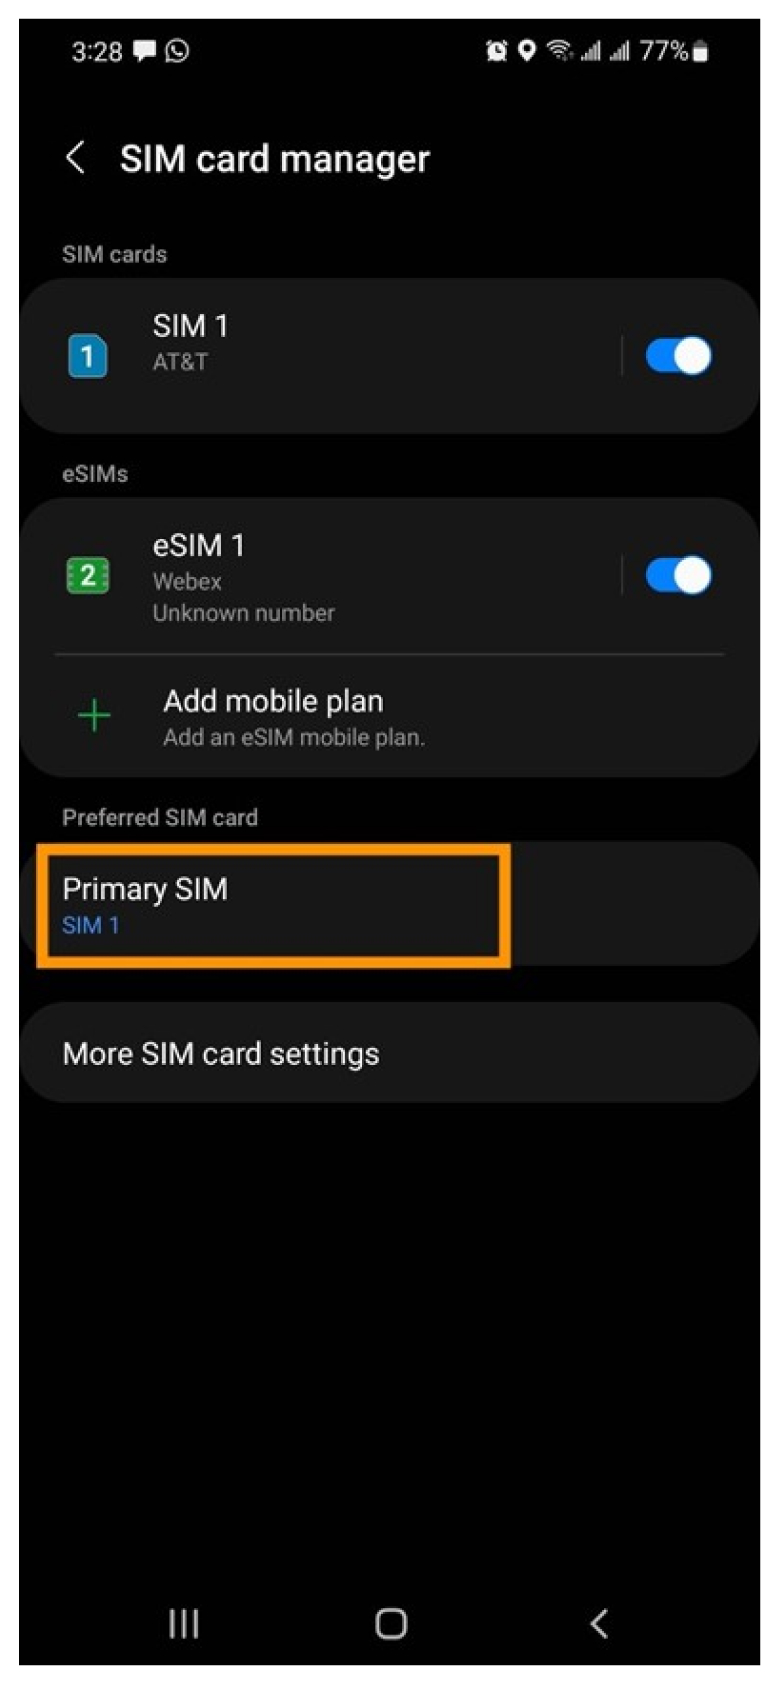
Accédez à Paramètres → connexions → gestionnaire de cartesSIM.
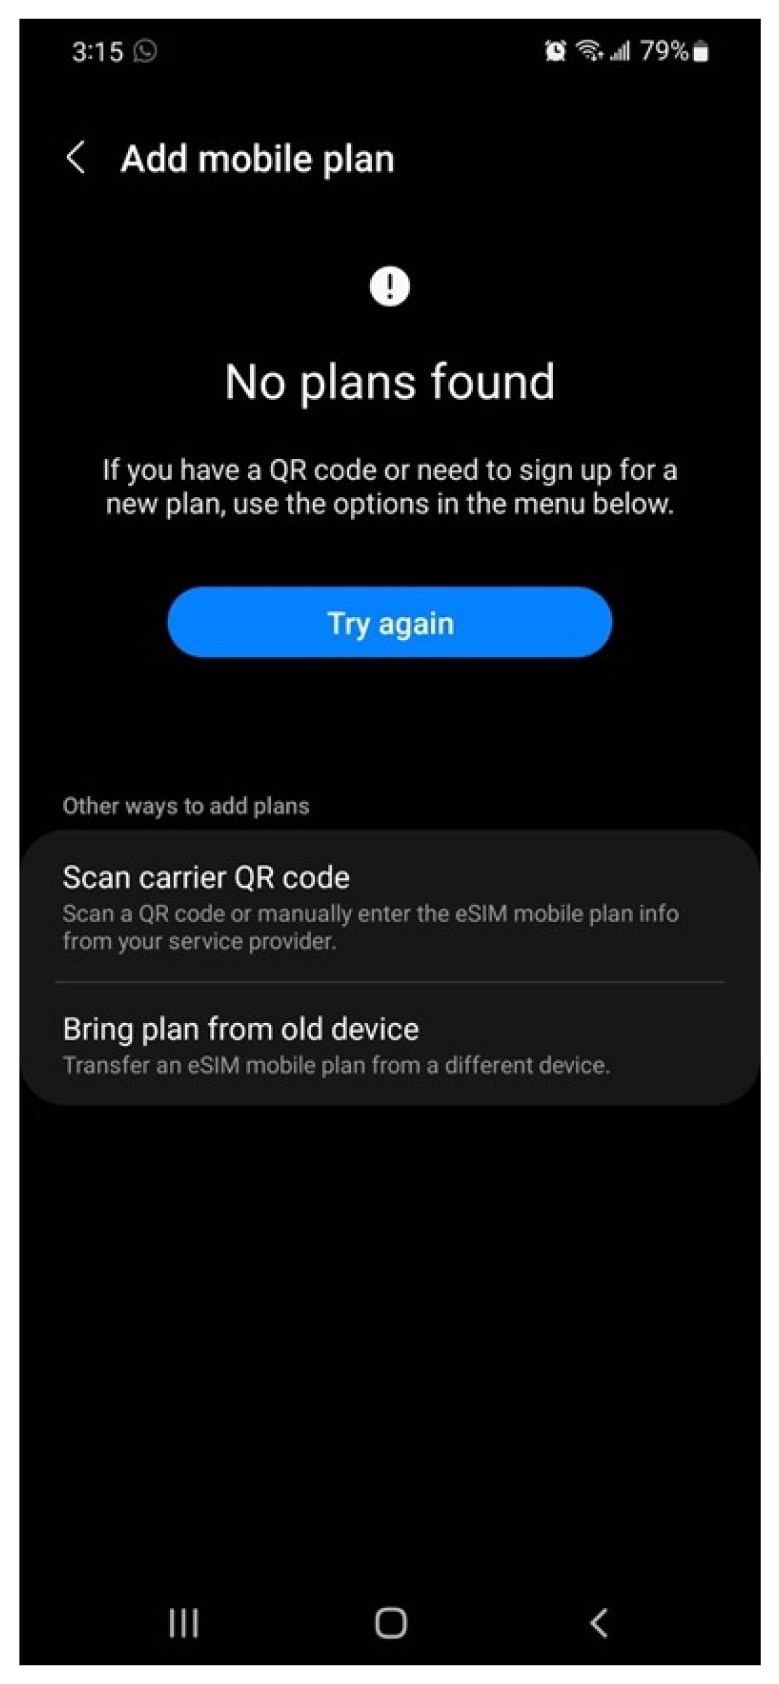
Tapez sur Ajouter un forfait mobile et sélectionnez Scanner l’Code QR.
-
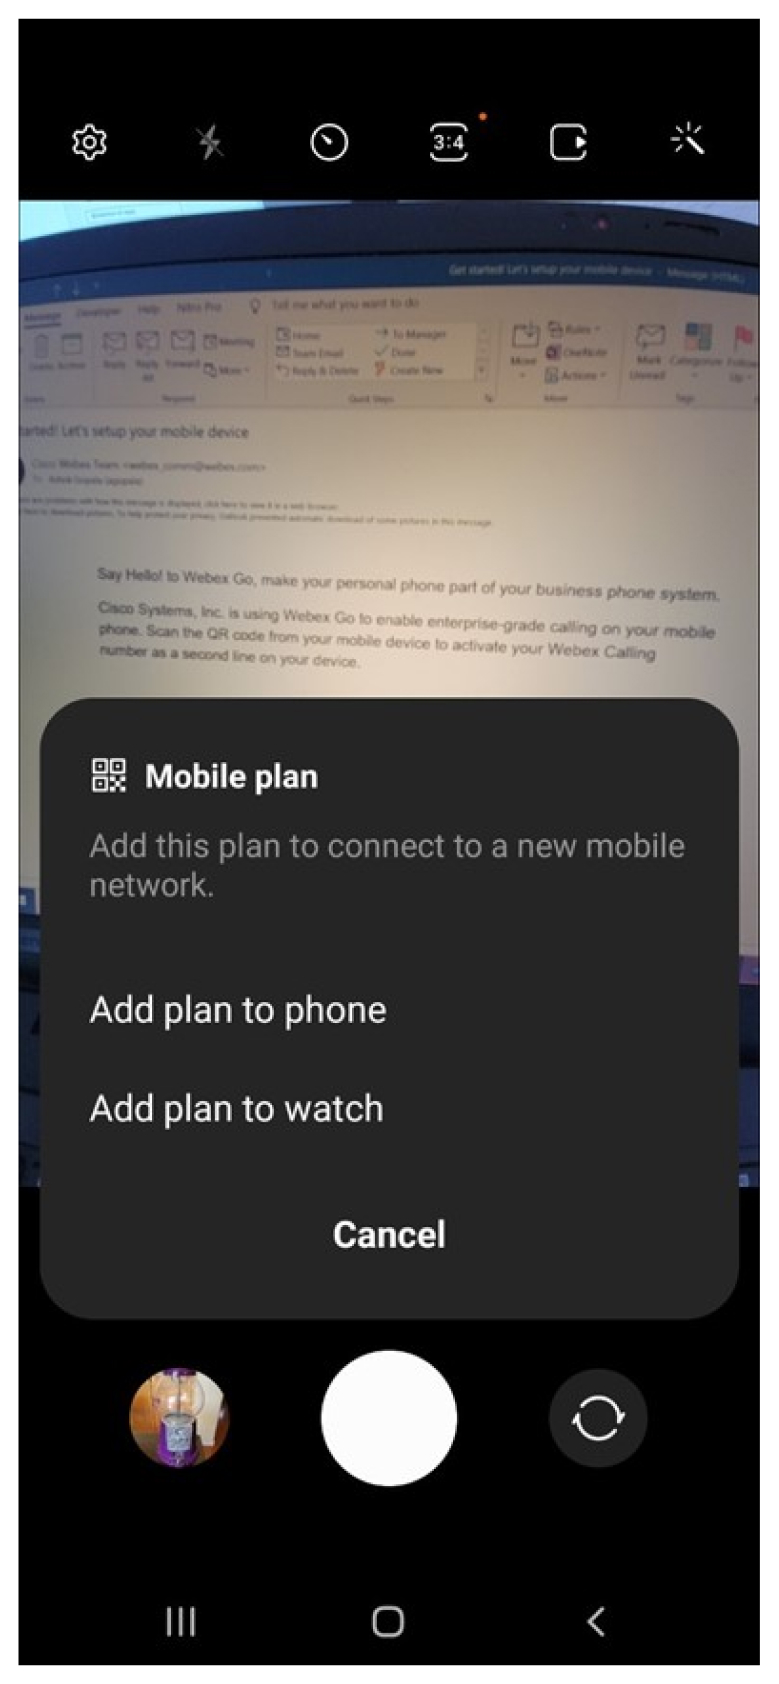
Scannez le code QR envoyé par e-mail.
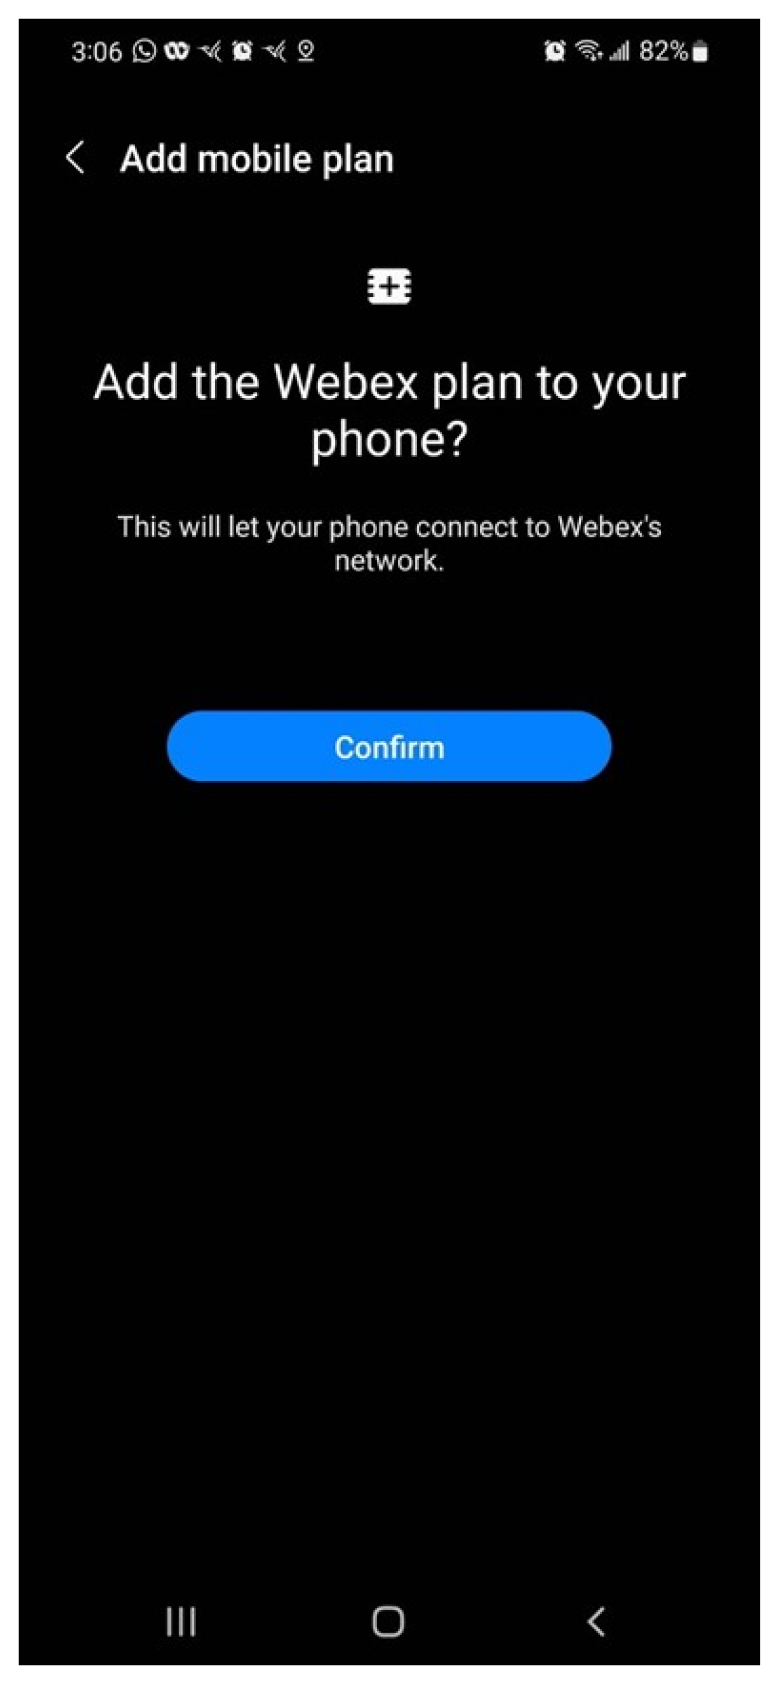
Sélectionnez Ajouter un forfait au téléphon e si le message Ajouter ce forfait à un nouveau réseau mobil e s'affiche.
Cliquez sur Confir mer dans l'écran suivant et le forfait est ajouté à votre appareil
Cliquez sur Autoriser lorsque vous y été invité pour autoriser la seconde carte SIM à utiliser les données au cours des appels.

-
Définir la carte SIM préférée : La carte SIM préférée est l'abonnement cellulaire par défaut utilisé pour les appels, les SMS et les données.
Si vous sélectionnez Webex comme carte SIM principale, les appels sont enregistrés. Notez que les politiques de sécurité et de conformité de votre organisation s’appliquent aux appels passant par l’abonnement mobile professionnel. De plus, les SMS ne sont actuellement pas disponibles avec votre business plan.
Ajouter manuellement le plan
Si vous rencontrez des problèmes avec le code QR, ajoutez manuellement le forfait en saisissant le code du fournisseur de réseau dans le courrier électronique.
Avant de commencer
-
Vérifiez que votre téléphone est déverrouillé, compatible avec la double SIM et peut prendre en charge un profil eSIM actif.
-
Webex Go est activé via eSIM et nécessite un profil eSIM actif sur le périphérique pour être disponible. Reportez-vous aux modèles de périphériques pris en charge et au nombre d'eSIM actives prises en charge par le périphérique.
Les politiques de verrouillage des périphériques s’appliquent uniquement aux États-Unis
-
-
Connectez-vous à l’application Webex sur votre téléphone mobile pour configurer les paramètres du mode d’appel.
-
Assurez-vous que vous avez un réseau Wi-Fi actif.
Modèles Google Pixel pris en charge
-
Pixel 6
-
Pixel 6a
-
Pixel 6 pro
-
Pixel 7
-
Pixel 7 pro
Version du système d’exploitation/logiciel requise : Android 13 ou version ultérieure
État du verrouillage du périphérique :
-
Si vous êtes sur un plan d’entreprise, veuillez contacter votre administrateur informatique pour déverrouiller votre périphérique.
-
Si vous avez un forfait personnel, veuillez contacter votre fournisseur de service. Liens vers les outils I LINKS offerts par les fournisseurs de service :
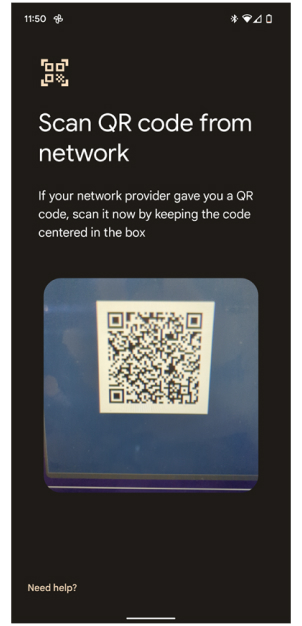
Numérisez les Code QR
-
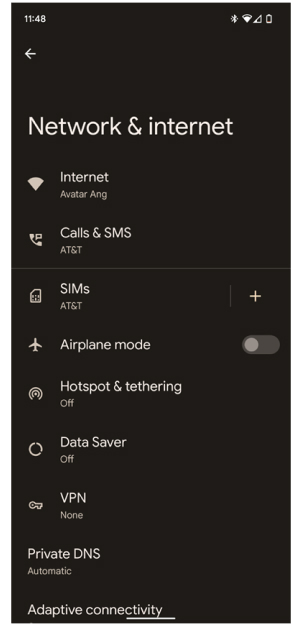
Naviguez dans Paramètres -> et Internet.
-
Tapez sur le signe + à côté de SIMs.
-
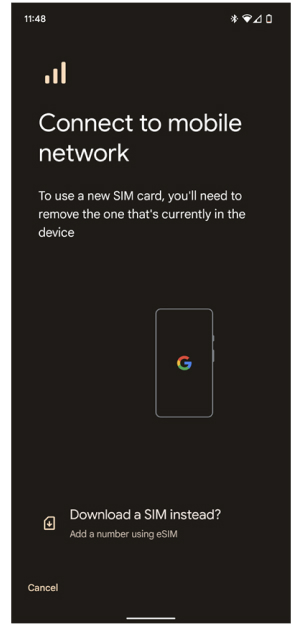
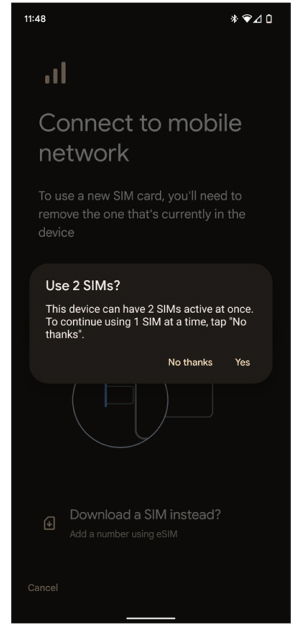
Sur l’écran Se connecter au réseau mobile, tapez sur Télécharger une carte SIM à la place ?.
-
Tapez sur l’écran Oui dans Utiliser 2 MS ? pour que deux SIMs restent actifs en même temps.
-
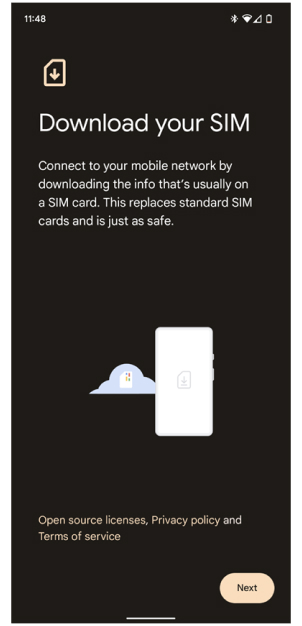
Cliquez sur Suivant sur Télécharger votre écran SIM .
-
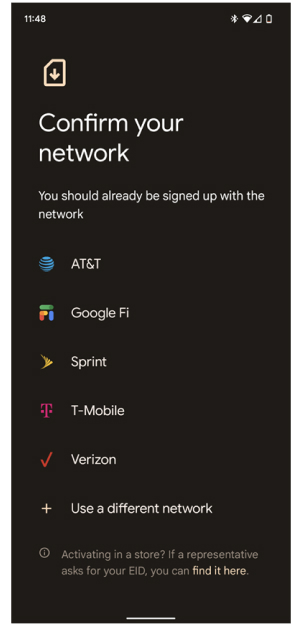
Cliquez sur + signe à côté pour Utiliser un autre réseau dans Confirmer l’écran de votre réseau.
-
Numérisez le Code QR.
-
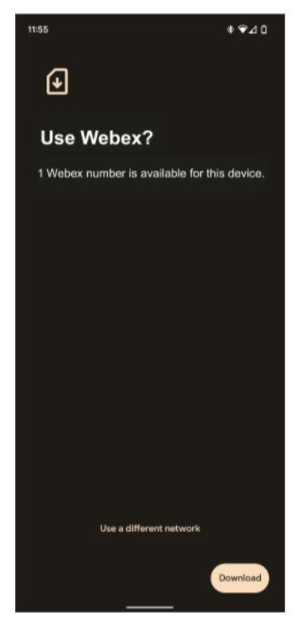
Confirmez que vous souhaitez utiliser le numéro Webex en cliquant sur Télécharger sur l’écran Utiliser Webex ?
-
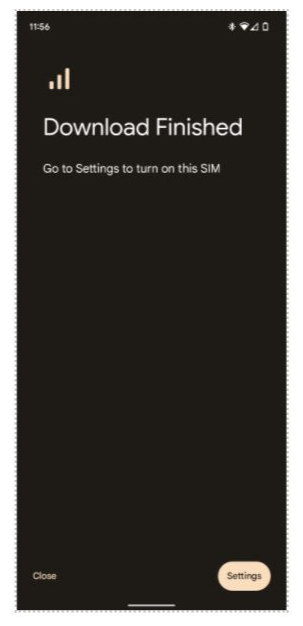
Lorsque le téléchargement est terminé, cliquez sur Paramètres pour activer la carte SIM.
-
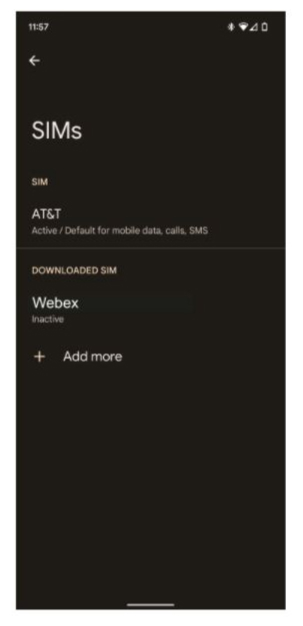
Sélectionnez Webex sous Carte SIM téléchargée.
-
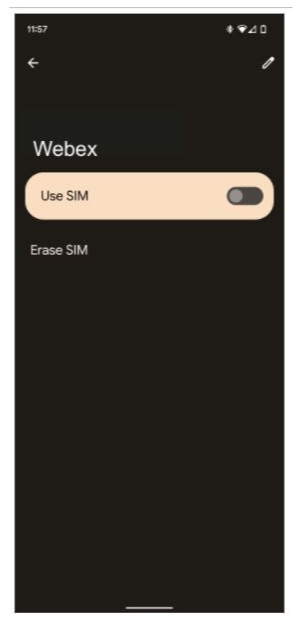
Activer et sélectionner Oui lorsqu’il vous est demandé de confirmer.
-
-
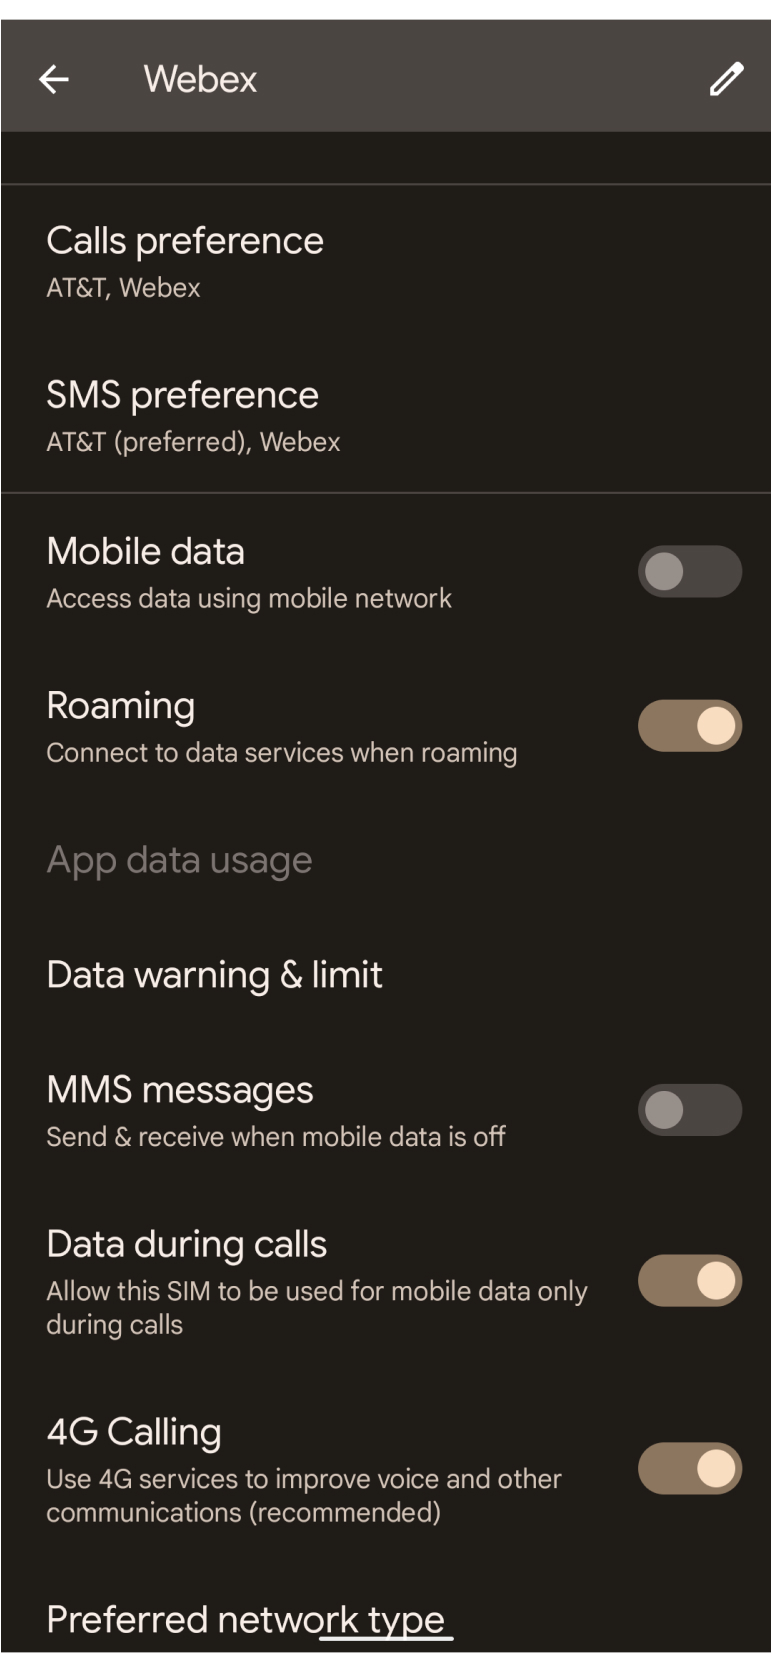
Activer l’itinérance pour utiliser les données sur la connexion eSIM.
-
Configuration des préférences de la double carte SIM :
-
Une seule carte SIM peut être la valeur par défaut pour les données. Si vous en avez déjà une configurer, vous recevrez une notification. Il est recommandé d’utiliser la carte SIM précédemment installée par défaut pour les données. Cependant, veuillez vous assurer que la carte SIM Webex est activée pendant le basculement des appels.
-
Pour les appels, définissez les préférences sur Demander à chaque fois.
-
Pour les SMS, définissez les préférences sur la carte SIM précédemment installée.
-
Saisir le plan manuellement
-
Si vous activez manuellement Webex Go, suivez l’étape 1 à l’étape 6 à partir de la ci-dessus. Dans l’écran Scanner Code QR ' de l’utilisateur, cliquez sur Besoin d’aide en bas de l’écran et saisissez manuellement le code du fournisseur de réseau inclus dans le courrier électronique d’activation.
-
Après avoir entré le code, veuillez suivre l’étape 8 à l’étape 11 à partir de la ci-dessus.
Pour plus d’informations , l’article Google Pixel .
L’opérateur mobile Webex Go ne nécessite pas de code QR pour l’activer. L'activation est gérée par votre administrateur. Pour en savoir plus sur le processus d’ajout de numéros mobiles et de leur attribution aux utilisateurs dans Control Hub, voir Mise à disposition de Webex Go. Une fois provisionné par votre administrateur, AT&T Cloud Voice pour Webex Go Bolt-on ou le code d’opération du service est automatiquement activé dans le back-end et doit être activé instantanément lorsque le numéro mobile est attribué dans le Control Hub. Aucune action n'est requise par l'utilisateur.
Une fois votre numéro de téléphone portable attribué par votre administrateur, tous vos périphériques Webex, y compris votre téléphone portable AT&T, votre téléphone de bureau Webex, votre système de bureau ou de salle et votre ordinateur portable avec l’application Webex partagent le numéro de téléphone portable AT&T. Vous êtes également mis à niveau vers la messagerie vocale Webex et avez accès à toutes les fonctionnalités de Webex Calling.
Pour les administrateurs :
L’opérateur mobile Webex Go est activé/provisionné en demandant l’authentification et l’activation du ou des numéros mobiles à l’opérateur mobile, puis en l’affectant à un utilisateur en tant que ligne principale (remplaçant son numéro professionnel fixe). Pour savoir comment ajouter des numéros mobiles dans Control Hub et les attribuer à un utilisateur, voir Provisionner Webex Go.


