- Home
- /
- Article

Thanks for your feedback.

Activate inter-op SIP trunk to Webex Calling multi-tenant
 In this article
 Feedback?
As part of the Dedicated Instance service activation, SIP connectivity is established between the Webex Calling Dedicated Instance and Multi-tenant platforms for inter-op calls between the platforms.
Overview
Once the Dedicated Instance service is activated, basic dial plan elements for call routing are configured in the Webex Calling multitenant Dedicated Instance calling platform. If you require call routing between the platforms, you must incorporate these elements into the Webex Calling and the Dedicated Instance Unified CM dial plan accordingly.
- Configured Webex Calling Dial Plan Elements
- Location
- SIP Trunk
- Route Group
- Configured Dedicated Instance (Cisco Unified Communications Manager) Dial Plan Elements
- SIP Trunk
- Route Group
- Route List
The preconfigured dial plan elements in the multitenant platform are prefixed with ‘WXC-DI’. For example, WXC-DI-<region>-<dial plan element>.
The preconfigured dial plan elements in Cisco Unified Communications Manager are prefixed with ‘xWxC’. For example, xWxC-<region>-<dial plan element>.
Refer to Dedicated Instance for Webex Calling - Base Configuration for more information on the preconfigured components.
The preconfigured SIP connectivity (certificate-based SIP Trunks) created between Dedicated Instance and Multitenant calling platforms is connected over the Cisco Webex backbone. These SIP trunks need to be activated for the calls to work and this document covers the steps, how to activate the interoperability SIP trunks.
Some of the existing Dedicated Instance customers have already deployed SIP trunks with Registration based trunks. You need to explicitly link the existing route list and dial plan in multitenant to the new certificate-based trunks associated to a route group. This enables you to switch from your existing routing with the registration-based trunks to certification-based trunks.
As a customer administrator you need to configure the Main Number (E.164) for the location created in the multitenant, before any calls can be made.
You’re advised not to modify or delete any of the preceding preconfigured interoperability dial plan elements otherwise it can cause call failures between the platforms.
Configure PSTN connection
You are required to configure a PSTN connection before adding a Main Number.
-
Sign in to Control Hub at https://admin.webex.com/login.
-
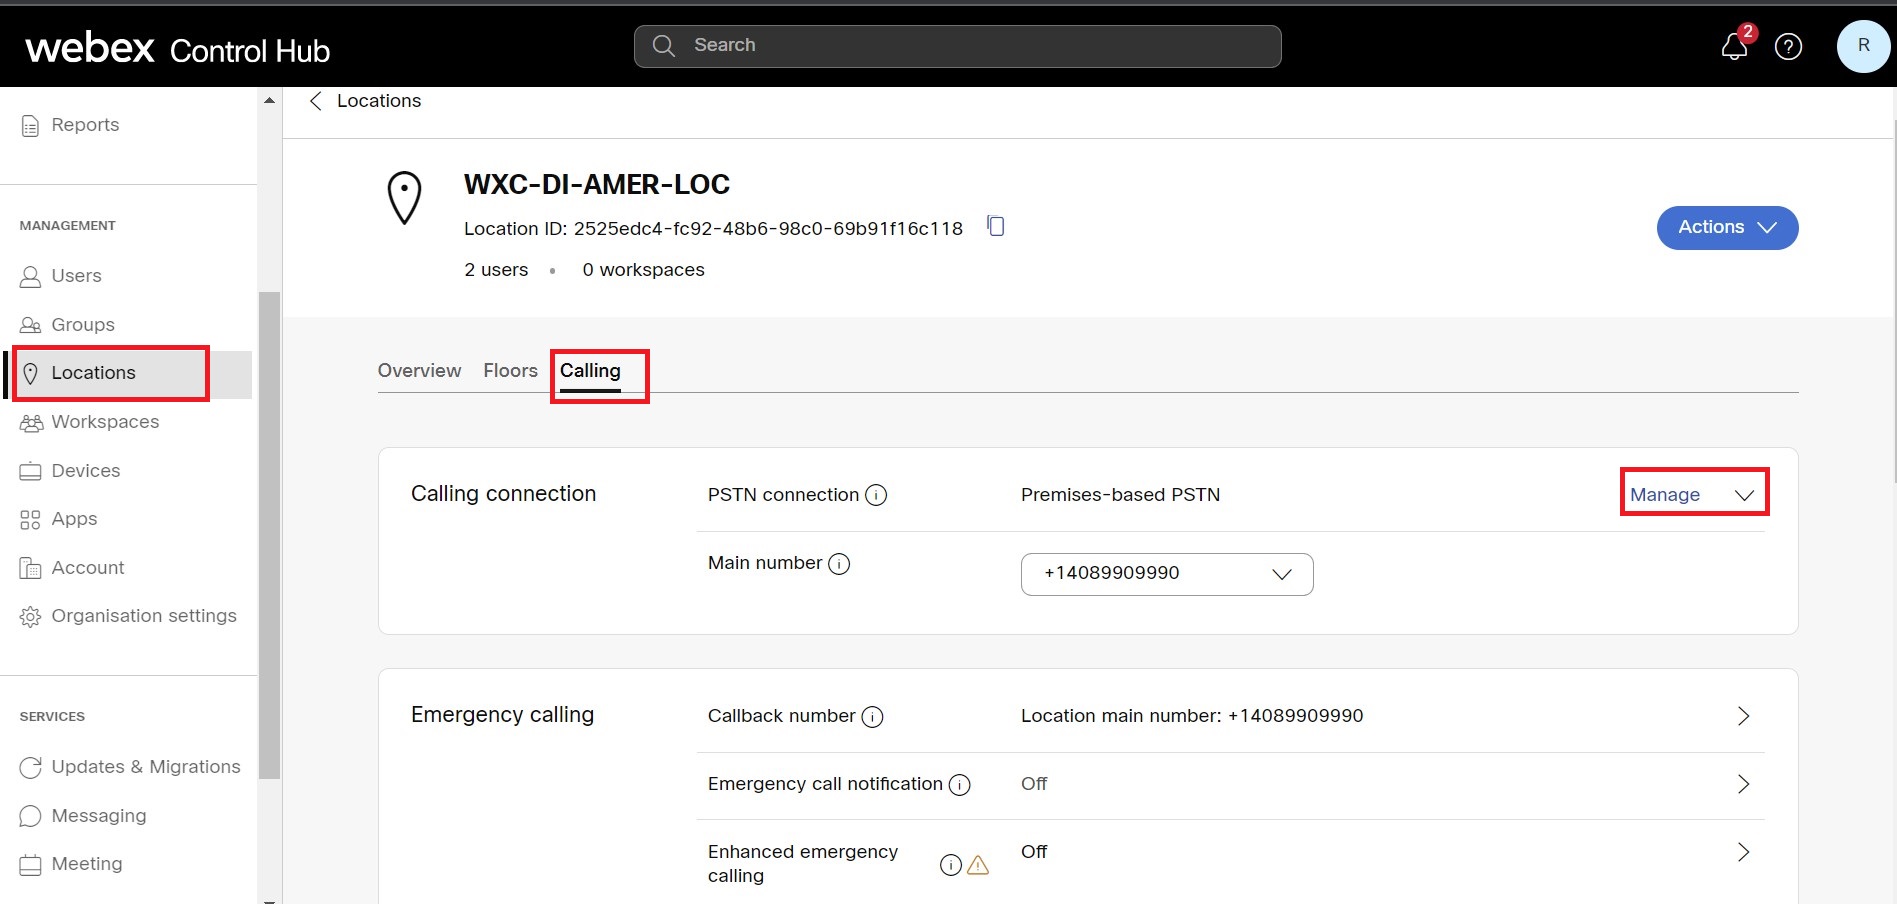
Go to Management > Locations.
-
Select the default location created by Cisco (prefixed with "WXC-DI" for a particular region) and click Calling.
-
Click Manage in the Calling connection section.
-
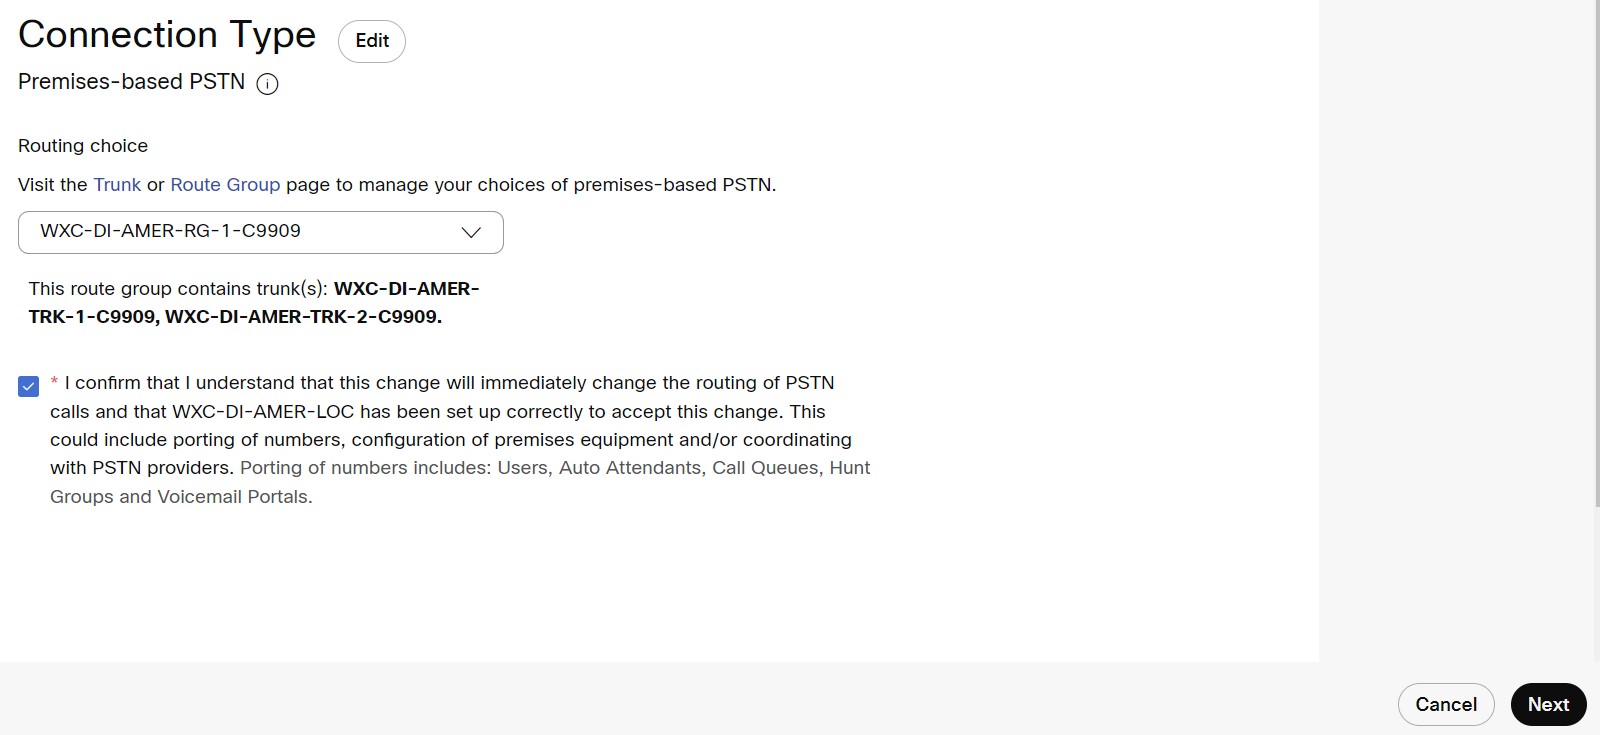
On the Connection Type window, select the default Route Group created by Cisco (prefixed with "WXC-DI" for that particular region) from the Routing choice drop-down list, check the disclaimer checkbox and click Next.
-
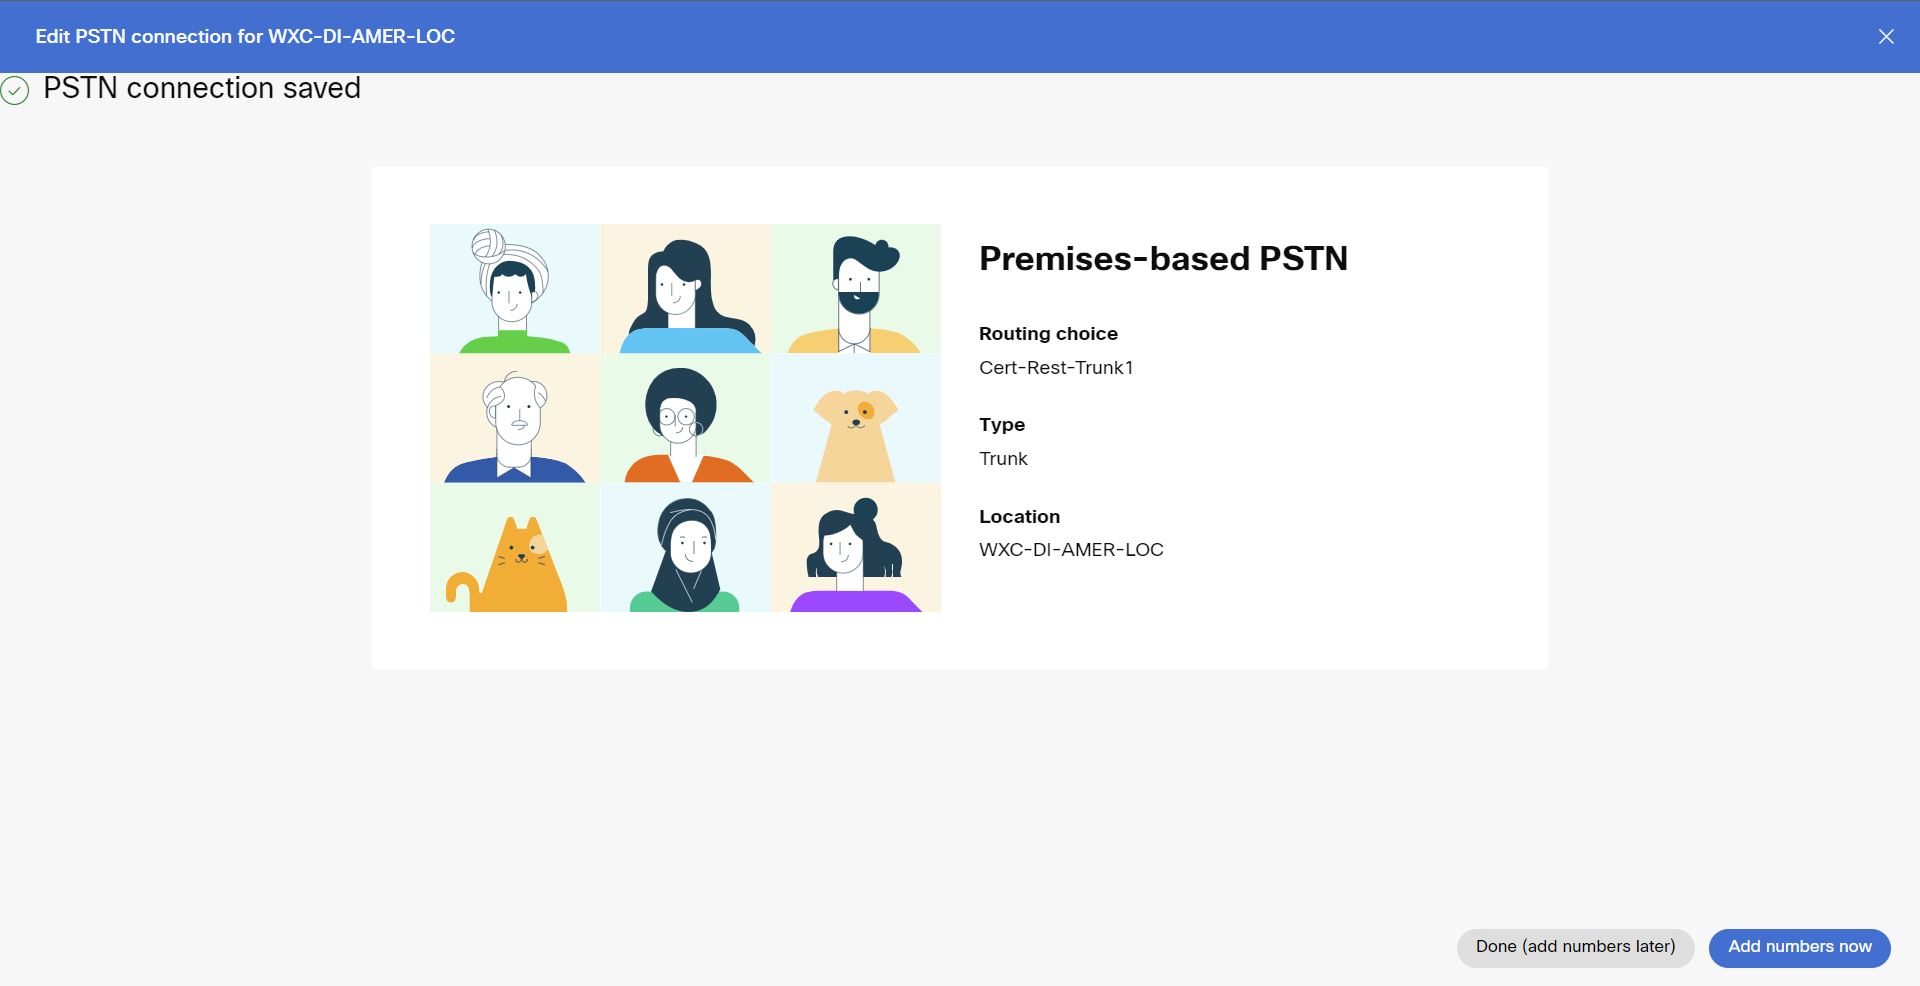
Click Done (add number later) if you wish to add the Main Number later else click Add numbers now to continue to add Main Number to make and receive calls.
You cannot make or receive calls until the main number is added to this default location.
Configure emergency callback number for a location
You can configure locations with a specified Emergency Callback Number (ECBN). Once configured, when an emergency call is made by a user their configured ECBN is presented to the PSTN provider.
-
From the customer view in https://admin.webex.com, go to Management, click Locations.
-
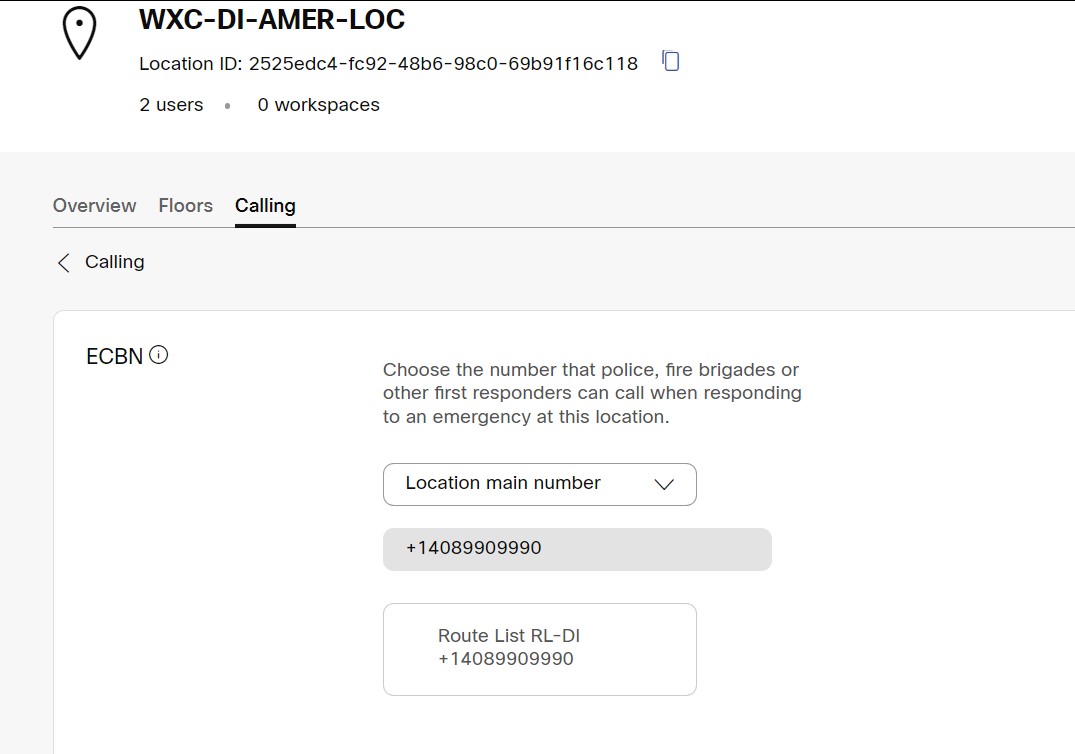
Select the default location created by Cisco (prefixed with "WXC-DI" for a particular region) and click Calling tab.
-
Click Callback Number in the Emergency Calling section.
-
Select one of the options listed to set as the ECBN for the location.
-
Click Save.
Route list configuration on Webex Calling multi-tenant
As part of certification-based trunk add-on configuration, we have created the route groups associated with certification-based trunks. When you are creating the route list and dial plan, you must select this particular certification-based trunk associated route group.
To link the route list and dial plan to the route group that is associated with cert-based trunk:
-
Sign in to Control Hub at https://admin.webex.com/login.
- Go to Services > Calling and select Call Routing.
under Trunk tab, make sure that the certification-based trunk are listed under Trunk Type column.
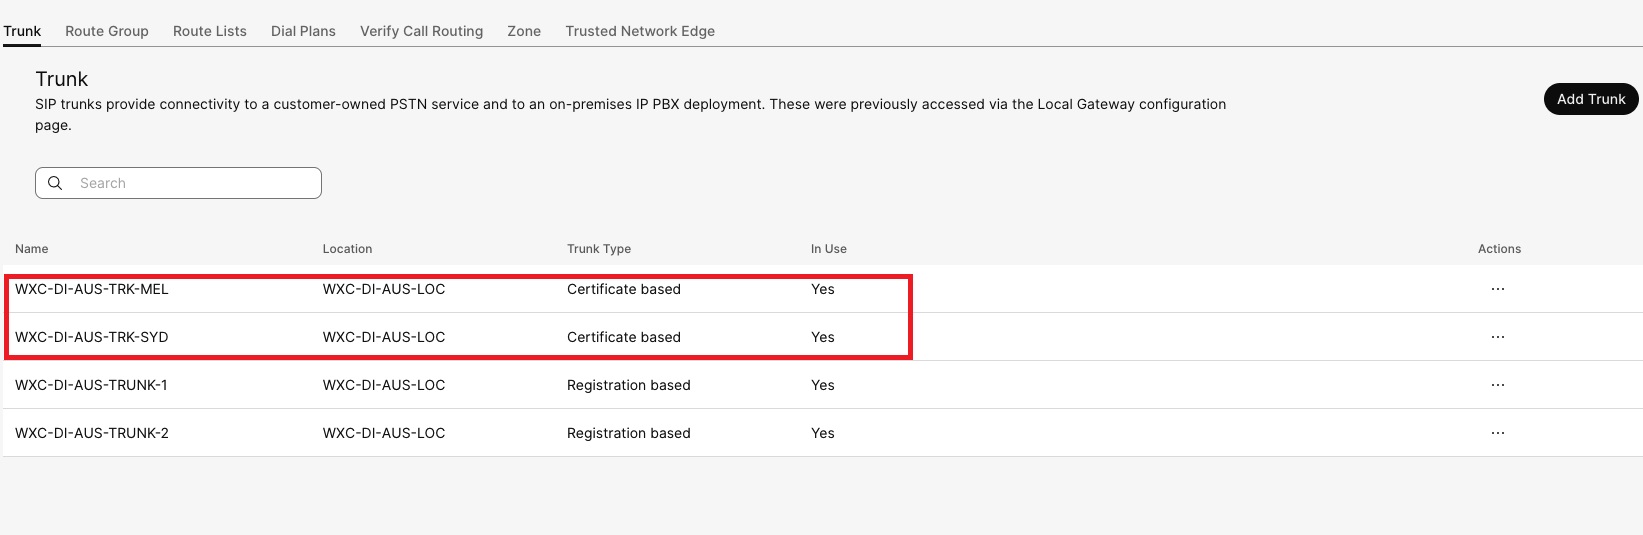
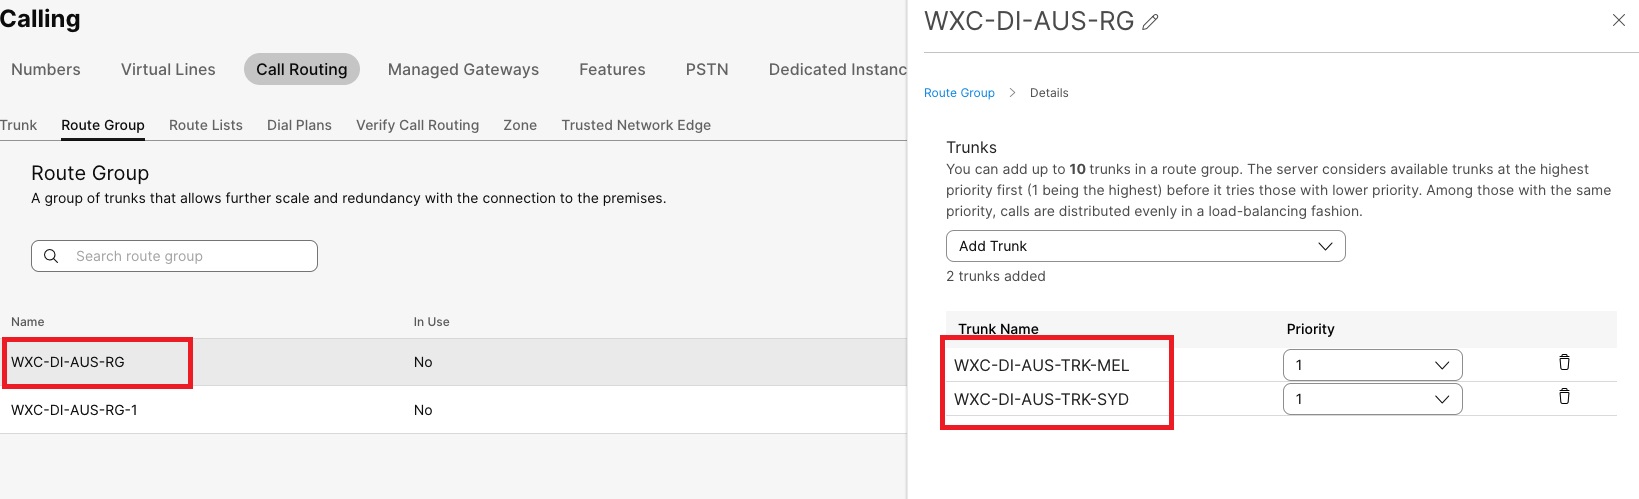
- Go to Route Group, make note of the route group name that is associated with certification-based trunk.
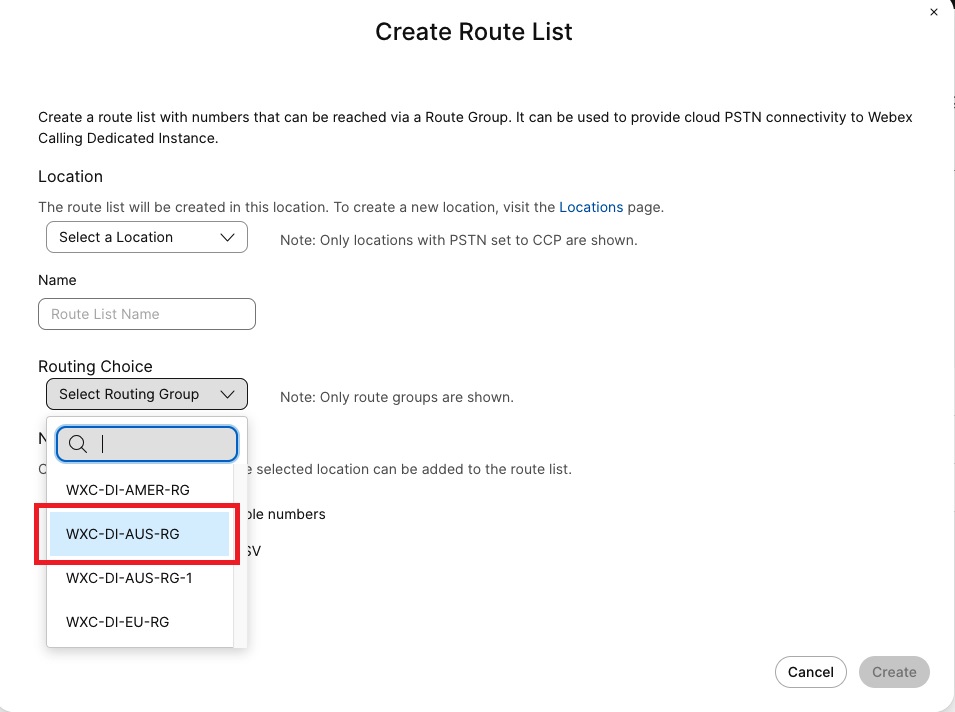
- Go to Route List > Create route list, under Routing choice select the route group associated with certification-based trunk.
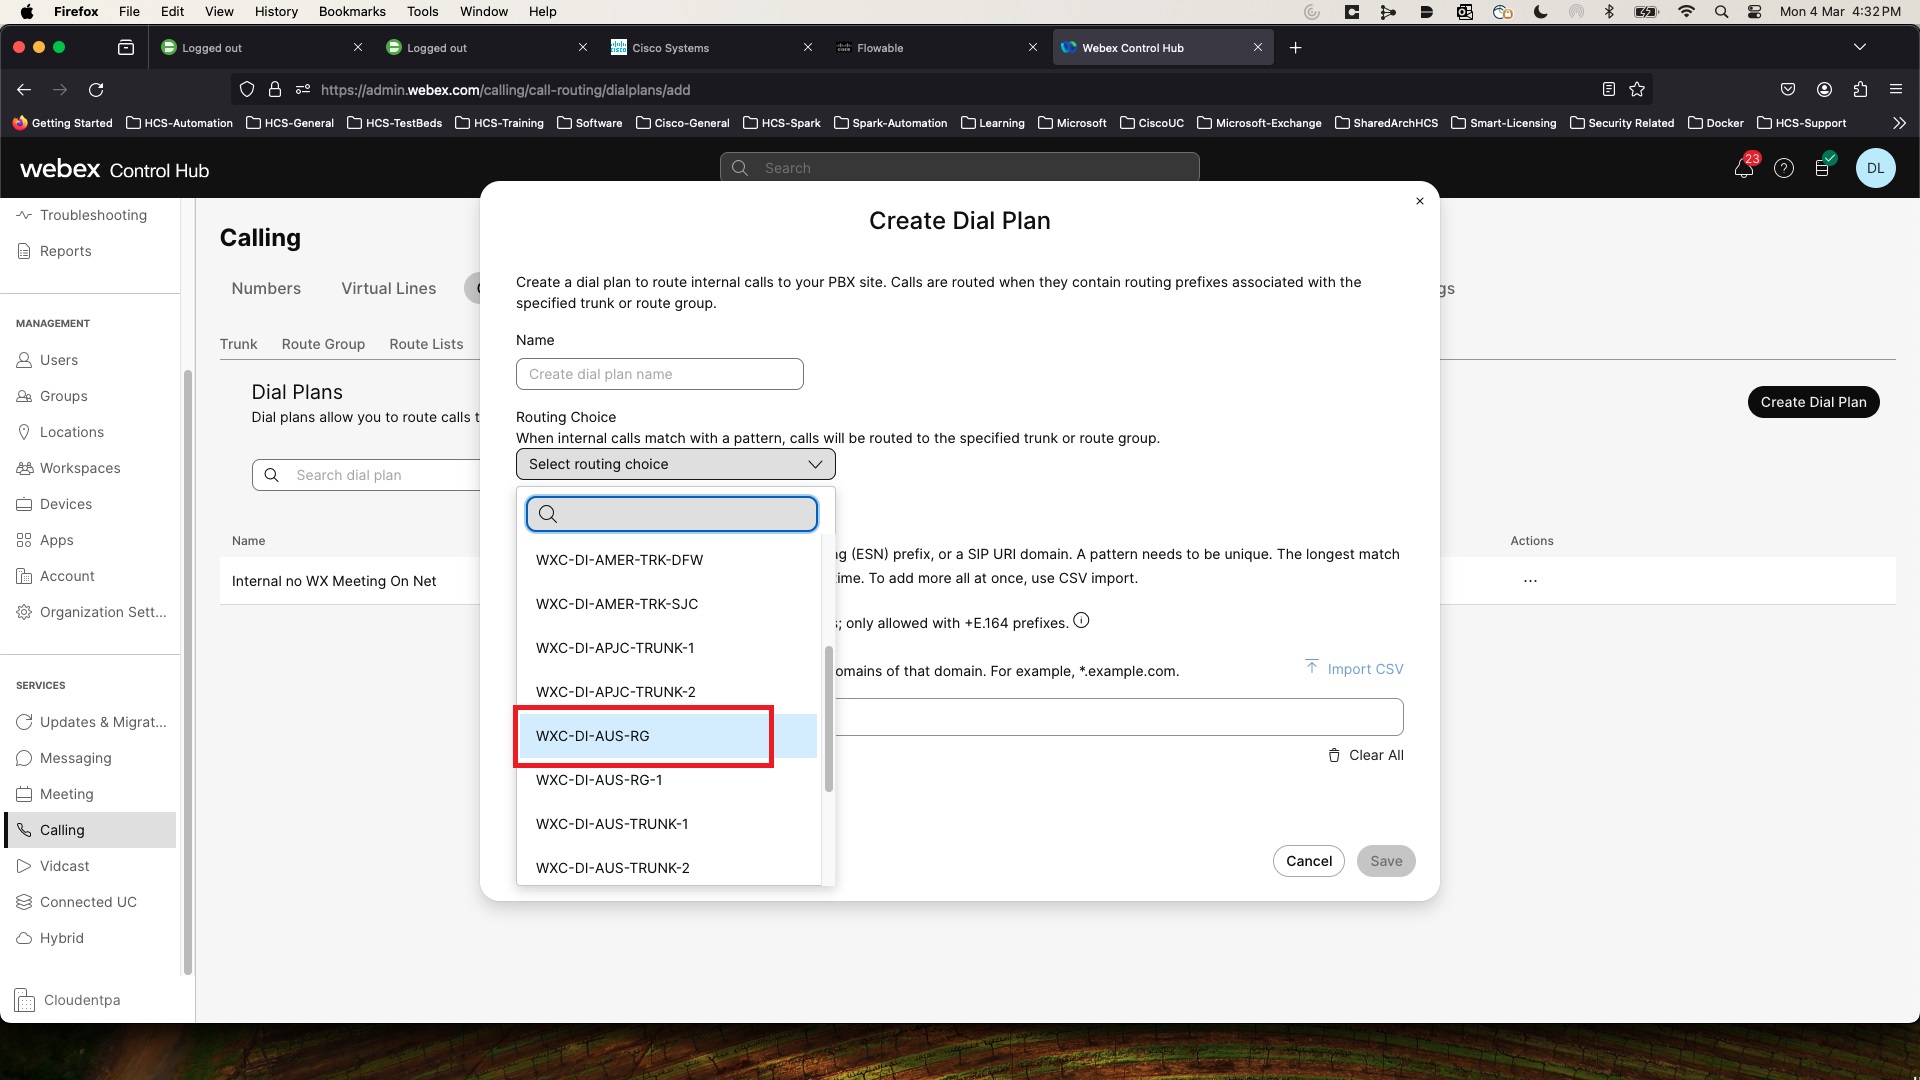
- Go to Dial Plans > Create a dial plan, under Routing choice select the route group associated with certification-based trunk.
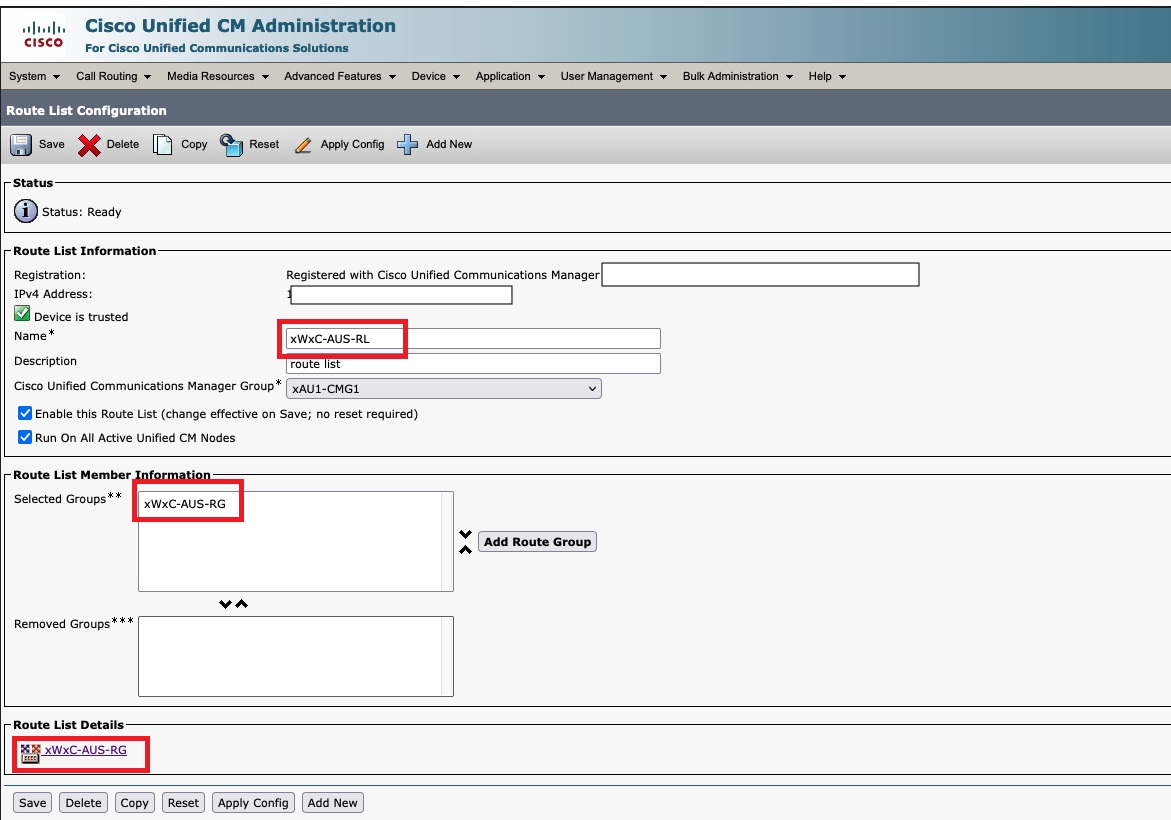
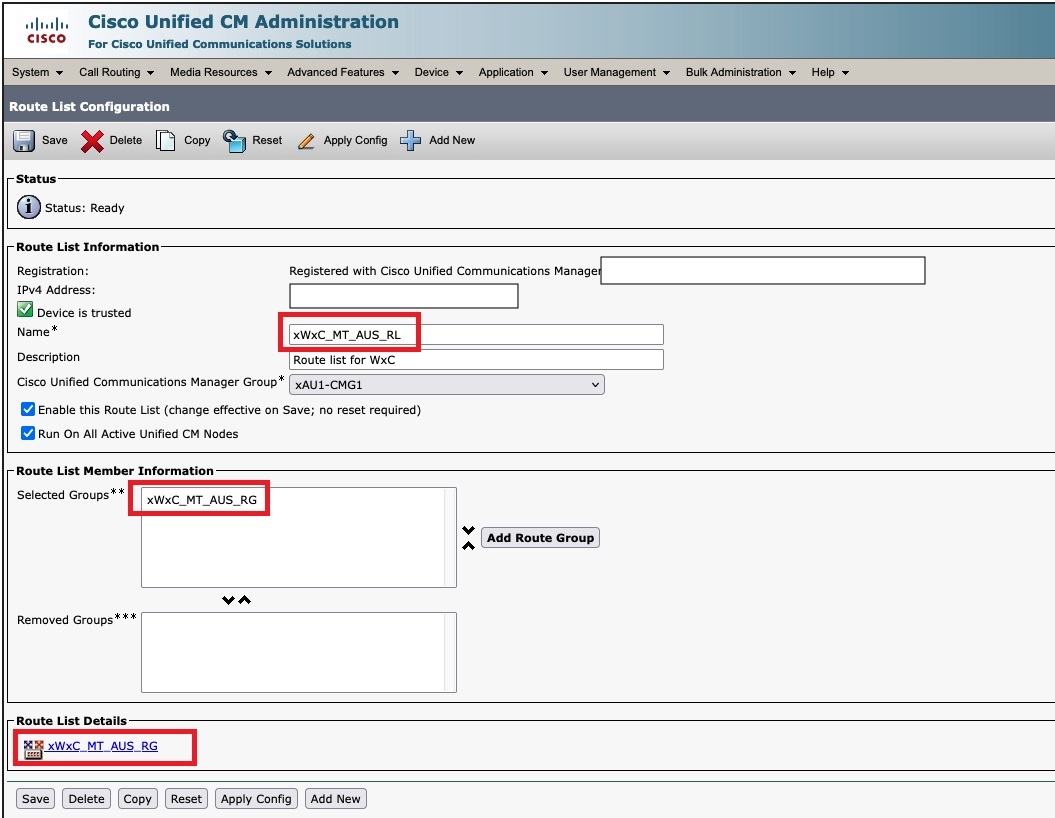
Route list configuration on Dedicated Instance
The route pattern that you were pointing to the existing route list must be changed to use the route group that is associated with certification-based trunk. For example: xWxC_<region>_RL should now point to xWxC_MT_<region>_RG.
| Old route list and route group | Redirected route list and route group to multitenant |
|---|---|
|
|


