Thanks for your feedback.
Configure voice portals for Webex Calling in Control Hub
 Feedback?
When you activate this service, you receive an email containing your voice portal number. Call this phone number to record your auto attendant greetings. This is also the phone number users at this location call to access their voicemail messages and settings.
The voice portal extension is typically the last four digits of the voice portal telephone number.
| 1 |
Sign in to Control Hub. |
| 2 |
Go to and then select the location you want to update. |
| 3 |
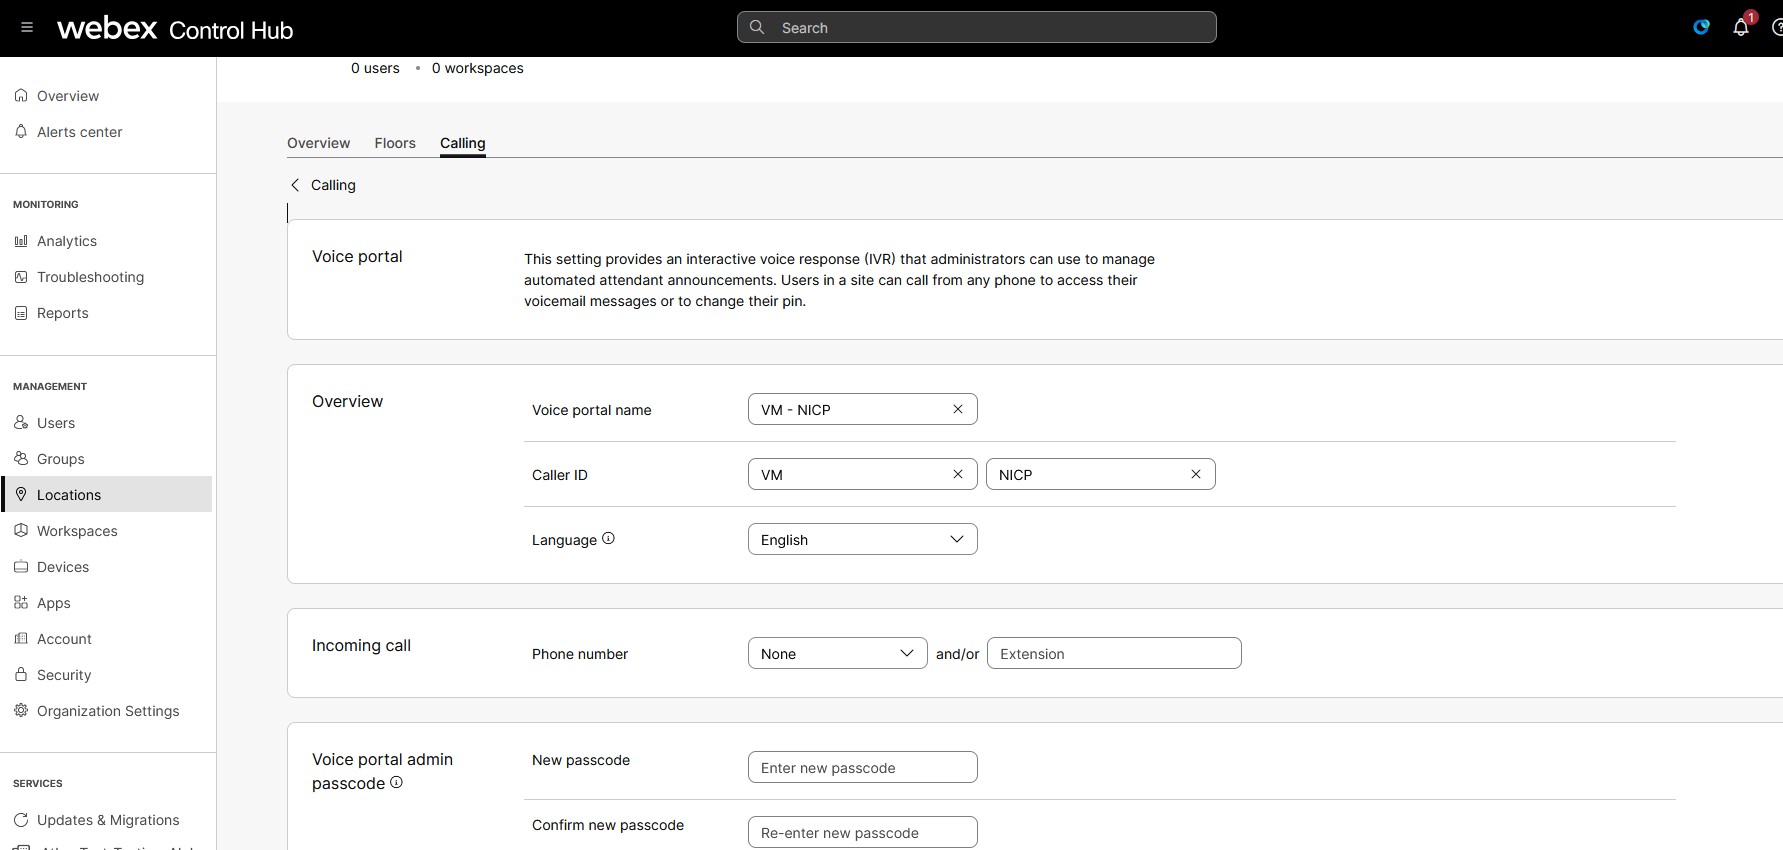
Click the Calling tab, scroll to Calling features settings, and click on Voice Portal.
|
| 4 |
Enter a name for the voice portal. |
| 5 |
In Direct line caller ID, select a caller ID to display when a person makes a call from this voice portal. You can choose a Display name or Other direct line caller ID name, a field displays in which you can enter a custom name. Other direct line caller ID name supports unicode characters of maximum 128 characters length. |
| 6 |
In Dial by Name field, enter a name which you want to use to dial this voice portal. Dial by Name field supports ASCII characters. |
| 7 |
Select the audio announcement language for the location in the Language drop-down menu. |
| 8 |
Under Incoming Call, choose a Phone Number and/or set an Extension number from those numbers configured for the location from the drop-down menu. The voicemail number and extension you've assigned for the location appears by default in the drop-down menu. If you don't assign a voicemail number and extension for a location, then you cannot access voicemails for that location. |
| 9 |
Under Voice Portal Admin Passcode, set the passcode for your location, and then reenter the passcode to confirm. Only administrators can access this passcode. When a user or administrator dials the voice portal number, the IVR system provides two options:
|
| 10 |
Click Save to confirm your changes. |