- Home
- /
- Article

Thanks for your feedback.

Manage call park in Control Hub
 In this article
 Feedback?
The call park service allows a user to park a call against a user’s extension or to a call park extension.
While the call is parked, you can make and receive other calls freely and invoke other features without limitation.
The call park service supports two types of call park:
-
Call Park Direct—Allows you to park a call against a specific user's extension or call park extension.
-
Call Park Group—Allows a defined group of users known as members to automatically park calls against available park destinations configured in a call park group. Park destinations can be member's extensions or call park extensions.
Call Park Direct
-
To park a call to a user or call park extension, the parking user puts the active call on hold and initiates a new call to the feature access code (FAC) *68 + (destination user’s extension) or (destination call park extension). The call remains parked until retrieved or a call park recall occurs.
-
To park a call using a call park extension being monitored by a user’s Cisco phone, the user presses the line key associated with the free call park extension.
Call Park Group
To park a call to a group, the parking user puts an active call on hold and initiates a new call to the feature access code (FAC) #58. The call park group service automatically hunts for the first available call park destination of the call park group to park the call against. The call park group feature always starts at the first assigned call park destination. When a destination is available, and the call is parked against that destination, the caller parking the call receives an announcement with the extension the call is parked against. The parking user may then announce or page that a call has been parked against an extension for retrieval.
Call park retrieve and recall user settings
The following operations apply to both call park direct and call park group.
-
To retrieve the parked call, any user within the organization can dial *88 + (extension of parked call).
-
To retrieve a call from a monitored call park extension, the user presses the line key associated with the call park extension holding the parked call.
-
If the parked call is not retrieved within the provisioned recall time, the parked call is retrieved and presented to the user that originally parked the call or an alternate recall user.
-
Call Park Direct—These settings are at the Locations level and are under
-
Call Park Group—These settings are at the Call Park Group level and are under
-
-
If the parking user’s line appears on other phones as shared or monitored, these phones also will be notified of the reverted calls, as shown in the Receptionist Client.
The Ring Pattern, Recall Timer, and Alert Hunt Group Wait Time values apply to both Call Park Direct and Call Park Group. These settings are at the Locations level and are under
Add call park extensions
You can manually add up to 100 call park extensions per location.
| 1 |
From the customer view in https://admin.webex.com/, go to . |
| 2 |
Go to the Call Park Extension card and click on Add New.
|
| 3 |
Choose the location where you want to add a call park extension. |
| 4 |
Enter a call park extension name and extension number. |
| 5 |
Select Save. |
Add multiple call park extensions
| 1 |
From the customer view in https://admin.webex.com/, go to . |
| 2 |
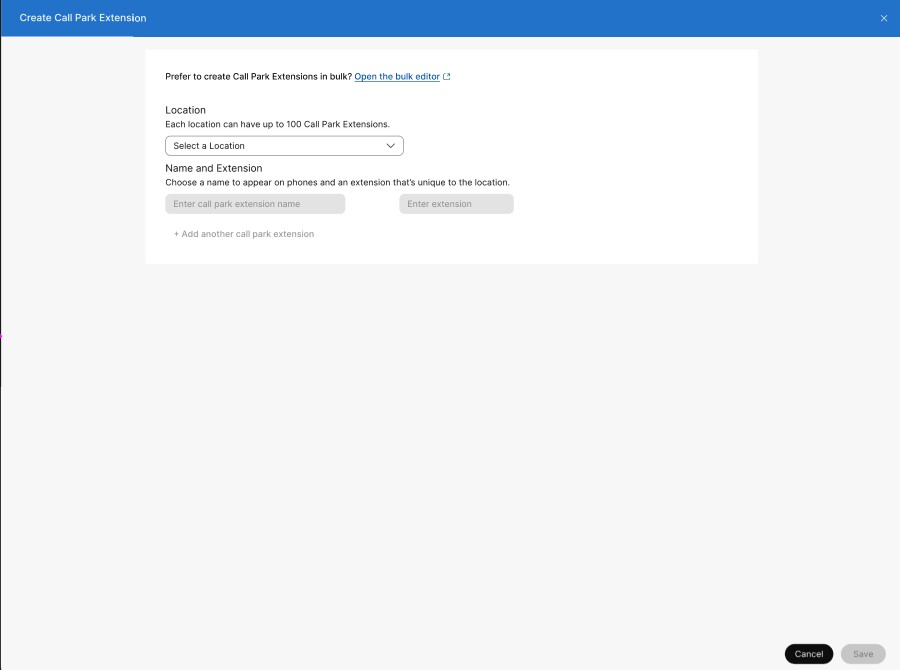
Go to the Call Park Extension card. On the Prefer to create Call Park Extensions in bulk message, click Open the bulk editor. The Manage Call park extensions window displays. |
| 3 |
Select a location from the drop-down list to download data for call park extensions configured on that location, or select all locations to download all data for all locations. |
| 4 |
Click Download Data or Download .csv templateto verify that your CSV file is properly formatted, making sure to fill in the required information. You can add up to 1000 call park extensions at a time. Each location can have up to 100 call park extensions. |
| 5 |
Click View Import history/Tasks to view the status of your CSV import and see whether you've encountered any errors. |
Create a call park group
Before you begin
| 1 |
From the customer view in https://admin.webex.com, go to . |
| 2 |
Go to the Call Park Group card and click on Add New. Select a location in the pop up window. |
| 3 |
On the Location and Name page, enter a name for the call park group. Click Next. |
| 4 |
On the Members page, search and add available members by name, phone number, or extension. Here, members define who can park the call. Click Next. Virtual line numbers can also be added as a member of call park group. You can make changes to the existing entries. Click the |
| 5 |
On the Park Destinations page, the Use members as park destinations is disabled by default. You can search for and add call park extensions where the group parks the calls. Click Next. Only call park extensions can be added to the destination list. You can park only one call at the call park extension. You can make changes to the existing entries. Click the |
| 6 |
On the Recall Settings page, select your preferred Recall To option in the drop-down menu. The recall destination is the user or group the call will be directed to if the call is not
picked up. They are the following options:
If you select a hunt group to recall to, then define the hunt group. |
| 7 |
Review your settings and then click Create. |
 to remove members.
What to do next
You can also view the newly created call park group.
-
Click the Call Park Name from the list to display a side panel. You can edit any specific entry.
From the Park Destinations, you can select the Use members as park destinations check box. This removes all the call park extensions from the destination list.
-
Click Yes, continue to proceed. The destination list with the call park extension(s) is removed.
Click No, Cancel to cancel and exit from the window.
Prerequisites for using the CSV file
-
Before uploading your call park CSV, ensure you read Bulk provisioning Webex Calling elements using CSV to understand the CSV conventions.
-
You can export your current call park groups, which allows you to add, delete, or modify your existing data set. You can also export a sample set of call park groups. Once modified, upload the file through the bulk features.
-
It is important to know the mandatory and optional columns, and information that you’ll need to provide when filling out the CSV template. The specific fields for the call park CSV are found in the table below.
-
The maximum amount of rows is 1,000 (not including the header).
Exporting more than 1000 records will export the data in a zip file format. The zip file contains a single CSV with all the data and multiple files less than 1000 records. The files less than 1000 records are generated for the administrators to quickly import any updates, as importing is limited to CSV of less than 1000 records.
-
A call park group can have users and workspaces. These are referred to as agents. If you're adding or editing a user, enter the user’s email address. For workspaces, enter the workspace name.
A user or workspace can only be assigned to one call park. A call park can only have users from the same location.
-
Each row can hold a maximum of 50 agents. See Add or Edit more than 50 call park agents at a time.
Prepare your CSV
Use the following table to see what fields are mandatory or optional, and what you need to determine when adding or editing the call park in bulk.
|
Column |
Mandatory or optional |
Description |
Supported values |
|---|---|---|---|
|
Name |
Mandatory |
Enter the name of the call park group. Call park group names within the same location need to be uniquely identifiable. If call park groups are in a different location, they can have the same name. |
Example: San Jose Call Park Character length: 1—30 |
|
Location |
Mandatory |
Enter the location to assign this call park group. |
Example: San Jose Location must be on the Locations tab in Control Hub. |
|
Agent Action |
Optional* *If you specify any agents, this field is mandatory. |
Enter ADD to add the agents you list in this row. Enter REMOVE to remove the agents you list in the row. Enter REPLACEto remove all previously entered agents and replace it with the agents you’re adding in this row only. |
ADD, REMOVE, REPLACE |
|
Agent1 ID, Agent2 ID… Agent50 ID |
Optional |
Enter the agents that you’d like to assign to the call park group. Agents can be users or workspaces. For users, enter their email address. For workspaces, enter the workspace name. |
Example: test@example.com Character length: 1-161 |
Add or Edit more than 50 call park agents at a time
Each row can hold a maximum of 50 agents. To add or edit more than 50 agents, using the CSV file, follow these steps.
| 1 |
Enter the 50 agents that you’d like to add or edit on the first row for the call park you’re adding or editing. 
|
| 2 |
On the next row, you only have to enter information in the following columns to add or edit additional agents:
You can leave all other columns blank. |
| 3 |
Continue to do this until you have added all of the agents you need to add or edit. |
Bulk add call park groups
To add call park groups in bulk, download and fill out a blank CSV template.
| 1 |
From the customer view in https://admin.webex.com, go to Services, and choose . |
| 2 |
Click on the Call Park Group card. On the Prefer to create Call Park Group in bulk message, click Open the bulk editor. The Manage Call park group window displays. |
| 3 |
Select a location for the call park group that you'd like to add. |
| 4 |
Click Download Data or Download .csv templateto verify that your CSV file is properly formatted, making sure to fill in the required information. Fill out the spreadsheet. See section Add or Edit more than 50 call park agents at a time.
If the data for the selected call park group exceeds the maximum, which is more than 10,000 rows for each CSV, you’ll receive a zipped file that includes multiple CSV files. |
| 5 |
Upload the CSV file by dragging and dropping or clicking Choose a file. |
| 6 |
Click View Import history/Tasks to view the status of your CSV import and see whether you've encountered any errors.. |
Configure call park settings for your location
| 1 |
From the customer view in https://admin.webex.com, go to , and then select the location you want to update. |
| 2 |
Go to the Call Park Extension card and click on Manage and select Bulk manage. |
| 3 |
Select the Calling tab, and then click Call Park Settings in the Calling Features Settings section. |
| 4 |
Change the following settings:
|
| 5 |
Click Save. |


