
Thanks for your feedback.
Webex App | Share Files from Microsoft OneDrive or SharePoint Online
 Feedback?
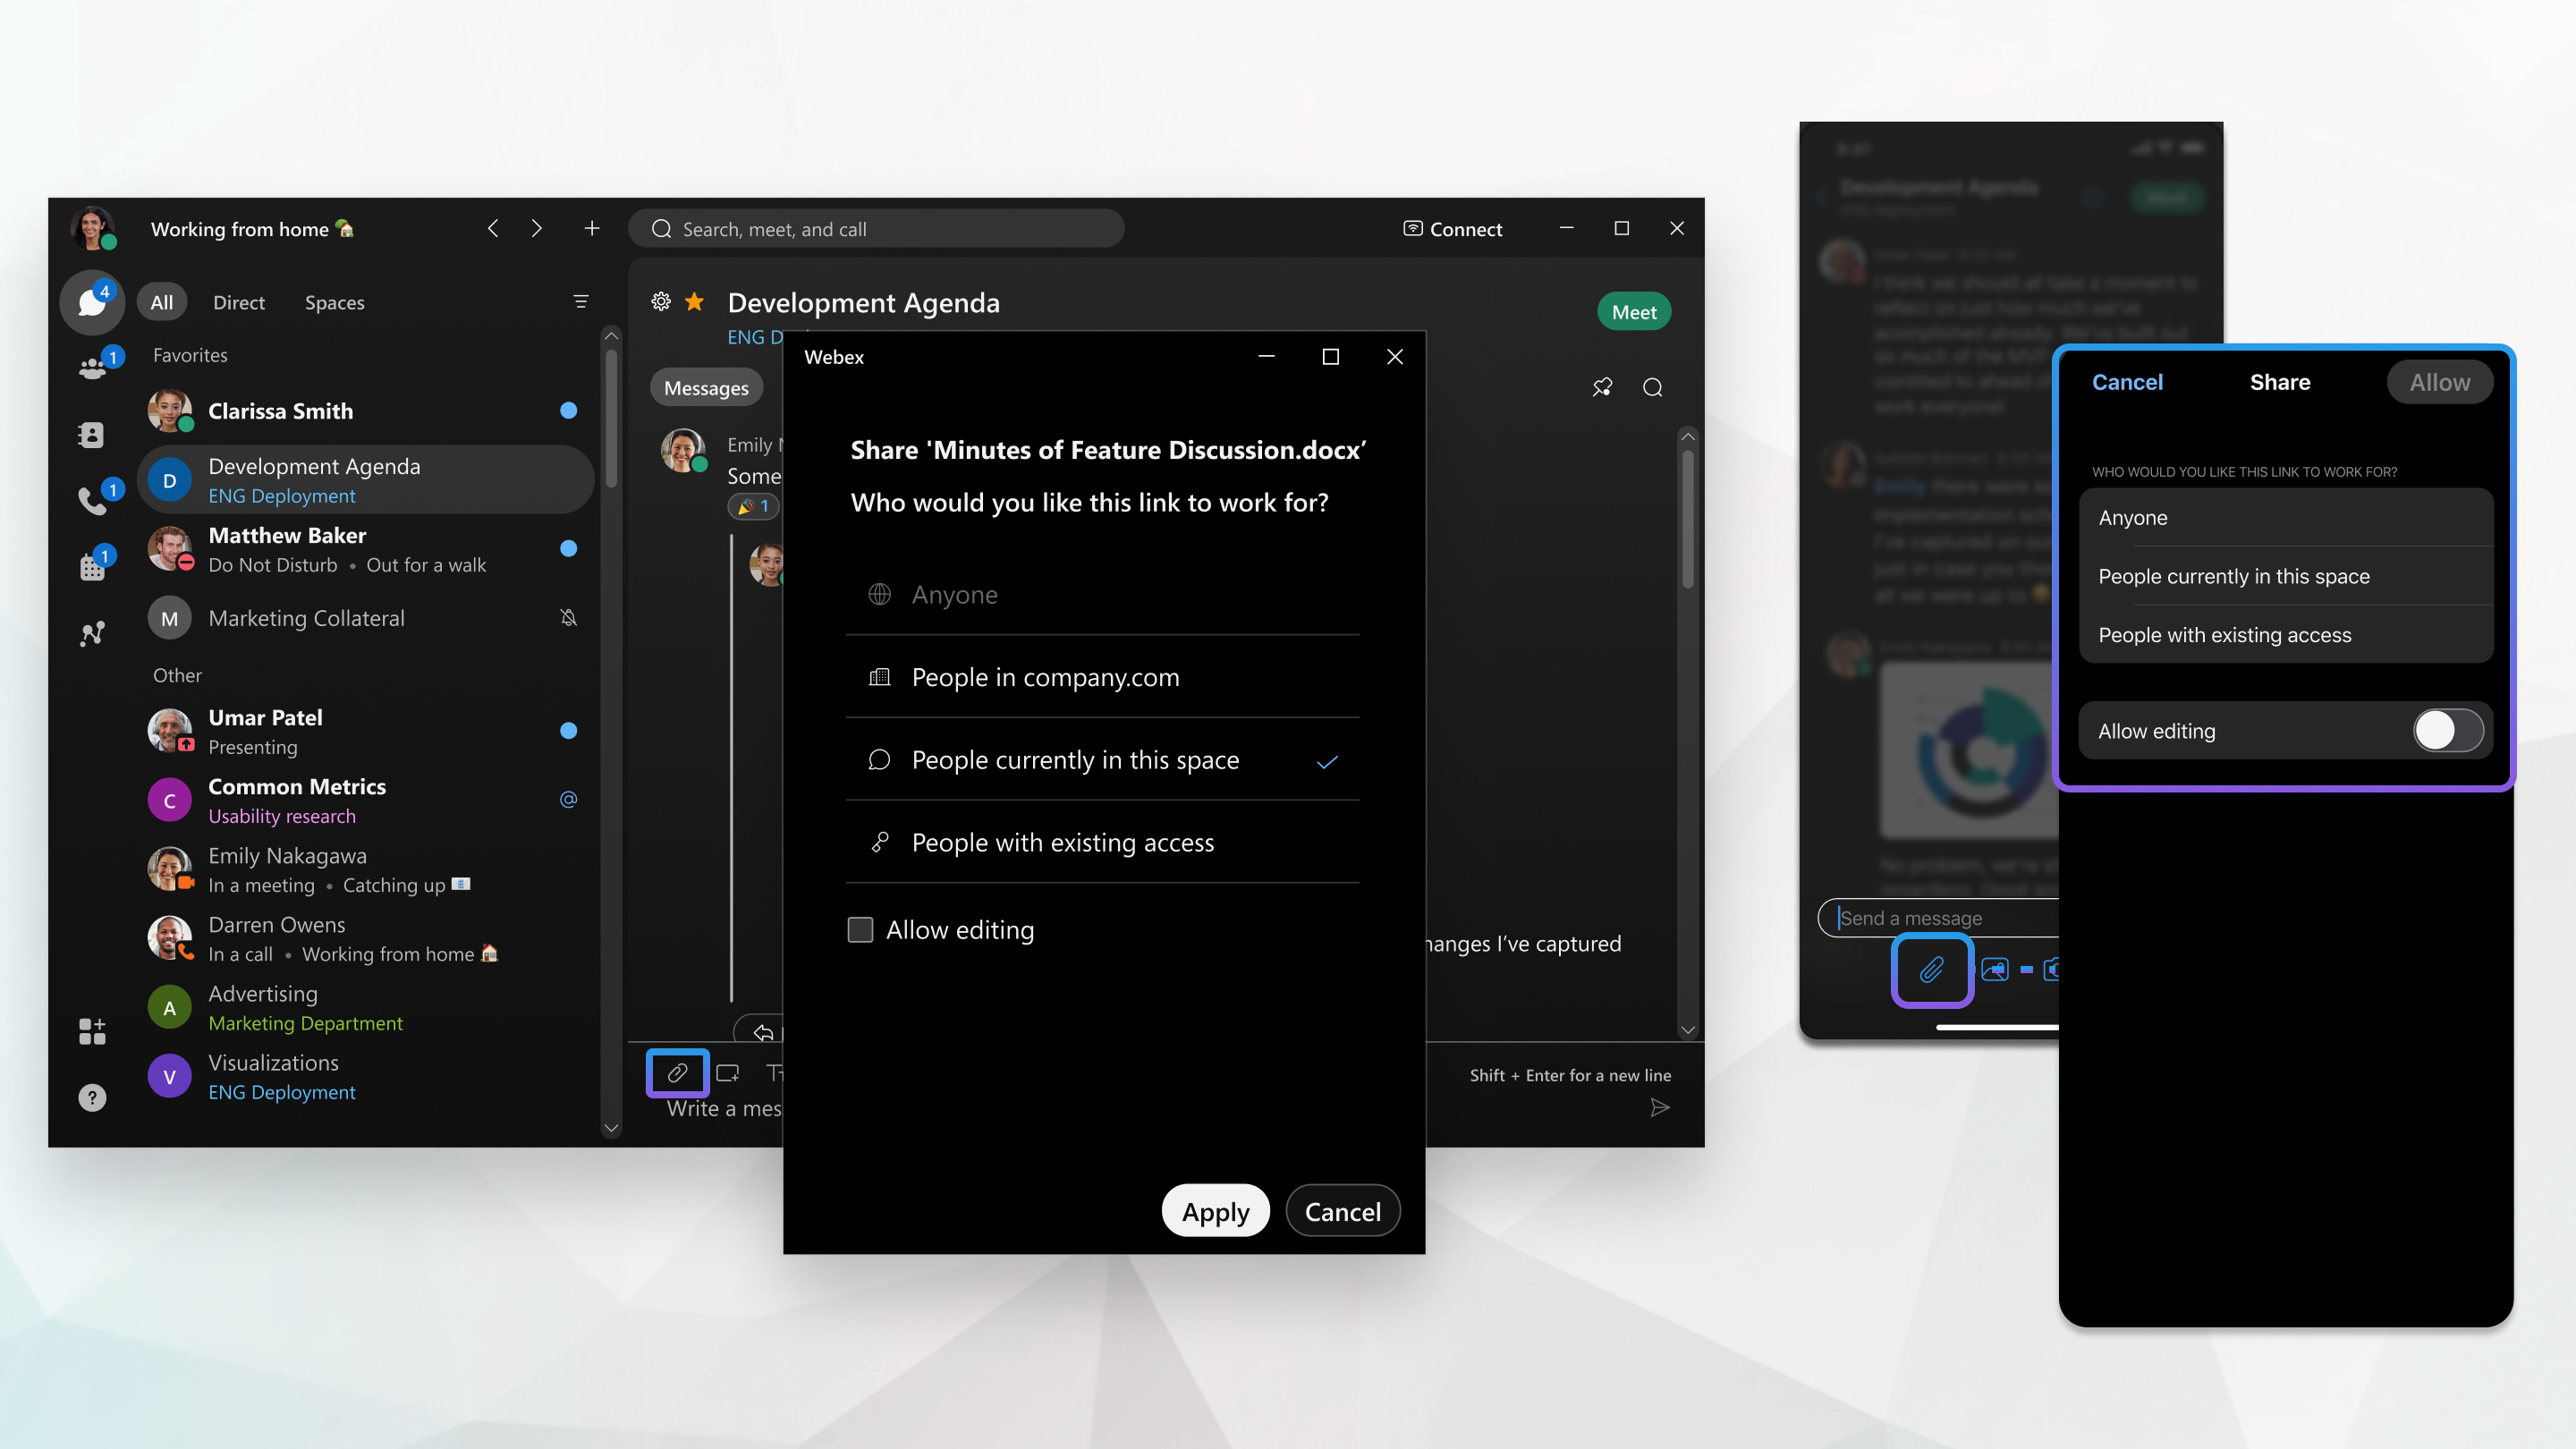
You can choose a file directly from OneDrive or SharePoint Online. After you share the file in your space, people can edit the file directly from Webex App. More than one person can edit the file at the same time and they can see all the updates.
There are two options for sharing files:
- Direct share using a file URL.
- Sharing using the Webex Attachment button,
 .
.
Both options are described below.
When a file is shared in multiple messages with varying permissions, each message's file link operates according to the permissions set at the time of sharing. However, any modifications to link or direct access permissions in OneDrive or SharePoint will continue to be respected in Webex.
Direct share using a file URL
You can now share links to files in a supported file sharing service (OneDrive/SharePoint, Box, Google Drive) simply by pasting a link into a Webex Space or direct message!
Once you've shared the link, you'll have a file sharing experience similar to files shared using the paperclip icon:
- The message shows a thumbnail for the file with basic details as well as Refresh and Copy share link options.
- You can use the Update file share button to extend access for the file to everyone in the space.
- File names are searchable within Webex.
- The content also appears in the Files tab of the space's Content tab.
- You can open the file directly within Webex rather than within an external browser.
To share a link as a file using ECM (Microsoft SharePoint/OneDrive, Box, or Google Drive), make sure that you meet the following prerequisites:
- You must have ECM file sharing enabled.
- The specific ECM service (Microsoft OneDrive/SharePoint, Box, or Google Drive) must be enabled for your organization by an administrator.
- You must be logged in to the ECM service.
If you're not logged in, you'll be prompted to do so. If you're not prompted to login because the service isn't enabled by your administrator, the file reference appears as a regular link.
Share using the Webex Attachment button
- In the message area, click Attachment
, and then choose Share from OneDrive or SharePoint Online.
Your administrator can restrict the files that you share to only files from OneDrive or SharePoint Online. When you click Attachment
, you don't see the option to Upload from my computer, and
you select a file from OneDrive or SharePoint Online. - Select a file from OneDrive or SharePoint Online, and then click Open.
- Then, decide who can view the file in the space:
Your administrator can change which of these options are available in OneDrive or SharePoint Online.
- Anyone—Anyone can view the file, including people from outside your organization. To allow people to edit the file, click Allow editing.
- People in your organization—Only people in your organization can view the file. To allow them to edit the files, click Allow editing.
- People currently in this space—Access to the file is shared with everyone in the space. To allow them to edit the files, click Allow editing.
People added to the space after the file is shared, won't automatically be given permission. Hover over the file in the space and click Update file share
 , to reshare the file. When the permission is updated everyone in
the space will have access to the file.
, to reshare the file. When the permission is updated everyone in
the space will have access to the file.- People with existing access—Webex App uses the permissions already set up for viewing and editing this file in OneDrive or SharePoint Online.
When people don't have access to the file, they see the file name but they can't edit or view the file or see a thumbnail preview.
- Click Apply and then press Enter to share the file.
You can choose a file directly from OneDrive or SharePoint Online. After you share the file in your space, people can edit the file directly from the Webex App. More than one person can edit the file at the same time and they can see all the updates.
When a file is shared in multiple messages with varying permissions, each message's file link operates according to the permissions set at the time of sharing. However, any modifications to link or direct access permissions in OneDrive or SharePoint will continue to be respected in Webex.
| 1 |
In the message area, tap Attachment
If you haven't already added your account, click Connect to Account to add your account. |
| 2 |
Select a file from OneDrive or SharePoint Online, and then tap Open. |
| 3 |
Then, decide who can view the file in the space: Your administrator can change which of these options are available in OneDrive or SharePoint Online.
When people don't have access to the file, they see the file name but they can't edit or view the file or see a thumbnail preview. |
| 4 |
Select Apply, and then tap Send
|


