
Thanks for your feedback.
Webex App | Schedule a meeting from the meetings calendar
 Feedback?
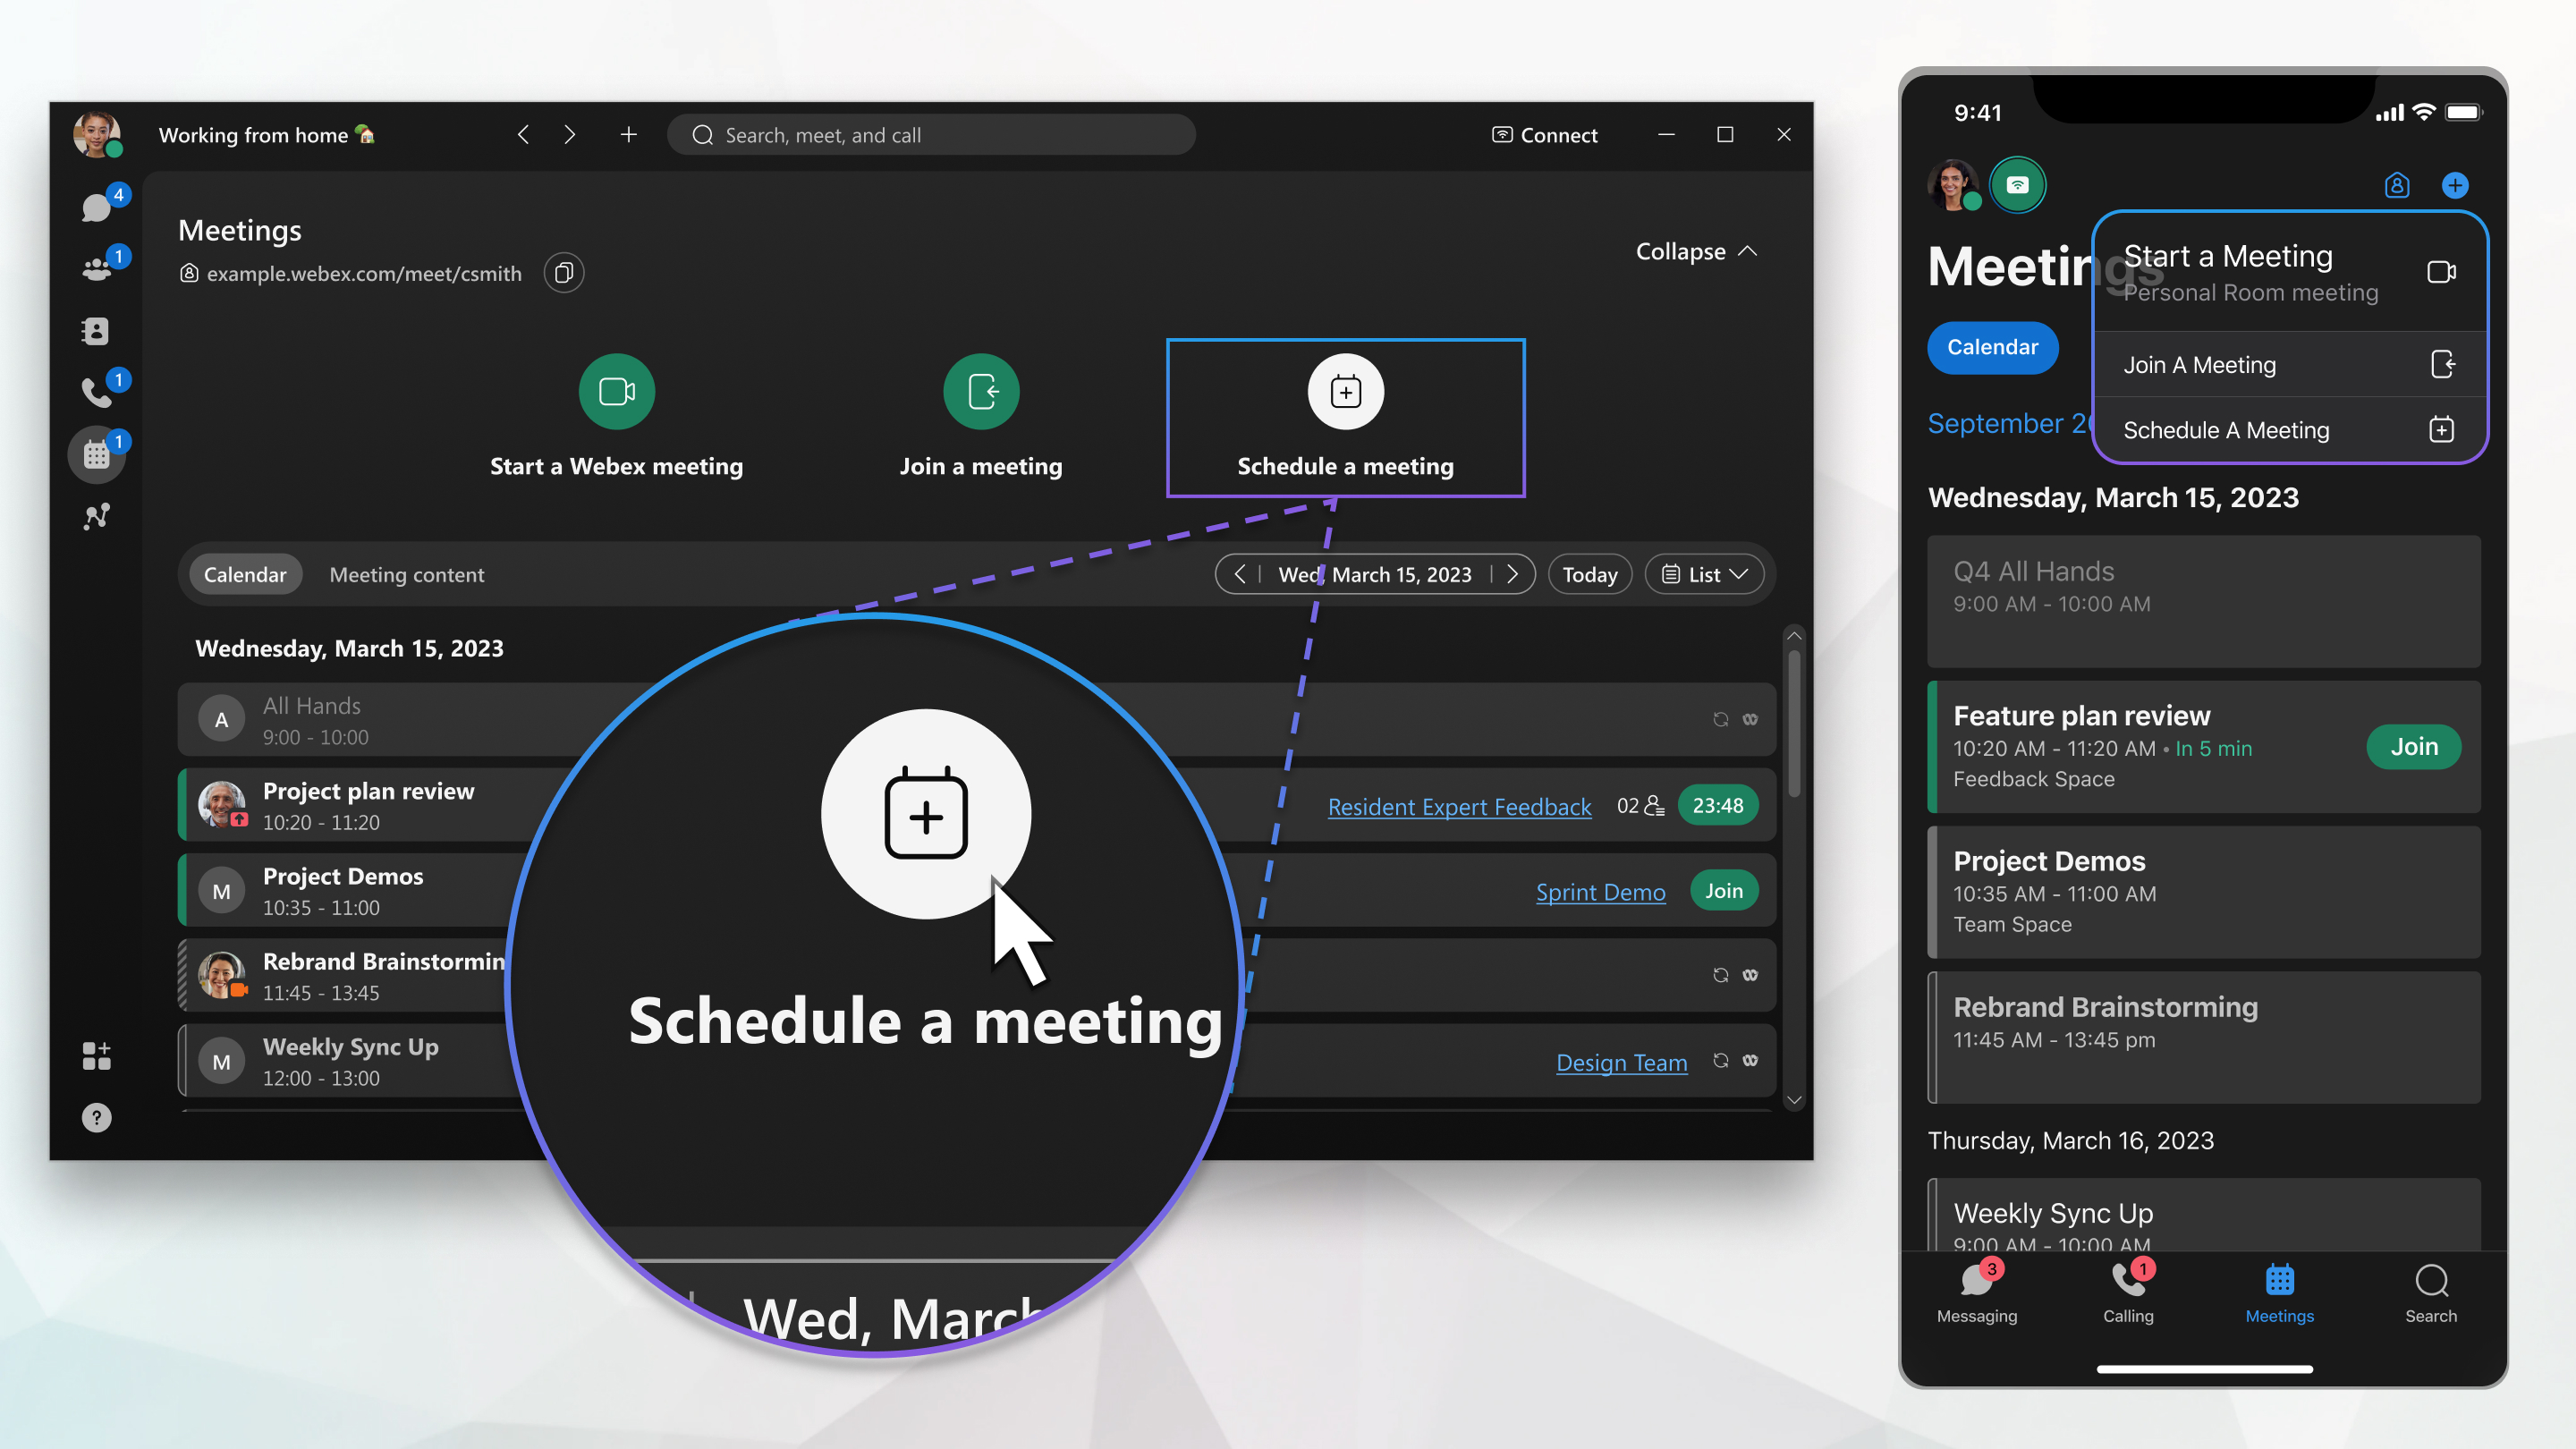
You or anyone you assign as a cohost can start the meeting, invite people to it, start breakout sessions, record the meeting, and share the recording.
End-to-end encryption for Webex App meetings
Scheduled meetings support end-to-end encryption. For more information on how to encrypt all your meetings by default, see Webex App | Set end-to-end encryption for meetings.
Before you begin
For FedRAMP users, when Hybrid Calendar or O365 isn't configured in Webex App, the only meetings that appear in the calendar are those meetings that are within the FedRAMP boundary (FedRAMP - FedRAMP).
| 1 |
Go to Meetings
|
| 2 |
Click Schedule a meeting
If you don't see Schedule a meeting, your account isn’t set up to host meetings. You can schedule a meeting from a space instead.
|
| 3 |
Add Invitees, enter a name or email address. When your account is set up with Hybrid Calendar, you see icons beside each person's name to show their availability.
To make an invitee a cohost, hover over their name, click |
| 4 |
Under Rooms, enter the name of a meeting room. When your account is set up with Hybrid Calendar, you see icons beside each room name to show the availability.
Only meeting rooms listed in your organizations directory are displayed. Hover on the room icon to see the room contact card. |
| 5 |
For a one-time meeting link, click Advanced settings and choose from the available options:
|
| 6 |
Click Schedule. The meeting is created and added to your calendar. An email invitation is sent
to everyone invited to the meeting.
If you need to make changes, you can update the meeting details or cancel the meeting. |
 .
. , and then enter your meeting info:


 , and then click
 | 1 |
Go to Meetings |
| 2 |
Tap Schedule |
| 3 |
Provide your meeting details:
|
| 4 |
Tap Schedule to schedule your meeting. |
 next to the person's name and tap
  to generate a new password.
| 1 |
Go to Meetings |
| 2 |
Tap the floating action button |
| 3 |
Provide your meeting details:
|
| 4 |
Tap Schedule to schedule your meeting. |

 next to the person's name and tap
 Once you schedule your meeting, the people you invited get an email sent to them automatically to let them know. If you edit the invite or cancel it, a new email is sent to everyone invited so they stay up to date.
| 1 |
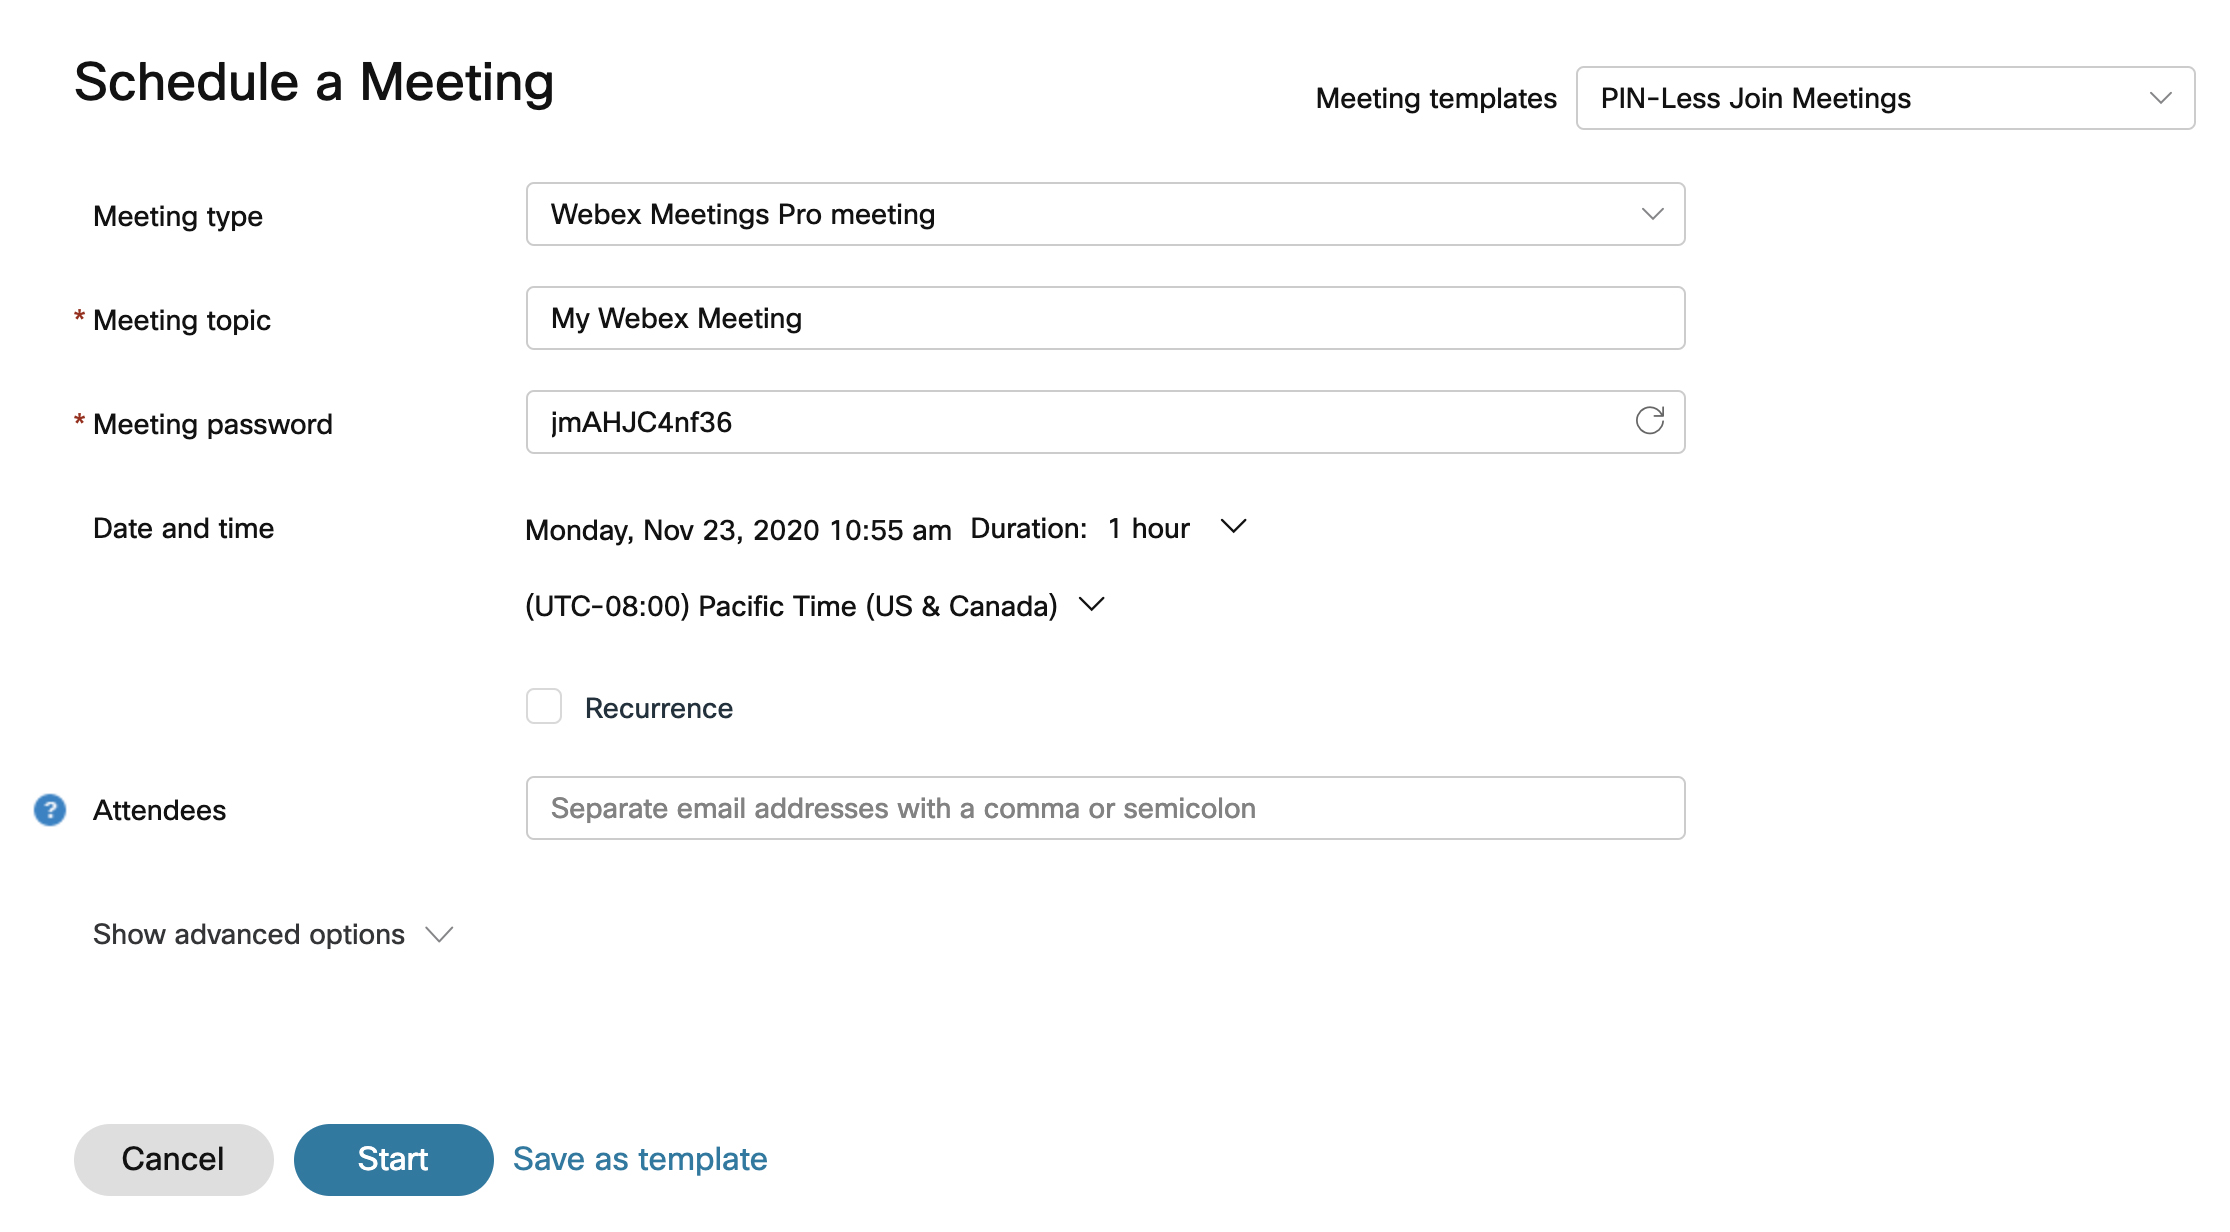
Sign in to Webex, click or, in the app header, click If you've saved meeting templates before, you can select one from the Meeting templates drop-down list. |
| 2 |
Select a Meeting type from the drop-down list, if your account has more than one associated with it. Meeting types are the default or customized sets of meeting features available for your organization. |
| 3 |
Enter a name for the meeting in Topic. |
| 4 |
From Meetings classification level, select the drop-down menu to view available classification labels. These labels help ensure that information is shared appropriately and aligns with your organization’s security standards. When you turn on classifications, the system automatically creates a public classification and sets this as the default. You can rename the public classification, but can't delete it. As the meeting host, you can change the classification anytime before the meeting starts, the classification can't be changed once the meeting has started, and when the meeting has ended. |
| 5 |
Select the Date and time for your meeting. |
| 6 |
You can set the meeting to repeat by checking the Recurrence check box. You can schedule your meeting to happen daily, biweekly, monthly, and more. |
| 7 |
In Description, enter any context or details you want your attendees to have about the upcoming meeting. |
| 8 |
In the Invitees section, enter the name or email address of the person you're inviting. The Attendees field suggests people who you've invited before, existing accounts on your Cisco Webex organization, and contacts in your address book. If the person has a host account in your organization, you can make them an alternate host by clicking Assign cohost |
| 9 |
For other options, select Advanced Settings. Your Webex options may be set to include:
|
| 10 |
If you want to save these settings to use as a template in the future, click Save as template. Otherwise, click Start to start your meeting right away, or click Schedule if you're meeting later.
For schedule meetings, you can add the meeting to your calendar by opening the meeting from the Meetings tab and clicking Add to my calendar An iCalendar (.ics) file downloads. Select the .ics file and accept the meeting. To invite others to your meeting, send the .ics file as an email attachment. |


 next to the name of the meeting.


