- Home
- /
- Article

Thanks for your feedback.

 In this article
 Feedback?
You can see the step-by-step instructions for migrating from BroadWorks and BroadCloud to Webex Calling using Control Hub. It covers data extraction, transformation, and provisioning processes, along with necessary pre-migration checks. Additionally, it offers steps for troubleshooting and managing errors during migration. Administrators can review their data after the provisioning and experience the features post migration.
Overview
This document provides detailed instructions on using tools to migrate from BroadWorks and BroadCloud to Webex Calling MT (Flex). Migration from BroadWorks and BroadCloud to Webex Calling MT (Flex) supports through Control Hub, using an enhanced transformation and provisioning tool. The migration tools facilitate a complete transition from BroadWorks or BroadCloud to Webex Calling services.
The steps outlined here also apply to Webex for Government, except for Broadcloud to Webex Calling MT (Flex) migration.
Migration impact
The post-migration impacts are as follows:
Administrators
After the migration, administrators must:
- Begin using Partner Hub and Control Hub to configure features rather than CommPilot.
- Reconfigure any features that are not part of the migration.
You need to manually migrate the features that are not automatically migrated after the migration tools are completed.
Users
Supported features should work post-migration the same that they worked before the migration. Webex Calling features not supported by the migration must be reconfigured on Webex after the migration:
- Users will lose their call history and message history.
- Users will lose all personal key-line settings and customizations and must reconfigure these settings after the migration. Examples include speed dials.
- Users must reset their access codes and passwords at first login.
- Users who use the UC-One client are required at first login to upgrade to the Webex App.
Prerequisites
Before you start your migration, make sure that you meet the following requirements:
- The partner must go through the premigration checklist to meet all the requirements.
- BroadWorks requires the system administrator credentials to run the extract and device move tools. It isn’t applicable for BroadCloud partners.
- Get the source extract file from BroadWorks and BroadCloud. For more information, see Extract tool.
Source extract file should always contain one customer.
- Extract and device move tools must run from the secondary BroadWorks Application Server during a maintenance window to minimize risk. BroadCloud partners run the Extract and Device Move Tool from the Service Provider Portal data.
- Create a location manually with PSTN configuration. The tool will copy this PSTN configuration for all newly migrated Webex Calling location. If multiple Webex Calling locations have PSTN, the tool will select the first location with PSTN and use its PSTN information to provision the migrated locations. If location is in different country (than the 1st location), then admin needs to manually provision PSTN in these locations (in different country) manually update customer.json file with the ID of the PSTN, before running provisioning tool.
Migration Plan
The migration plan has 3 stages:
| 1 |
Preparation - Get a copy of user data with the Extract Tool. |
| 2 |
Transform and Provisioning - Use the customer view in Control Hub to transform and provision the data. |
| 3 |
Migration: If the partner administrators don’t have devices to move from Cisco BroadWorks to Webex Calling, then running the device move tool is not necessary. Partner administrators can use the public link below to activate the phone numbers directly through the Control Hub portal. For more information, See Manage phone numbers in Control Hub. |
Migration steps in Control Hub
Consider the following steps and considerations for migration.
- Choose PBX type and import
- Custom configuration (optional)
- Supplemental Data
- Data transformation
- Data provisioning
- Provisioning summary.
Get started with Control Hub
| 1 |
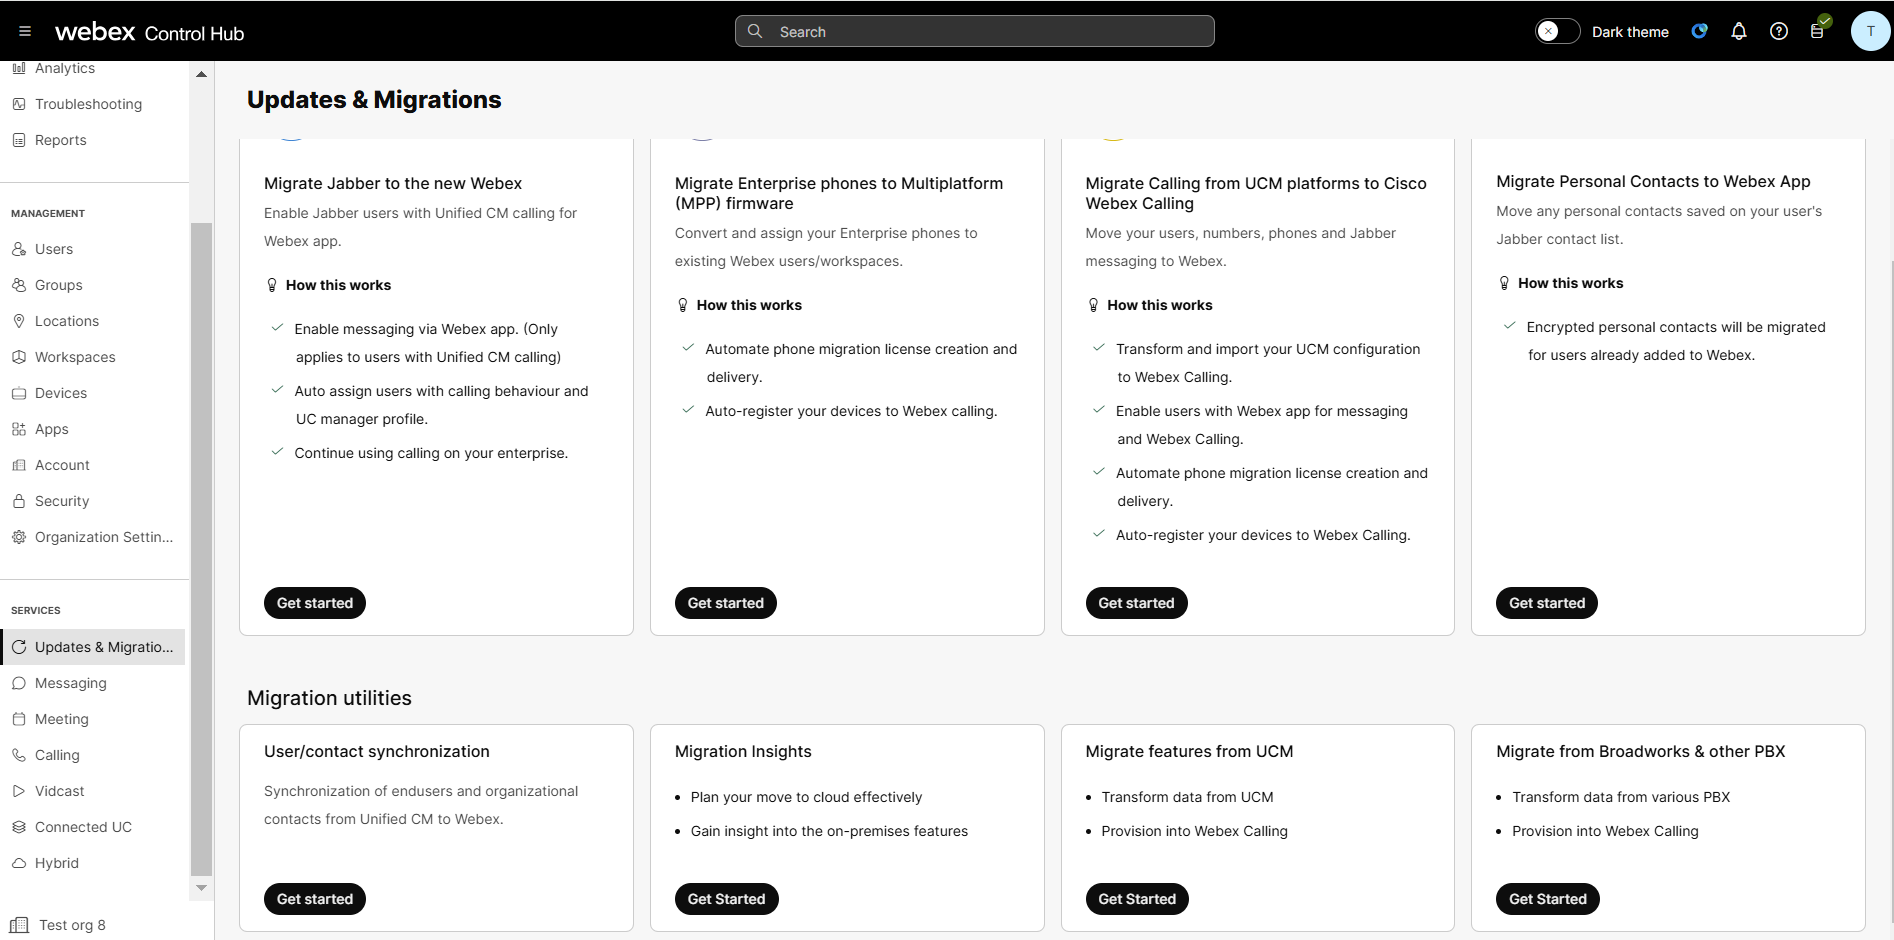
From the customer view in Control Hub, go to Services > Updates & Migrations. Here you see a single dashboard to manage migration. |
| 2 |
In the Migration utilities section, go to Migrate from BroadWorks & other PBX card and click Get Started.
The Migrate from BroadWorks & other PBX page opens. |
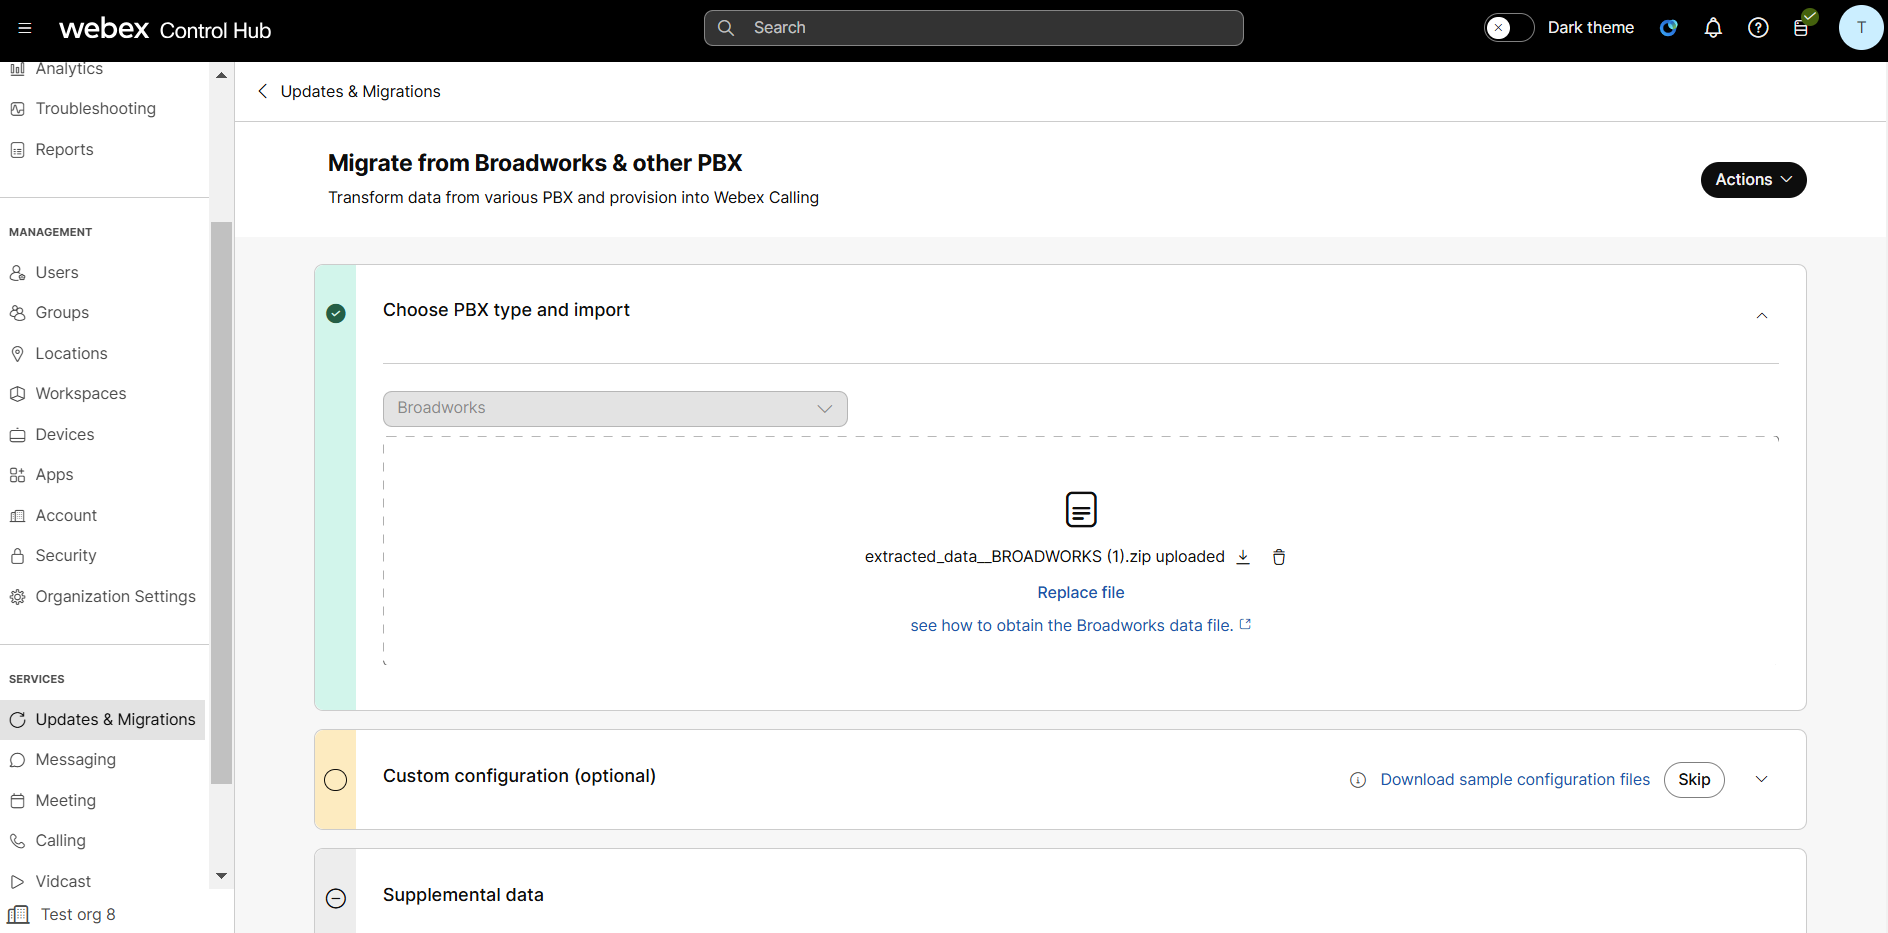
Choose PBX type and import
You can choose the PBX type to transform the data and provision into Webex Calling.
| 1 |
In the Select PBX type drop-down, you can choose BroadWorks or BroadCloud type. Once selected, the pane opens and then uploads the customer extract data. |
| 2 |
To get the source extract file, Refer Extract tool for BroadCloud and BroadWorks. The extract file is in .ZIP format. |
| 3 |
Select Choose a file or Drag and drop a file to upload the extracted data.
The maximum size of upload is 2 GB. |
| 4 |
Use Replace file, to replace the uploaded .zip file. Once uploaded, In the left pane, the color changes to green stating the step is complete. |
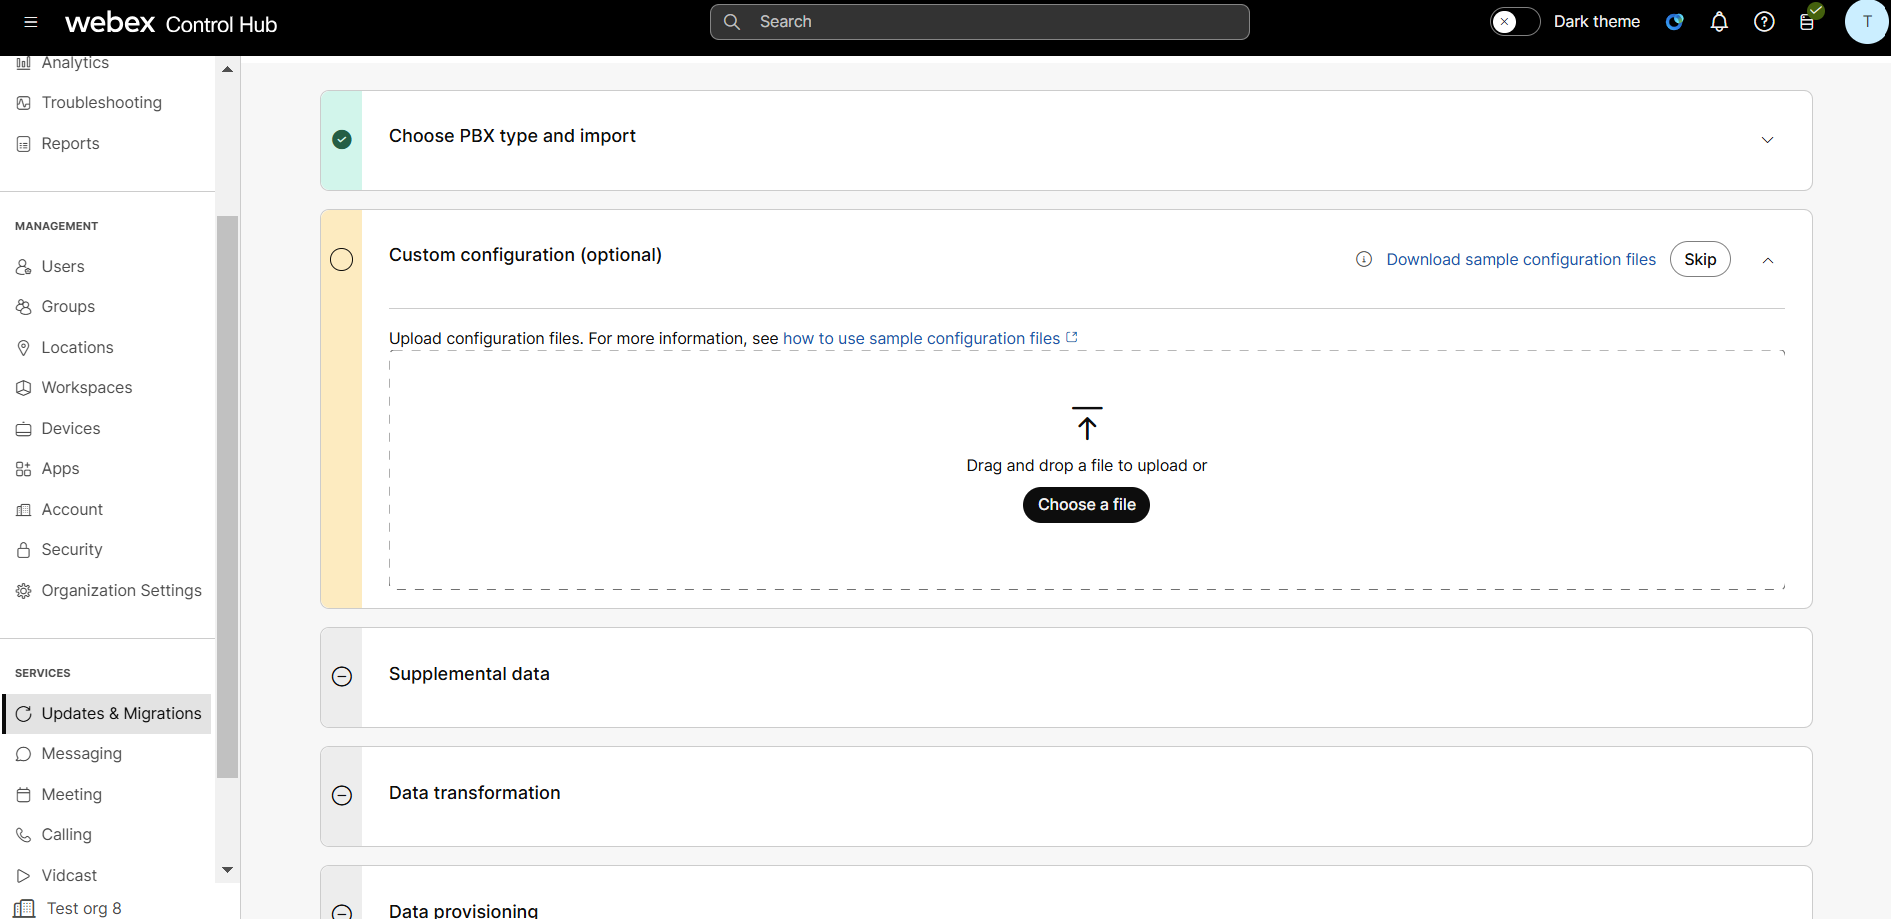
Custom configuration(optional)
This is an optional step. You can use it to modify the parameters or skip with the default configuration.
| 1 |
Click Download sample configuration files, you can download and modify the few optional parameters applicable for the migration.
| |||||||||||||||||||||||||||||||||||
| 2 |
Once modified, Select Choose a file or Drag and drop a file to upload the modified .zip file. | |||||||||||||||||||||||||||||||||||
| 3 |
Use the Skip option to move to the next step with the default configuration. |
Supplemental data
- Click Download sample supplemental data files to download the .zip files.
- From the downloaded .zip files, choose the customers.csv.
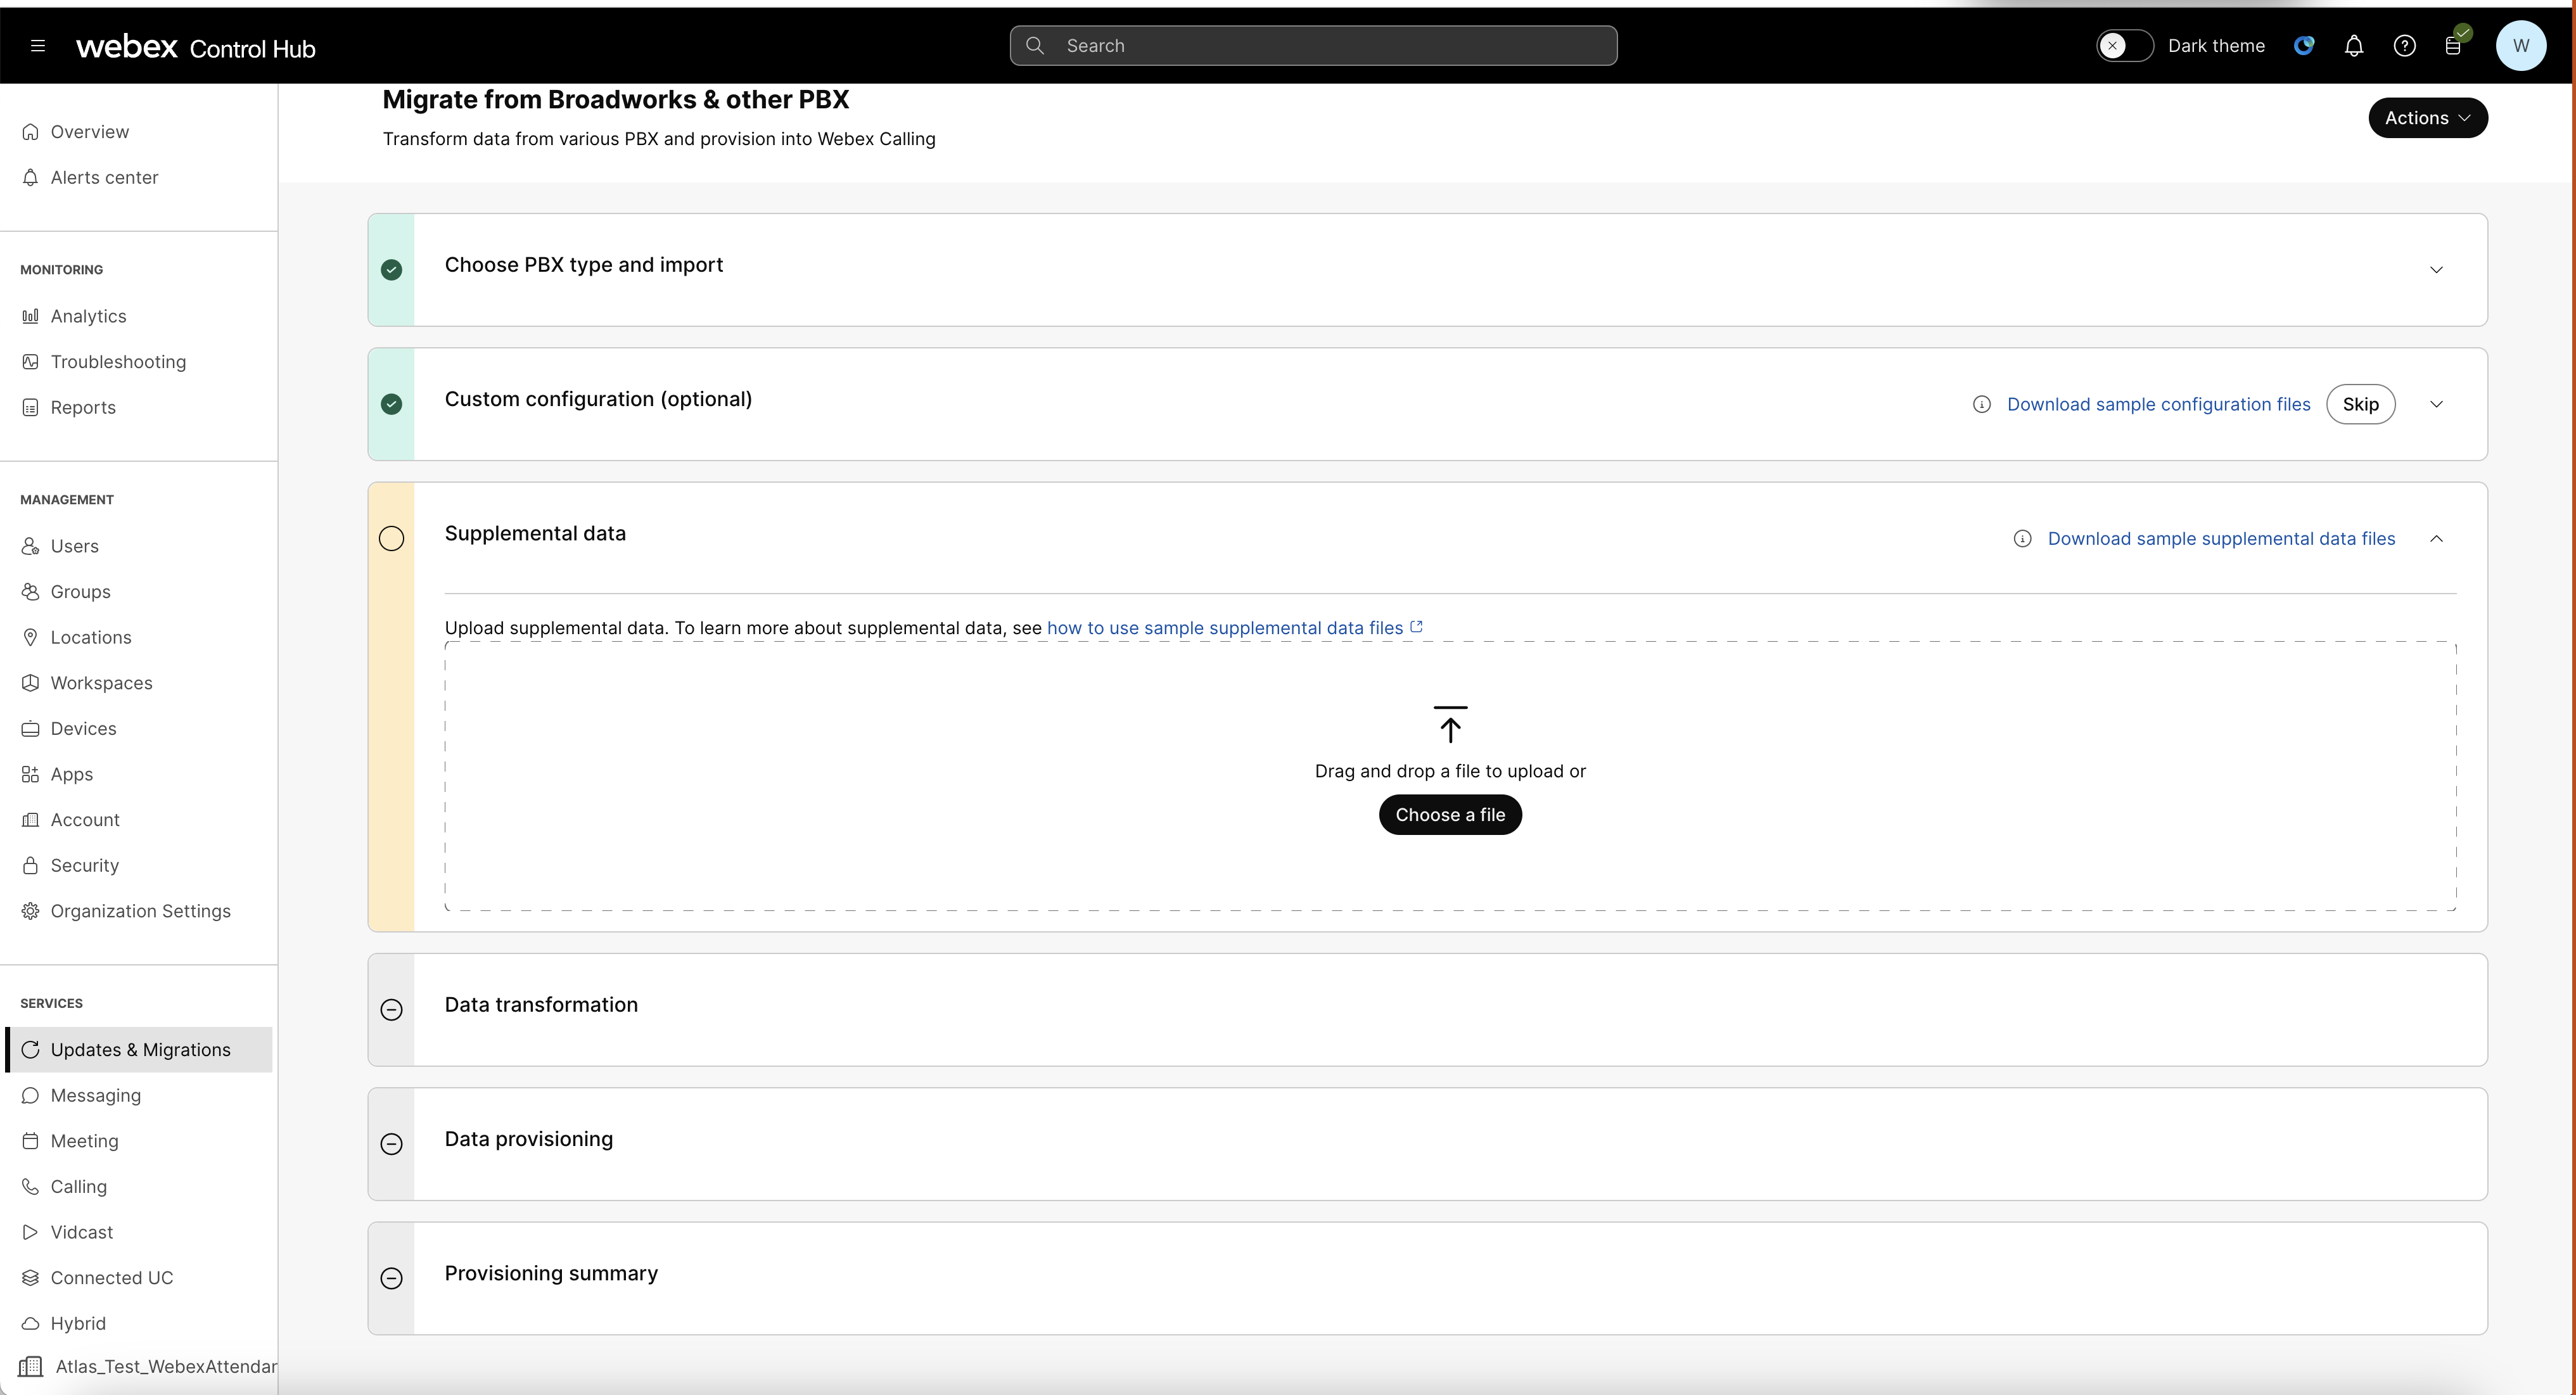
- Filling-up customers.csv
The customers.csv provides data that maybe missing in BroadWorks or BroadCloud. It’s mandatory to fill the licensing fields ending with flex only.
Column name Rules Id In Cisco BroadWorks enterprise mode:
- It is the Cisco BroadWorks serviceProviderId for the enterprise.
- Also, Each group within the enterprise needs a separate line. The Id is the Cisco BroadWorks groupId.
In BroadWorks service provider mode, it is the Cisco BroadWorks groupId.
In BroadCloud, this is the Rialto customerId.
externalId This is an identifier that matches the partner’s internal identifier for this customer. This column must be unique within a Webex partner org. This column is optional, and the transform tool generates a unique identifier.
Groups within an enterprise don’t use this column.
customerName For the enterprise, the system uses this column as the Webex customer name field.
For a group within an enterprise, the system uses this column as the location name.
Location names must be unique within an enterprise.
primaryEmail This serves as the email address of the Webex customer admin.
This column is optional for groups within an enterprise.
Address columns For an enterprise, the system uses the address as both the billing address and the first location address.
For a group within an enterprise, the system uses this column as the location address.
timezone Refer to the time zone section of this article.
language See Languages Webex supports. defaultvoicemailpin See Set a voicemail PIN.
cloudConnectedPstnProvider_flexonly Leave it blank userSubscriptionId_flexonly This is the subscription from where the user will be assigned a Webex Calling license.
Navigate to the Control Hub, Go to Management > Account, and click the Subscriptions tab. In the left pane, you can see the subscription ids for the user.
userLicenseName_flexonly These are the possible licenses that can be assigned to the user. Use one of the following licenses,
Webex Calling standard
Webex Calling professional
Webex Calling CX essential
workspaceSubscriptionId_flexonly This subscription assigns a Webex Calling license to the workspace.
Navigate to the Control Hub, Go to Management > Account, and click the Subscriptions tab. In the left pane, you can see the subscription ids for the workspace.
workspaceLicenseName_flexonly These are the licenses that can be assigned to the workspace. Use one of the following licenses,
Webex Calling workspace
Webex Calling professional workspace
- Filling-up users.csv
The users.csv provides data that maybe missing in BroadWorks or BroadCloud at the user level. It’s mandatory to fill the licensing fields ending with flex only.
Column Name Rules userid This is the Cisco BroadWorks userId email (optional) Provide the Cisco BroadWorks email address if the email is not present in the BroadCloud for the user phonenumber (optional) Not applicable for flex package (optional: voice or Calling or suite or common_area or virtual_line or dont_migrate or call_park_ext) There are two options for packages: -
dont_migrate - Broadworks/Boradcloud's record is not migrated in the current migration
-
Common area - If you want to convert a BroadWorks/BroadCloud user to the workspace or in flex, then name it as a common_area.
If there are no changes, leave the column empty.
extension (optional) Not applicable for flex name (optional) Not applicable for flex subscriptionId_flexonly This subscription assigns a Webex Calling license to the corresponding user/workspace.
Navigate to the Control Hub, Go to Management > Account, and click the Subscriptions tab. In the left pane, you can see the subscription ids for the workspace.
Use subscriptionId_flexonly if you want to migrate at the user level.
licenseName_flexonly These are the licenses that can be assigned to the user/workspace. Use one of the following licenses,
For User:
-
Webex Calling standard
-
Webex Calling professional
-
Webex Calling CX essential
For workspace:
- Webex Calling workspace
- Webex Calling professional workspace
Use licenseName_flexonly if you want to migrate at the user level.
ata_settings (Optional) Allowed values: t38, analog
To enable/disable call waiting, music on hold, and T38 settings
T38:
This option disables call waiting and music on hold, and enables T38 settings for ATA devices.
Analog:
- Similar to the T38 option, this setting also disables Call Waiting and Music on Hold, and enables T38 for ATA devices.
- The key advantage of the Analog option is that these features can be controlled via partner.cfg files, offering more flexibility for configuration.
do_not_move_phone BroadWorks only. Optional flag to prevent device migration to Webex Calling.
This option allows partners to provision users along with their calling settings, devices, and phone numbers without migrating the devices to Webex or activating phone numbers in Webex Calling.
This setting is only available for BroadWorks, not BroadCloud.
To use it, administrators should specify do_not_move_phone in the do_not_move_phone (BroadWorks only) column of the users.csv file.
This ensures users are provisioned without activating numbers or moving their phones, so they continue operating via BroadCloud.
-
- After changing the CSV, create a zip file with CSV.
- Once modified, Select Choose a file or Drag and drop a file to upload the
.zip file.
You can delete, modify, or replace the uploaded file in each step until you move to the Data Transformation step, where the data transformation starts. Perform only one action at a time
If you delete/replace any of the files in any step 1–3, it deletes the data from the subsequent steps if any.
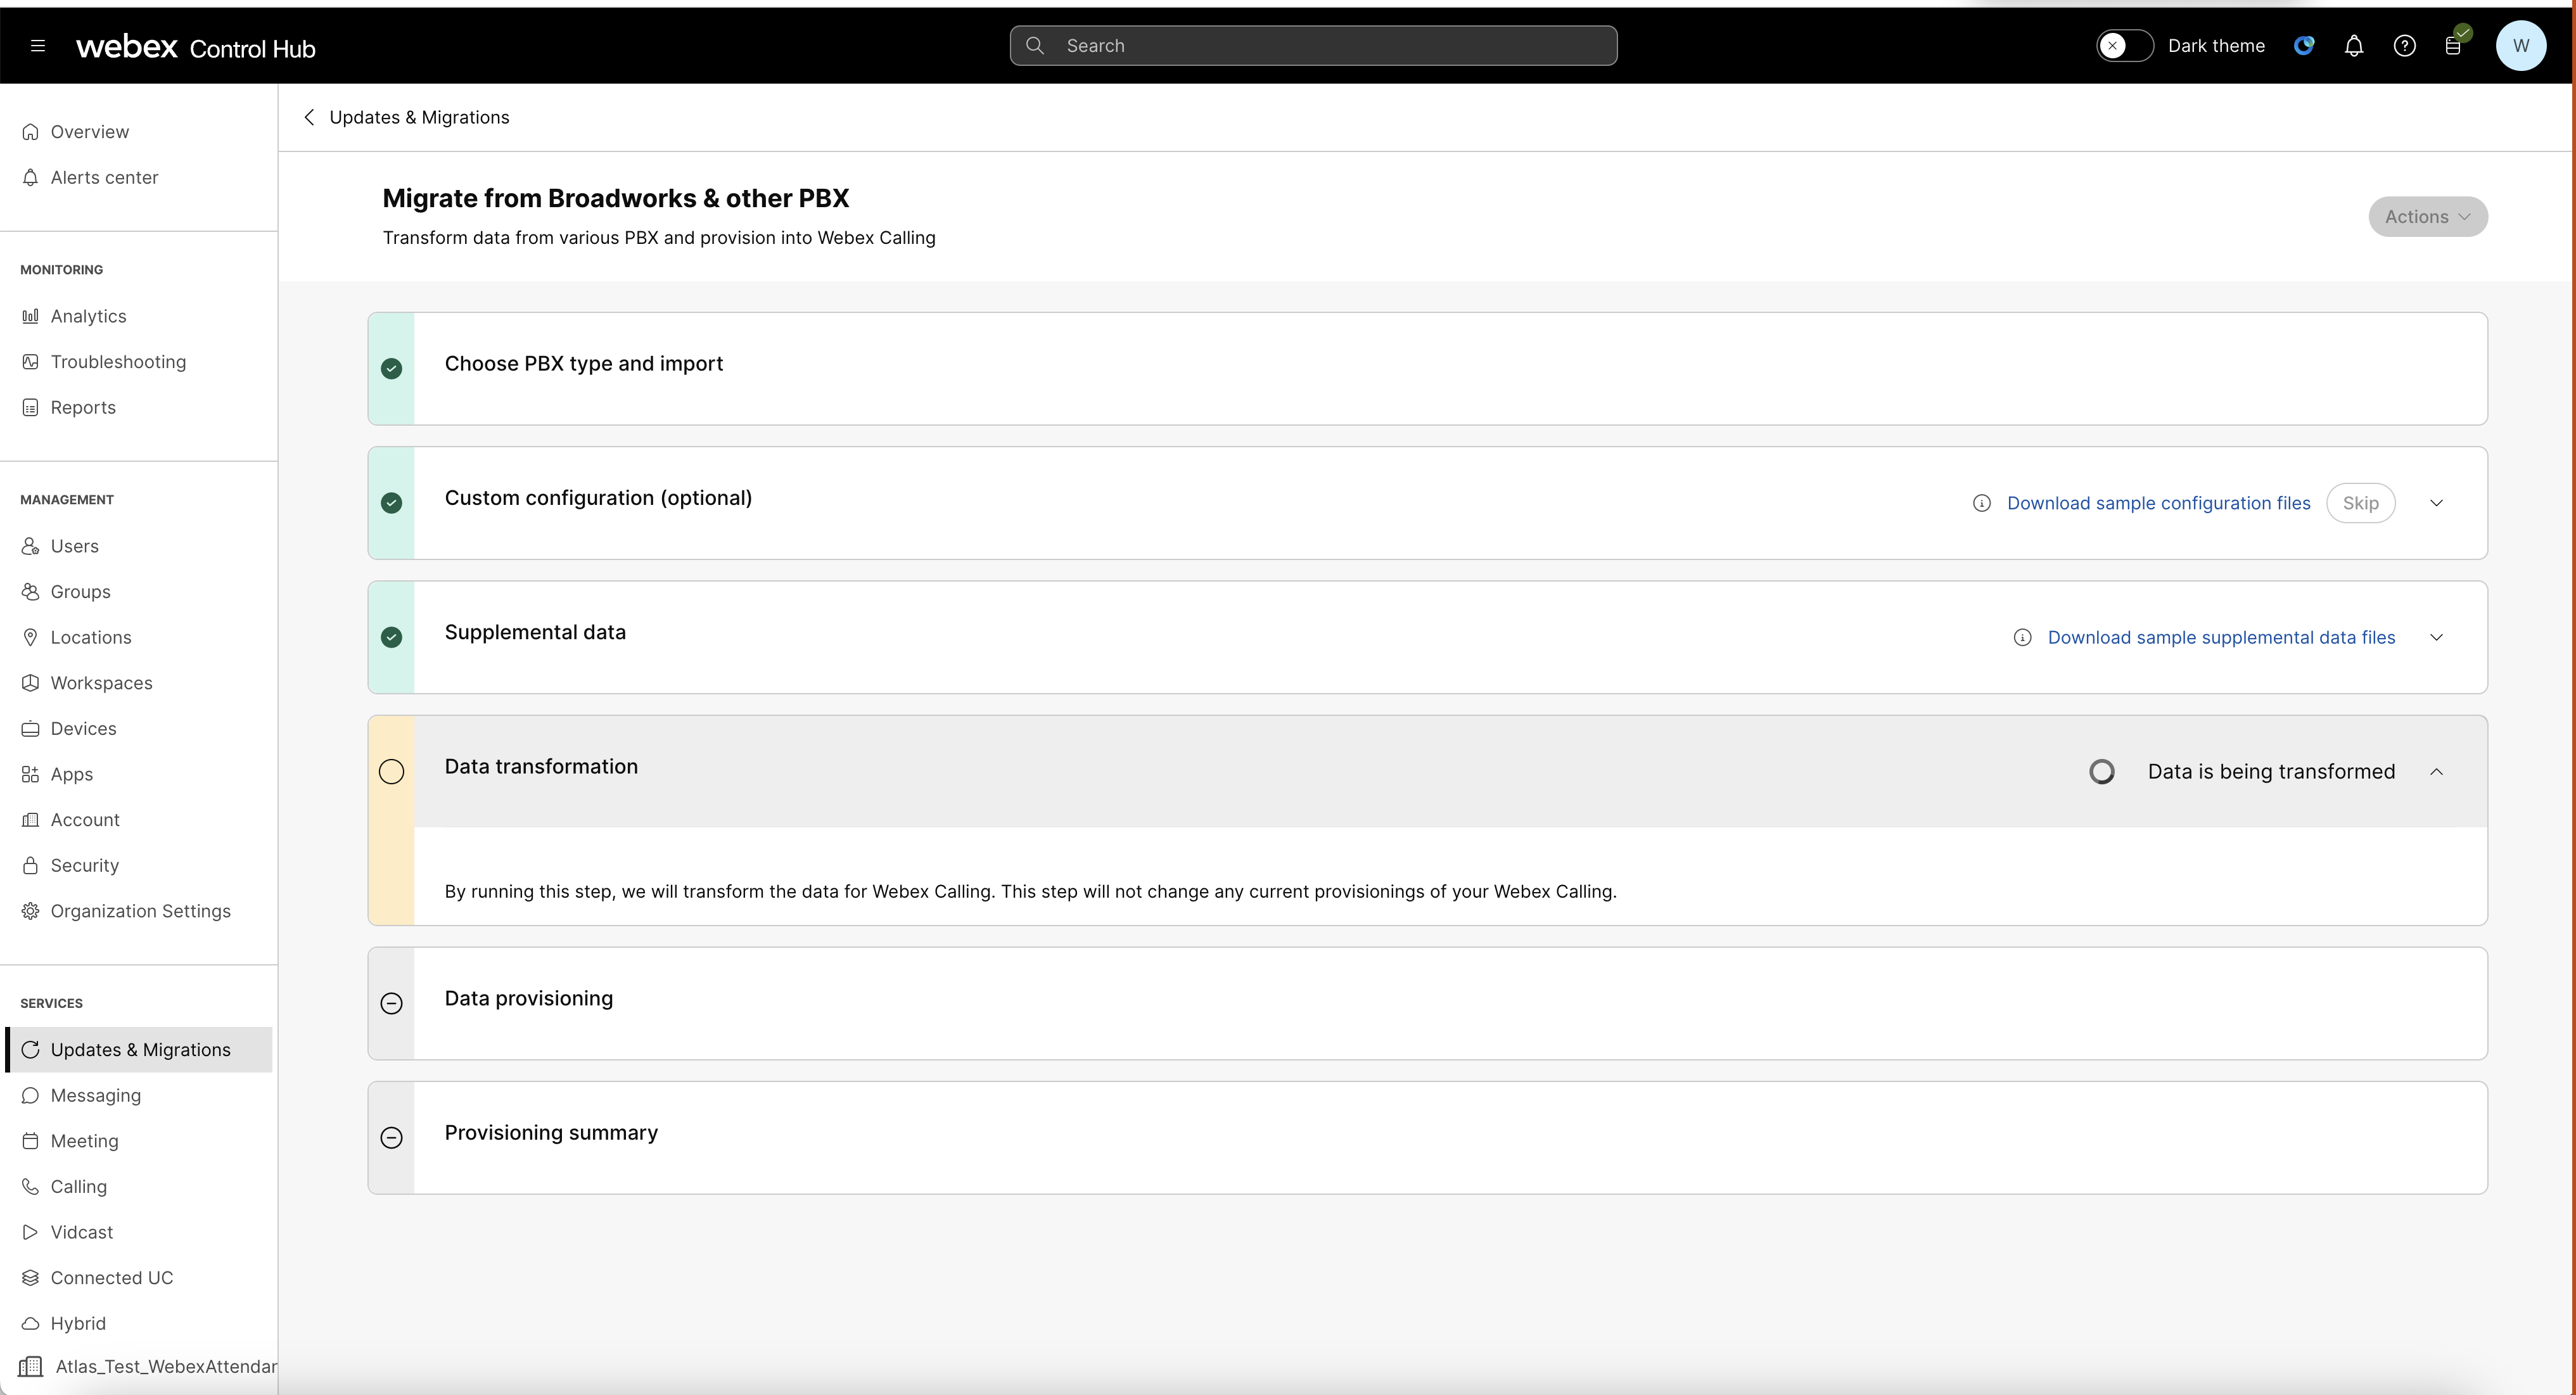
Data transformation
Once you click the Run, we transform the data for Webex Calling. This step doesn’t change any current provisioning of Webex Calling.
| 1 |
Click Run to start with data transformation. The status of Run changes to Data is being transformed.
|
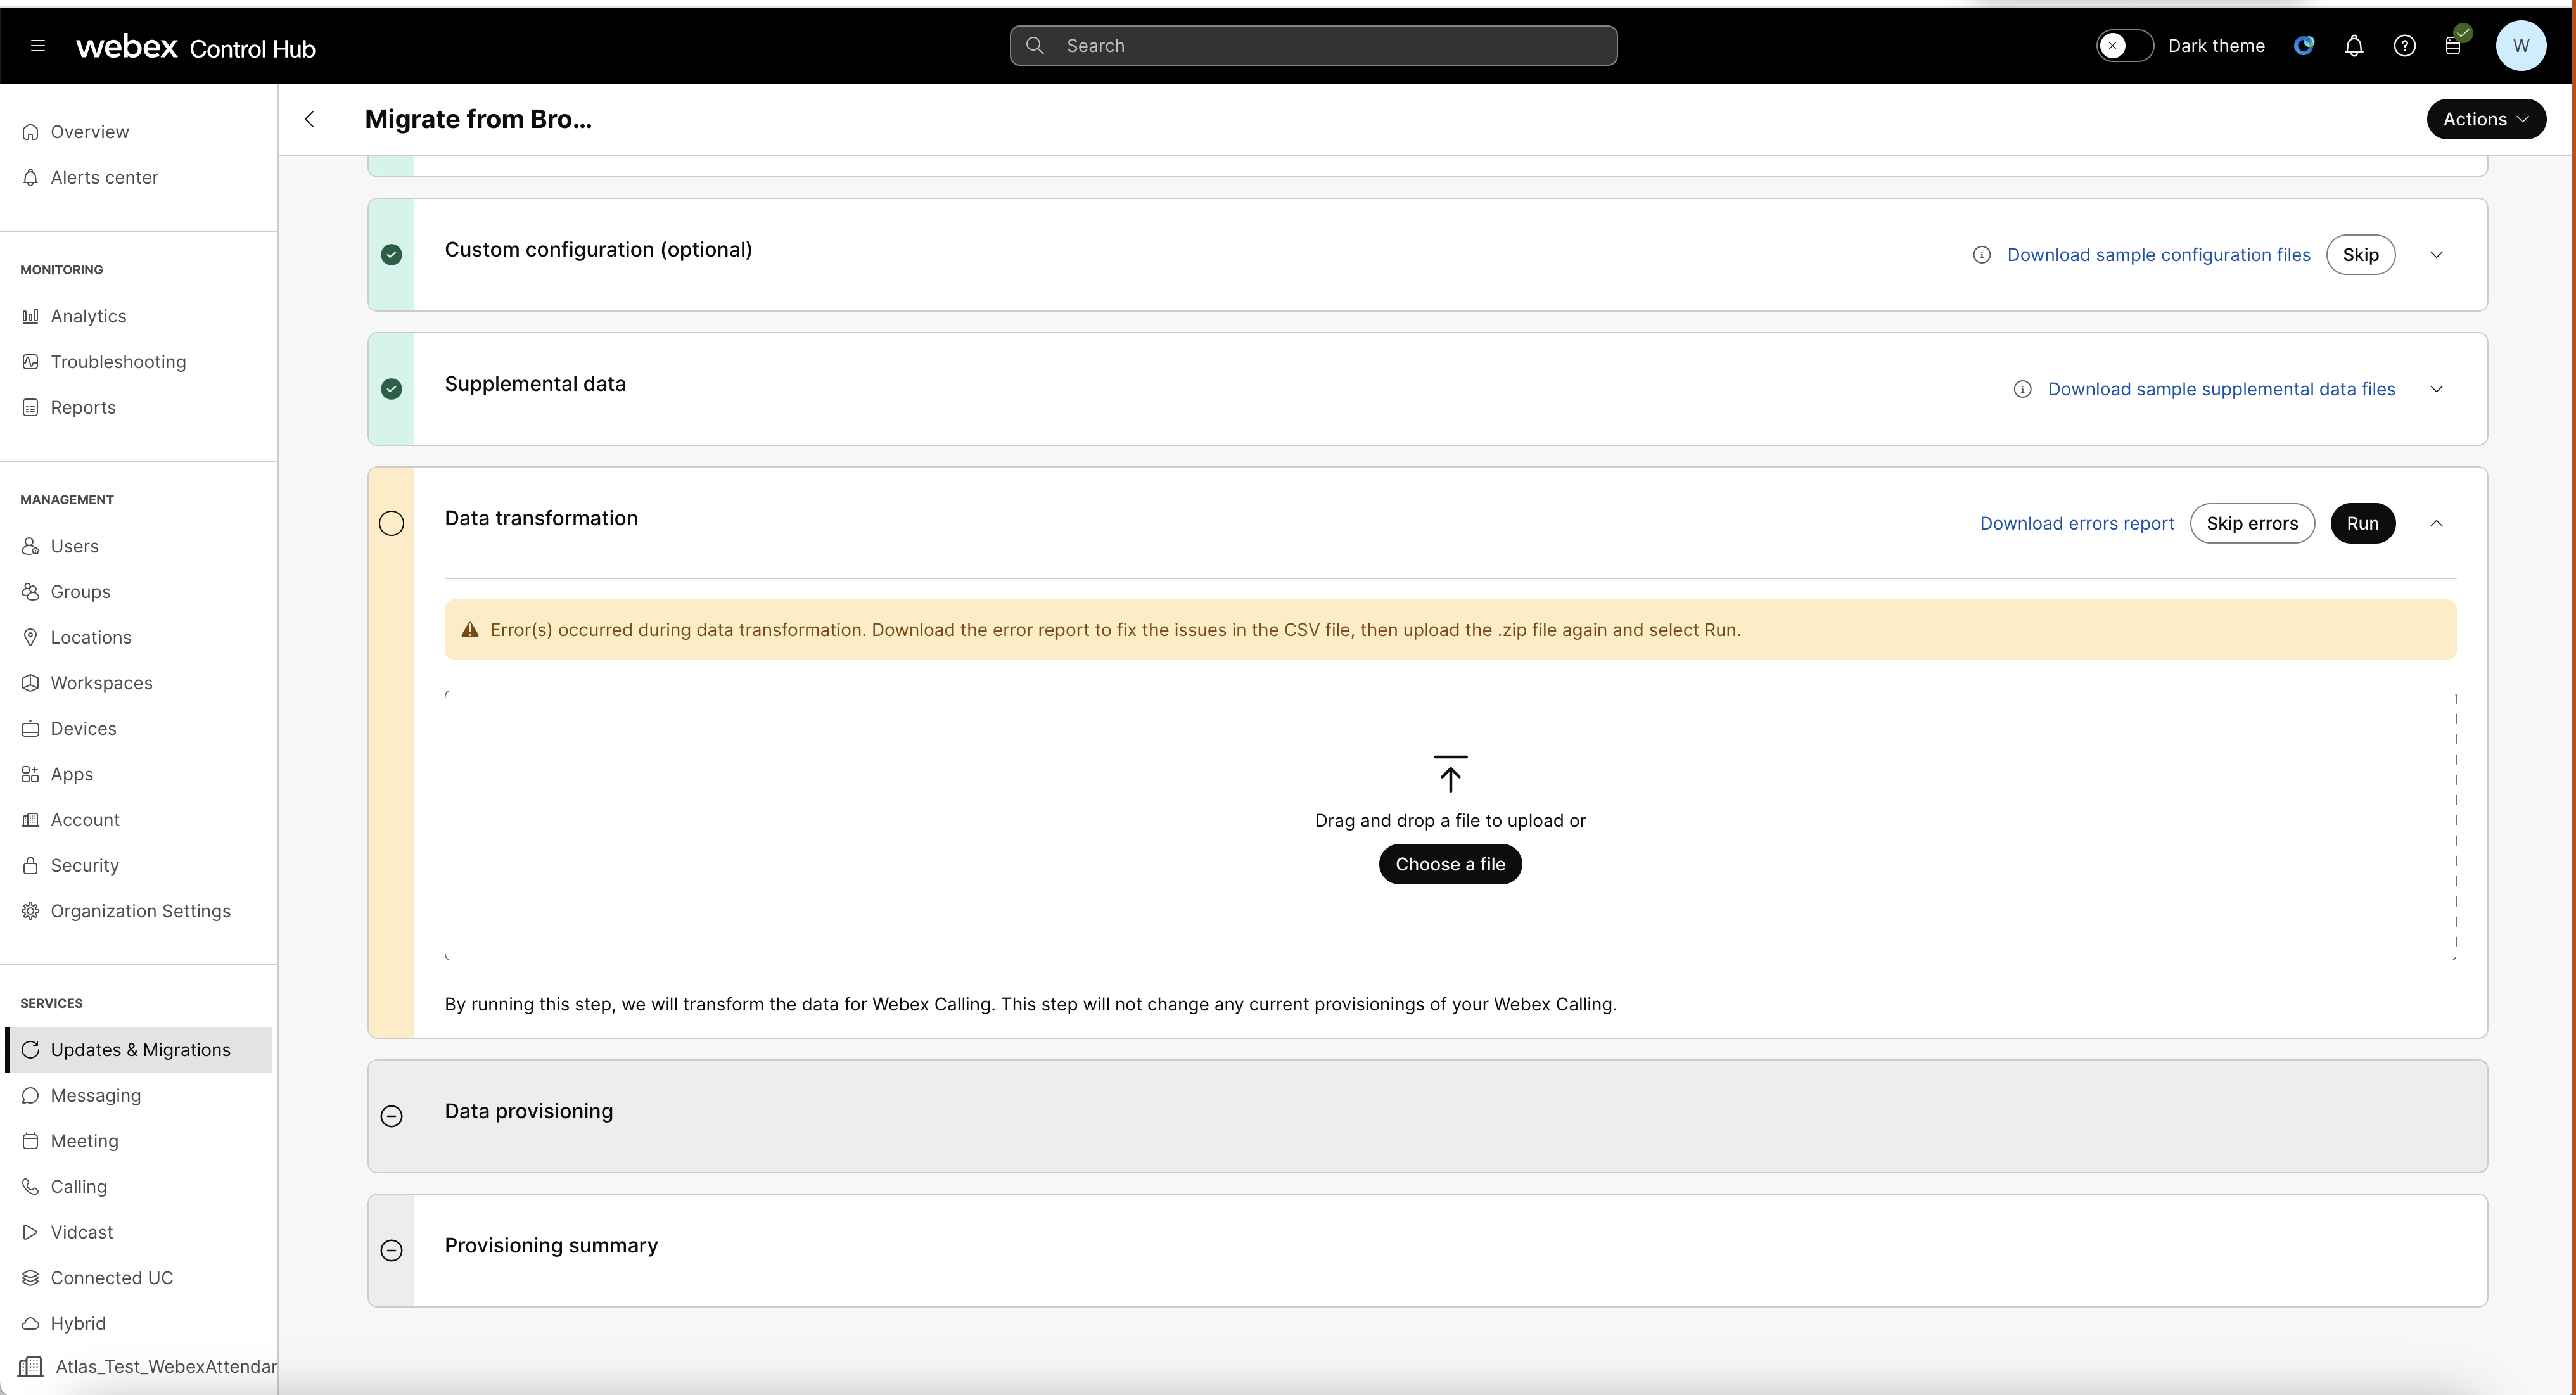
| 2 |
Click Download error report, this results in an exception_report along with CSVs in the .zip file. You can audit the exception_report and perform either action.
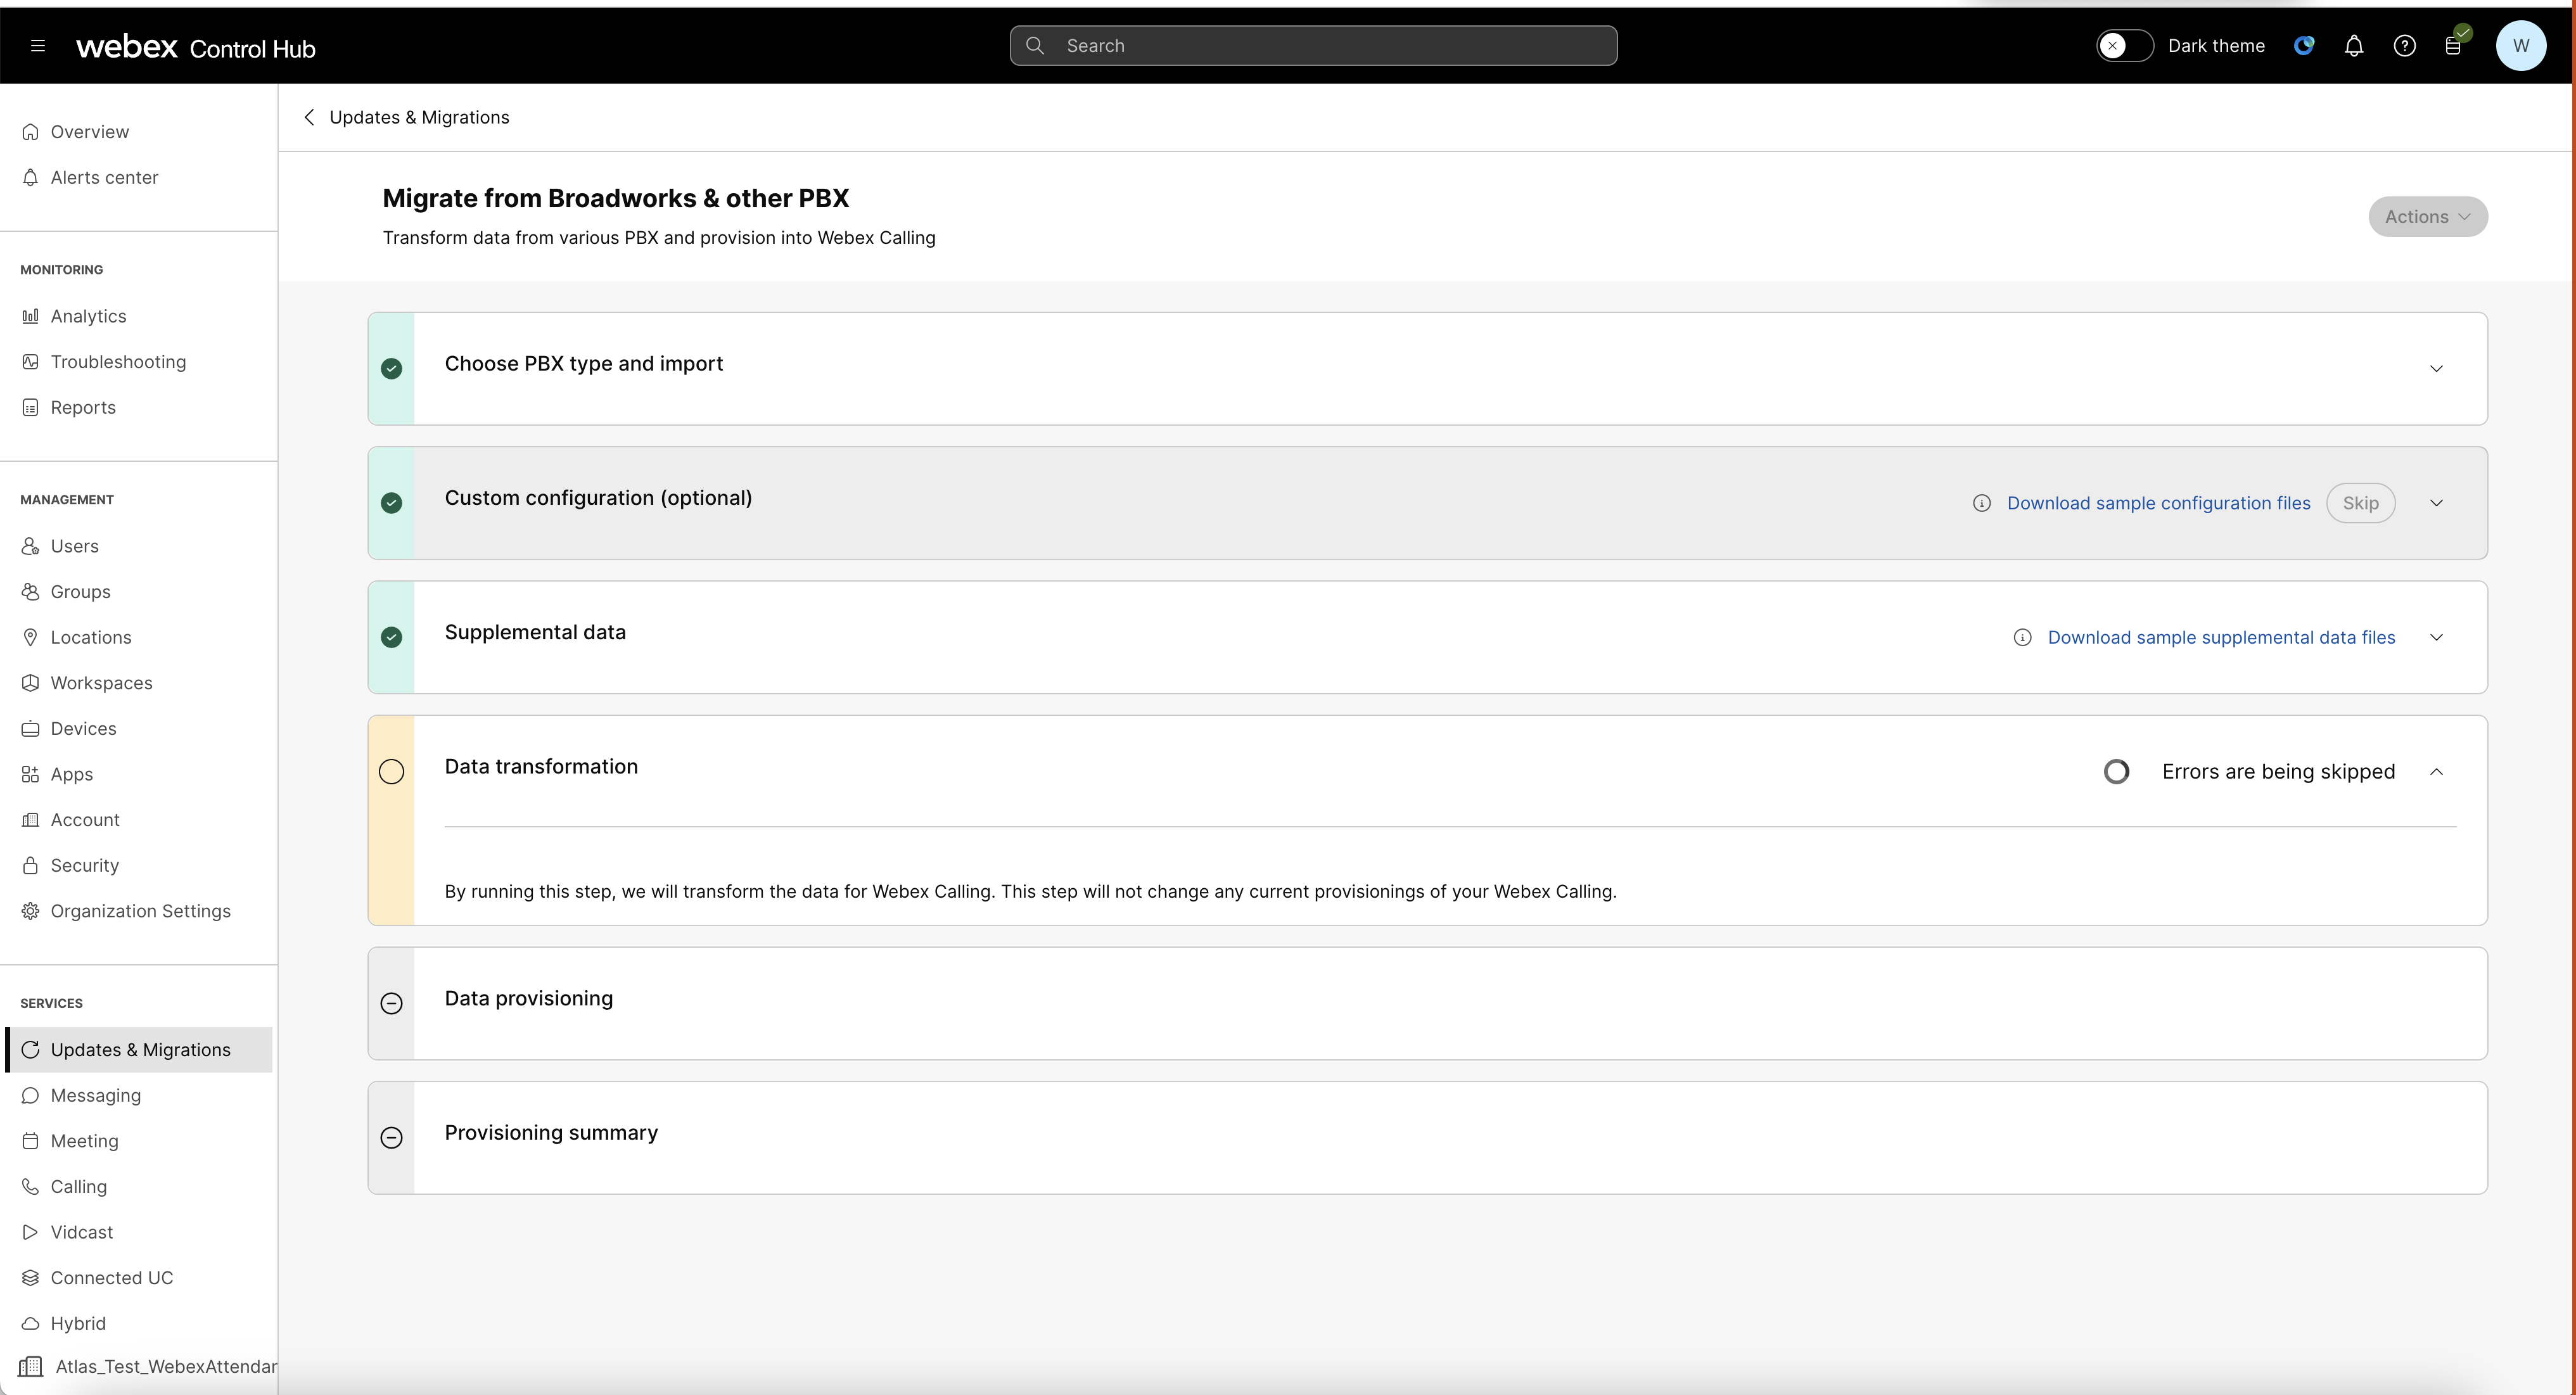
The skip error is available only when the provisioning files are partially generated. |
| 3 |
After fixing the error, Select Choose a file or Drag and drop a file to upload the modified .zip file. |
| 4 |
Click Run again. If there’s no error, the left pane's color changes to green, indicating that the step is complete. |
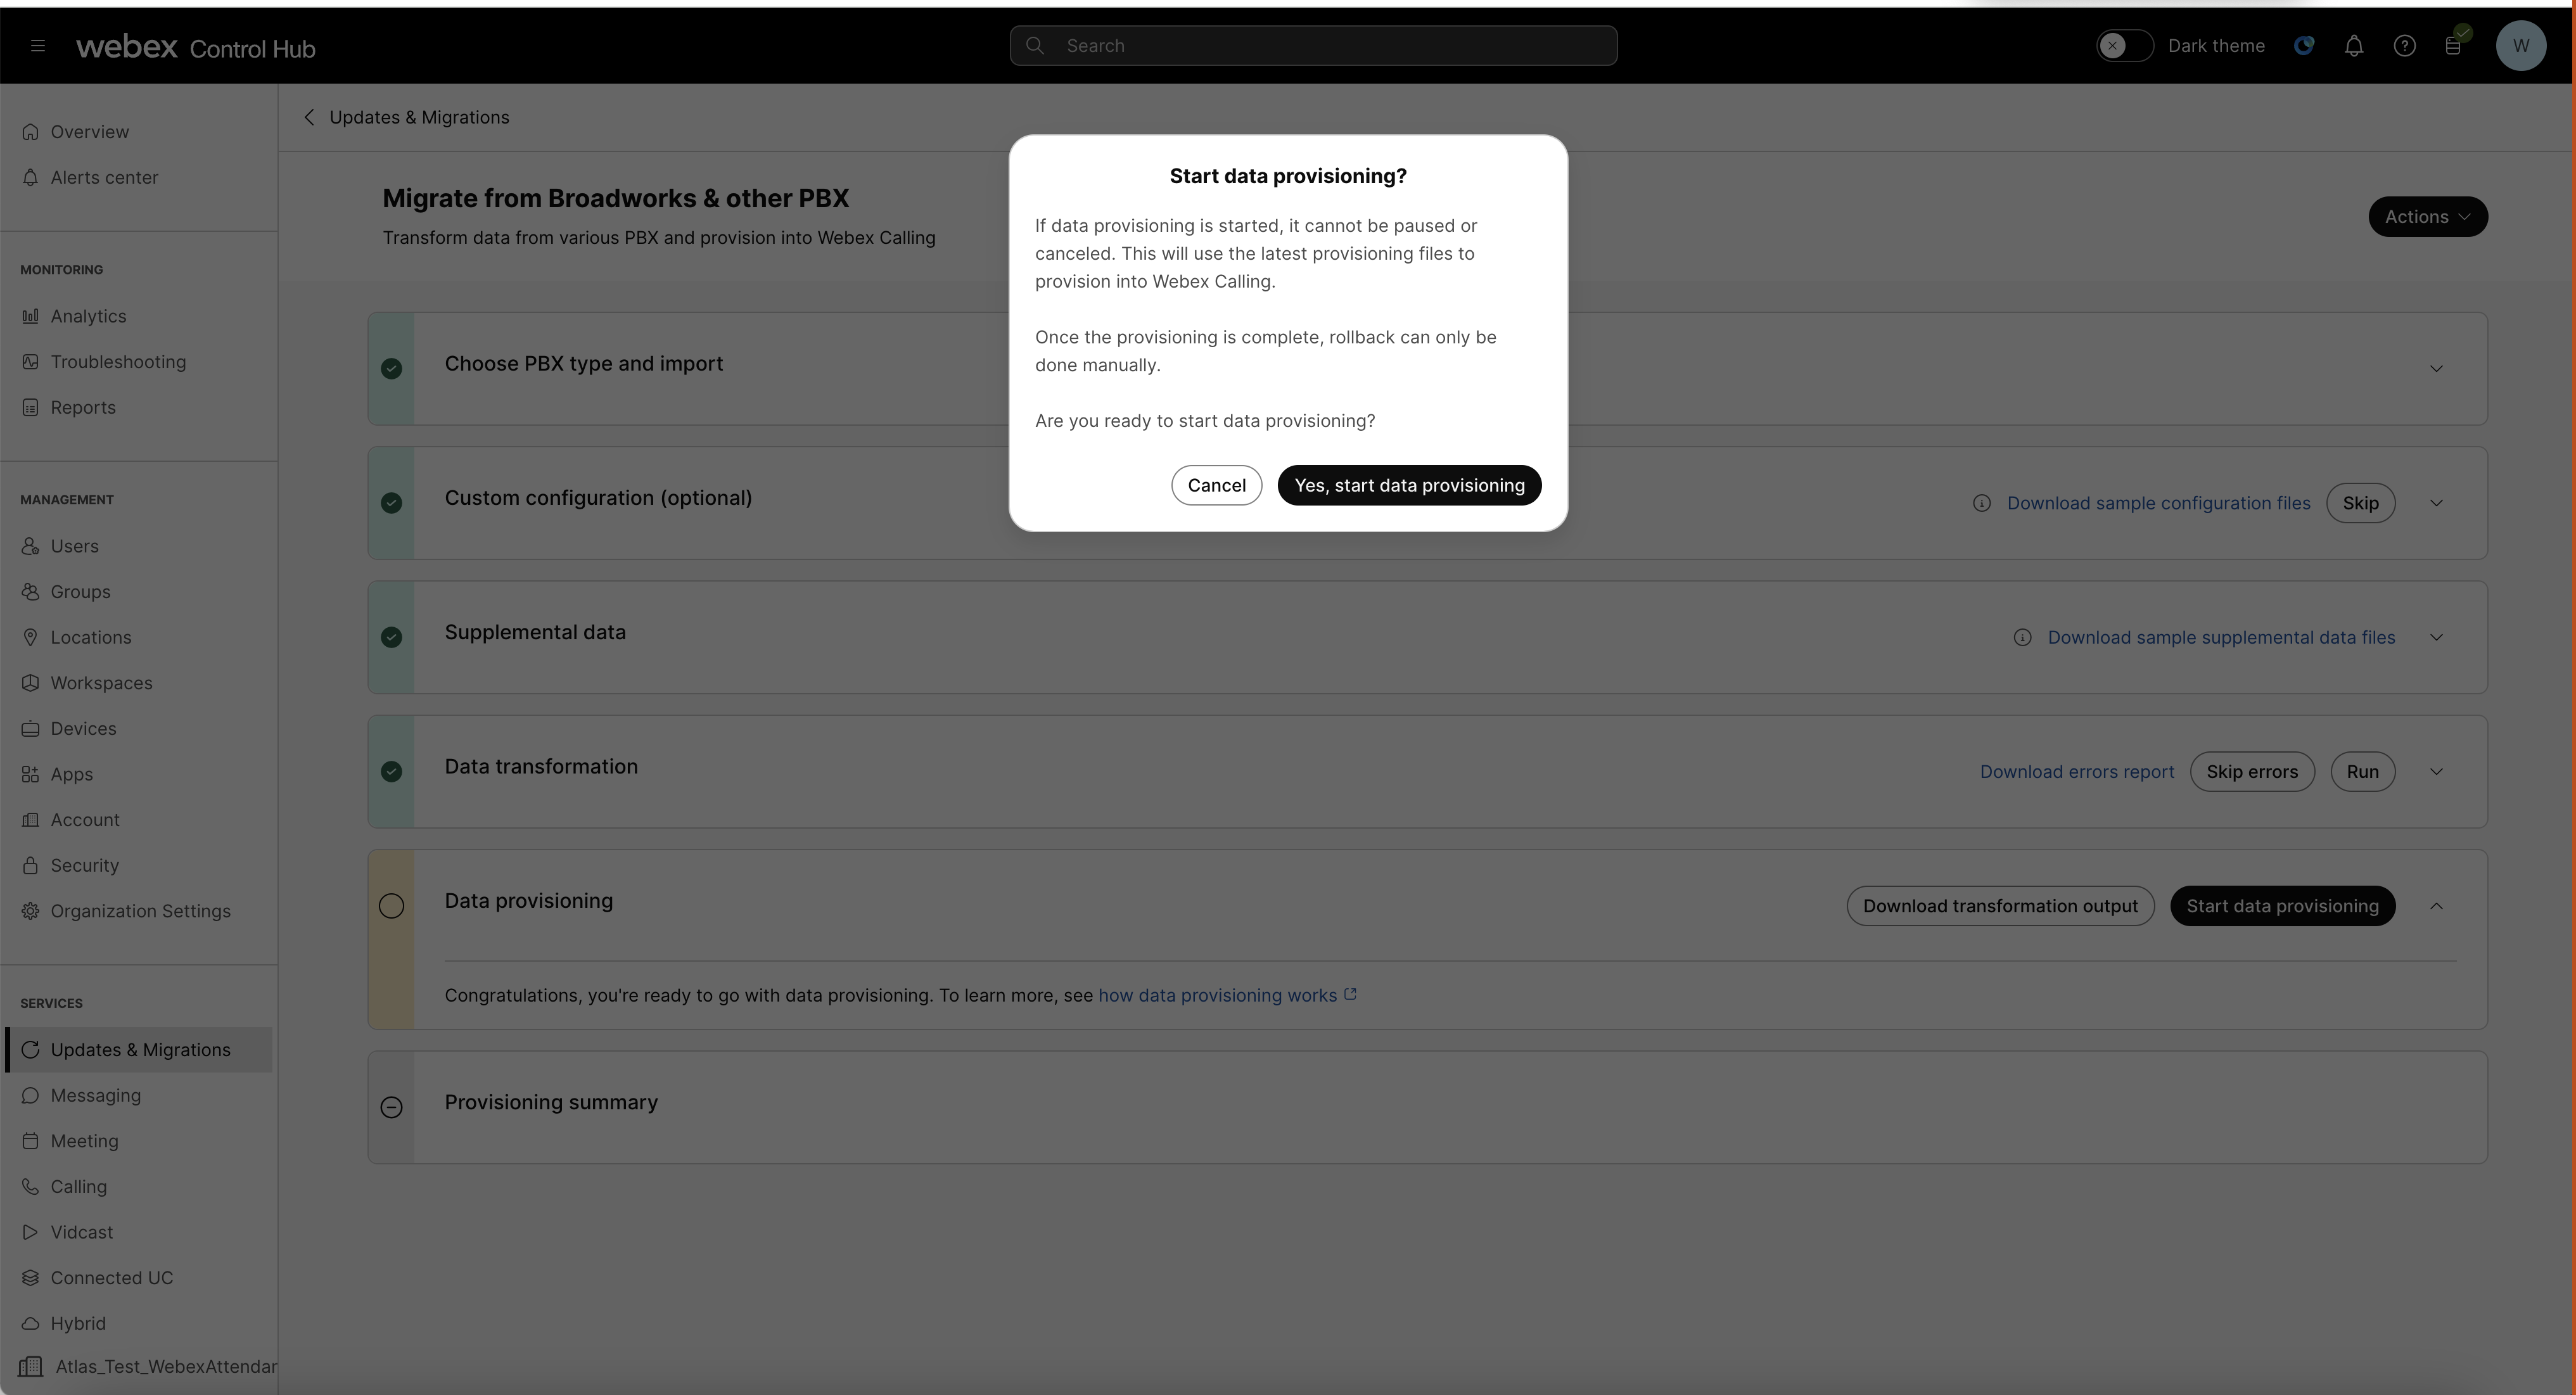
Data provisioning
| 1 |
(Recommended) Click Download transformation output to re-check the transformed data inputs and any error report generation. |
| 2 |
Click Start data provisioning to provision the data into Webex Calling. Start data provisioning? A pop window opens. Once data provisioning starts, it can’t be paused or canceled. This uses the latest provisioning files to provision into Webex Calling. Once the provision is complete, you can roll back only manually.
|
| 3 |
Click Yes and start data provisioning. The data provisioning may take hours depending on the size of imported data. |
| 4 |
If the provision is successful, you see the list of entities that migrates in the What have been updated section under the provisioning summary.
|
| 5 |
If the provision throws an error,
You can reupload the JSON file after fixing the errors and click start provisioning. |
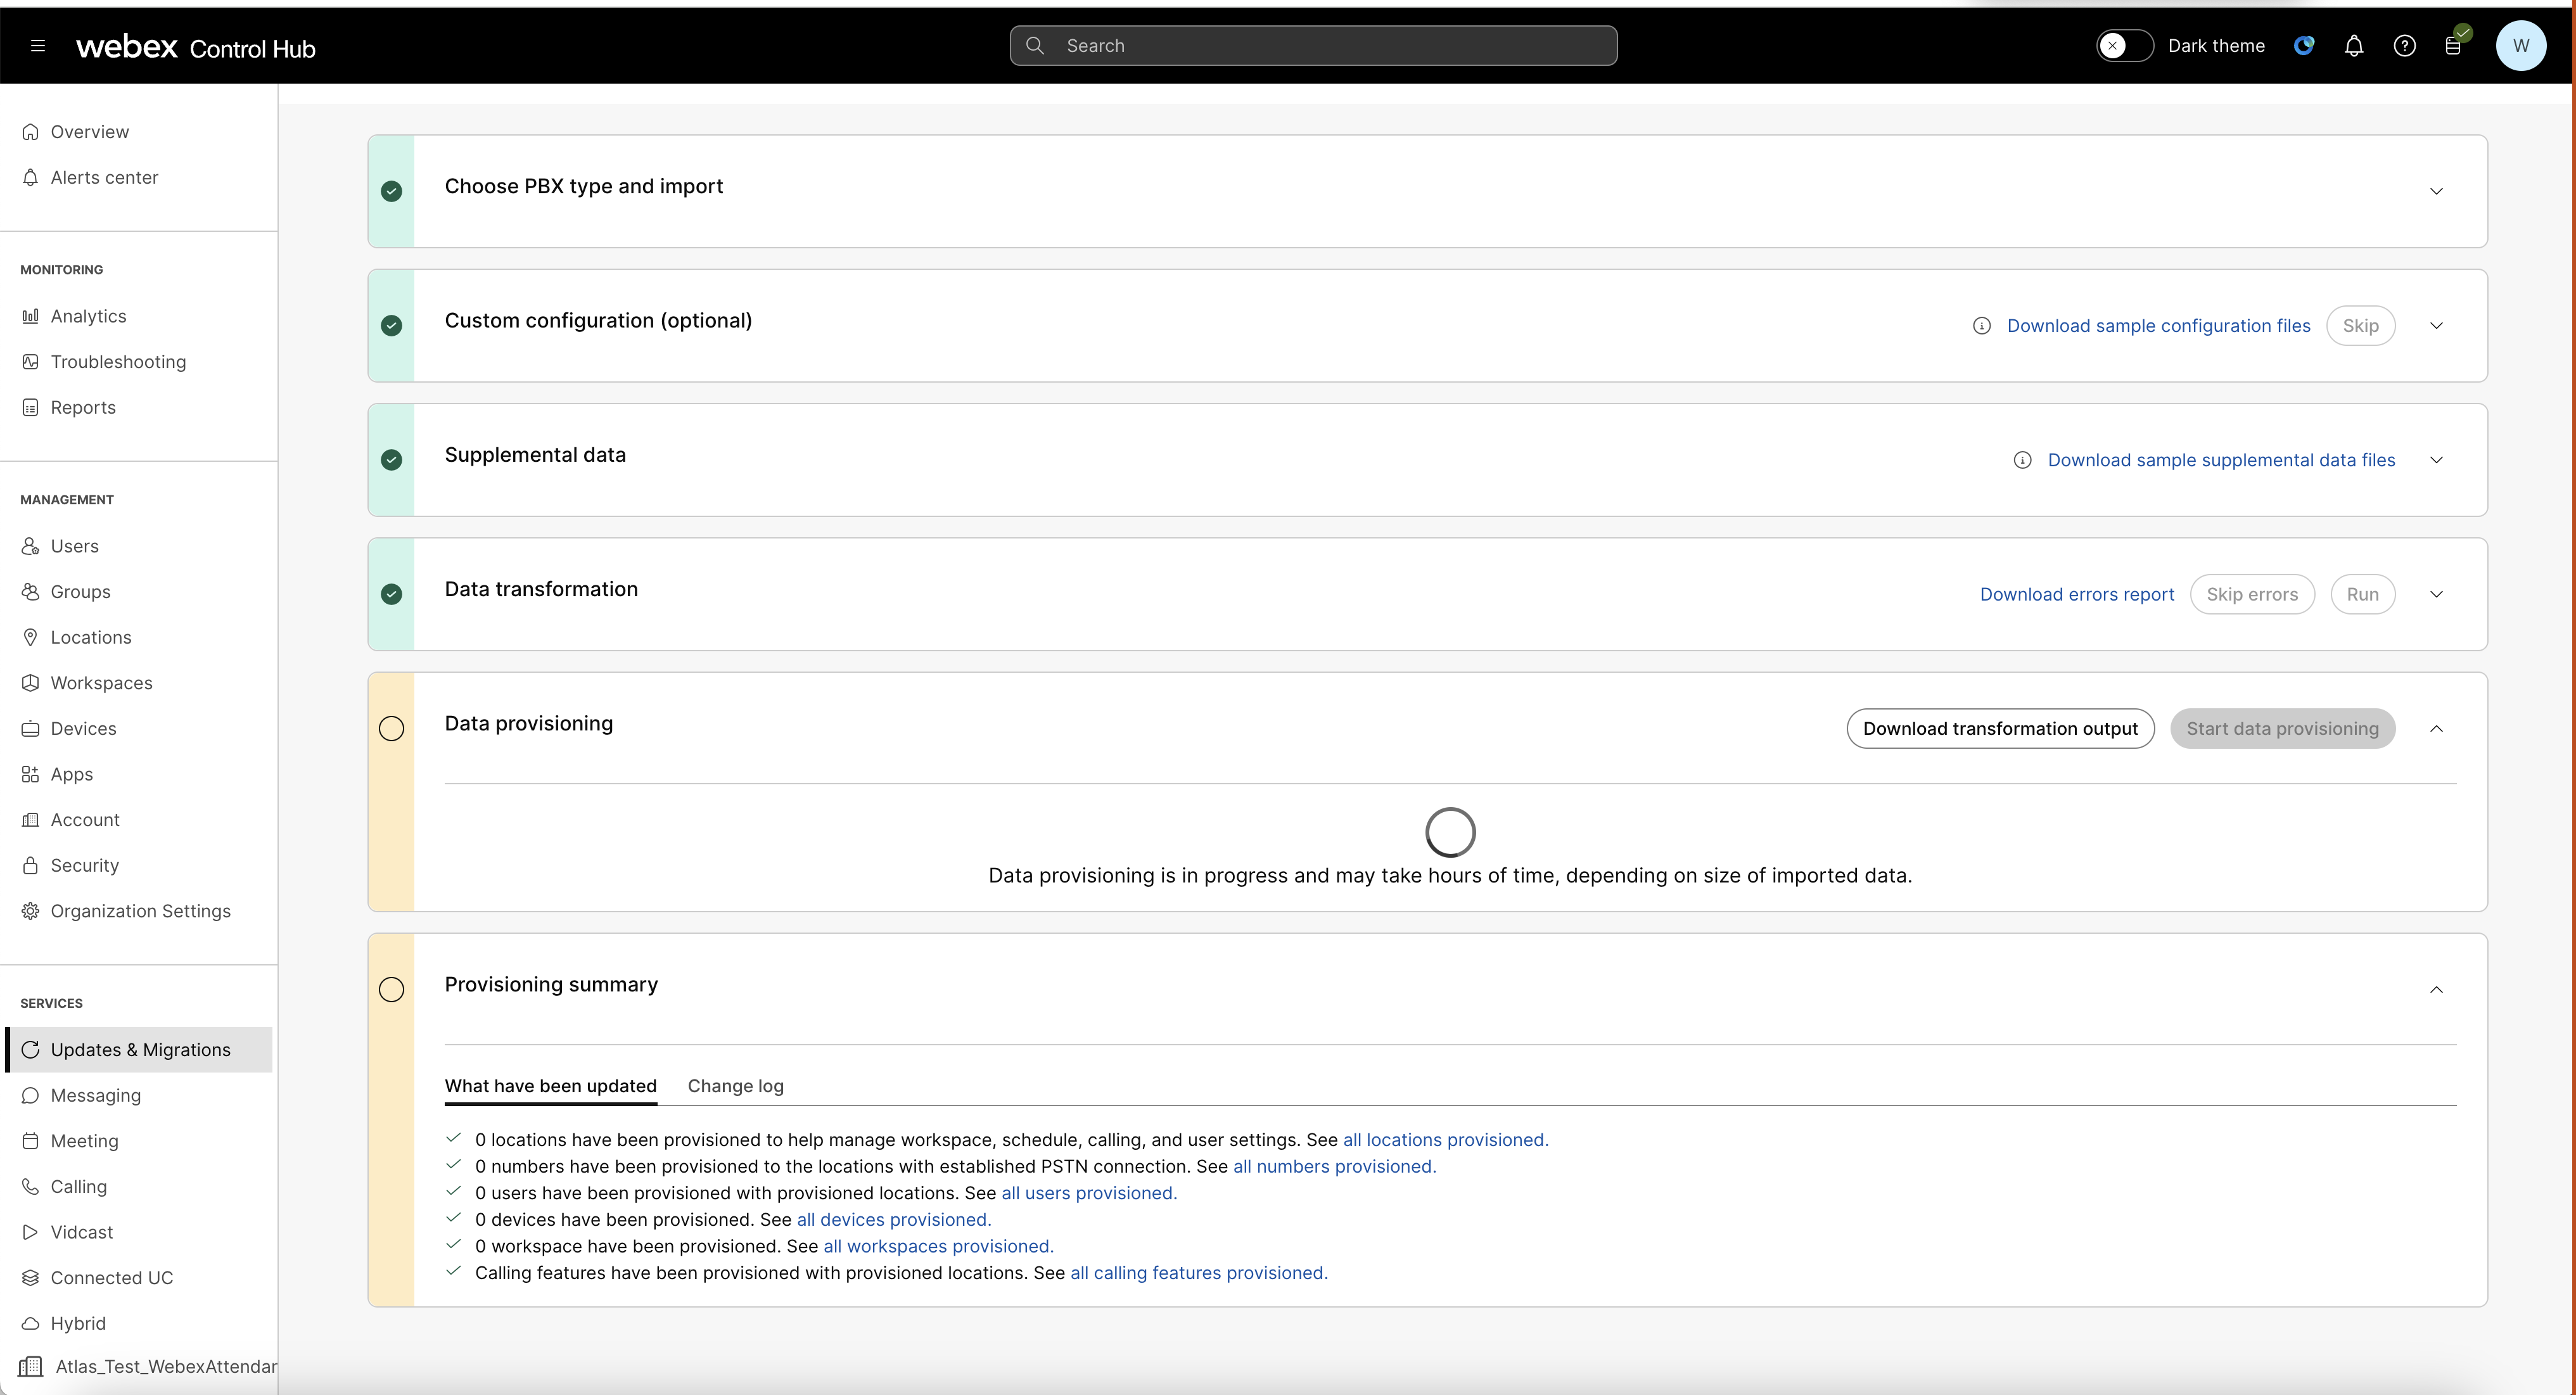
Provisioning summary
The system activates the provisioning summary once data provisioning begins. The provisioning summary has two sections:
- What have been updated
- Change log

What have been updated
The system displays the live status of migrated users, numbers, locations, and Calling features, refreshing to provide real-time updates.
If the provisioning is successful, the list of migrated entities appears, highlighted in green.
Change log
The change log provides a detailed history of who made updates, what has been updated, when the changes occurred, and what was provisioned.
Device move tool
The prerequisites for a device move tool are:
-
Complete the Transformation and Provisioning successfully.
-
Customer.json file from the Control Hub.
-
Click on download transformation output in the data provisioning, the refresh token is available in the partner.cfg file.


