- Home
- /
- Article

Thanks for your feedback.

User attributes in Control Hub
 In this article
 Feedback?
You can create and assign attributes to help categorize users and store information in a way that’s easily filterable.
Required profile attributes
When a new user is onboarded to your organization, you can mark specific profile attributes as required. These attributes are standard across all organizations. Required profile attributes are attributes that must be provided at time of user onboarding or else the onboarding will fail. The available profile attributes are:
| Profile attribute | Description |
|---|---|
| Email address of the user. This attribute is always marked as required. | |
| First name | First name of the user. |
| Last name | Last name of the user. |
| Display name | The name that the user prefers. |
| Title | The user's job title. |
| Department | The department that the user works under. |
| Address | Place where the user lives. |
| City | City associated with the user's address. |
| State / province | State associated with the user's address. |
| Zip / postal code | Zip code associated with the user's address. |
| Country | Country associated with the user's address. |
| Time zone | Time zone associated with the location of the user. |
| Work phone | Assigned phone number given to the user. |
| Mobile phone | Personal phone number of the user. |
| Alternate phone 1 | Another contact phone number to reach the user. |
| Alternate phone 2 | Another contact phone number to reach the user. |
Mark profile attributes as required
If you mark custom attributes as required, then the user must fill out those required attributes or else the onboarding will fail. Proceed with caution before marking custom attributes as required.
| 1 |
Sign in to Control Hub and go to . |
| 2 |
Check the check box next to the profile attributes that you want to mark as required. |
| 3 |
Click Save. |
Pronouns
You can allow users to assign pronouns for themselves. Available pronouns depend on if you want to upload a list of selectable pronouns or if you want users to customize one for themselves.
Create custom attributes
You can have up to 15 custom attributes in your organization.
| 1 |
Sign in to Control Hub and go to . |
| 2 |
Select Custom attributes. |
| 3 |
Click Add an attribute. |
| 4 |
Assign a display name to the attribute. |
| 5 |
Check the Required or Locked check boxes. |
| 6 |
Select from the following input types:
|
| 7 |
Click Save. |
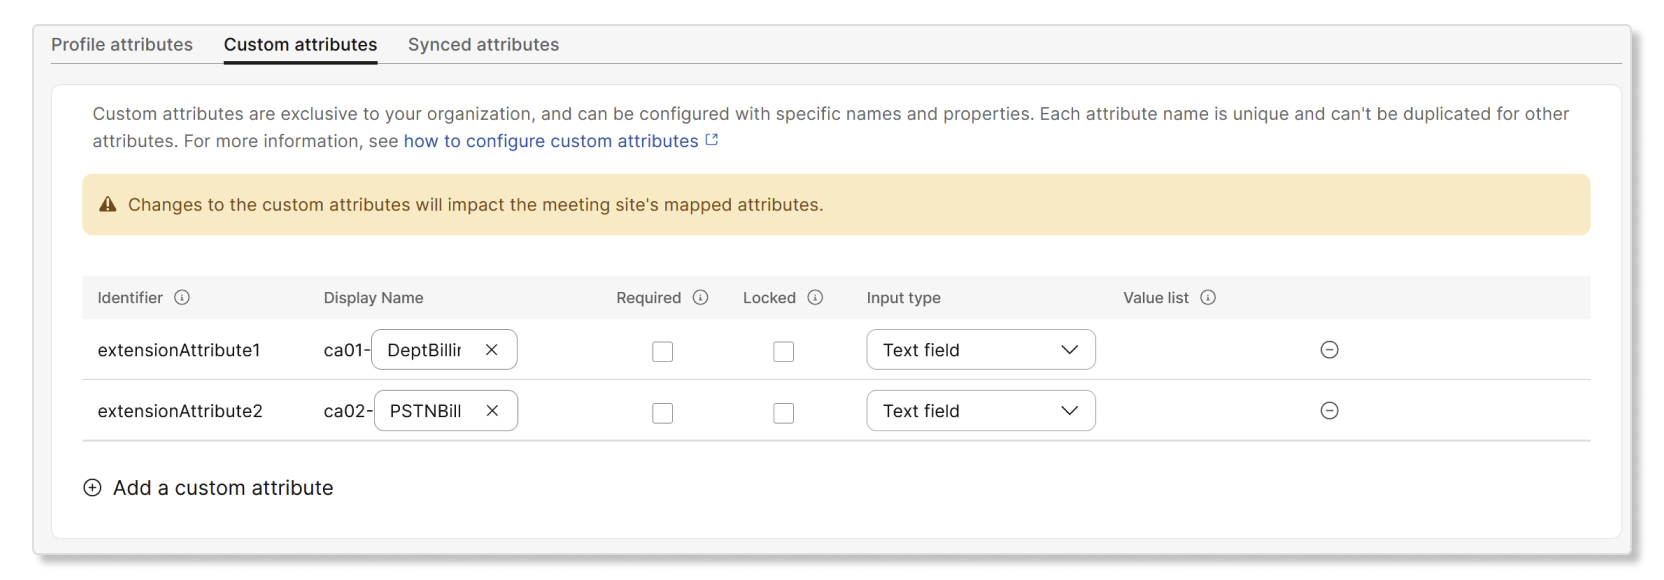
About custom attributes
Custom attributes are organization-specific user attributes that you can set up and define for your organization. All organizations start with zero custom attributes. You can add custom attributes as needed for your organization, but you can only have up to 15 custom attributes.
Display names for custom attributes
By default custom attributes are named extensionAttribute1,
extensionAttribute2, and so on, up to 15, but you can assign display
names to those attributes. Display names can have up to 128 characters and can't have the
same display names as other custom attributes in the organization or any existing user
attributes.
When custom attributes are given display names, those names are used during user onboarding in Control Hub and when mapping extension attributes to tracking codes on Meeting sites. However, when using APIs and CSV files to onboard users, the standard fixed names for custom attributes apply.
Values for custom attributes
User values for custom attributes can be open text, picked from a predefined set of values, or a combination of both. These values can be uploaded in the same part of Control Hub where you add custom attributes for your organization. A custom attribute can have up to 500 predefined values.
Marking custom attributes as required or locked
Custom attributes can be marked as required. If you mark custom attributes as required, then a value for that attribute must be included when you add users to the organization or when users self-sign up. Proceed with caution before marking custom attributes as required.
Custom attributes can also be marked as locked. Locked means that users can't view or modify those attributes.
Removing custom attributes
If you need to replace a custom attribute, you can remove them only if no meeting site tracking codes are mapped to that attribute. To remove a custom attribute that's mapped to tracking codes on a meeting site, you need to first unmap that attribute from tracking code maps for all meeting sites that use it.
Removing a custom attribute doesn't delete the data that's associated with that attribute. That means that if you accidentally remove a custom attribute and add it back again, the attribute will have the same previous display name. You may not see the custom attributes in the same sequential order when you remove an attribute.
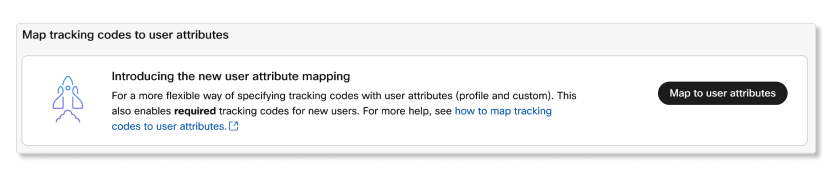
How are custom attributes used?
Custom attributes can be used in any way you want, but we have a preexisting use of custom attributes for tracking codes on Meeting sites. Previously, each site had its own tracking codes that had to be populated for users on each site. Now, you can map those tracking codes to user profile attributes and custom attributes. This enables tracking codes for meeting sites to be auto-populated from those attributes.
We provide a wizard in Control Hub to help you map tracking codes to custom attributes or other profile attributes. Additionally, all sites can now use the same custom attributes.
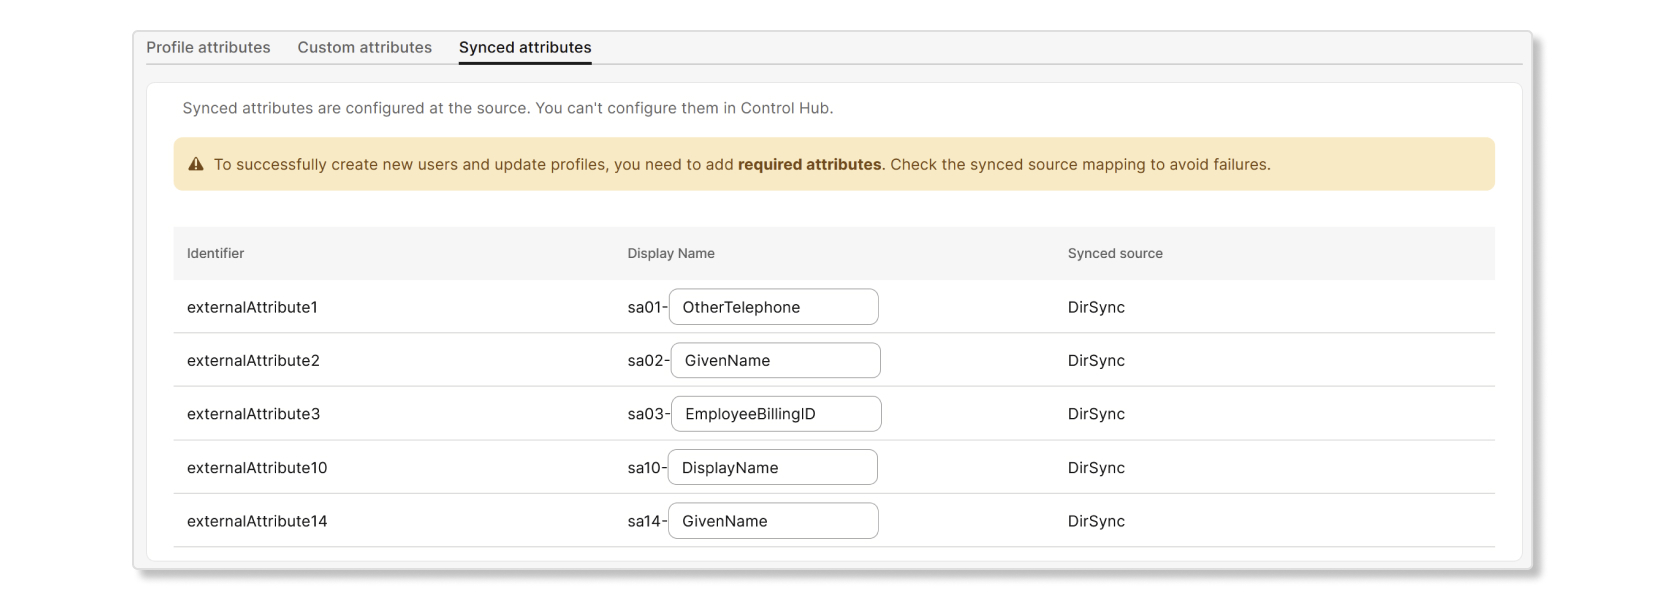
Synchronized attributes
Synchronized attributes only come in to Control Hub from external sources like Directory Connector. Automated user onboarding processes, such as Directory Connector, don't support custom attributes. You shouldn't use custom attributes if your organization uses one of those automated processes. Instead, we recommend that you use synchronized attributes.
Map tracking codes to user attributes
You can switch any Control Hub managed site from using classic tracking codes to mapped tracking codes. The process for mapping tracking codes to custom or user profile attributes is a one-time operation per site and is similar whether the site already had tracking codes or not.
We recommend that you map tracking codes to attributes because this process:
- Ensures consistency with user data in the organization. You can map tracking codes to the same user attributes in multiple sites so that any changes made to a user attribute will update tracking codes in all sites.
- Allows you to use tracking codes for sites as needed.
- Enables required tracking codes. Previously, required tracking codes weren't possible on Control Hub managed meeting sites.
- Automatically populates tracking code data through a sync source if your organization uses automated user onboarding processes, such as Directory Connector, Azure AD, or SAML.
For meeting sites that use department as a tracking code, we recommend that you map that tracking code to the department user profile attribute as opposed to a custom attribute. Since department is a standard profile attribute in Control Hub, this scenario will be more efficient in most cases.
Keep in mind that this department attribute, along with other user attributes, won't be populated for external users.
| 1 |
Sign in to Control Hub and go to Meeting. | ||||||||||||||||||||||||||||||||||||||||
| 2 |
Select a site, and then go to . | ||||||||||||||||||||||||||||||||||||||||
| 3 |
Select Map to user attributes. | ||||||||||||||||||||||||||||||||||||||||
| 4 |
Select Open tracking code summary. 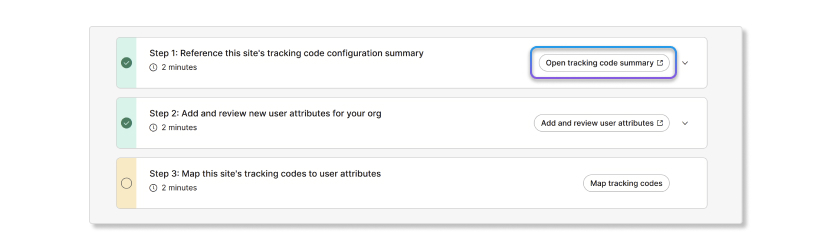
| ||||||||||||||||||||||||||||||||||||||||
| 5 |
Click Download configuration summary. You must download a copy of the current tracking code configuration. You'll need this summary for the next steps to make sure that all attribute values are consistent with the current tracking codes. You can also download previous tracking code lists as a CSV file to upload the same values for custom attributes. 
| ||||||||||||||||||||||||||||||||||||||||
| 6 |
Go back to the wizard and select Add and review user attributes. 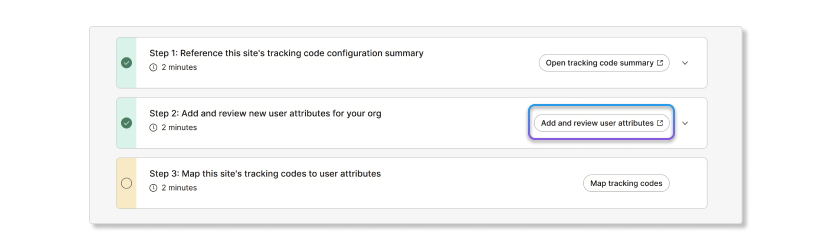
| ||||||||||||||||||||||||||||||||||||||||
| 7 |
Configure any new custom attributes needed for this site. Custom attributes aren't applicable for organizations that sync users with Directory Connector, Azure AD, etc. You can use this step as an opportunity to review the display names for tracking codes. Once you've made any changes that are needed, click Save. Locked attributes are similar to AdminSet
in classic meeting site tracking codes. When you mark a custom attribute as locked,
users won't be able to see that attribute.If you hit save in this step, then any custom attributes that you added,
removed, or marked as required immediately go into effect for the organization. New
users that are onboarded to the organization need to comply with this updated custom
attribute configuration or else user onboarding will fail. Proceed with caution before
marking custom attributes as required.
| ||||||||||||||||||||||||||||||||||||||||
| 8 |
Go back to the wizard and select Map tracking codes. 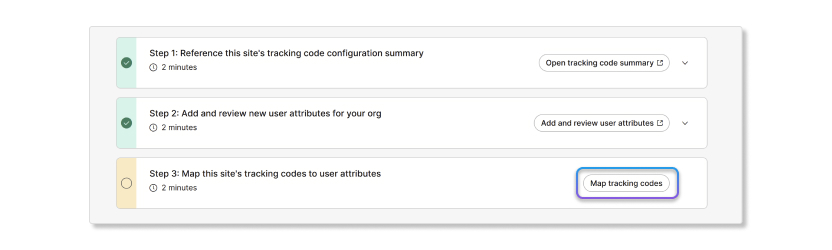
| ||||||||||||||||||||||||||||||||||||||||
| 9 |
Use the dropdown list to map tracking codes to the organization's custom or user profile attributes. When mapping a site tracking code to an attribute, the system first maps to pre-existing attributes that match tracking code names if the input type is set to text field. Once you're all done, click Next. If your organization uses an automated user
onboarding process such as Directory Connector or Azure AD, then you shouldn't map
tracking codes to custom attributes. Instead, map the tracking codes to synchronized
attributes. Previously, tracking codes can be configured differently per center. All centers (Meetings, Events, Webinars, etc.) now share a single scheduling configuration. When you map an attribute as required, that attribute will be required at the time of scheduling in Webex Meetings, Webex Webinars, etc. 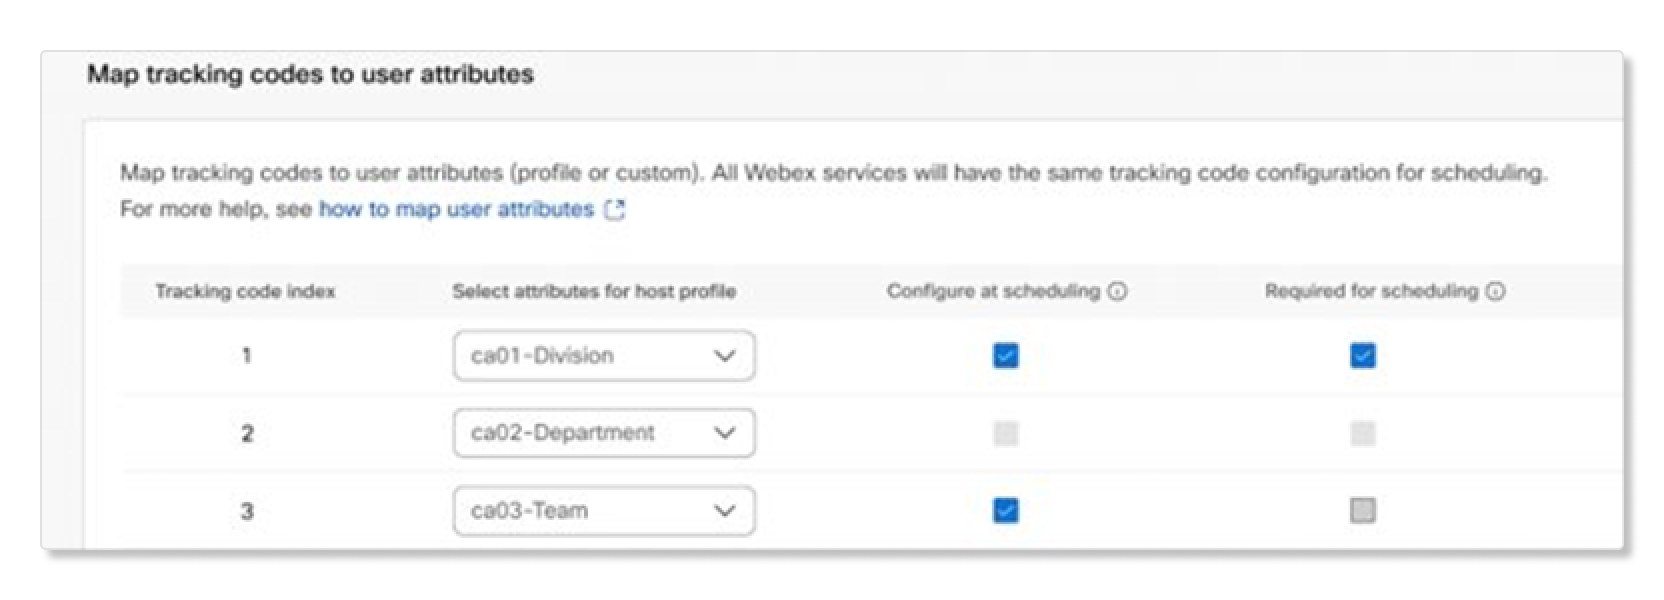
| ||||||||||||||||||||||||||||||||||||||||
| 10 |
Click Sync tracking codes. We suggest making a backup of tracking code values for users
by doing a site user export for the meeting site. 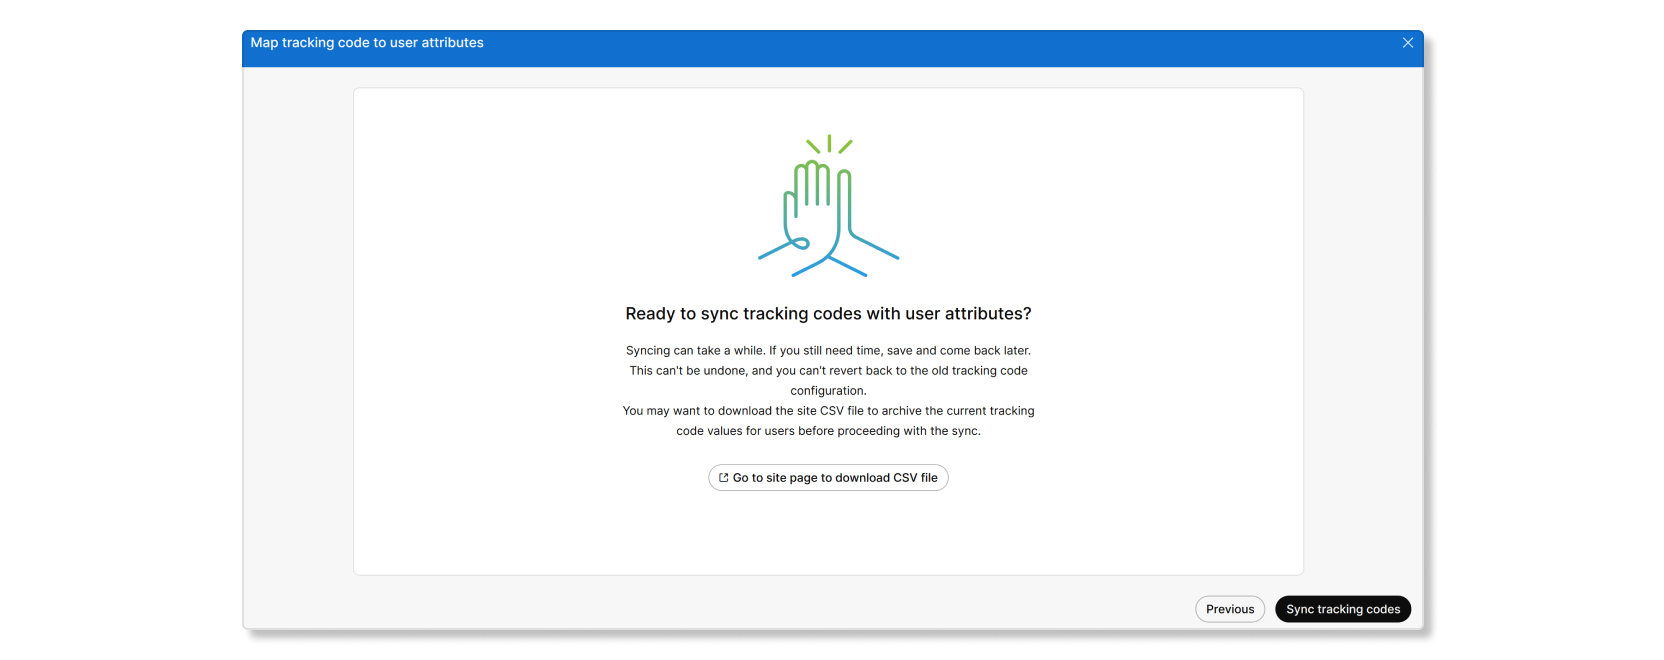
When you map tracking codes to custom attributes, the data's single source of truth comes from Webex Identity instead of each individual meeting site. Syncing does a one time copy of tracking code user values to mapped attributes that aren't already populated for users, which means that the order of what sites you sync tracking codes first matters. When syncing the first site, the tracking code values for users from that site are copied to the mapped user attribute for that user in Control Hub, but only if that value isn't already populated for the user. This is a one-time irreversible operation, so make sure that you've mapped the tracking codes correctly. Don't sync the tracking codes if you're unsure about the mapping until you're certain everything's correct. The following table outlines possible scenarios where data supersedes the original tracking codes. In these scenarios, the tracking code and mapped attribute are the user's city.
Some tracking code values may not be copied from site to user attributes during sync If a user's value for a mapped site is already populated at time of syncing then the tracking value from that site in not copied to the mapped attribute in Control Hub for that user. To avoid data superseding other tracking codes for users, we recommend that you map and sync data for a meeting site with the most current tracking code data for users. Tracking code values
aren't copied from sites that map tracking codes to user fields that are synchronized
via external sources, such as Directory Connector or Azure AD. If you aren't ready to being the sync, you can cancel out of the wizard. You can come back to the wizard and finish the data sync later once you're ready. | ||||||||||||||||||||||||||||||||||||||||


