- Home
- /
- Article

Thanks for your feedback.

 In this article
 Feedback?
Schedule meetings with options tailored to your needs. Schedule to meet quickly, or set up a series of meetings with advanced options for your team.
If you don't have a calendar service set up, when you schedule, modify or cancel a meeting, Webex automatically sends everyone a new email so they stay up to date. When you modify or cancel the meeting, Webex automatically sends everyone a new email with the updated details. When the time comes, Webex sends reminder emails.
If you have Hybrid Calendar Service, when you schedule a meeting, Webex no longer sends emails, but creates a new event in the calendar. Invitees receive an invitation. When you modify the meeting, invitees receive an updated invitation. When you cancel the meeting, your calendar removes the meeting. In addition, hosts and invitees receive a pop-up reminder message before the meeting.
Schedule your meeting
| 1 |
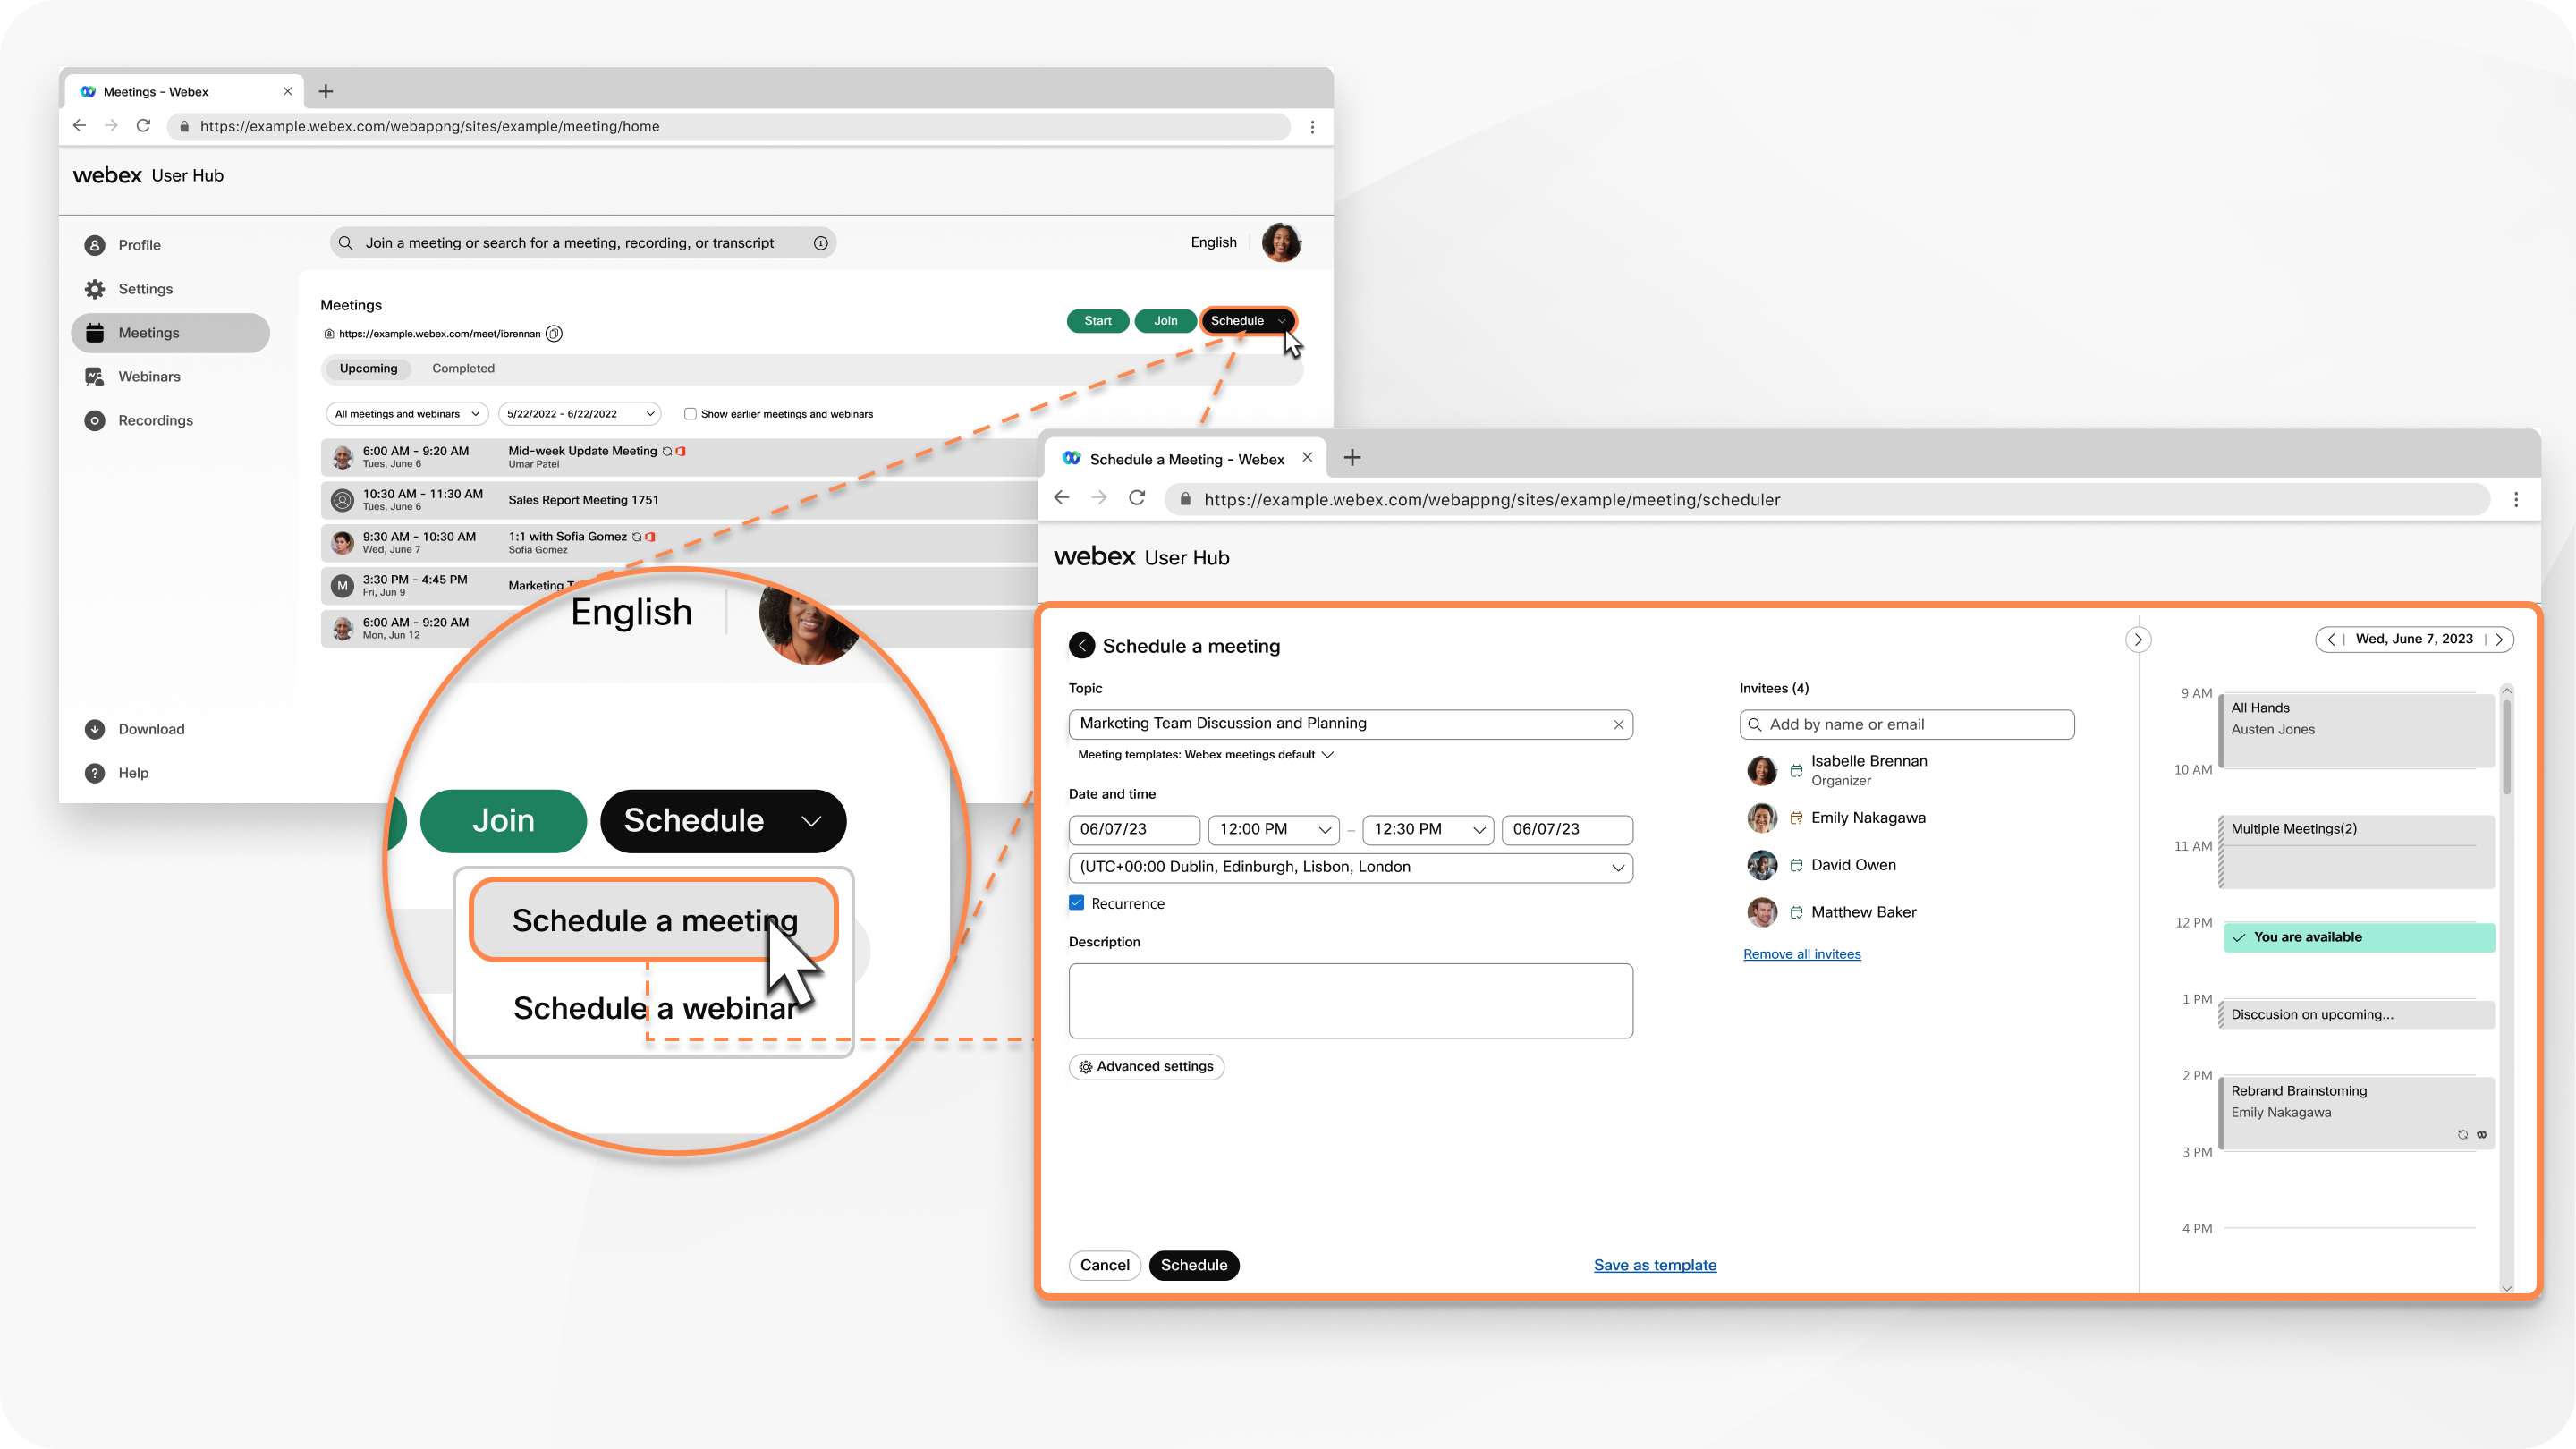
Sign in to User Hub, click the Meetings tab, then click the Schedule drop-down menu and select Schedule a meeting. |
| 2 |
Add the standard meeting information:
|
| 3 |
Under Invitees, enter the email addresses of the people you want to invite to your meeting. If the invitee has Hybrid Calendar Service, an icon appears next to their name that
shows whether they're available for the meeting time you chose. If they have an account on
this site, you can select the icon to make them a cohost.
|
| 4 |
Choose from the available advanced options:
|
| 5 |
Click Back, then select Schedule. |
Edit a scheduled meeting
After you schedule your meeting, you can go back and edit the details if you forgot to include something or want to change specific settings. You can't edit a meeting after you start it.
| 1 |
Sign in to User Hub. |
| 2 |
Click the Meetings tab, and select the meeting you want to edit from the Upcoming list. |
| 3 |
Click Edit
You can only edit meetings scheduled from Microsoft Outlook, Webex App from the respective platform. The edit icon doesn't appear for these meetings. If you add attendees to the meeting, don't remove the original attendees from the list as they may receive cancellation emails. |
| 4 |
Click Save, then choose who you want to send the updated meeting information to. |
 , then update the meeting details.
Cancel a scheduled meeting
After scheduling a meeting, you can cancel at any time before the meeting is due to start.
| 1 |
Sign in to User Hub. |
| 2 |
Click the Meetings tab, and select the meeting you want to cancel from the Upcoming list. |
| 3 |
Click Cancel meeting
This cancels the meeting, and notifies all attendees, and cannot be undone. |
 , and when prompted, click


