- Головна
- /
- Стаття


Налаштування параметрів голосової пошти
 У цій статті
 Надіслати відгук?
Ви можете керувати налаштуваннями голосової пошти, такими як привітання, транскрипція, сховище та сповіщення, з Центру користувача.
Перш ніж почати
- Ваш адміністратор повинен увімкнути налаштування голосової пошти, щоб ви могли отримати до них доступ та налаштувати їх. Якщо ви не знайдете жодних налаштувань голосової пошти, зверніться до свого адміністратора.
- Опція виклику в Центрі користувача
Ви можете налаштувати всі параметри голосової пошти в Центрі користувача, перейшовши до .
Опція Виклики доступна лише для користувачів із ліцензією Webex Calling. Якщо ви не бачите опції Виклики, це означає, що у вас немає ліцензії Webex Calling.
Якщо ви хочете дізнатися, яку службу викликів у вас налаштовано, ви можете перевірити це в застосунку Webex. Для отримання додаткової інформації див. Дізнайтеся, яка у вас послуга дзвінків.
- Пересилання голосової пошти
Якщо ваш адміністратор увімкнув цей параметр, ви можете пересилати голосові повідомлення на номер або додатковий номер інших користувачів. Якщо цю функцію вимкнено, ви не можете пересилати голосові повідомлення, використовувати зовнішню поштову скриньку або надсилати копію голосового повідомлення на вказану адресу електронної пошти.
- Видалення голосової пошти
Ваш адміністратор може встановити термін дії голосових повідомлень (1-180 днів) та умови видалення повідомлень, термін дії яких закінчився.
Після налаштування параметрів адміністратором голосові повідомлення, яким понад 180 днів, автоматично архівуються. Якщо вам потрібен доступ до архівованих голосових повідомлень, зверніться до адміністратора.
Якщо адміністратор не налаштував параметри, вам потрібно видалити повідомлення вручну.
- Код доступу або PIN-код голосової пошти
Ваш адміністратор може встановити мінімальну кількість днів (1–7) між змінами пароля та термін дії пароля (15–180 днів). Якщо адміністратор не налаштував параметри, ваш пароль ніколи не матиме терміну дії.
Ви можете скинути код доступу голосової пошти в Центрі користувача, див. Встановлення або скидання PIN-коду голосової пошти для отримання додаткової інформації. Щоб прослухати голосові повідомлення з Центру користувача, див. Прослуховування голосових повідомлень.
Якщо у вас виникнуть проблеми з налаштуванням параметрів, зверніться до адміністратора. Ваш адміністратор також може налаштувати всі параметри голосової пошти від вашого імені.
Пов'язані статті
Увімкнути голосову пошту
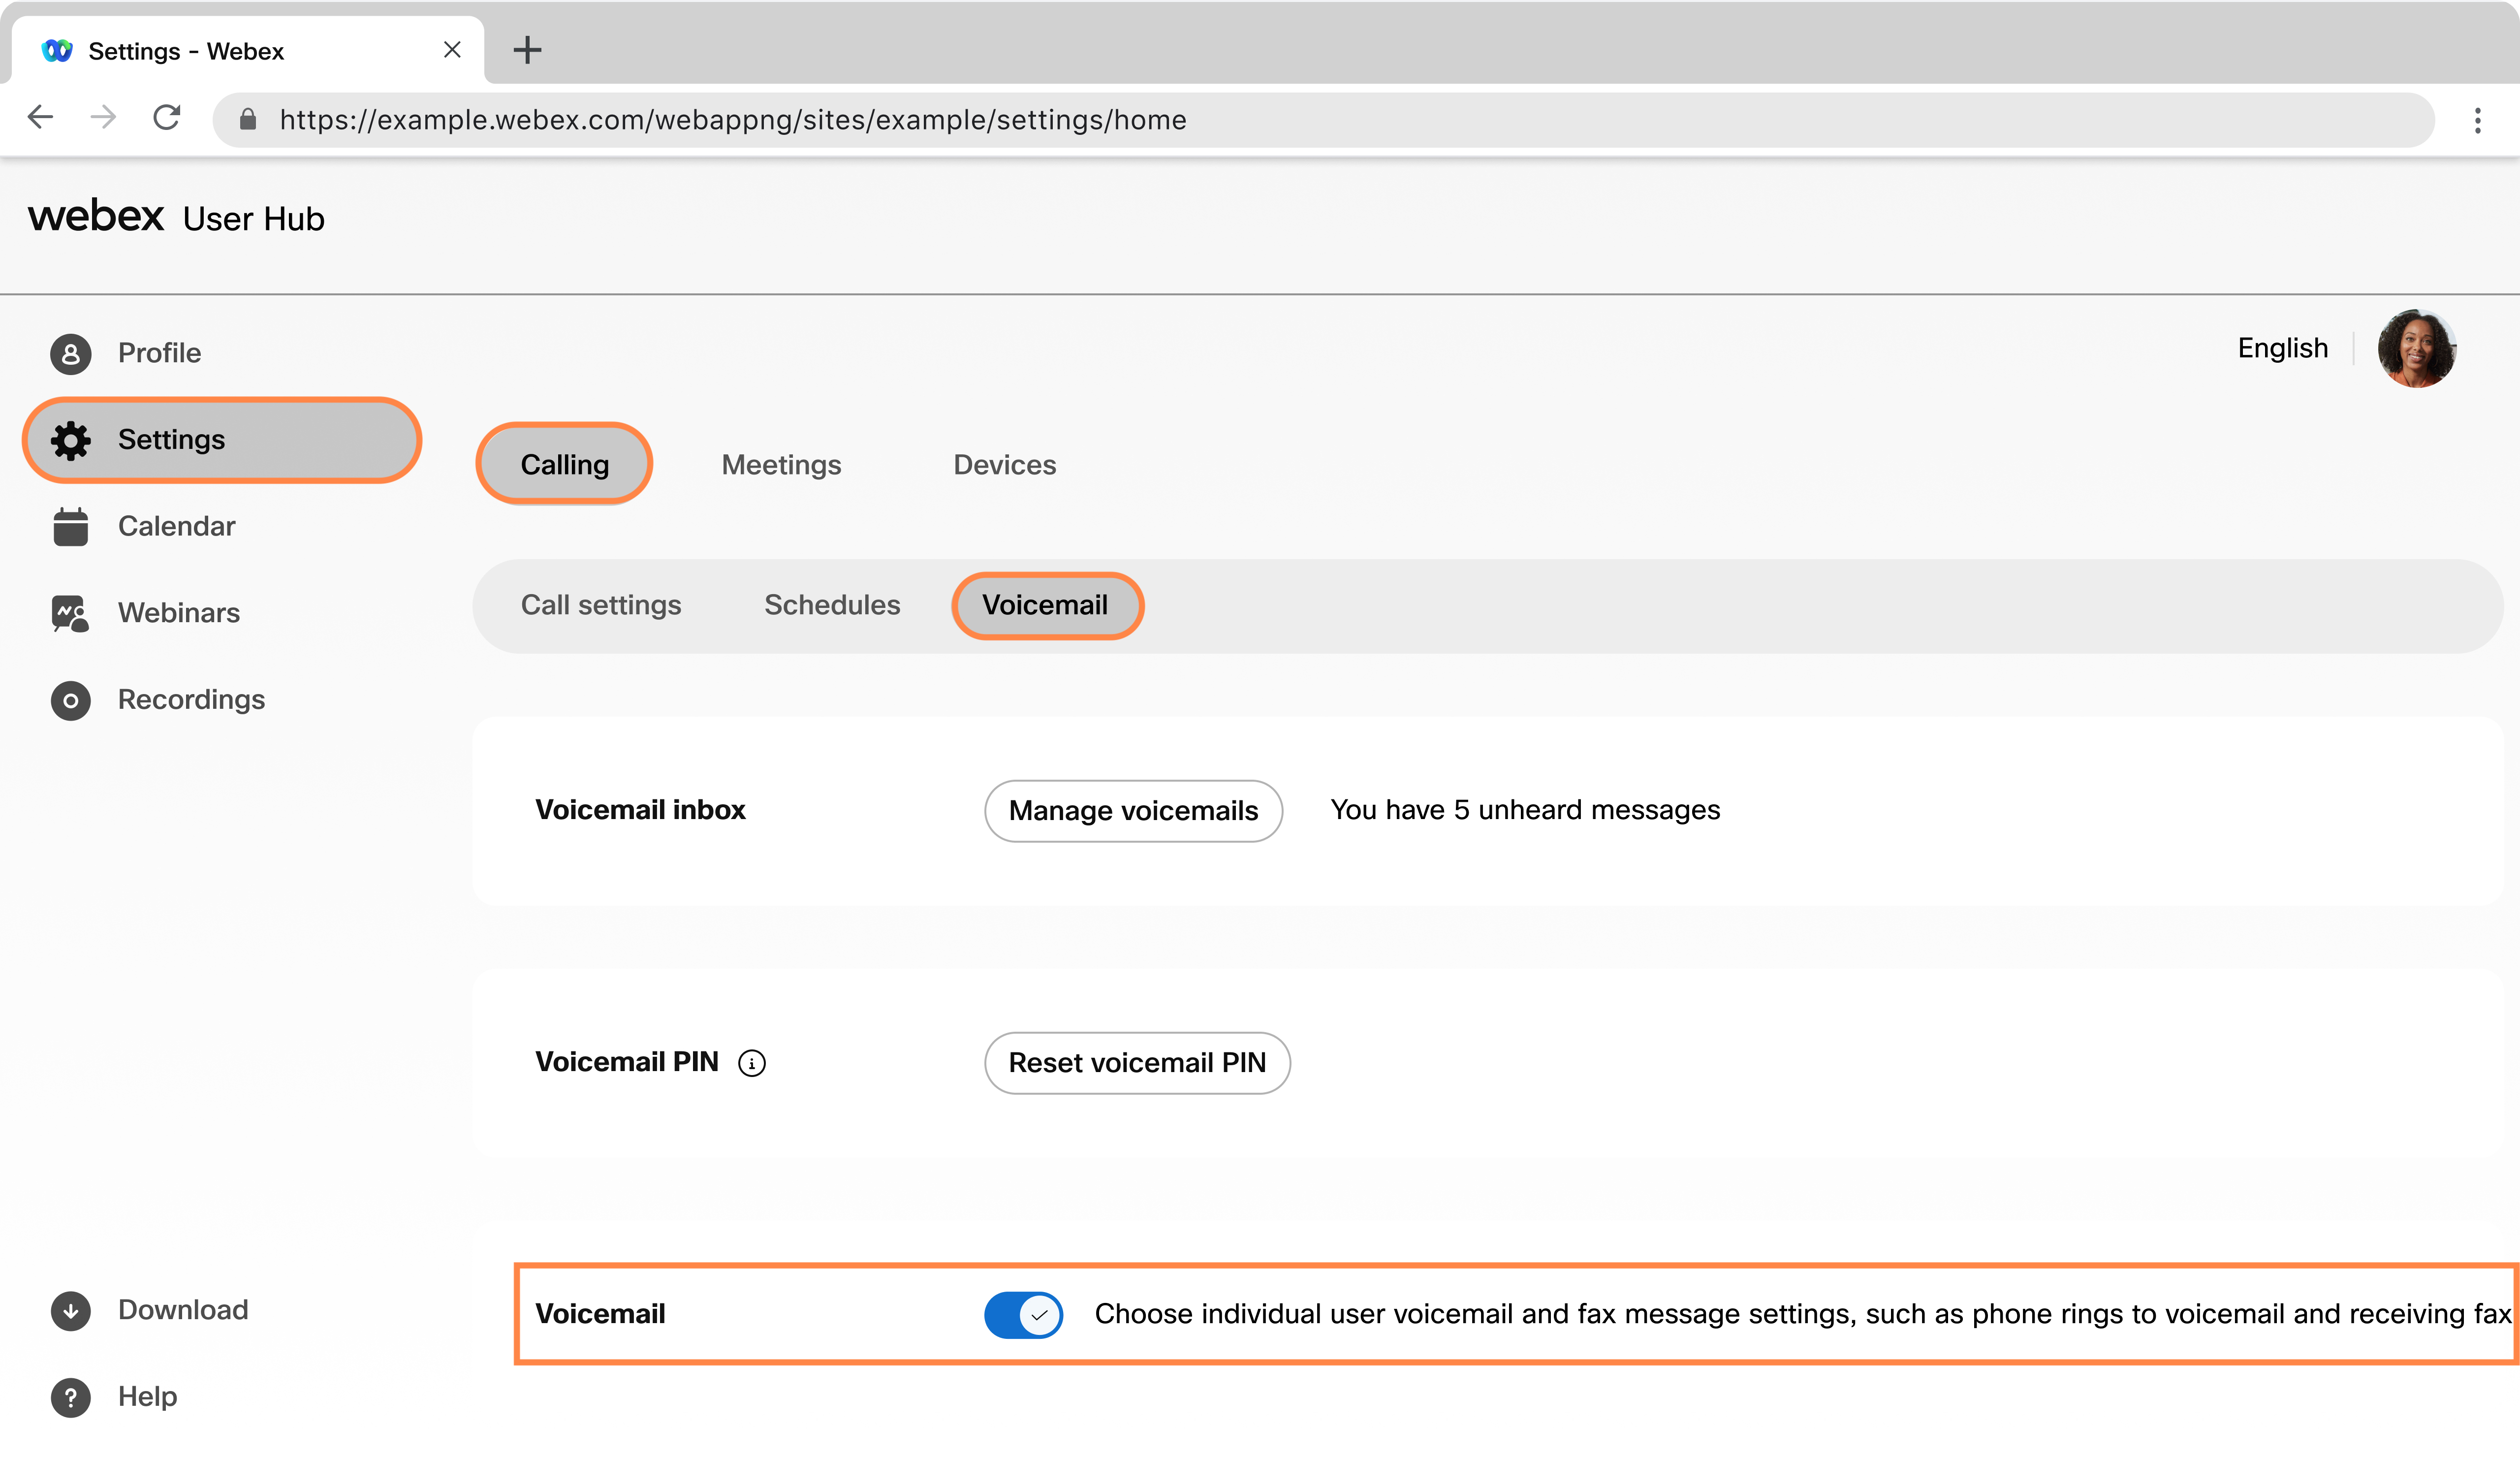
Щоб отримувати голосові та факсимільні повідомлення, а також налаштовувати різні параметри голосової пошти, такі як надсилання викликів на голосову пошту, увімкнення сповіщень та налаштування зберігання повідомлень, спочатку потрібно ввімкнути перемикач голосової пошти.
| 1 |
Увійдіть до Центру користувачів, а потім натисніть . |
| 2 |
Перейдіть до розділу Голосова пошта та увімкніть перемикач.  |
Що далі
Надсилати дзвінки на голосову пошту з привітаннями
Ви можете встановити, коли потрібно перенаправляти абонентів на голосову пошту. Наприклад, ви можете надсилати всі виклики на голосову пошту, коли знаєте, що збираєтеся бути поза офісом і не приймати телефонні виклики.
Ви можете встановити привітання голосової пошти – це повідомлення, яке чують абоненти, коли надходять на вашу голосову пошту. Існує два типи привітань голосової пошти - Зайнятий і Без відповіді. Привітання «Зайнято» відтворюється, коли ви розмовляєте по іншому номеру і немає виклику на очікуванні, а привітання «Немає відповіді» відтворюється, коли ви не відповідаєте на виклик.
- Вхідні дзвінки не перенаправляються на голосову пошту, якщо ви ввімкнули очікування дзвінка.
- Якщо у вас увімкнено перенаправлення викликів, ці параметри перенаправлення перенаправляють над настройками голосової пошти, які ви налаштували.
| 1 |
Увійдіть до Центру користувачів, а потім натисніть . |
| 2 |
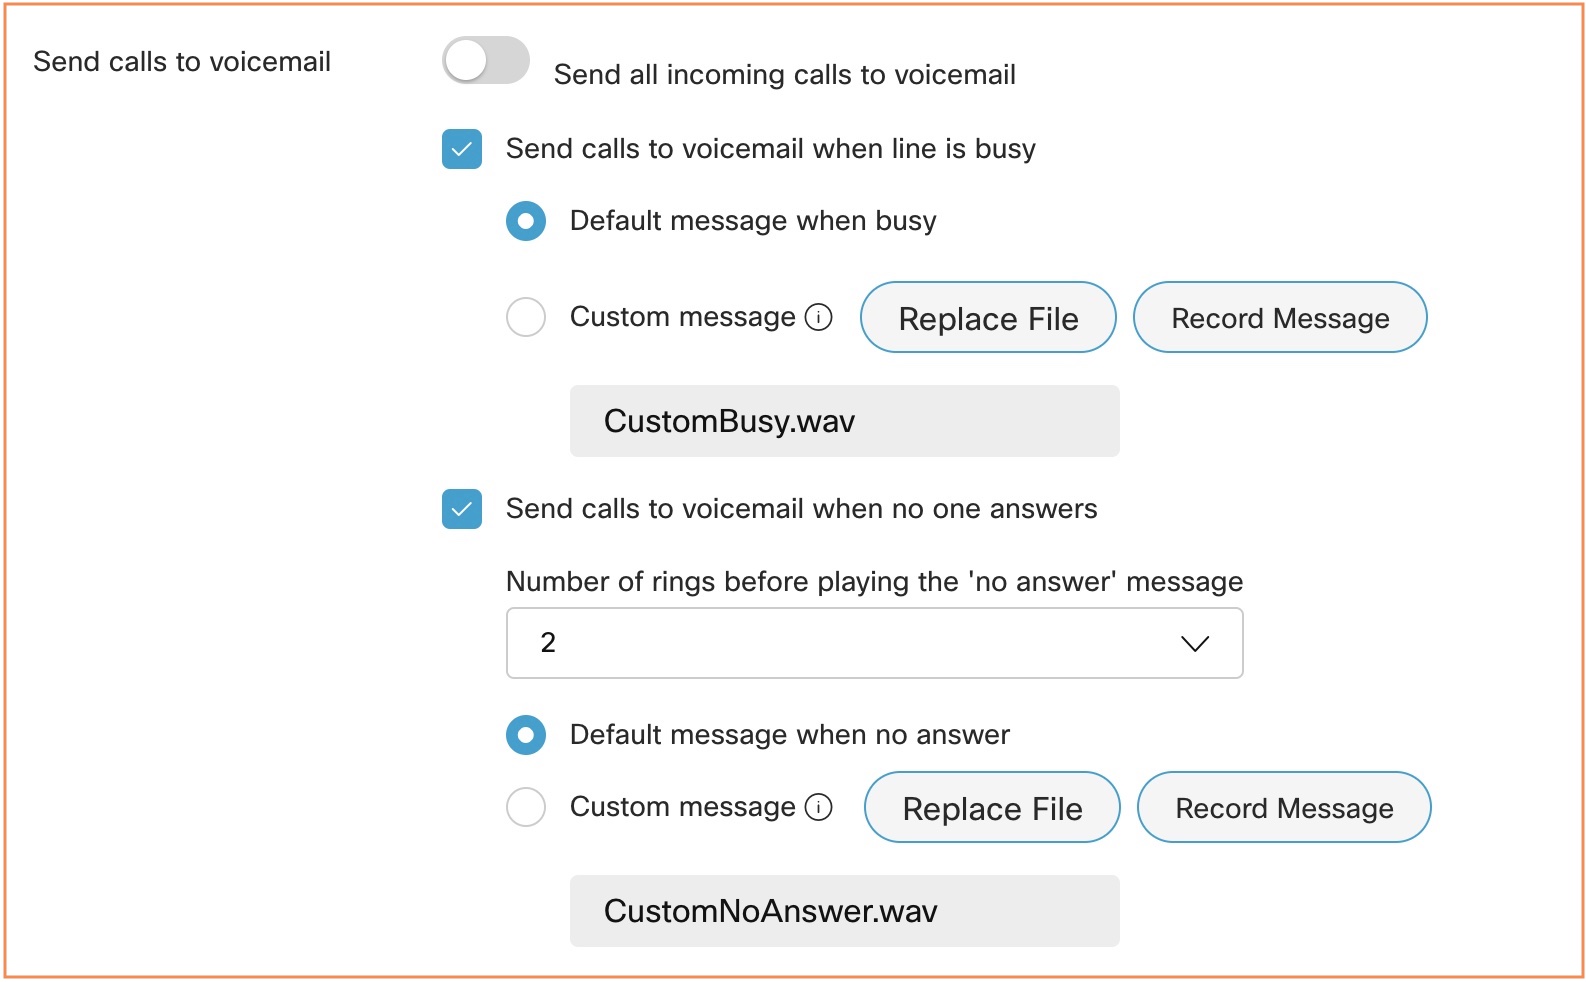
Перейдіть до розділу Надіслати дзвінки на голосову пошту та виберіть один із наведених нижче варіантів.
Після завантаження файлу або запису привітання ви можете змінити його, вибравши Замінити файл або записавши інше привітання. Запис нового привітання або завантаження нового файлу замінює попереднє привітання. Аудіофайл (WAV) має бути 8 кГц, 8-бітним моно, CCITT µ-law, максимум 2 МБ, формат файлу .wav. Максимальний розмір файлу становить 960 КБ для 90 секунд відтворення. Ви також можете записати привітання, набравши номер голосового порталу *62 з ваших IP-телефонів Cisco або застосунку Webex. Якщо ви виберете Надіслати всі дзвінки на голосову пошту, ви не зможете вибрати два інші варіанти. Можна вибрати пряме спрямування на голосову пошту за допомогою обох параметрів "Надсилати виклики на голосову пошту", коли лінія зайнята , і "Надсилати виклики на голосову пошту", коли разом не вибрано параметри відповіді. |
| 3 |
Клацніть Зберегти. |
Зберігайте голосові та факсимільні повідомлення
Ви можете вибрати, де зберігати голосові повідомлення та факсимільні повідомлення — у Центрі користувача або на вказаній електронній адресі у форматі .tiff.
| 1 |
Увійдіть до Центру користувачів, а потім натисніть . |
| 2 |
Перейдіть до розділу Сховище повідомлень та виберіть місце, де ви хочете зберігати свої повідомлення:
|
| 3 |
Клацніть Зберегти.  |
Що далі
Якщо у вашому регіоні ввімкнено транскрипцію голосової пошти, для отримання транскрипцій голосової пошти необхідно вибрати опції Використовувати внутрішню поштову скриньку та Надіслати копію голосового повідомлення електронною поштою. Для отримання додаткової інформації див. розділ Налаштування транскрипції голосової пошти.
Увімкнення сповіщень голосової пошти
| 1 |
Увійдіть до Центру користувачів, а потім натисніть . |
| 2 |
Перейдіть до розділу Сповіщення та увімкніть Отримувати сповіщення голосової пошти. |
| 3 |
Виберіть один із наведених нижче параметрів.
 |
| 4 |
Щоб надіслати голосове повідомлення на адресу електронної пошти з вкладеним повідомленням, перейдіть до розділу Додаткові налаштування, увімкніть Надіслати копію голосового повідомлення електронною поштоюта введіть адресу електронної пошти, на яку потрібно надіслати транскрипції. Цей параметр може бути недоступний, якщо переадресацію голосової пошти вимкнуто.  |
| 5 |
Клацніть Зберегти. |
Що далі
Якщо у вашому регіоні ввімкнено транскрипцію голосової пошти, для отримання транскрипцій голосової пошти необхідно вибрати опції Використовувати внутрішню поштову скриньку та Надіслати копію голосового повідомлення електронною поштою. Щоб отримати довідку, див. розділ Налаштування транскрипції голосової пошти.
Налаштування транскрипції голосової пошти
Перш ніж почати
-
Підтримувані мови:
- Англійська
- Німецька
- Іспанська
- Французька
-
Адміністратор повинен увімкнути транскрипцію голосової пошти для вашого розташування.
| 1 |
Увійдіть до Центру користувачів, а потім натисніть . |
| 2 |
Перейдіть до розділу Зберігання повідомлень та виберіть Використовувати внутрішню поштову скриньку.  |
| 3 |
Перейдіть до розділу Додаткові налаштування та увімкніть Надіслати копію голосового повідомлення електронною поштою, а потім введіть адресу електронної пошти, на яку потрібно надіслати транскрипції. Цей параметр може бути недоступний, якщо переадресацію голосової пошти вимкнуто.  |
| 4 |
Клацніть Зберегти. |
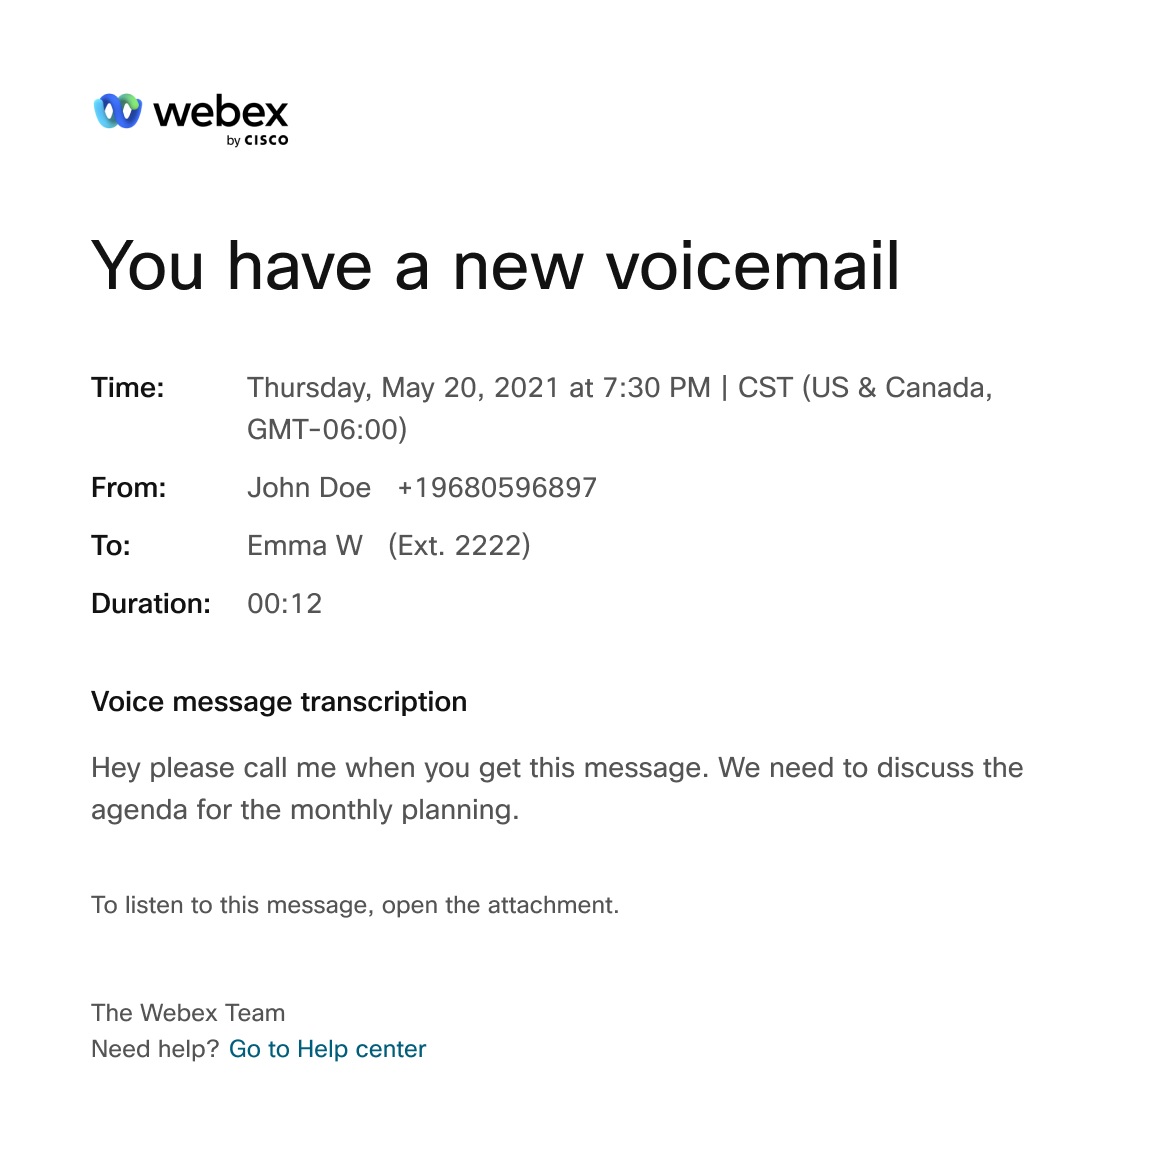
Ви можете використовувати наступне зображення як корисне візуальне уявлення про сповіщення електронною поштою для транскрипції голосової пошти.

Причини, чому транскрипція голосової пошти недоступна
Система не створює стенограму, якщо загальна якість або точність стенограми низька. Це може статися, якщо якість звуку була поганою через такі обмеження:
-
Фоновий шум
-
Погана чутливість
-
В аудіофайлі присутні слова непідтримуваної мови
Транскрипція голосової пошти доступна лише для голосових повідомлень, залишених підтримуваними мовами.
-
Важкий акцент
Обмеження транскрипції голосової пошти
-
Коли ви пересилаєте голосове повідомлення або відповідаєте на нього з голосового порталу, воно не транскрибується.
-
Коли ви створюєте голосове повідомлення та надсилаєте його іншому користувачеві з голосового порталу, воно не транскрибується.
Дозвольте абонентам передавати з вашої голосової пошти привітання
Ви можете дозволити абонентам натиснути 0 і бути переведеними на інший номер телефону, за вашим вибором, коли вони дійдуть до вашого привітання голосової пошти.
Якщо ця функція ввімкнена, обов'язково запишіть привітання голосової пошти з відповідними вказівками для абонента. Наприклад, "Щоб достукатися до мого помічника, натисніть 0".
| 1 |
Увійдіть до Центру користувачів, а потім натисніть . |
| 2 |
Перейдіть до Додаткові налаштування та увімкніть Переадресація з '0' на інший номер телефону, а потім введіть номер телефону, на який потрібно переадресувати абонентів. |
| 3 |
Клацніть Зберегти.  |
Налаштування для отримання факсів
Факсимільні повідомлення дозволяють отримувати вхідні факси безпосередньо від служби голосової пошти.
Факси зберігаються у спільному сховищі разом із голосовими повідомленнями. Обсяг сховища становить 100 хвилин голосової пошти або 1000 сторінок факсимільних повідомлень. Обов’язково розподіліть місце для нових факсів та архівуйте їх з розумом.
Докладніше про функцію факсимільних повідомлень див. у статті Налаштування функції факсимільних повідомлень для користувачів Webex Calling.
Перш ніж почати
Опція Факсимільні повідомлення відображається лише за умови, що ваш адміністратор увімкнув цю функцію.
| 1 |
Увійдіть до Центру користувачів, а потім натисніть . |
| 2 |
Перейдіть до розділу Факсимільні повідомлення та увімкніть перемикач. Якщо адміністратор увімкнув функцію факсимільних повідомлень, перемикач за замовчуванням увімкнено. З’явиться ваш номер факсу та додатковий номер. |
| 3 |
Клацніть Зберегти. |


