Configure call intercept in Control Hub
 Feedback?
| 1 |
Sign in to Control Hub. |
| 2 |
Go to . You can also find the Locations from and from Calling quick links tile, select Locations. |
| 3 |
Select the location that you’d like to configure for Location Intercept. |
| 4 |
Go to Calling tab and click Call intercept under the Call handling section. |
| 5 |
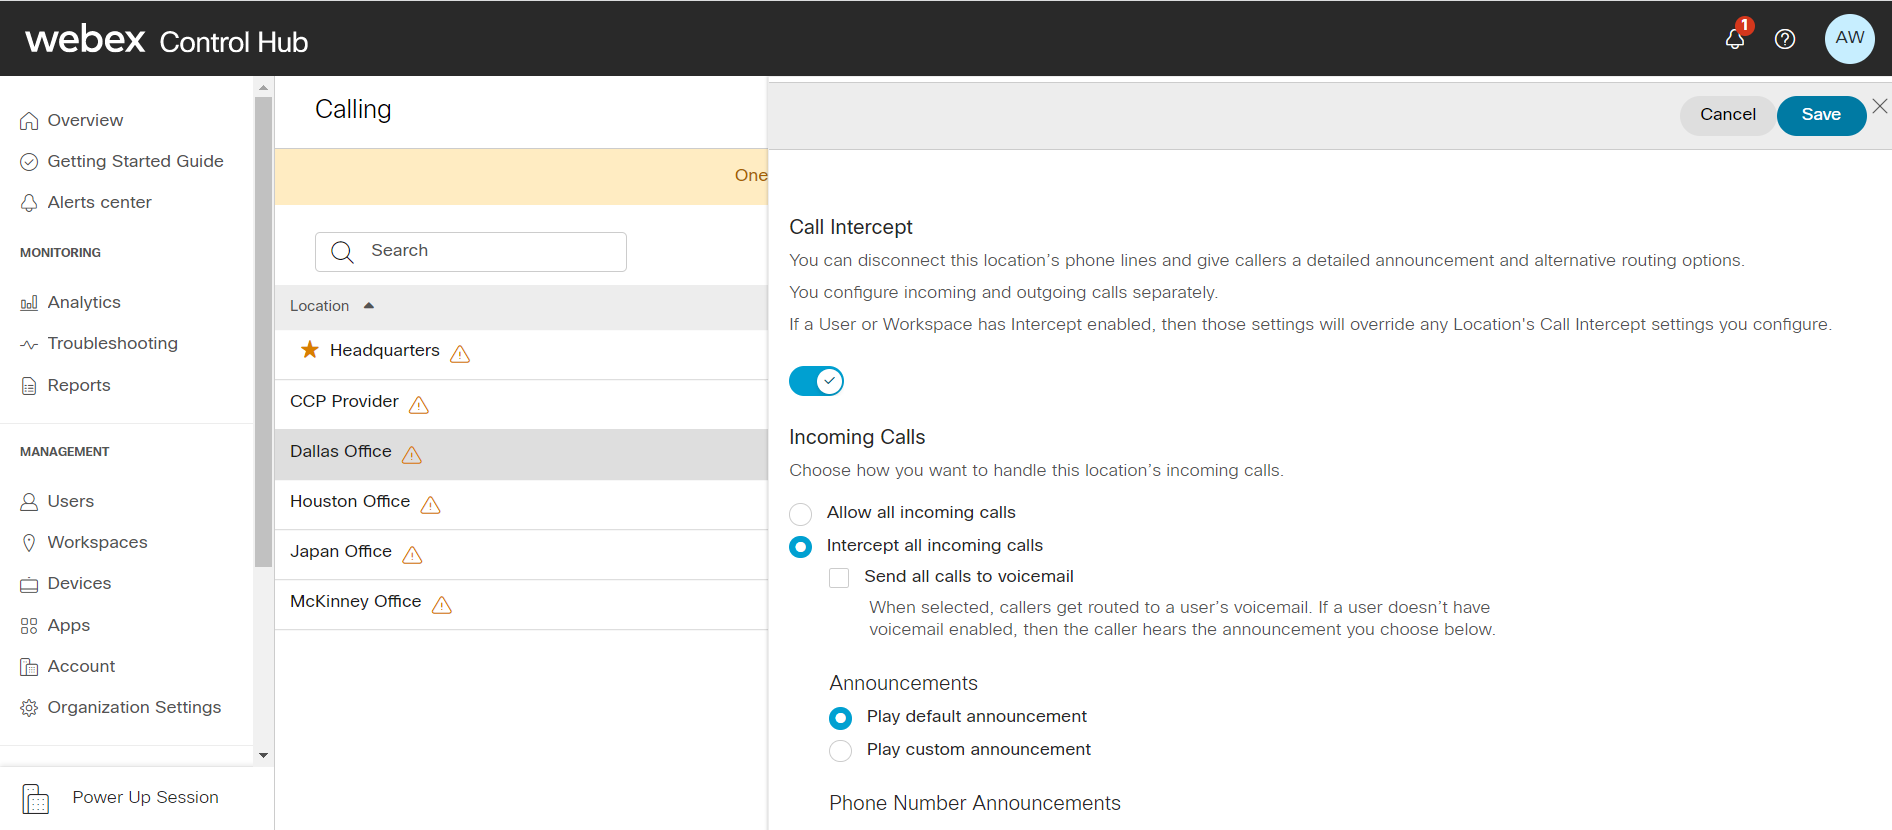
Toggle to enable Call Intercept. |
| 6 |
Under Incoming calls, choose Allow all incoming calls or Intercept all incoming calls. |
| 7 |
If you choose Intercept all incoming calls, choose the features that you need.
The audio (WAV) file must meet specified requirements.  |
| 8 |
Under Phone Number Announcements, choose from the following options, and enter the number redirects:
If both of these options are checked, it’s possible to enter two different numbers for each option, but it results in a misleading announcement message. Example, if the Play new number announcements are set to 1111 and the Transfer on '0' to this phone number to 2222, callers hear the message "The number you’re trying to reach is out of service. The new number is 1111. Press 0 now if you wish to be transferred to the new location." In this case, pressing '0' sends callers to 2222 rather than 1111. |
| 9 |
For Outgoing Calls, choose from the following:
|
| 10 |
Click Saveto confirm your changes. |
| 1 |
Sign in to Control Hub. |
| 2 |
Go to and select the user that you want to edit. |
| 3 |
Go to Calling tab and click Call Intercept section. |
| 4 |
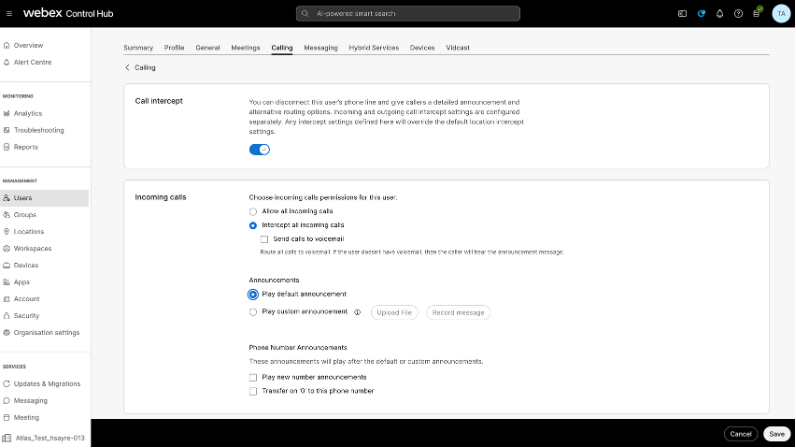
Toggle the button to change the settings for the user. |
| 5 |
Under Incoming Calls, choose Allow all incoming calls or Intercept all incoming calls.
|
| 6 |
If you choose Intercept all incoming calls, set up the features you need:
|
| 7 |
Under Phone Number Announcements, choose from the following options, and enter the number redirects:
If both of these options are checked, it’s possible to enter two different numbers for each option, but it results in a misleading announcement message. For example, if the Play new number announcements is set to 1111 and the Transfer on '0' to this phone number to 2222, callers hear the message "The number you’re trying to reach is out of service. The new number is 1111. Press 0 now if your wish to be transferred to the new location." In this case, pressing '0' sends callers to 2222 rather than 1111. |
| 8 |
For Outgoing Calls, choose from the following:
|
| 9 |
Click Save to confirm your changes. |
To make this feature available, a workspace license must be assigned to the workspace.
| 1 |
Sign in to Control Hub. |
| 2 |
Go to and select the workspace that you want to edit. |
| 3 |
Select Calling. |
| 4 |
In the Call handling card, select Call intercept. |
| 5 |
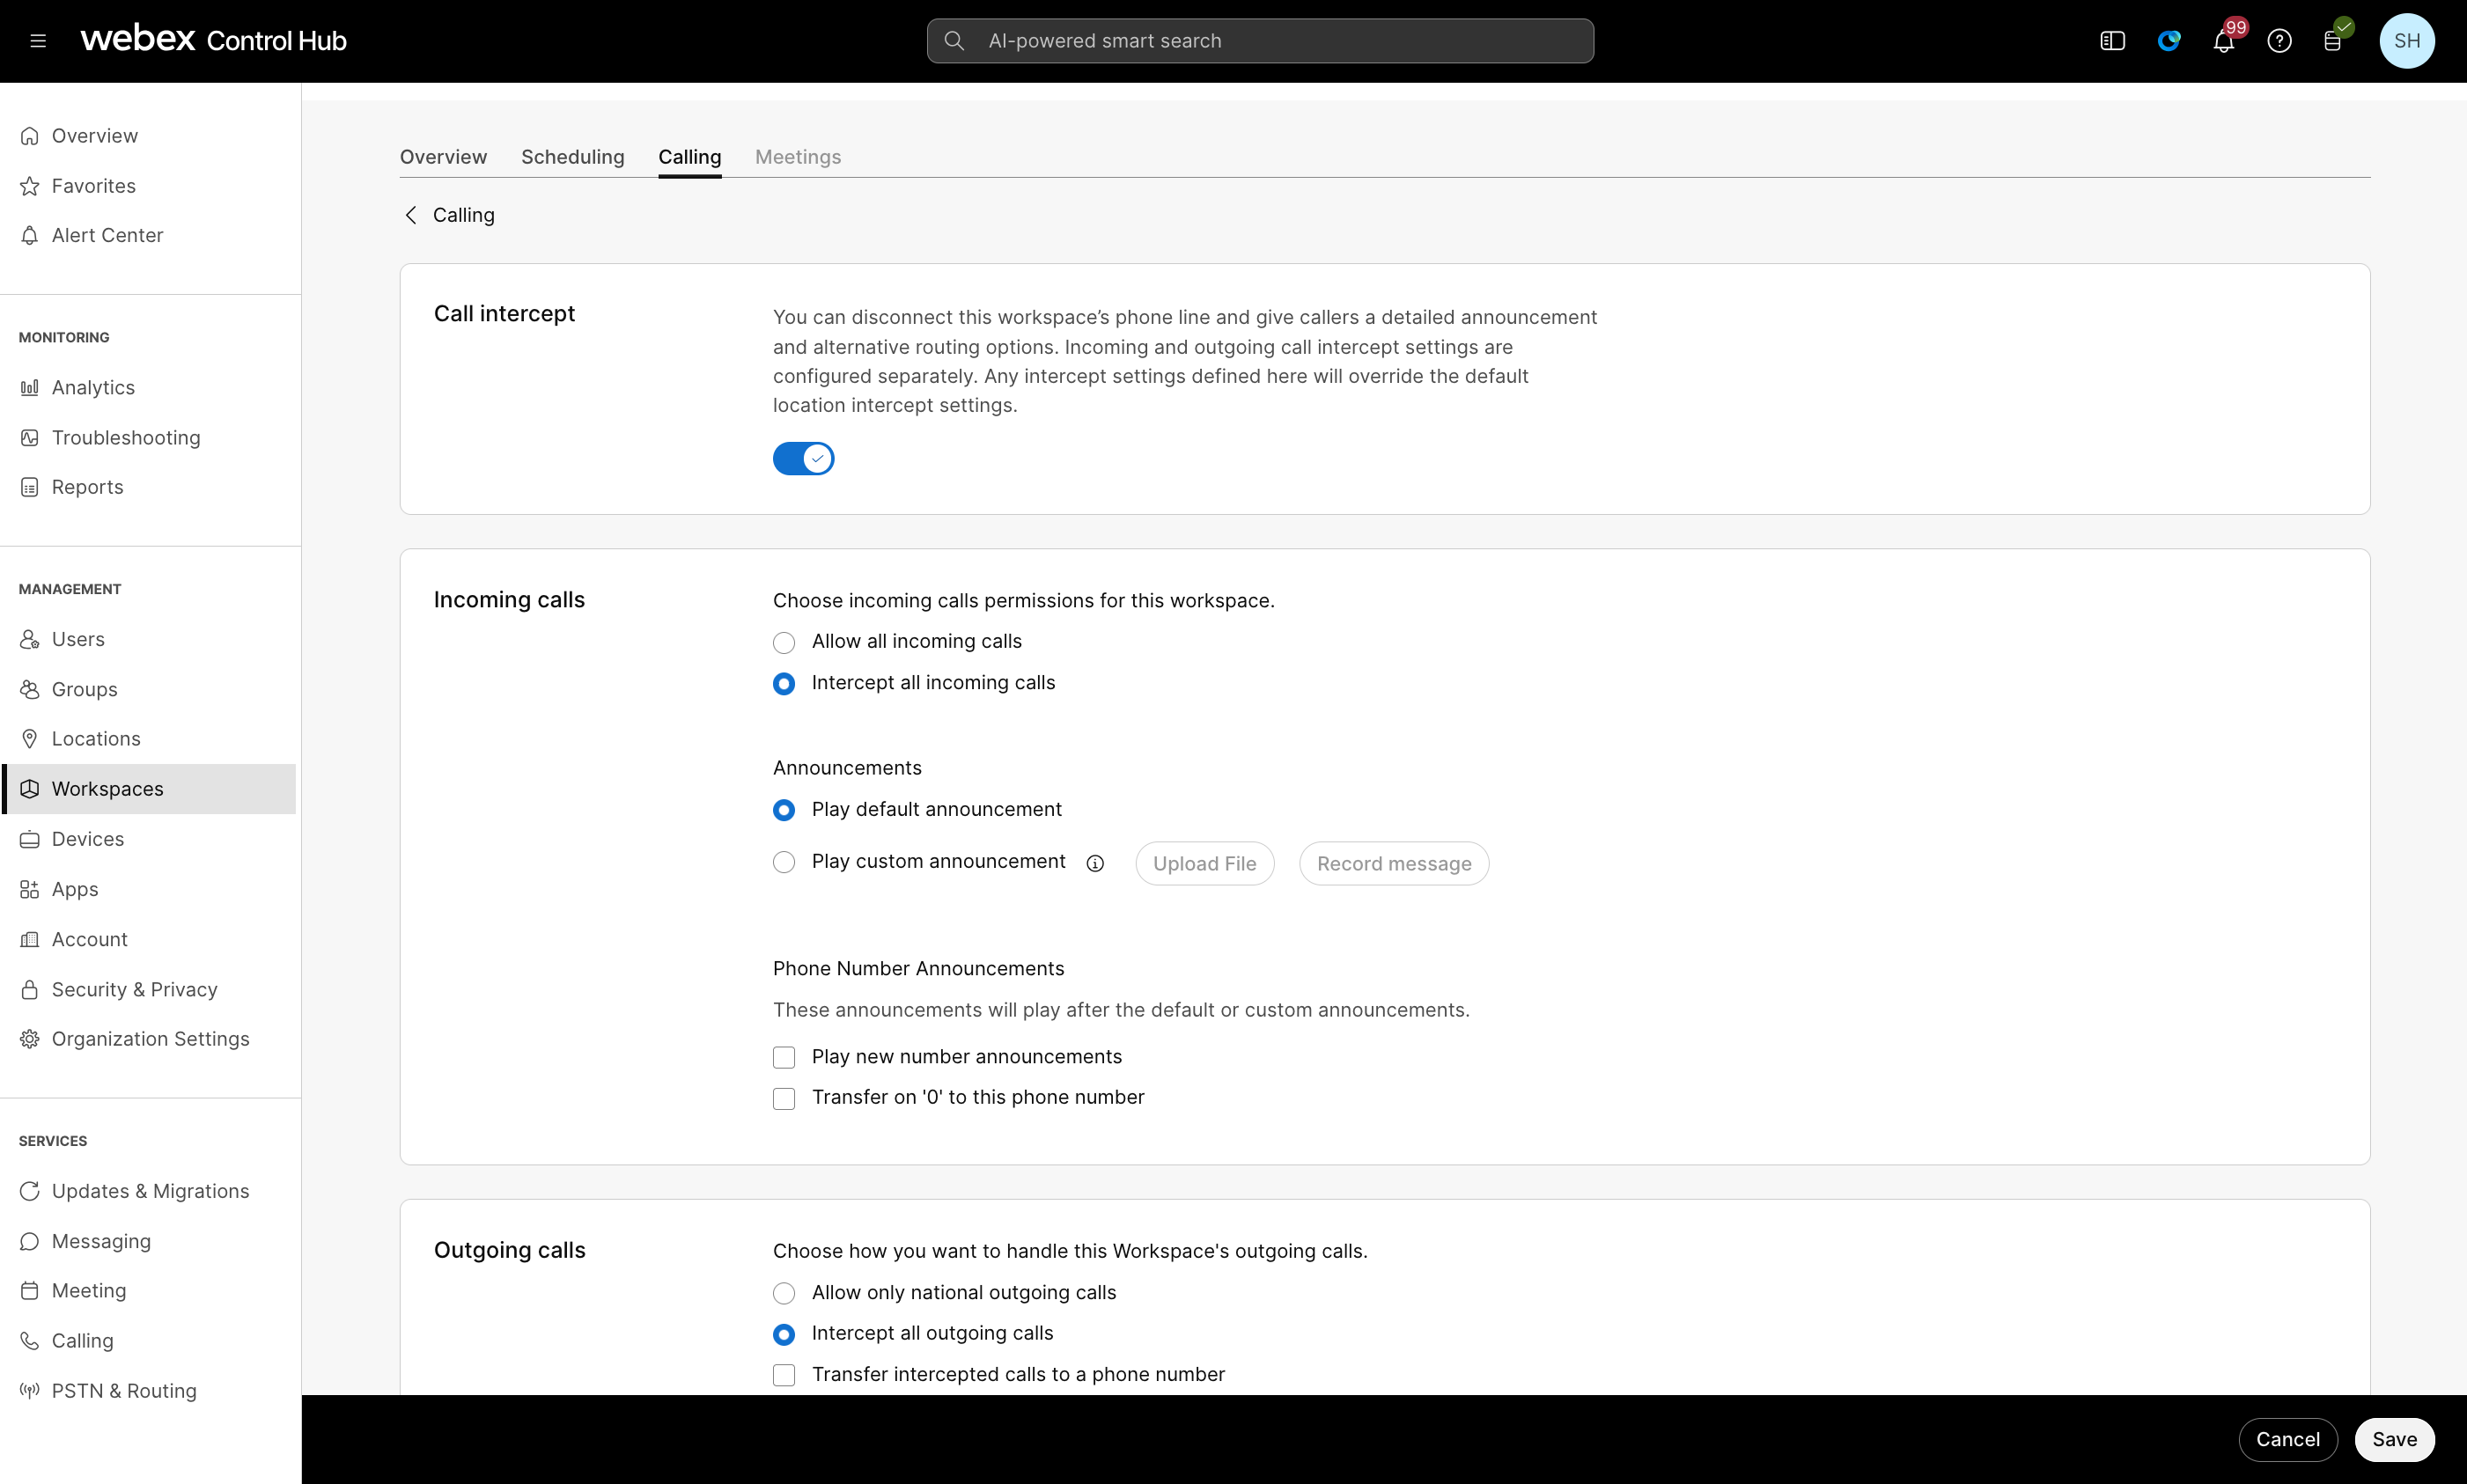
Under Incoming calls and Outgoing calls the call intercept functionality can be configured once Call intercept is enabled.
|
| 6 |
If you choose Intercept all incoming calls, set up the features you need:
|
| 7 |
Under Phone Number Announcements, choose from the following options, and enter the number redirects:
If both of these options are checked, it’s possible to enter two different numbers for each option, but it results in a misleading announcement message. For example, if the Play new number announcements is set to 1111 and the Transfer on '0' to this phone number to 2222, callers hear the message "The number you’re trying to reach is out of service. The new number is 1111. Press 0 now if your wish to be transferred to the new location." In this case, pressing '0' sends callers to 2222 rather than 1111. |
| 8 |
For Outgoing Calls, choose from the following:
|
| 9 |
Click Save to confirm your changes. |


