- ホーム
- /
- 投稿記事

コメントありがとうございます。

コントロールハブでスケジュールを作成する
 この記事の内容
 フィードバックがある場合
さまざまなスケジュールを作成し、それを自動応答とユーザーの通話設定 に適用して、営業時間、休日、またはユーザーの 空き時間に基づいて通話を効率的にルーティングします。
ロケーションスケジュールの管理
組織内の場所の営業時間や休日のスケジュールを作成し、自動応答などの機能に適用できます。自動応答は、営業時間スケジュールで定義された曜日と時刻に基づいて動作します。
また、ある場所で作成されたスケジュールを、その場所内の順次呼び出し、同時呼び出し、優先アラートなどのユーザーの通話設定に適用することもできます。
ロケーションスケジュールを作成する
| 1 | |
| 2 |
. |
| 3 |
場所を選択し、 通話 タブをクリックします。 |
| 4 |
通話機能の設定 セクションに移動し、 スケジュールを選択します。 |
| 5 |
[スケジュールの追加] をクリックします。 |
| 6 |
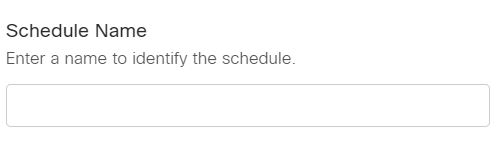
スケジュール名 を入力し、 スケジュールタイプ として 営業時間 または 休日を選択します。 スケジュール名とイベント名は固有である必要があります。 |
| 7 |
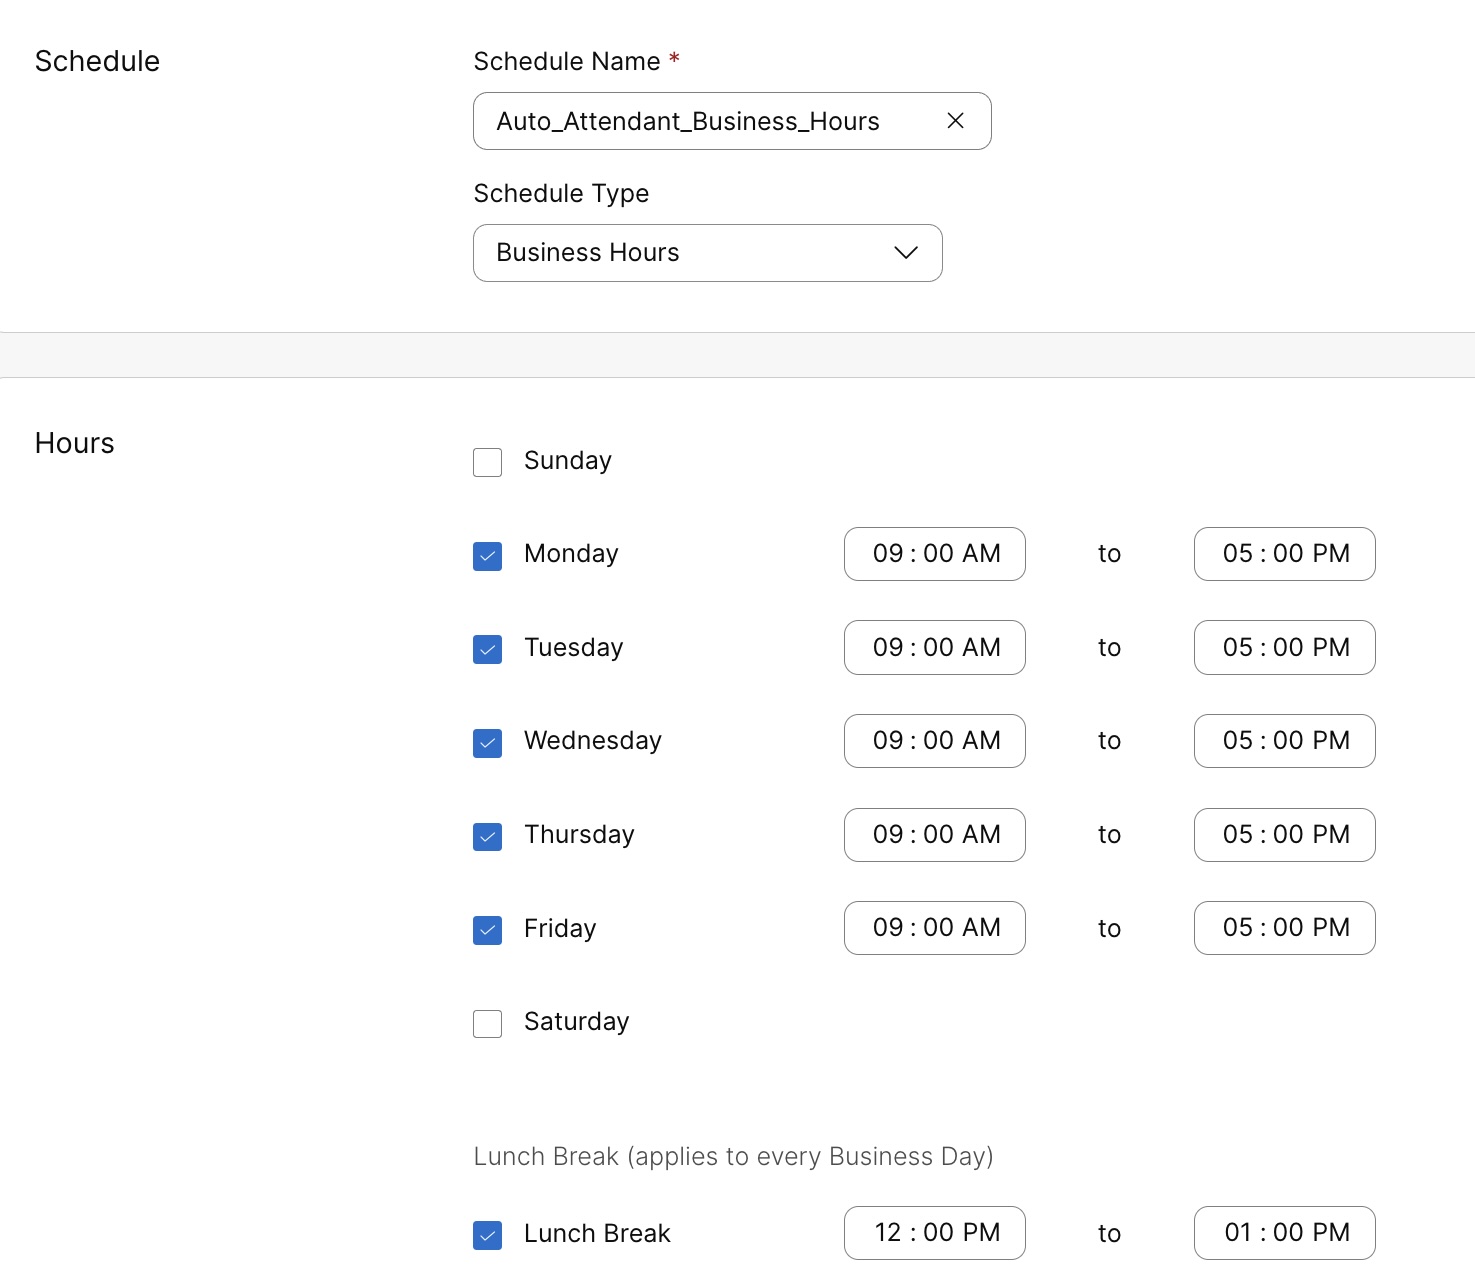
営業時間を選択した場合は、次の手順に従って、1 日の勤務時間のスケジュールを決定します。
営業時間スケジュールを作成したら、個々のイベントを編集して、その繰り返しを なし (複数日間続く 1 回限りのイベント)、 毎週 (選択した日に繰り返す)、 毎年 (毎年特定の日付または曜日に繰り返す)、または 終日 (一日中続く) として更新できます。
|
| 8 |
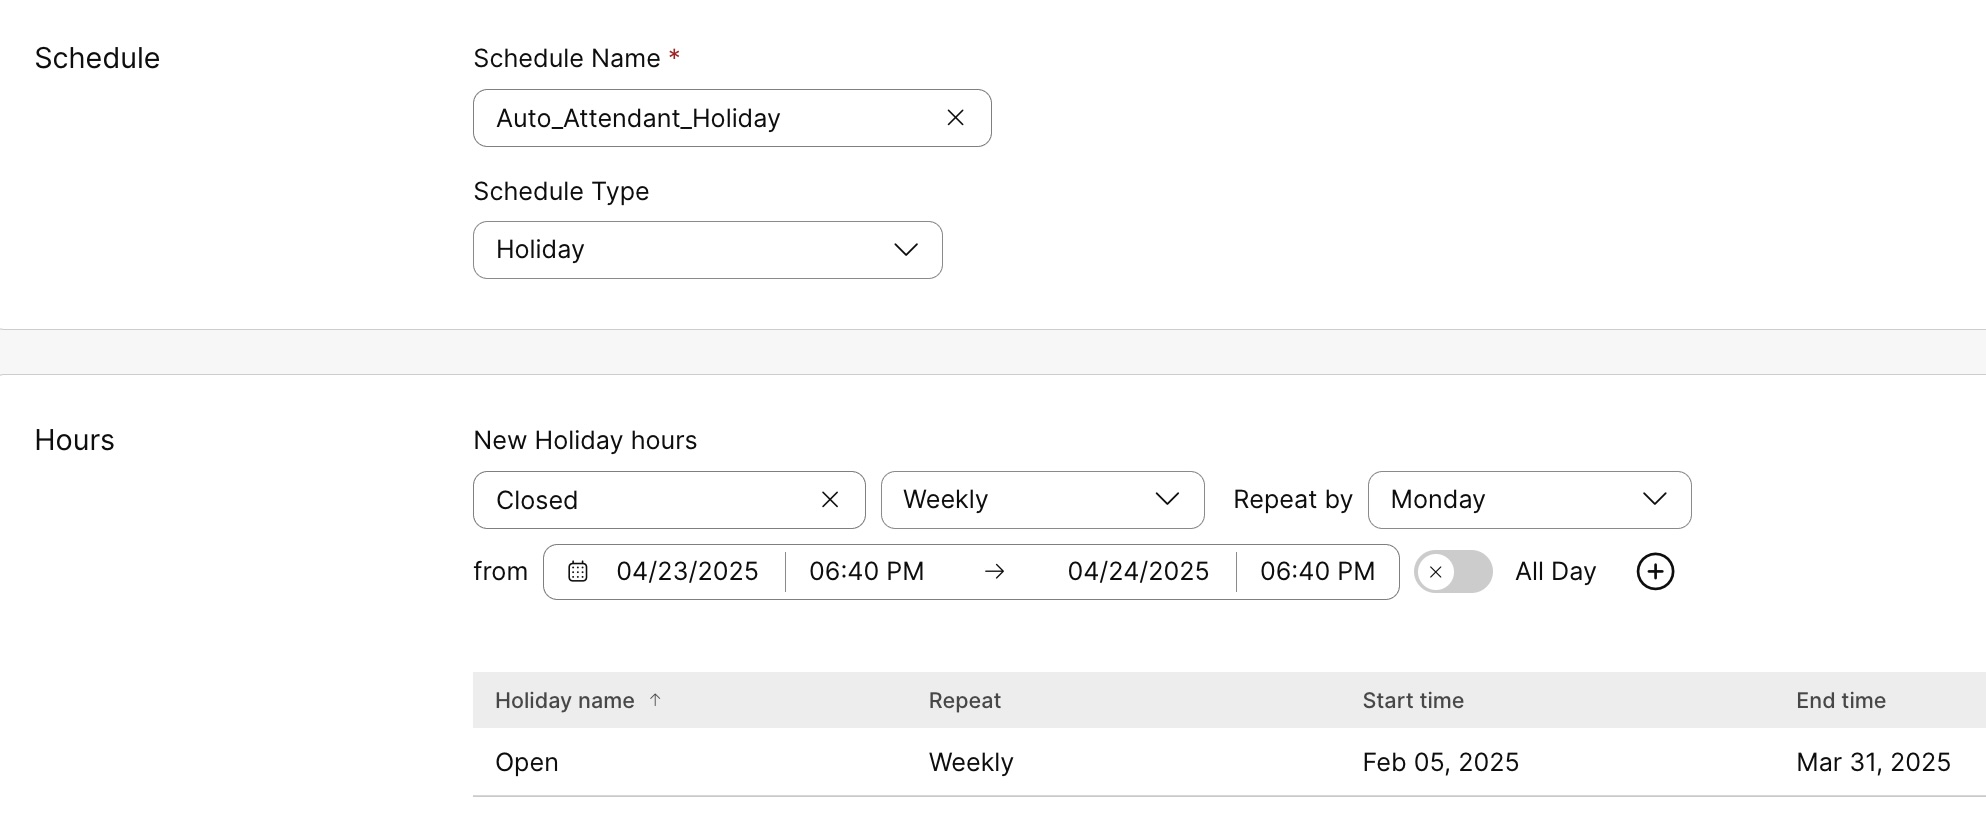
休日を選択した場合は、次の手順を実行して、組織が営業していない年間の特定の日のスケジュールを作成します。
|
| 9 |
[保存] をクリックします。 |

ロケーションスケジュールを編集または削除する
ロケーションスケジュールはいつでも変更または削除できます。スケジュールのすべてのイベントをエクスポートすることもできます。
開始する前に
ロケーション スケジュールを削除するには、まずそれを使用しているすべての機能からそのロケーション スケジュールを削除する必要があります。
| 1 | |
| 2 |
. |
| 3 |
場所を選択し、 通話 タブをクリックします。 |
| 4 |
通話機能の設定 セクションに移動し、 スケジュールを選択します。 |
| 5 |
スケジュールのリストで、スケジュールの上にマウスを移動し、 |
| 6 |
スケジュールのイベントを
|
 をクリックして変更するか、
  をクリックして削除します。
 をクリックします。
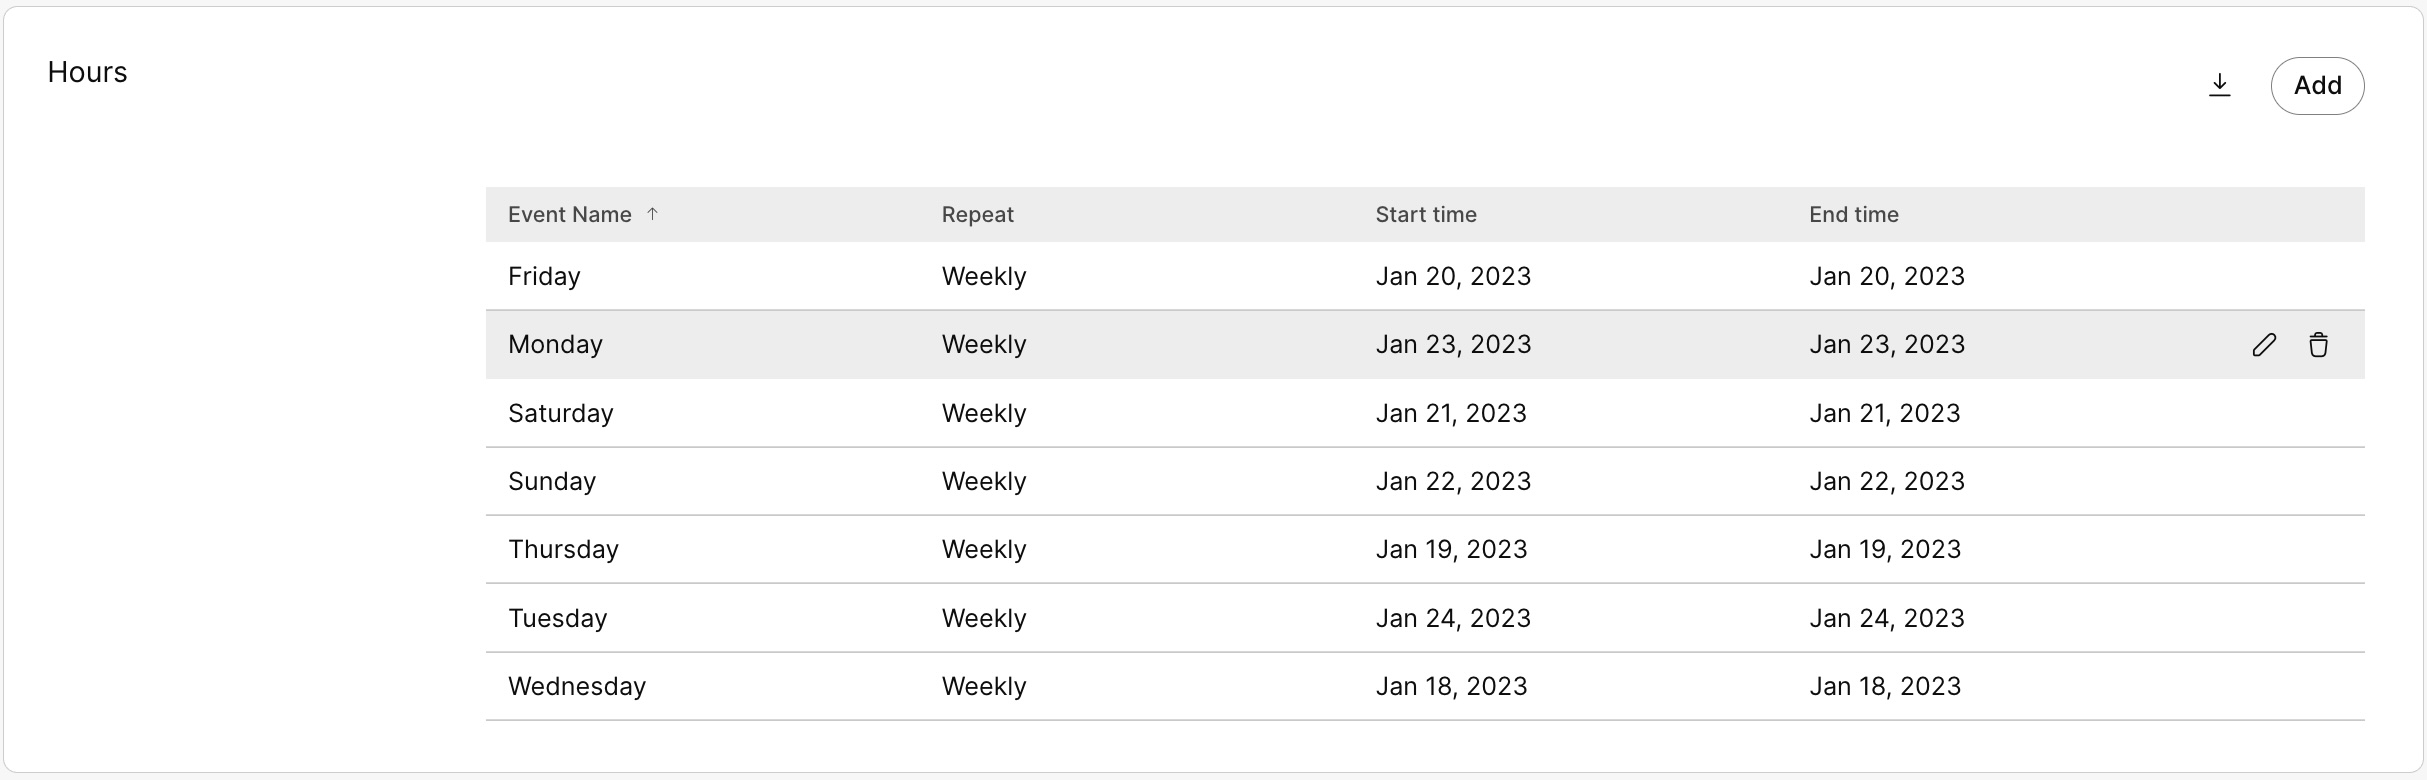
複数の場所のスケジュールを追加または編集する
一括使用 import/export スケジュールとイベントの CSV を使用すると、複数の場所で同時にスケジュールを一括して追加、編集、または削除できます。
開始する前に
-
アップロードする前に Schedule/Events CSV の場合は、CSV 規則を理解するために、 CSV を使用した Webex Calling 要素の一括プロビジョニング を必ずお読みください。
-
現在の Schedule/Events, 既存のデータセットを追加、削除、変更したり、サンプルセットをエクスポートしたりすることができます。 Schedule/Events. 変更を完了すると、一括機能を使ってファイルをアップロードできます。
CSVファイルをZIPファイル形式でエクスポートする: データを CSV ファイルにエクスポートすると、レコード数が 1000 を超える場合があります。このような場合、ZIP ファイルがダウンロードされます。ZIP ファイルには、1 つの CSV ファイルに完全なレコード セットが含まれています。すべてのデータを含む別のフォルダーは、それぞれ 1000 件未満のレコードを含む複数の CSV ファイルに分割されます。これらのファイルを使うと、管理者は更新をすばやくインポートしアップロードできます。
-
CVS テンプレートに入力する際には、必須列とオプション列、および提供する必要のある情報を知っておくことが重要です。特定のフィールド Schedule/Events CSV は次の表にあります。
-
最大行数は 1,000 行です (ヘッダーは含みません)。
-
各行には最大 10 件のイベントを保持できます。
-
1 つの場所に最大 1000 のスケジュールを作成できます。
-
スケジュールごとに最大 150 件のイベントを追加できます。
| 1 | |
| 2 |
. |
| 3 |
場所を選択し、 通話 タブをクリックします。 |
| 4 |
通話機能の設定 セクションに移動し、 スケジュールを選択します。 |
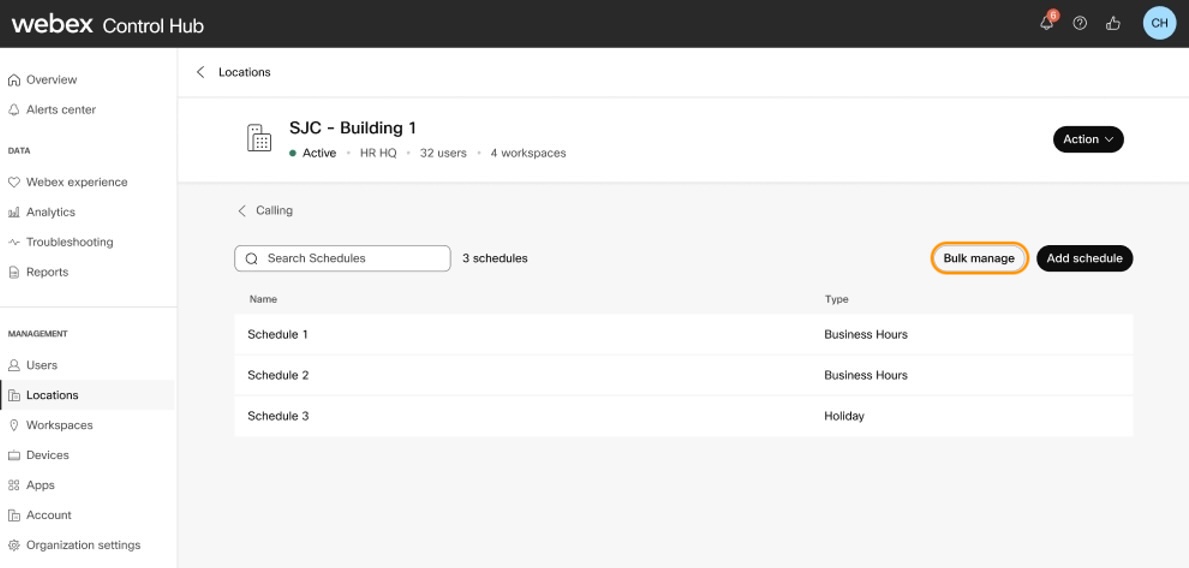
| 5 |
一括管理をクリックします。 |
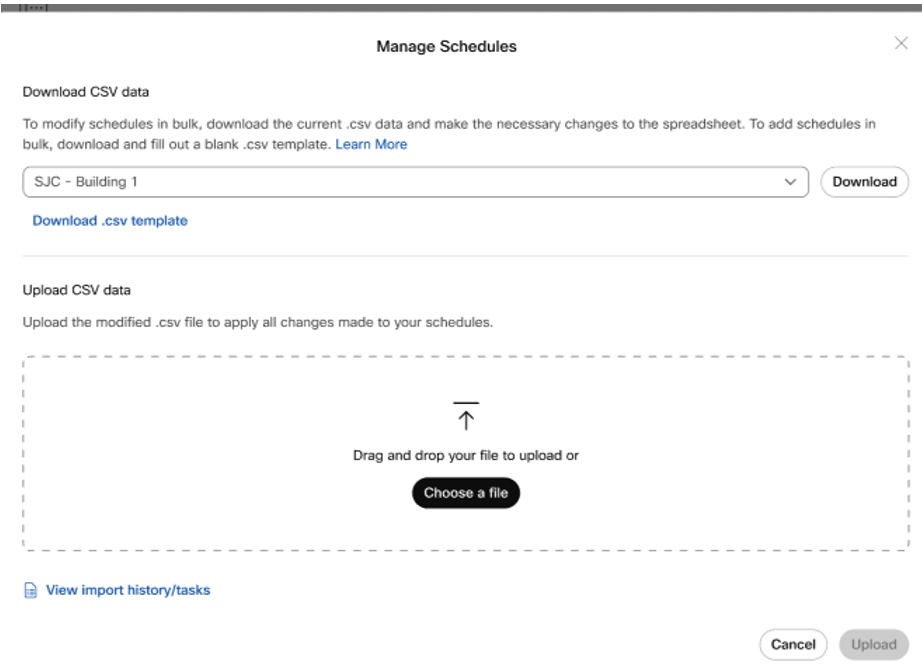
| 6 |
スケジュールの管理 ポップアップ ウィンドウで場所を選択し、 .csv テンプレートのダウンロードをクリックします。 .CSV テンプレートはスケジュール指向であり、複数のイベントがスケジュールに添付されます。
|
| 7 |
スプレッドシートに入力します。 |
| 8 |
ドラッグアンドドロップして CSV ファイルをアップロードするか、 ファイルを選択をクリックします。 |
| 9 |
[アップロード] をクリックします。 |
CSVファイル形式のリファレンス
この表を使用して、必須またはオプションのフィールドと、スケジュールとイベントを一括で追加または編集するときに決定する必要がある内容を確認します。
| Column | Mandatory/Optional | 説明 | サポートされている値(例) |
|---|---|---|---|
|
Name |
必須 |
スケジュールを特定する名前を入力します。 |
Location_A |
|
Location |
必須 |
組織の所在地を入力します。 複数の場所に スケジュールを複製するには、スケジュール レコードを新しい行にコピーし、新しい場所に関連付けます。 複数の場所のスケジュール を並行して変更するには、 search/replace エクスポートしたCSVを修正して再インポートします。
1 つの場所に最大 1000 のスケジュールを作成できます。 |
場所A |
|
スケジュールアクション |
必須 |
追加、変更、削除するスケジュール アクション列の値を入力します。 スケジュールを追加するには、「ADD」と入力します。 スケジュールを変更するには、新しい値で更新する列を入力します。 スケジュールを削除するには、「REMOVE」と入力します。 |
追加 取り除く |
|
スケジュールの種類 |
必須 |
スケジュールの種類を入力してください (Time/Holiday) 追加したいもの。 営業時間スケジュールを追加する場合は TIME を入力し、休日スケジュールを追加する場合は HOLIDAY を入力します。 |
時間 休日 |
|
イベントアクション |
オプション |
1 行に、同じ場所のイベントを最大 10 件追加できます。さらにイベントを追加するには、新しい行の追加を続行します。 イベントを追加するには、ADD と入力します。 以前に割り当てられたイベントの詳細を新しいものに置き換えるには、「REPLACE」と入力します。 イベントを削除するには、「REMOVE」と入力します。 |
追加 交換する 取り除く |
|
イベント名 |
オプション |
イベントの名前を入力します。 |
シスコデー |
|
イベント開始日 |
オプション |
イベントの開始日をYYYY-MM-DDの形式で入力します。 |
2025-06-18 |
|
イベント終了日 |
オプション |
イベントの終了日をYYYY-MM-DDの形式で入力します。 |
2025-06-18 |
|
イベント開始時刻 |
オプション |
イベントの開始時刻を入力します。 |
12:00 |
|
イベント終了時刻 |
オプション |
イベントの終了時刻を入力します。 |
14:00 |
|
イベントの繰り返しタイプ |
オプション |
繰り返しを入力してください None/Weekly/Yearly による day/Yearly 日付順。 |
なし |
|
週ごとの繰り返しイベント日 |
オプション |
イベントに基づいて繰り返しを選択します (週別の繰り返し日、日別の年間繰り返し日、日別の年間繰り返し週、日別の年間繰り返し月、日付別の年間繰り返し日、日付別の年間繰り返し月)。 スケジュールごとに最大 150 件のイベントを追加できます。 |
- |
|
年間繰り返しイベント日(日別) |
オプション |
月曜日 |
|
|
年間繰り返しイベント週(日別) |
オプション |
初め |
|
|
年間繰り返しイベントの月(日別) |
オプション |
1月 |
|
|
日付による年間繰り返しイベントの日付 |
オプション |
- | |
|
日付による年間繰り返しイベントの月 |
オプション |
- |
ユーザーのスケジュールを管理する
ユーザーのスケジュールを作成し、それをそのユーザーの通話設定(順次呼び出し、同時呼び出し、優先アラートなど)にのみ適用できます。これらの通話設定は、スケジュールの時間枠に基づいて定義されたアクションを実行するため、ユーザーは通話をより便利に管理できます。
ユーザースケジュールを作成する
| 1 | |
| 2 |
。 |
| 3 |
ユーザーを選択し、[通話] タブをクリックします。 |
| 4 |
通話処理 セクションに移動し、 スケジュールを選択します。 |
| 5 |
[新しいスケジュール] をクリックします。 |
| 6 |
[スケジュール名] を入力します。 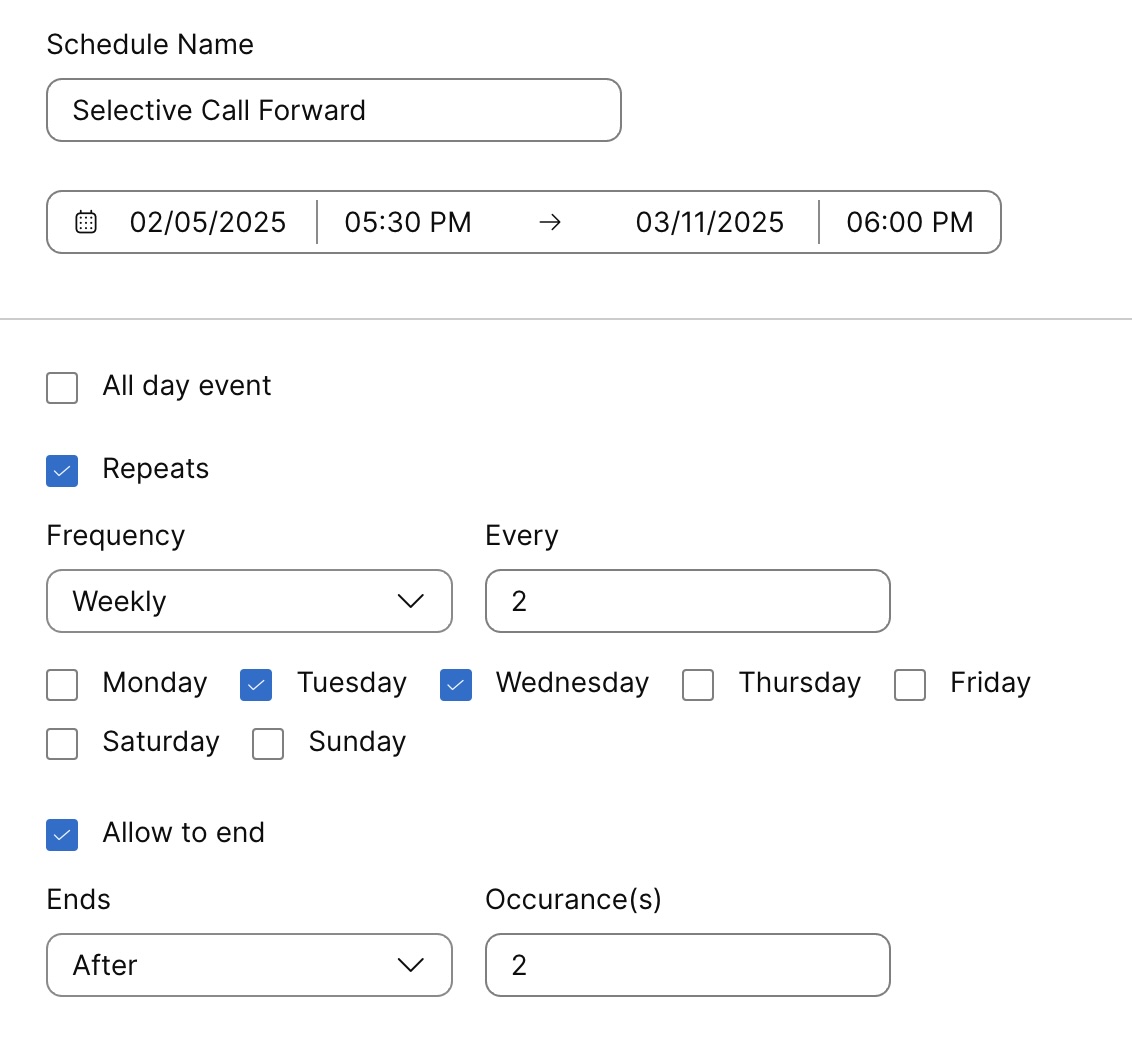 |
| 7 |
スケジュールの開始日時と終了日時を設定します。 |
| 8 |
スケジュールが一日中続く場合は、 終日イベント を選択します。 |
| 9 |
スケジュールを繰り返し実行する場合は、 繰り返し を選択します。 次のいずれかの周波数を選択します。
繰り返しスケジュールをいつ停止するかを定義する場合は、 終了を許可 を選択します。選択すると、 終了 ドロップダウンが表示され、次の 2 つのオプションが表示されます。
|
| 10 |
[保存] をクリックします。 ユーザーは、ユーザー ハブで独自にスケジュールを作成することもできます。詳細については、 通話設定のスケジュールの作成を参照してください。ユーザーがこれらの設定に加えた変更は、ユーザー ハブとコントロール ハブの両方に反映されます。 |
ユーザースケジュールを編集または削除する
開始する前に
ユーザー スケジュールを削除するには、まずそのスケジュールを使用しているすべての通話設定からそのスケジュールを削除する必要があります。
| 1 | |
| 2 |
。 |
| 3 |
ユーザーを選択し、[通話] タブをクリックします。 |
| 4 |
通話処理 セクションに移動し、 スケジュールを選択します。 作成されたスケジュールとイベントのリストが表示されます。
|
| 5 |
スケジュールにイベントを追加するには、スケジュールを展開し、 イベントの追加をクリックします。 |
| 6 |
スケジュールを削除するには、
|
 をクリックし、