schedule a webinar

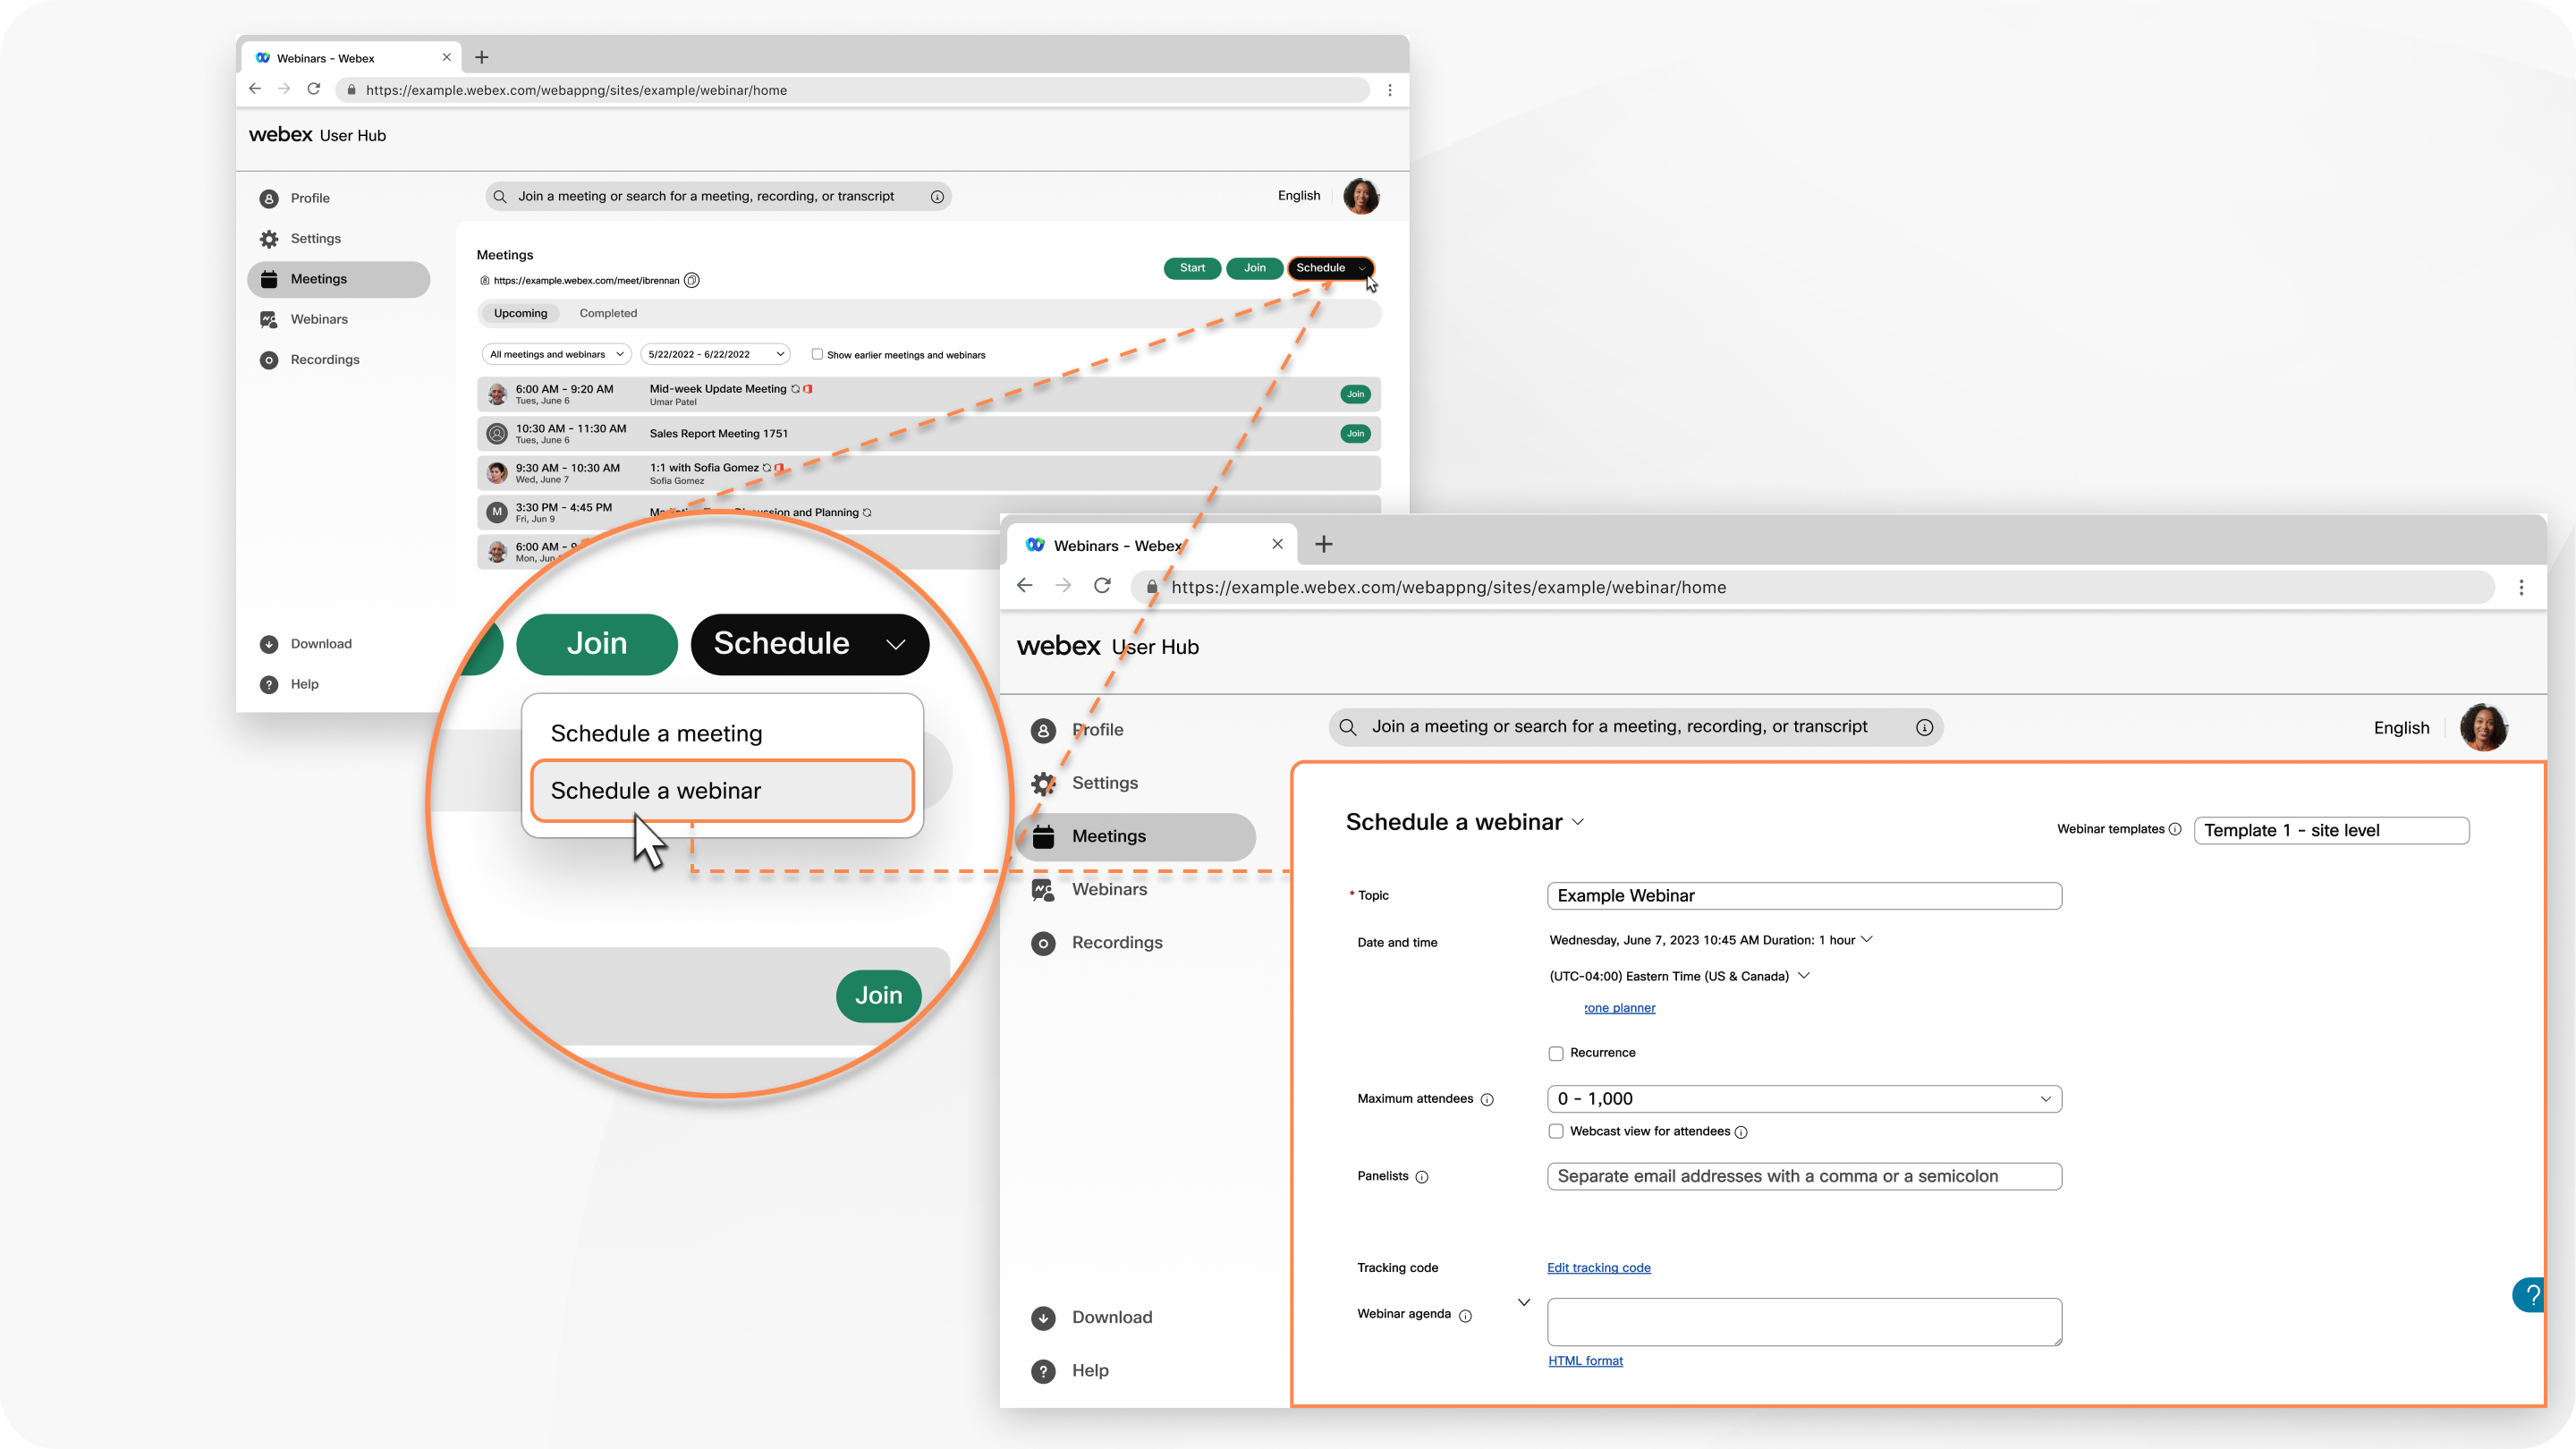
Antalet personer som du kan bjuda in till ett webbsinar beror på vilken licens som har köpts. Webinars can include up to 10,000 people. Schedule a webinar in webcast view for more than 10,000 attendees.

Webbsnakar i webbsändningsvyn är inte tillgängliga för Webex för myndigheter.

After you schedule a webinar, you get a confirmation email, and an email to forward to attendees.

1

Sign in to User Hub, click the Meetings tab, then click the Schedule drop-down menu and select Schedule a webinar.

2

(Optional) If you have any saved webinar templates, select one from the Webinar templates drop-down menu.

3

Lägg till grunderna genom att ange följande information:

  • Topic—Choose a topic that people recognize and get excited about.
  • Date and time—Indicate when the webinartakes place. Om du bjuder in personer från olika tidszoner kan du klicka på Tidszonsplaneraren så att du kan hitta den tid som passar bäst för alla.
  • Maximum attendees—Choose the maximum number of attendees and whether you want a webinar in webcast view. See Compare experiences in Webex Webinars for more information.
  • Panelists—Enter the email addresses of the people you’re inviting to help you run your webinar. Du kan ha upp till 500 panelmedlemmar i ditt webbsingar. Om de har ett konto på den här webbplatsen kan du välja bredvid deras namn om du vill att de ska vara en cohost.
  • Webinar agenda—Add any context or details that you want your attendees to have about the upcoming webinar.
4

I avsnittet Säkerhet lägger du till följande information:

  • Webinar password—Use the provided password or enter your own. Deltagarna måste ange detta lösenord för att kunna delta i ditt webbsinar.
  • Panelist password—Use the provided password or enter your own. Paneldeltatörer måste ange detta lösenord för att kunna vara en del av din webbsinarpanel . If panelists don't enter this password when they join your webinar, they join as an attendee.

    If a panelist has an account on the same site where the webinar is hosted, they just have to sign in. If they don't have an account on the same site, a prompt appears to enter this panelist password.

    Check out Roles in Webex Webinars for information about the differences between the various roles.

  • Join before host—Allow panelists and attendees to join your webinar and panelists to connect their audio before the webinar starts.
  • Require account—If you want attendees to have a Webex account on this site to join the webinar, check this check box.

    Check Restrict webinar to invited attendees only if you want to restrict the webinar to invited attendees only. This turns off webinar registration options.

5

I avsnittet Ljudanslutningsalternativ lägger du till följande information:

  • Ljudanslutningstyp
    • Webex-ljud – Välj för att stödja alternativ för inringning, uppringning och datorljud. Du kan då även inkludera avgiftsfria och globala inringningsnummer och ställa in inträdes- och utträdeston som hörs när någon ansluter till eller lämnar webbsinar.
      When using Webex Audio with the Announce Name feature, panelists who select the Use computer for audio option can't record and announce their names
    • Använd VoIP endast – Begränsar alla panelmedlemmar till att använda datorljud.
    • Annan telekonferenstjänst – Gör det möjligt för dig att ange telekonferensinformation från tredje part.
    • Ingen – Inget ljud.
  • Stäng av ljudet för paneldeltagare
    • Allow the host and cohosts to unmute participants (moderated unmute mode)—Hosts and cohosts can unmute participants and SIP-based video devices directly without sending an unmute request.
    • Allow panelists to unmute themselves in the webinar—If you choose to mute panelists when they join, select this option to allow them to unmute themselves during the webinar.
      • Välj inte det här alternativet om du endast vill att värden eller cohost ska kunna slå på ljudet för panelmedlemmarna.
    • Always mute panelists when they join the webinar—automatically mutes panelists when they join the webinar.
6

Klicka på Avancerade alternativ för att lägga till ett övningssession, aktivera breakoutmöten, lägga till detta webbsingar till en befintlig serie eller en ny serie som du skapar, aktivera samtidiga tolkningenar, kräva registrering, skicka e-postpåminnelser med mera.

7

Click Schedule to schedule your webinar.

When you schedule a webinar, attendees automatically receive email reminders using the default template. If you prefer to customize your email template and send reminders later, uncheck Automatically send email invitations to all participants after clicking Schedule, then follow the instructions in Customize email templates in Webex Webinars.

After you schedule the webinar, you can select it from your calendar and do one of the following:
8

After you schedule the webinar, you can click to download an .ics file, or add the webinar to your Google or Microsoft Office 365 Calendar.

9

You receive an email to forward to attendees to invite them to the webinar.

After you schedule your webinar, click Save as template to save these options as a template for future use.