
Thanks for your feedback.
 Feedback?
This process allows you to efficiently add multiple workspaces at once, streamlining workspace management for your organization. It is designed to save time and minimize manual data entry errors when handling large numbers of workspaces.
Steps to bulk upload workspaces
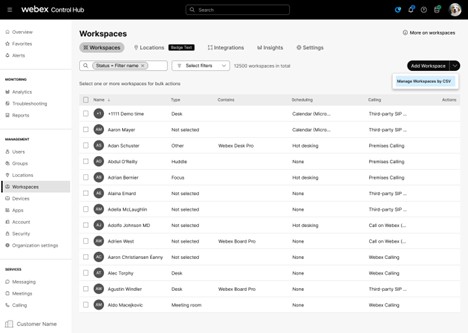
- Sign in to Control Hub.
- Navigate to Workspaces.
- Click Add Workspace.
- Select Manage Workspaces by CSV.
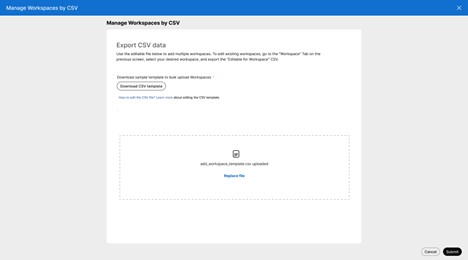
- Upload your CSV file containing the list of workspaces to be created.
You can download the CSV template here to assist you in creating and editing your own file easily. This template provides the necessary structure and fields to ensure your data is correctly formatted for bulk workspace creation.
When the CSV file is submitted, you are redirected to the task manager, which displays the status of current and previous workspace management jobs. This interface allows you to monitor the progress and results of your bulk workspace creation or update operations efficiently. The task manager provides visibility into job history and execution details, helping you track and manage workspace management tasks effectively.
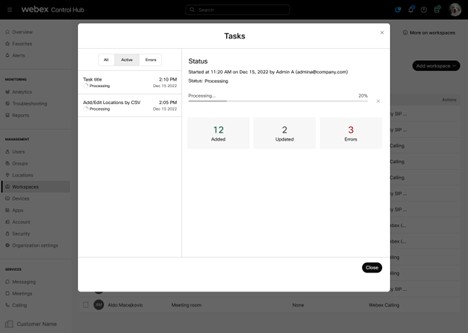
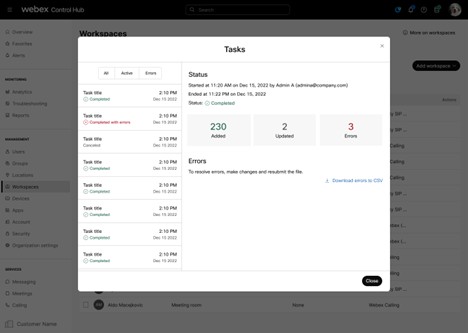
If you enter incorrect data in a field or encounter any other errors during the bulk workspace upload, these issues will be visible in the task manager. Additionally, you can download the error report from the task manager to gain detailed insights into the errors for each job, helping you to identify and resolve them efficiently.
For adding new workspaces, the only mandatory field is the workspace name, which must be unique and not duplicate any existing workspace name. Some CSV fields have dependencies; for example, a locationId must be provided if a floorId is specified. You can also configure calendar and calling settings for a new workspace—if omitted, the workspace defaults to free calling and no calendaring. When updating existing workspaces, the only required field is the workspace ID.
Edit bulk workspaces
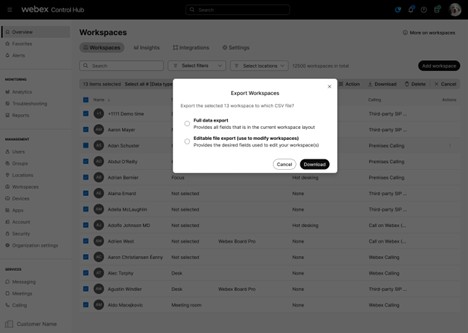
To modify existing workspaces in bulk, use the “Editable file export” option. Follow these steps:
- Select the workspaces you want to update.
- Click Export to CSV.
- Select “Editable file export” option to download an editable CSV file containing the selected workspace data.
- Make the necessary changes directly in the exported file.
- After editing, re-upload the file to apply the updates to the selected workspaces.
The workspace ID and name are the only required fields when updating an existing workspace. This ensures the system correctly identifies which workspace to update. All other fields are optional and can be modified as needed.
You can easily obtain the floorId by navigating to Locations > Floors tab in Control Hub. This allows you to quickly copy the floorId directly from the interface and paste it into your CSV file, simplifying the data entry process for bulk workspace creation or updates. Using this method helps ensure accuracy and saves time when preparing your CSV file.
List of the fields in a CSV file
The fields primarily correspond to those defined in the Create Workspace API: https://developer.webex.com/docs/api/v1/workspaces/create-a-workspace
Name: A friendly name for the workspace. Must be unique. This field is mandatory.
Capacity: How many people the workspace is suitable for. If set, must be 0 or higher.
Workspace Type: The type that best describes the workspace.
- notSet - No workspace type set.
- focus - High concentration.
- huddle - Brainstorm/collaboration.
- meetingRoom - Dedicated meeting space.
- open - Unstructured agile.
- desk - Individual.
- other - Unspecified.
Location: Location associated with the workspace. Must be provided when the floorId is set.
Floor: Floor associated with the workspace.
Calling Type: The calling type that is supported on the workspace.
- freeCalling - Free Calling (Default).
- hybridCalling - Hybrid Calling.
- webexCalling - Webex Calling.
- webexEdgeForDevices - Webex Edge For Devices
- thirdPartySipCalling - Third-party SIP URI.
- none - No Calling.
Calendar Type: Workspace calendar configuration requires a type (microsoft, google, or none). The default is none.
Calendar Email Address: Workspace email address. Will not be set when the calendar type is none.
Calendar Resource Group ID: The ResourceGroup ID is associated with the workspace and is only applicable for on-premise MICROSOFT calendar.
Notes: Notes associated to the workspace.
Adhoc Booking: Adhoc booking status of the workspace. Default is off.
- On: Workspace supports adhoc booking
- Off: Workspace does not support adhoc booking
Supported Devices: The supported devices for the workspace. Default is collaborationDevices.
- collaborationDevices - Workspace supports collaboration devices.
- phones - Workspace supports MPP phones.
Hotdesking: Hot desking status of the workspace. Default is off.
- on - Workspace supports hotdesking
- off - Workspace does not support hotdesking.
Indoor Navigation URL: URL of a map locating the workspace.
Device Hosted Meetings: The Webex site for device hosting meetings.


