- 홈
- /
- 문서

Webex 앱에 대해 공유된 라인 모습
 이 문서에서
 피드백이 있습니까?
공유 회선 기능은 한 개의 전화 번호를 여러 장치에 지정하는 것입니다. 사용자는 여러 장치에서 해당 전화 번호로 걸려오는 전화에 응답할 수 있습니다. 동일한 전화 번호를 공유하는 다른 장치로 응답한 전화를 넘길 수 있습니다.
공유 회선 모양은 최종 사용자 장치에서 다른 사용자의 회선을 공유 회선으로 프로비저닝하는 기능입니다. 이 특정 기능을 사용하면 Control Hub에서 최종 사용자의 Webex 앱에 공유 회선 표시를 지정하고 관리할 수 있습니다. Webex 앱에 대한 공유된 라인 구성은 Control Hub에서 멀티플랫폼 전화(MPP)에 대한 공유된 라인 구성과 유사합니다. 최종 사용자는 Webex 앱의 데스크탑, 모바일 및 태블릿 버전을 통해 공유된 라인에 액세스할 수 있습니다.
장점
-
사용자는 Webex 앱에서 직접 다른 사용자의 내선 번호에 있는 통화를 처리할 수 있습니다.
-
사용자는 Webex 앱에서 멀티 통화 창 (Windows에서 지원됨)을 사용하여 여러 공유 회선을 효율적으로 관리할 수 있습니다.
-
사용자는 기본 회선과 유사한 공유 회선에 대한 보류 및 호 전환과 같은 모든 통화 중 기능을 사용할 수 있습니다.
제한 사항
공유 회선 표시에 대한 몇 가지 알려진 제한 사항은 다음과 같습니다.
-
Control Hub에서 기본 라인을 포함하여 최대 15개의 라인을 Webex 앱에 추가할 수 있습니다. 단, 현재 Webex 앱은 10개의 라인만 표시합니다. 향후 릴리즈는 Webex 앱이 15개의 모든 라인을 표시할 수 있게 합니다.
-
작업 공간 전화기에 추가 회선을 추가할 수 있습니다. 단, 전문 라이선스가 있는 작업 공간 전화만 공유 회선으로 추가할 수 있습니다.
-
Webex 앱의 브라우저 버전에 대해 공유된 라인 모양을 구성할 수 없습니다.
공유 회선 형태(LA) 구성
다른 Webex Calling 위치에 있는 번호를 다른 위치에 있는 Webex 앱으로 지정할 수 있습니다. 예를 들어, 영국 위치에서 미국 위치에 있는 사용자에게 지정된 Webex 앱에 번호(사용자 또는 가상 라인)를 지정할 수 있습니다.
위치에서 공유된 라인에 대한 자세한 정보는 위치에서 공유된 라인 및 가상 라인의 구성을 참조하십시오.
| 1 | |
| 2 |
로 이동합니다. |
| 3 |
공유된 라인을 지정할 사용자를 선택하고 통화를 클릭합니다. |
| 4 |
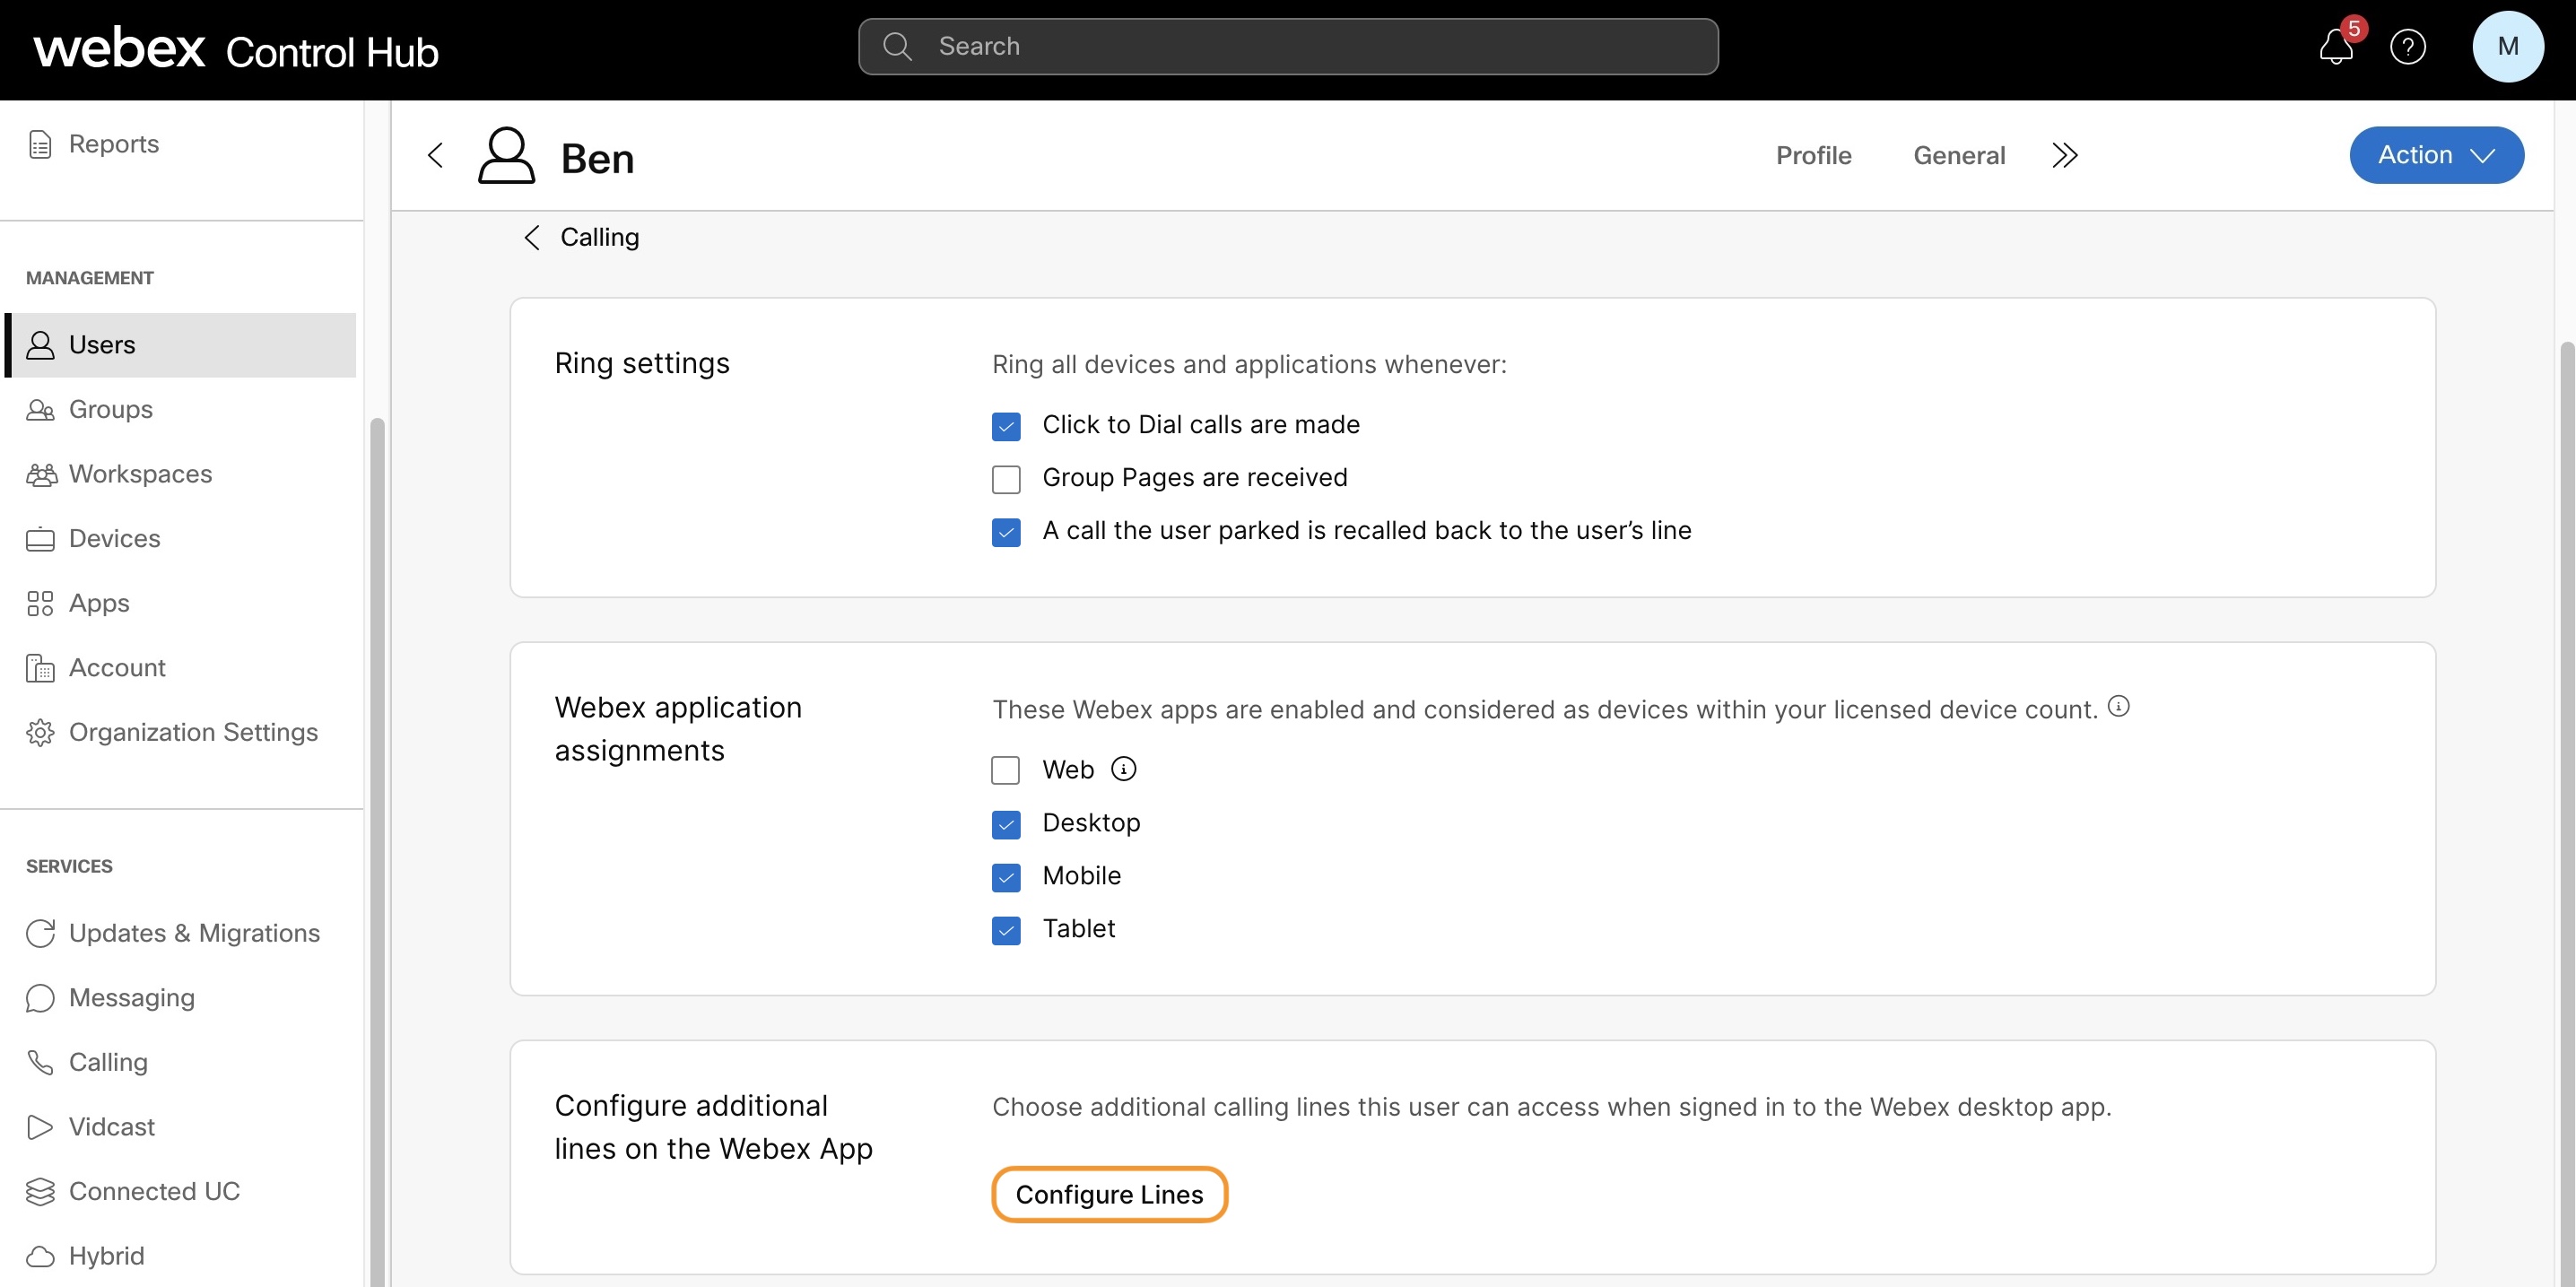
사용자 통화 환경 으로 이동하고 응용프로그램 라인 지정을 클릭합니다. |
| 5 |
Webex 앱에서 추가 라인 구성 으로 이동하고 라인 구성을 클릭합니다. Webex 응용프로그램 지정 아래에서 데스크탑, 모바일 또는 태블릿 옵션이 활성화되지 않은 경우, 라인 구성 옵션은 비활성화됩니다. 여러 회선 지정은 웹 클라이언트에서 지원되지 않습니다. 응용프로그램 벨 소리 및 지정에 대한 자세한 정보는 다음을 참조하십시오. Webex Calling 사용자에 대해 응용프로그램 서비스 관리를 선택합니다.
|
| 6 |
공유된 라인 모양을 추가하려면 라이센스에 따라 최대 공유 회선의 수를 초과하지 않은 사용자만 Webex 앱 공유 회선에 지정 가능한 사용자로 나타납니다. 사용자에게 장치를 추가하고 지정하는 방법에 대한 자세한 정보는 사용자에게 전화 추가를 참조하십시오. 사용자의 Webex 앱에 표시할 라인을 추가합니다. 사용자의 기본 회선은 항상 첫 번째 회선이며, 순서를 변경할 수 없습니다. 사용자가 Webex 앱에 구성된 다른 사용자/그룹의 번호를 갖고 있는 경우, 공유된 회선에 대한 사용자 정의 레이블을 추가할 수 있습니다. 이 사용자 정의 레이블은 사용자가 하나의 공유 회선 형태(LA)를 다른 것과 식별하는 데 도움이 됩니다. |
| 7 |
통화 거절 드롭다운 목록에서 필요한 옵션을 선택합니다.
통화 거절 설정에 대한 자세한 정보는 사용자에 대해 모든 장치에서 벨이 울리는 전화 거절을 참조하십시오. 공유된 라인을 제거하려면 |
| 8 |
저장을 클릭합니다. |
공유된 라인을 추가, 제거 또는 변경하면 Webex 앱은 업데이트를 탐지하고 사용자는 Webex 앱에서 다시 시작하여 변경 사항을 반영하도록 안내받습니다.
공유 회선을 구성하면 사용자는 통화 브리지에 대해 FAC 를 사용하여 통화 브리지를 시작할 수 있습니다.


 아이콘을 클릭하고 이름 또는 전화 번호로 검색한 후 라인을 선택합니다.
 아이콘을 클릭합니다. 회선 1에서 기본 사용자를 제거할 수 없습니다.
