- Home
- /
- Article

Thanks for your feedback.

Add and manage hot desk only devices
 In this article
 Feedback?
Hot desk only (HDO) devices introduce a new “no cost” option that allows administrators to rapidly deploy hot desk only devices at a location without having to assign a workspace license to them. HDO phones are also Kari’s Law compliant and allow calls to emergency services without signing into the device.
Prerequisites
Onboarding limitations
Before you begin onboarding devices as hot desk only, review the following requirements:
- Must be an 8800 series (including 8875) or a 9800 series device.
- The location must be enabled for Webex Calling.
- Only available where the Webex Calling location is configured with:
- Location main number.
- Location emergency callback number (for callback if an emergency call is made).
Device support for emergency calling
Hot desk only devices natively support calls to emergency numbers defined per region. Emergency calling from hot desk only devices doesn’t require a person to initiate a hot desk session on the device before calling.
License usage
Devices that onboard as hot desk only are assigned a free hot desk only license. For a user to sign into any hot desk device, the user must have a Webex Calling license.
Host profile
When initially added, a hot desk only device comes up as a hot desking host device. The hot desk only host device:
- Shows a QR code to enable a guest to sign in.
- Displays the workspace name as the display name on the phone screen.
- Supports no incoming calls. In host mode, the device can only make emergency calls.
- The workspace will have no phone number. Manually dialed outbound calls are only allowed to regionally appropriate emergency number(s) (for example, 911, 112, 999, 000). The emergency callback number is populated from the Location default ECBN.
Host device configuration
On hot desk only host devices, most device settings continue to be used, including background, backlight timer, CDP, ICE, interdigit timers, and PoE mode. Some configuration, however, is overridden with the following logic:
- Call history is forced to none.
- Contacts are forced to none.
- Display name shows the workspace name.
- Custom line label is forced to Line.
- Line key configuration, all but the first line, is forced to closed (no speed dial configuration allowed).
- Softkeys are forced to blank.
Guest profile
When a user signs in as a guest on a hot desk only device, the phone behaves in the same way that it would when a user signs into a hot desking enabled device in any other workspace. The user can make and receive calls with their configured phone number.
Add a hot desk only device (from Devices)
| 1 |
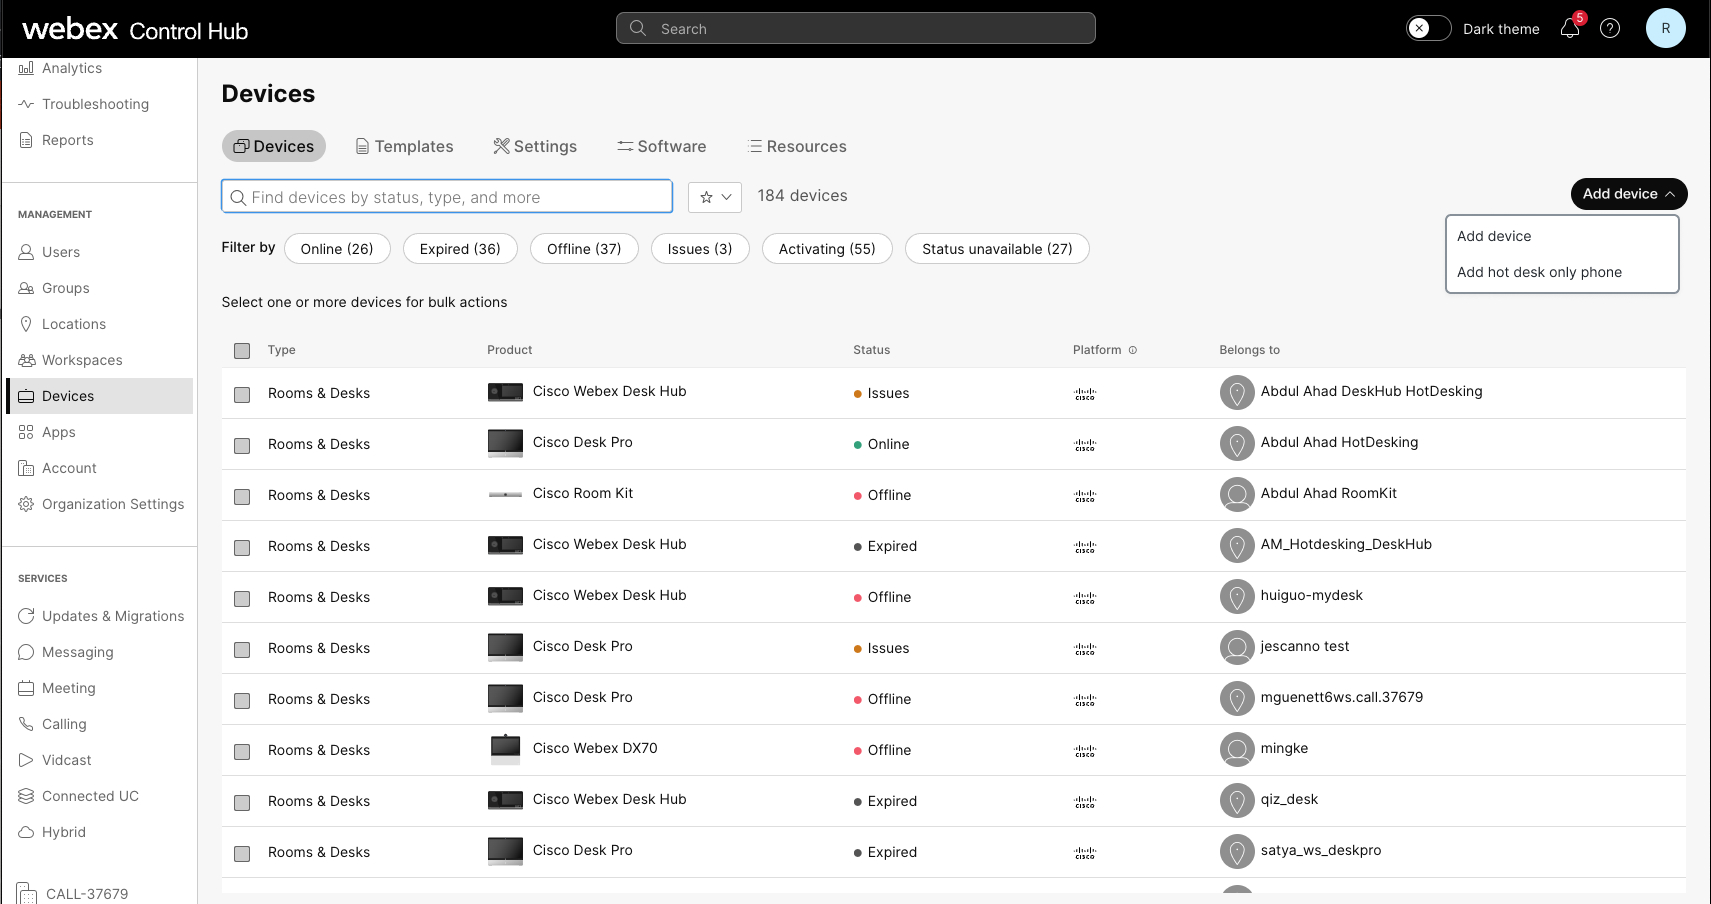
From Control Hub, https://admin.webex.com, go to Devices and then click Add device. |
| 2 |
Select Add hot desk only phone from the dropdown.
This option only appears if the organization has a Webex Calling license.
|
| 3 |
Select a hot desk only device type. |
| 4 |
Enter a Workspace Name. This appears as the display name at the top of the phone screen.
|
| 5 |
Select a Location.
The location list is restricted to Webex Calling locations. Locations must have an emergency callback number and a location level main number configured for CDR reporting. |
| 6 |
Select the device model. |
| 7 |
Choose to set the device up by activation code or MAC address.
|
| 8 |
Click Save. |
Add a hot desk only device (from Workspaces)
| 1 |
From Control Hub, https://admin.webex.com, go to Workspaces and then click Add workspace. 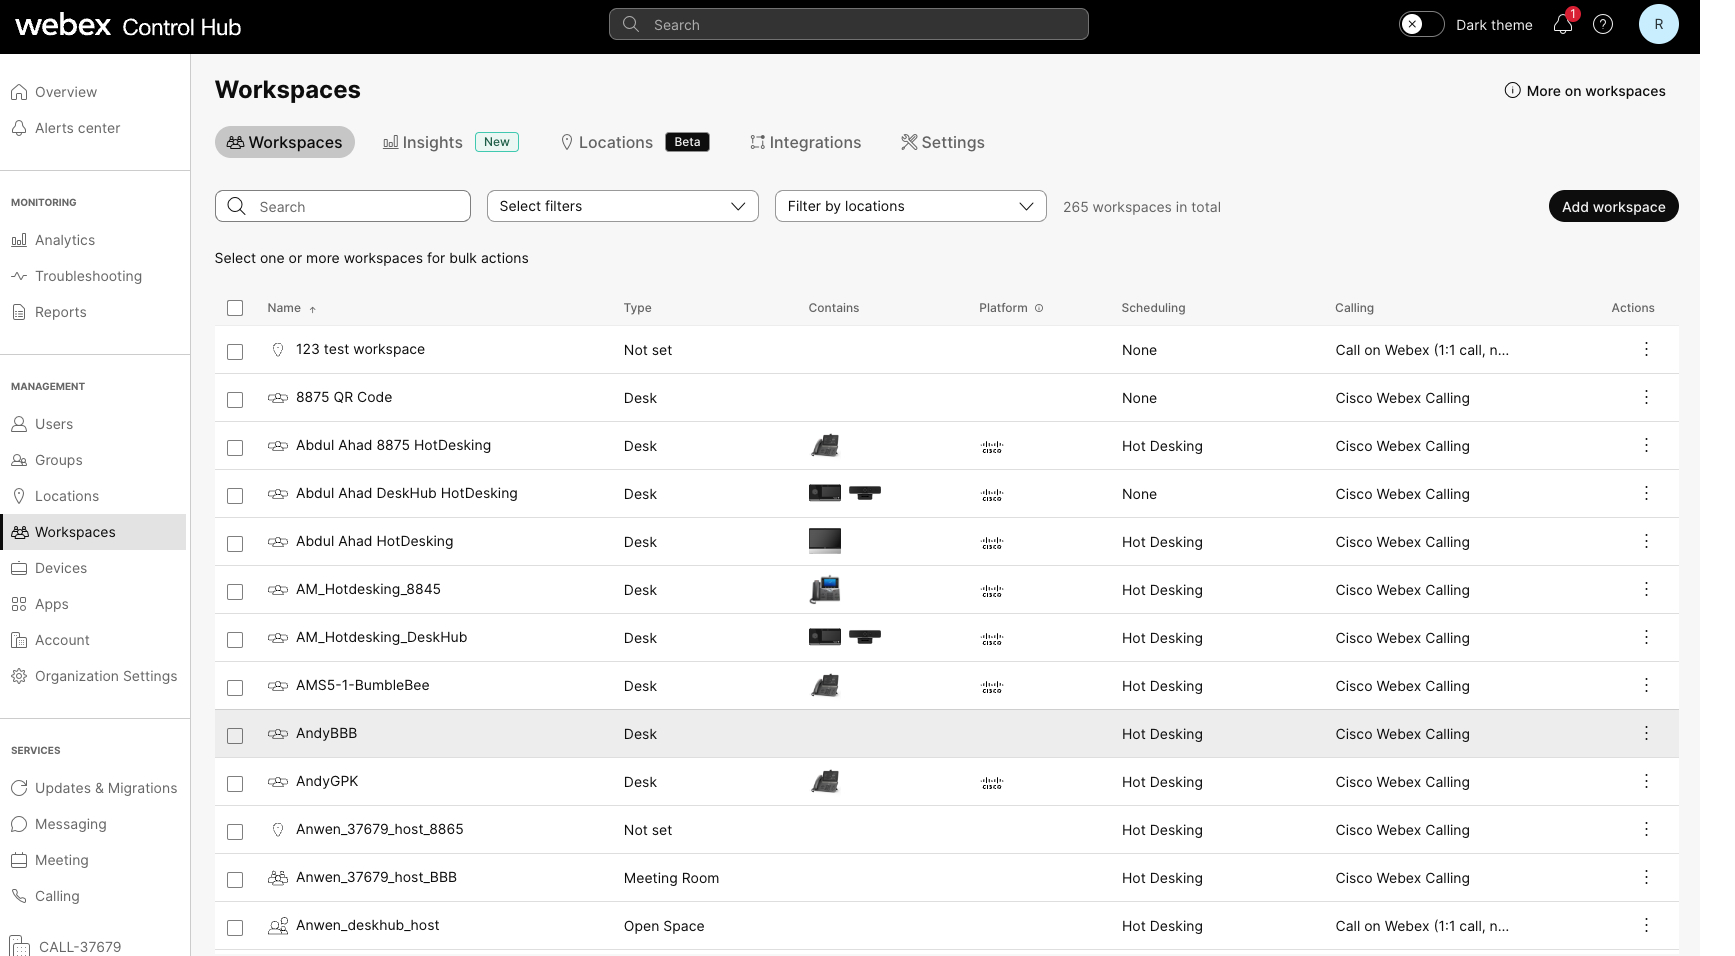
|
| 2 |
Enter a workspace name and select the type of workspace this is. |
| 3 |
Select a Location and click Next.
If the location isn't selected on this screen, it's required later in the steps. |
| 4 |
Select a device type and choose the device model. Then, select the activation method and click Next |
| 5 |
Click Hot desk only.
This option doesn’t use a phone number or extension and in host mode can only make emergency calls. If no location was previously chosen, the location selector appears and the Next button is disabled until a location is selected. If a location was already selected, it needs to meet the requirements for hot desk only. If not, the following errors may be displayed:
|
| 6 |
The Add workspace window appears with the activation code (if that option is chosen). The activation code can be shared with the person setting up the device or entered yourself when prompted by the device. Once the device activates, you can find and configure it in theWorkspaces or Devices tabs in Control Hub. |
Bulk onboard devices as hot desk only devices
You can add multiple Cisco phones, Cisco Desk Phones and Room System devices as hot desk only devices.
To bulk onboard devices as hot desk only devices, follow these steps:
| 1 |
From Control Hub, https://admin.webex.com, go to Devices and then click the Add device dropdown. |
| 2 |
Click Add device. |
| 3 |
Click Multiple Cisco IP Phones and choose Next. |
| 4 |
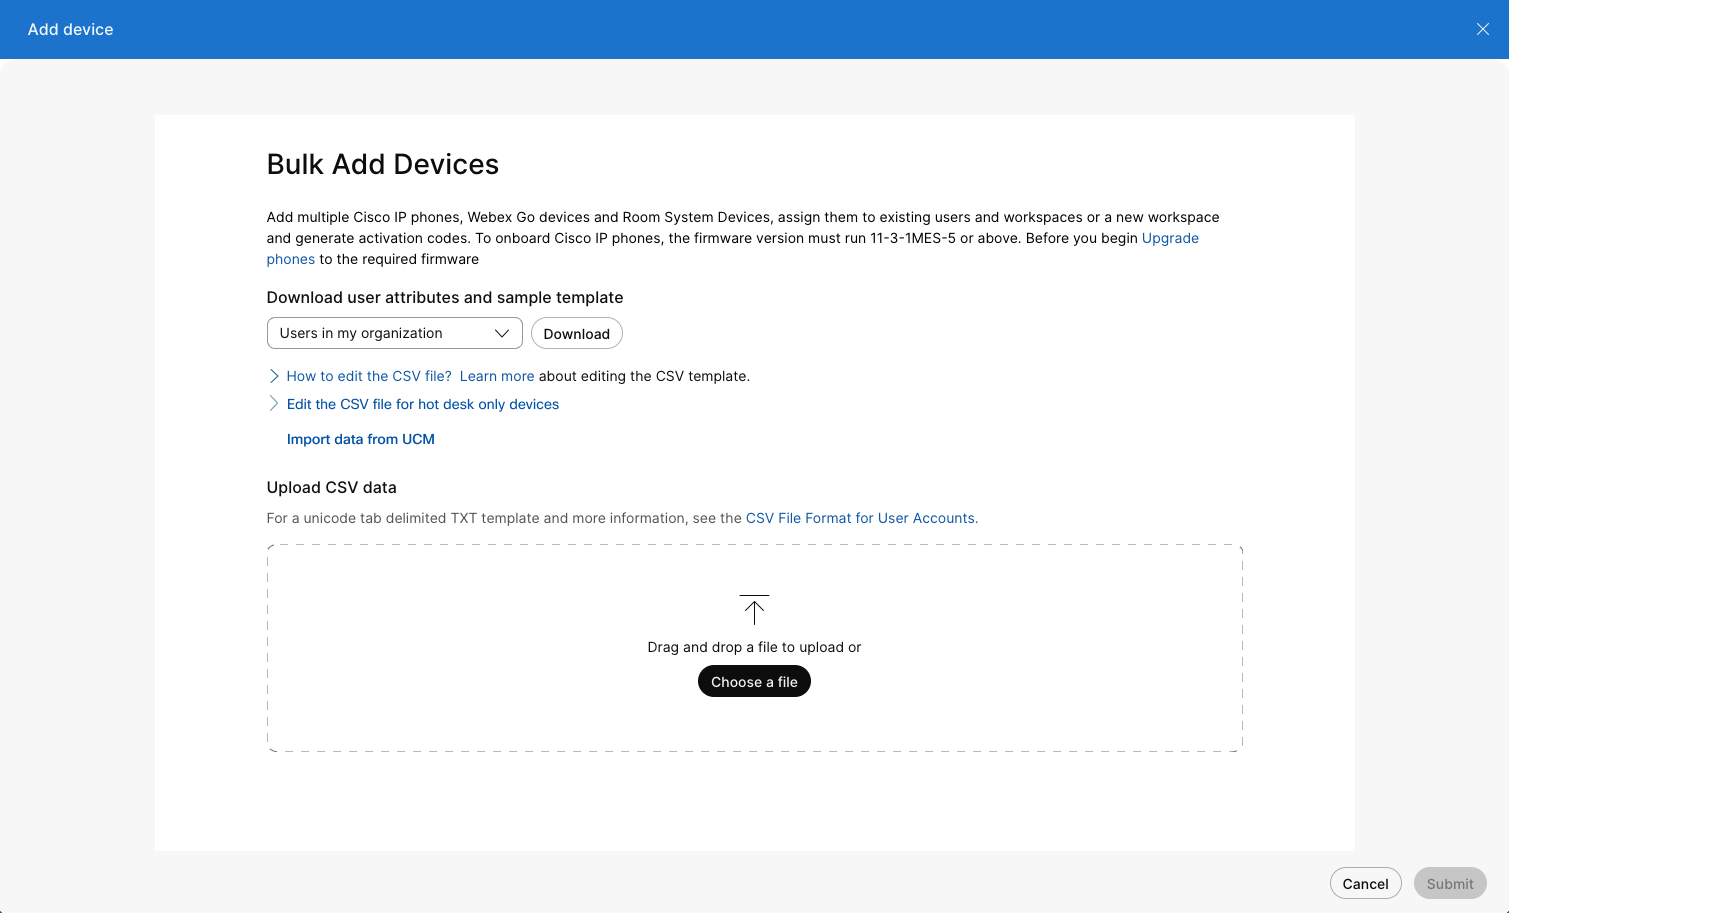
Click Edit the CSV file for hot desk only devices. Use the following rules and apply them to the sheet:
|
| 5 |
Drag and drop or upload the saved file to the Upload CSV data area. The task manager runs and displays the import status and any errors. |
View hot desk devices in Control Hub
You can filter your view in Control Hub to search for hot desk only devices and exclude all other devices.
Filter in Workspaces
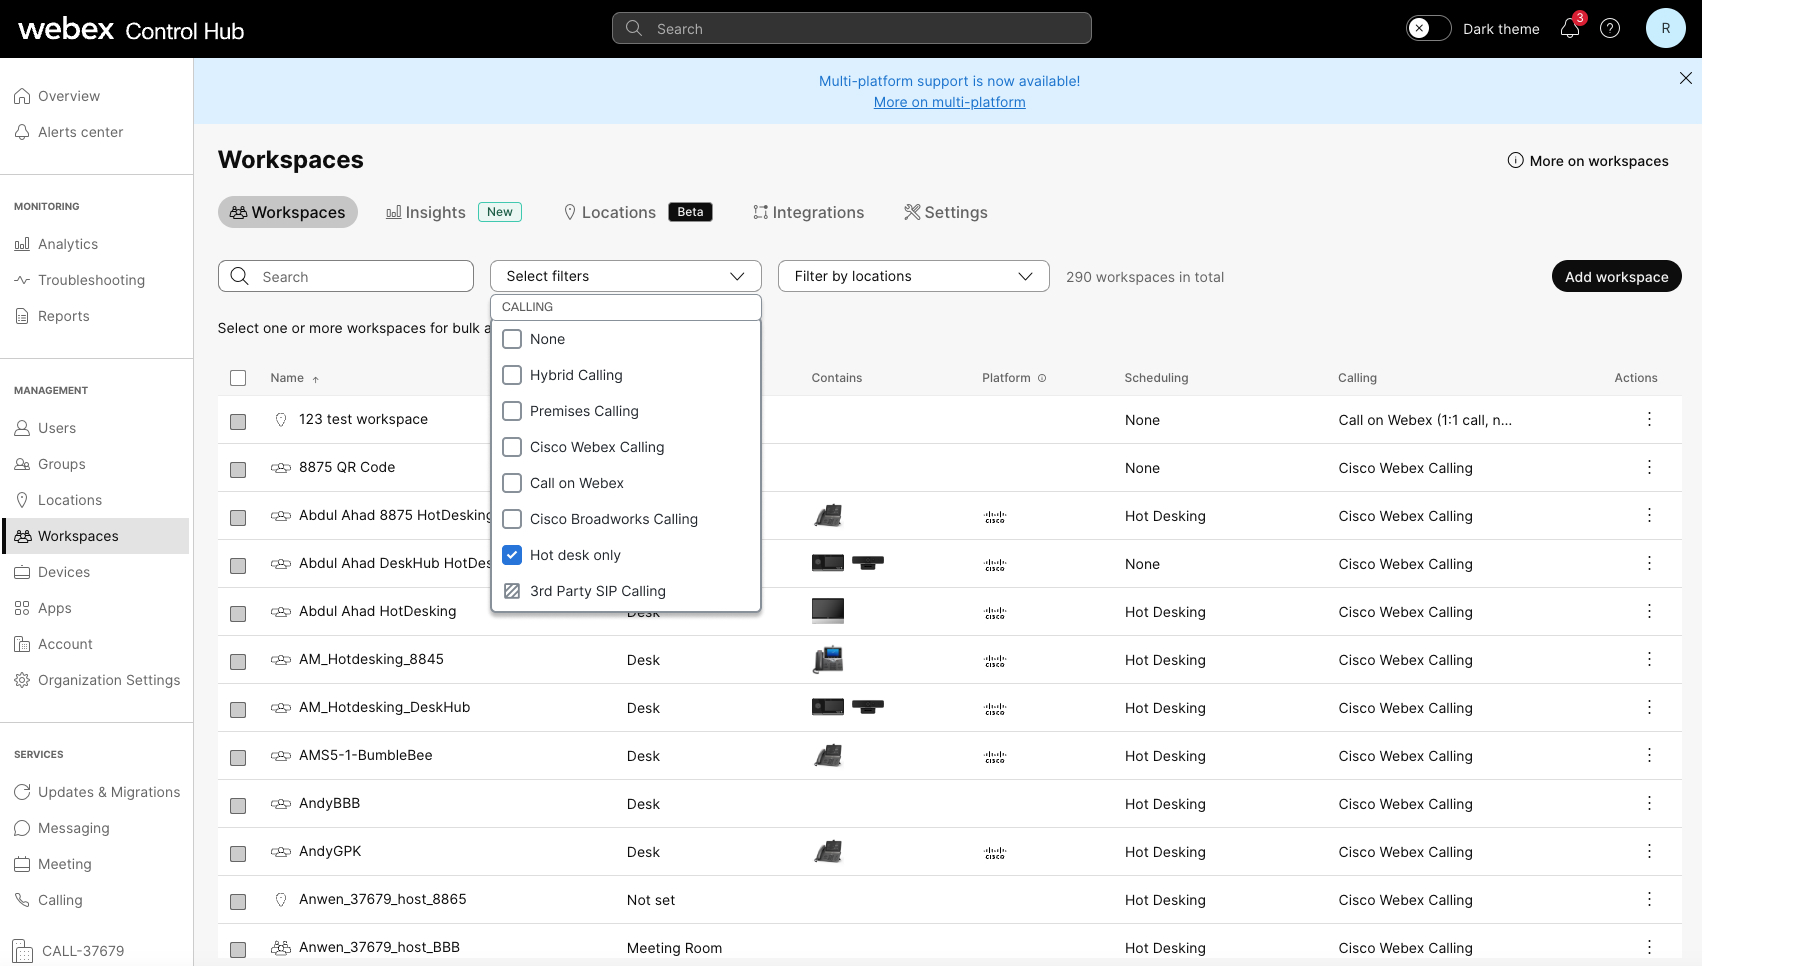
- From Control Hub, https://admin.webex.com, go to the Workspace page.
- Click and check the option for Hot desk only. The filter is applied to the list and the Calling column only shows hot desk only workspaces. The Scheduling column also updates to show hot desking. Hot desk only workspaces have an overview tab. Workspace details shows device and hot desk only as the calling service.
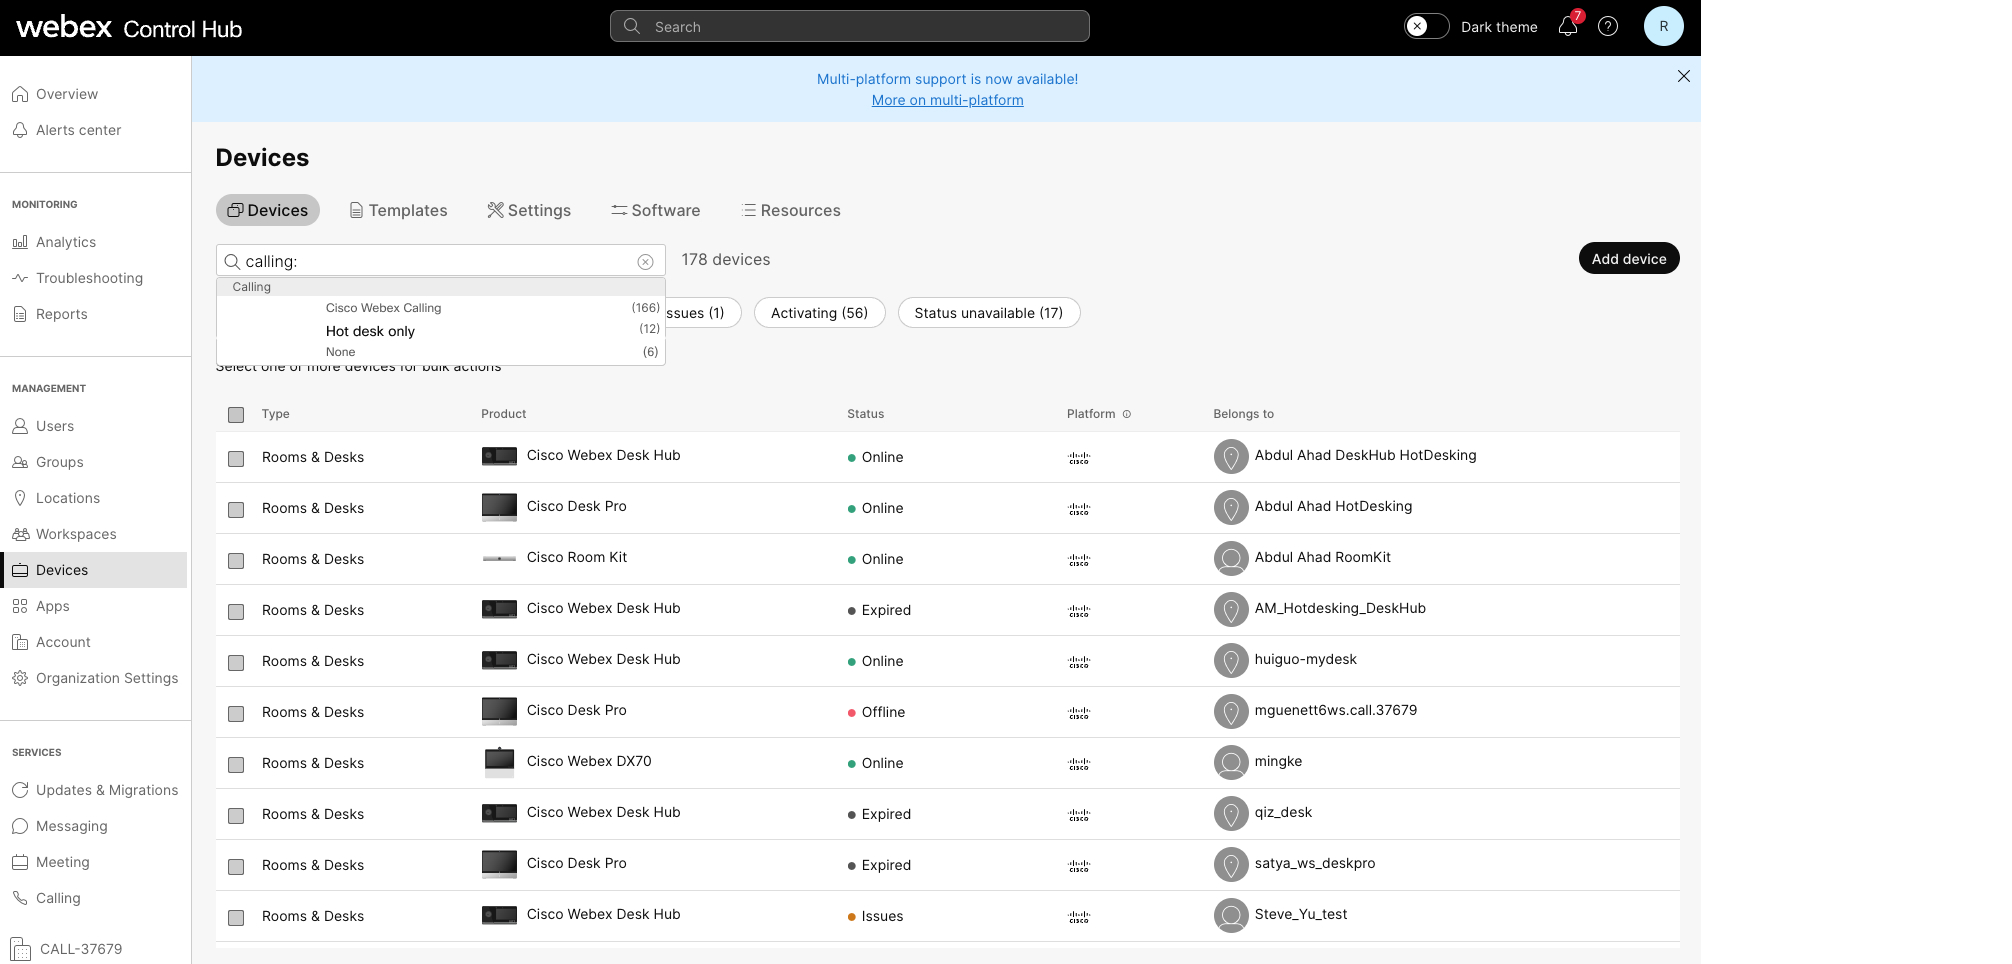
Filter in Devices
- From Control Hub, https://admin.webex.com, go to the Devices page.
- Click and check the option for Hot desk only. The filter is applied to the list to show devices and their workspaces. Selecting a device displays its details along with the device management card to explain its functionality and limits.
During an active session
You can view the hot desk devices a user is actively using.
- From Control Hub, https://admin.webex.com, go to .
- Locate the device and hover over the information icon. A message displays that this is a hot desk device in use during an active session.
Change workspace licenses to or from a hot desk only workspace
- Hot desk only to a workspace
- Workspace to hot desk only
- Hot desk only to a professional workspace
To edit a calling service, follow these steps:
| 1 |
From Control Hub, https://admin.webex.com, go to Workspaces. |
| 2 |
Select a workspace device with a hot desk only capable phone and click Edit calling service. The Edit workspace window appears. |
| 3 |
Choose the calling service you’d like for the workspace. You can promote the hot desk only workspace to a paid workspace by selecting Cisco Webex Calling. Or, demote the paid workspace to a hot desk only licensed workspace.
If changing to a paid license, the Next screen presents licensing subscription options to choose from. |
Edit a workspace device's details
You can edit a workspace device's details in Control Hub.
To edit a workspace device’s details, follow these steps:
-
From Control hub, https://admin.webex.com, go to Workspaces.
-
Select a workspace device with a hot desk only capable phone and click Edit details.
The Edit workspace window appears where you can change the workspace’s name, type, capacity and avatar.
- Click Save.
Manage hot desking sessions on behalf of users
The following admin types are allowed to make changes to hot desking sessions:
- Full admin
- Device admin
- User and device admin
- Location admin
To manage a hot desking session, follow these steps:
| 1 |
From Control Hub, https://admin.webex.com, go to Workspaces. The Overview page displays the devices for the selected workspace, along with the
Calling and Scheduling cards. In the
Real-time utilization metrics card, the device status is
displayed, along with the booking status.
|
| 2 |
When the device is in an active hot desk session, Click End hot desking session and confirm the action in a new window. |
| 3 |
Click the overflow menu |
| 4 |
Use the time picker or arrows to adjust the session end time.
Booking end time can’t extend beyond midnight or be set before the current time. |
| 5 |
Click Save. |
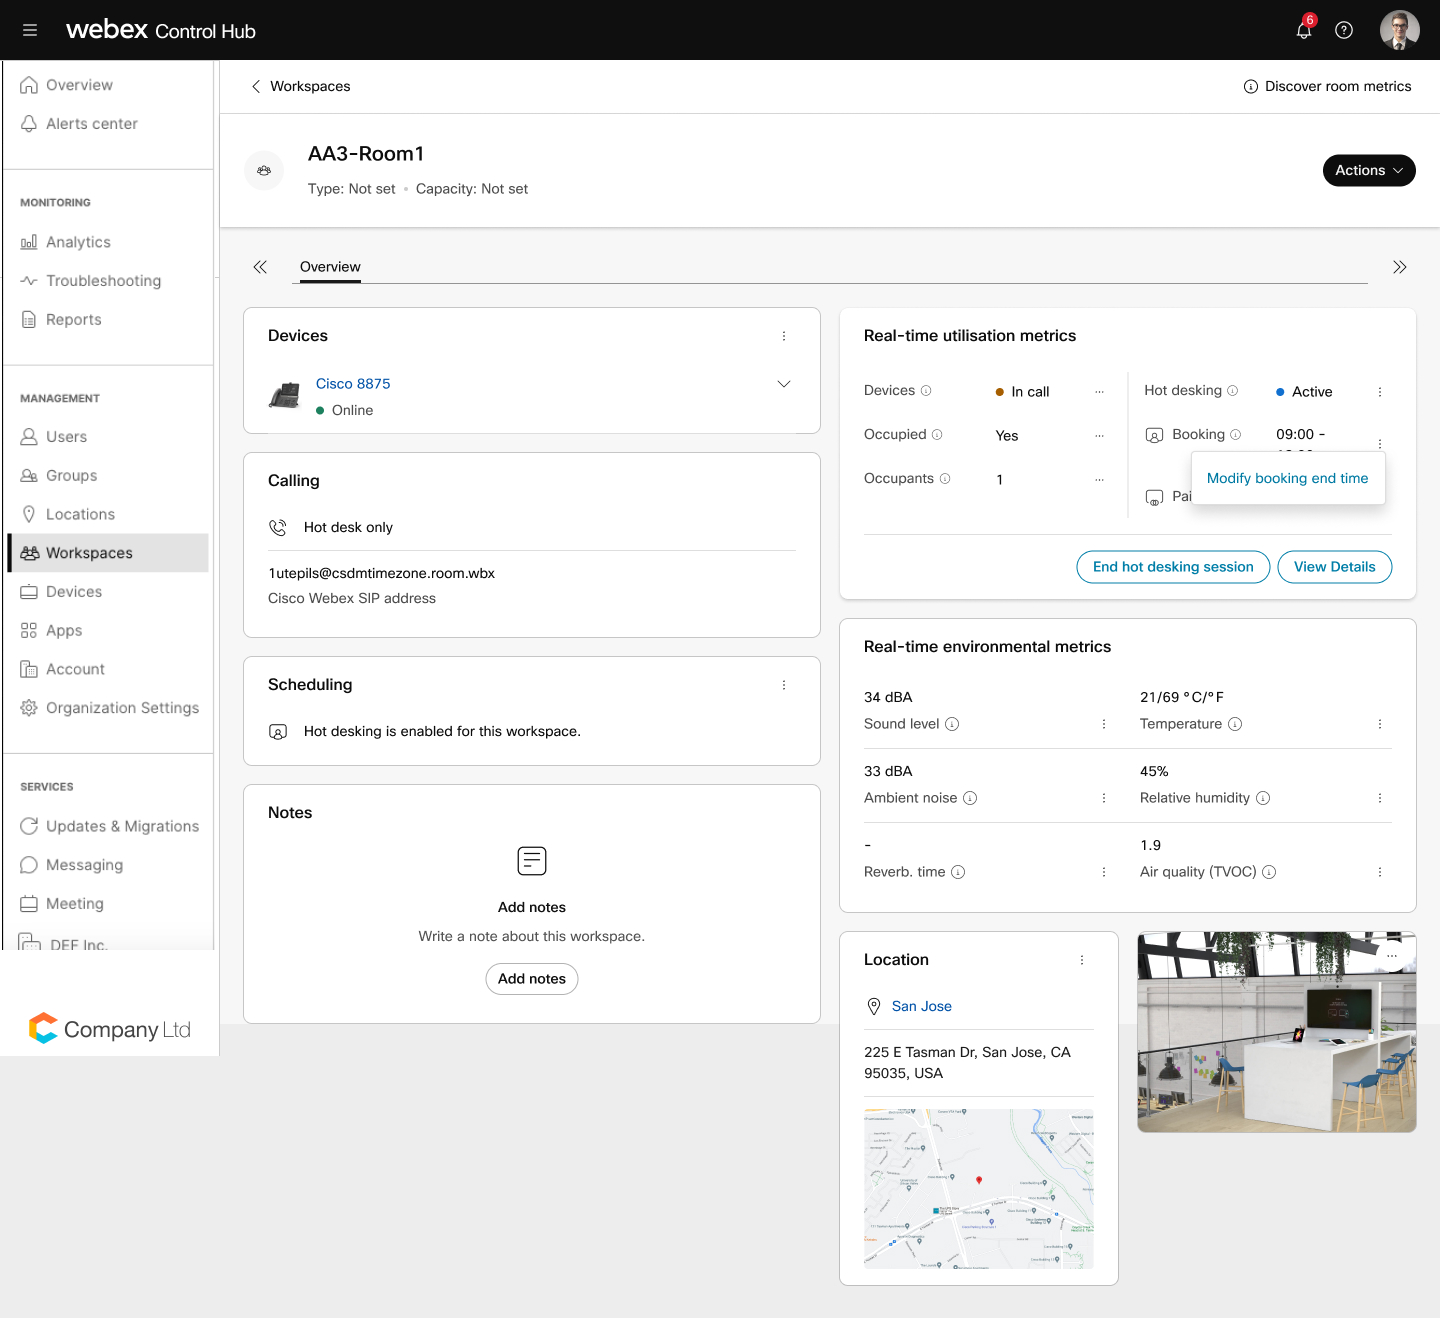
 to modify the booking end time.


