- Главная
- /
- Статья


Настройка полномочий на вызовы в Control Hub
 В этой статье
 Отправить обратную связь?
Полномочия на исходящие и входящие вызовы по умолчанию для организации можно изменить для определенного пользователя, рабочего пространства или виртуальной линии Webex Calling. Например, можно разрешить пользователю получать входящие вызовы за счет вызываемого абонента, продолжая при этом блокировать вызовы для остальной части организации.
Разрешения для исходящих вызовов
Типы исходящих вызовов
Ниже приведен список различных типов исходящих вызовов, доступных для Webex Calling в Control Hub.
-
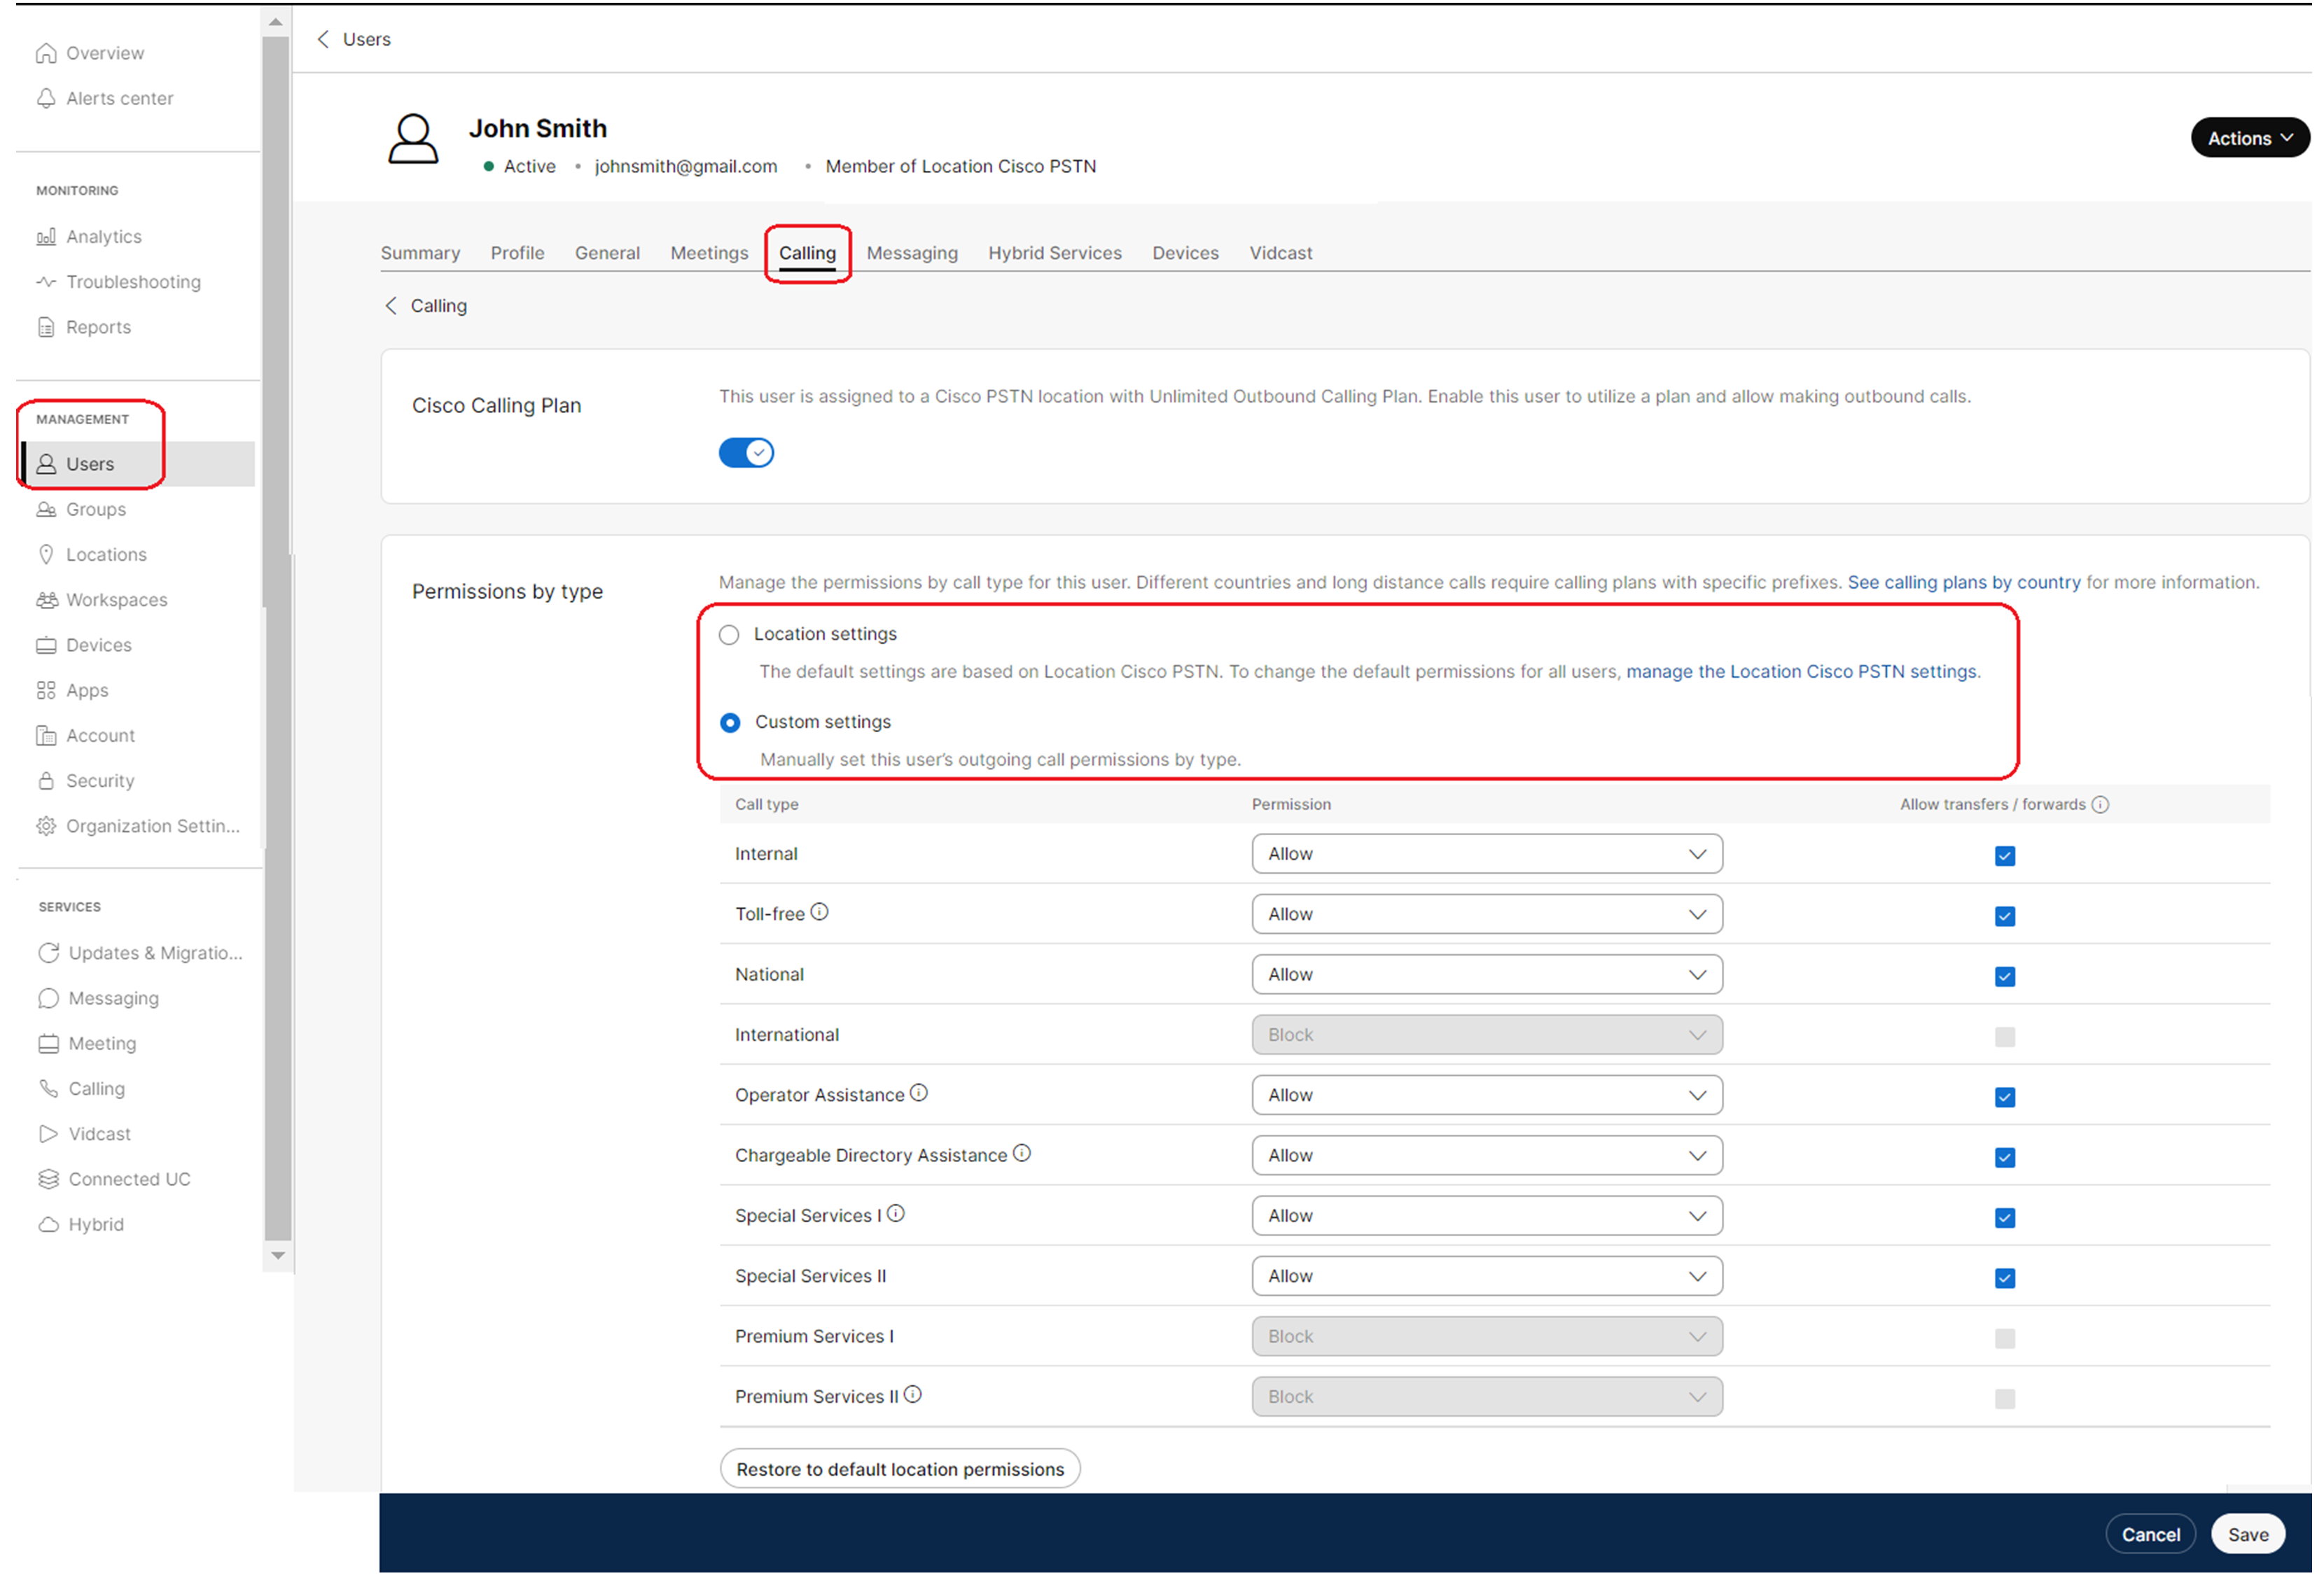
Внутренние вызовы: вызовы в пределах вашей компании. В том числе звонки другим пользователям в пределах вашего веб-сайта и в другие местоположения.
-
Бесплатные вызовы: вызовы на номер телефона, на который взимается плата за все входящие вызовы, вместо взимания платы с вызывающего абонента, являются бесплатными с стационарной линии.
-
Национальные вызовы: вызовы в пределах вашей страны происхождения, как внутри страны, так и за ее пределами.
-
Международные вызовы: вызовы за пределы страны, для совершения которых при наборе используется международный код вызова. Вызовы между США, Канадой и Пуэрто-Рико являются исключением, поскольку вызовы между этими странами в настоящее время не рассматриваются как международные.
-
Вызовы с помощью оператора: все вызовы, для которых требуется помощь оператора.
-
Вызовы платной абонентской службы помощи: вызовы в компании абонентских помощников, для подключения к вызову которых взимается плата.
-
Специальные службы I и Специальные службы II: вызовы на номера конкретного оператора связи, назначенные для специальных служб или направлений.
-
Премиум-службы I и Премиум-службы II: предоставляет информацию или развлечения за плату, взимаемую непосредственно с вызывающего абонента.
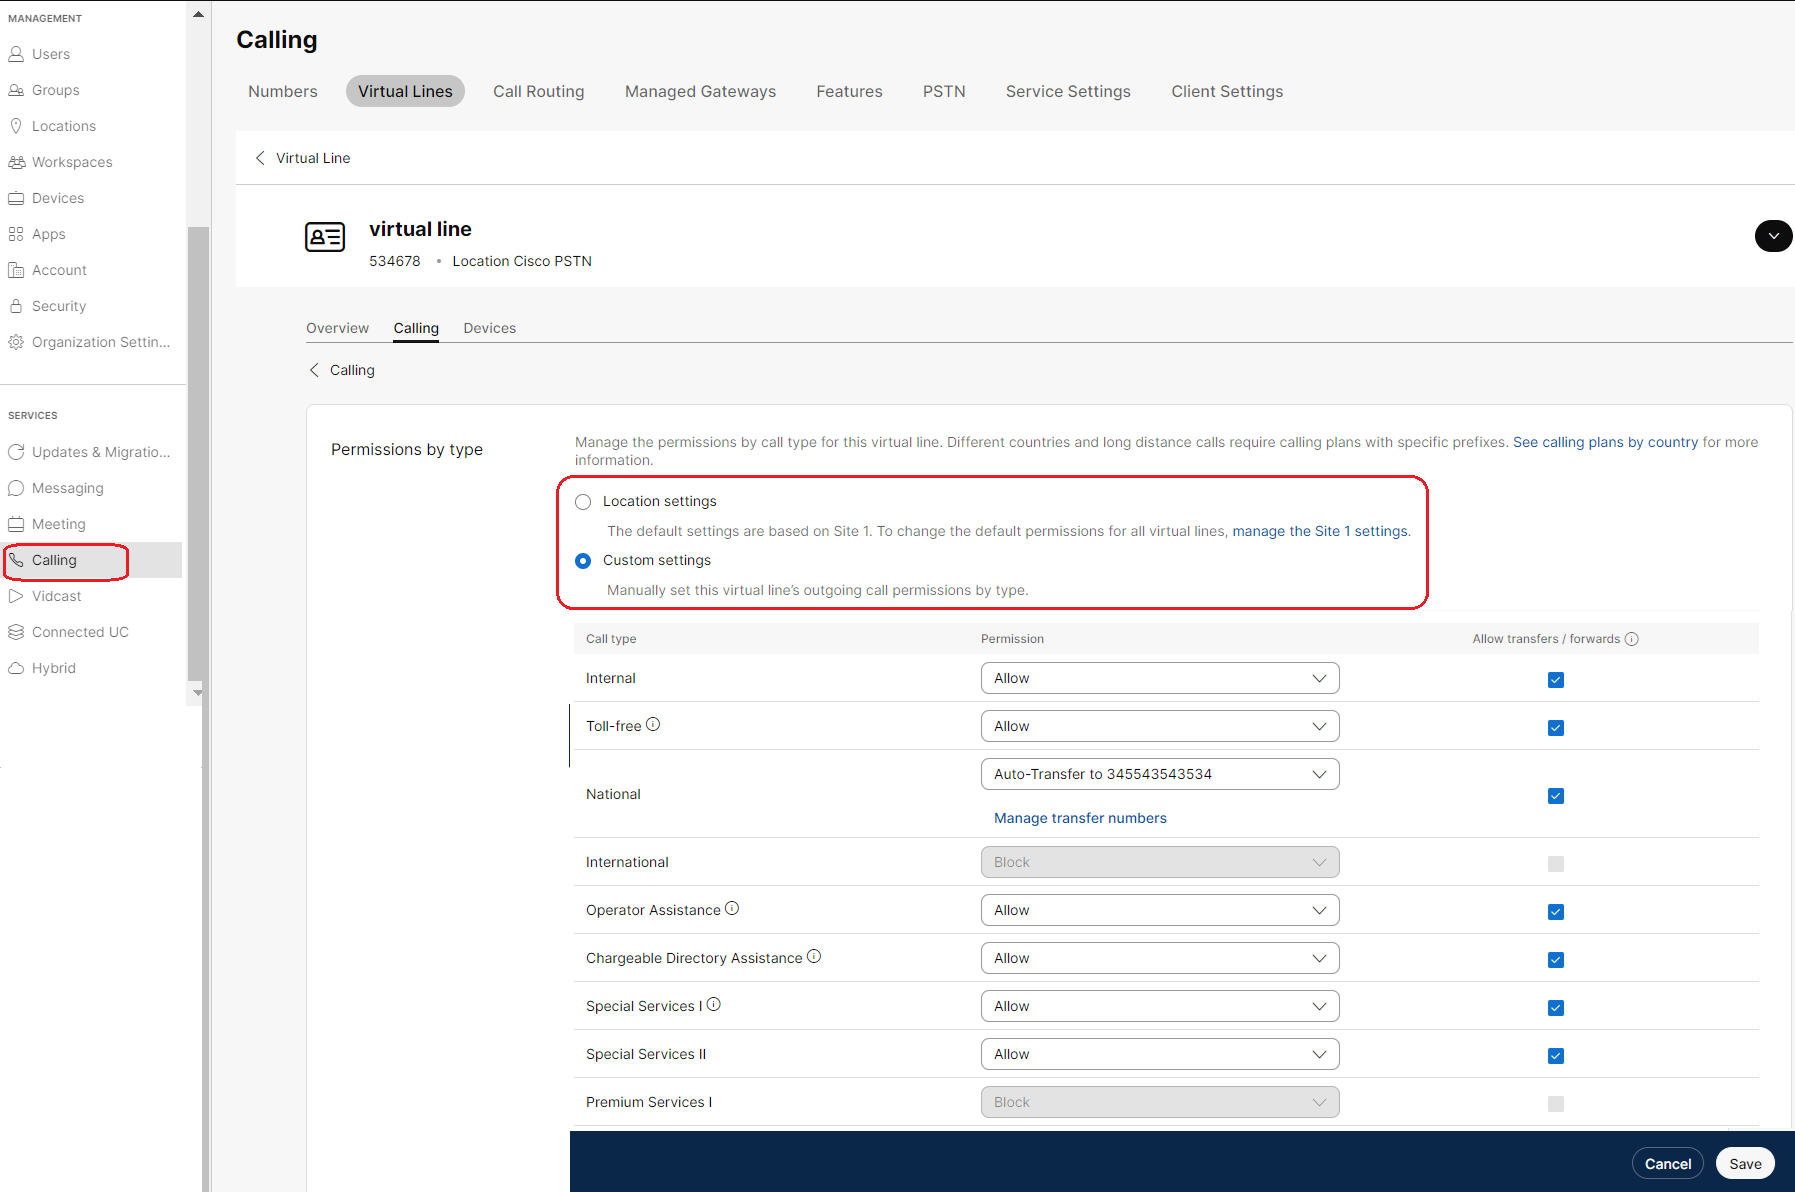
Для каждого типа вызова можно выбрать Разрешить, Блокировать, Требовать код авторизации или Автоматическая передача на первый, второй или третий номер.
Параметр Разрешить передачу/переадресацию определяет, разрешено ли переадресовывать или переадресовывать определенный тип исходящего вызова.
Настройка полномочий на исходящие вызовы для пользователя или рабочего пространства
| 1 | |
| 2 |
Перейдите в раздел Управление и щелкните Пользователи или Рабочие пространства. |
| 3 |
Выберите пользователя или рабочее пространство, для которого необходимо задать полномочия на исходящие вызовы. Информацию об управлении пользователями см. в статье Способы добавления пользователей в вашу Control-Hub-организацию. Информацию об управлении рабочими пространствами см. в статье Настройка устройств Webex Calling и управление ими. |
| 4 |
Выберите Вызовы, прокрутите страницу вниз до раздела Обработка вызова. Щелкните, чтобы раскрыть полномочия на исходящие вызовы. Ниже перечислены типы полномочий для исходящих вызовов.
|
| 5 |
Щелкните Полномочия по типу и перейдите на соответствующую страницу конфигурации. Подробную информацию о настройках типа полномочий см. в статье Полномочия на исходящие вызовы для местоположений Webex Calling. |
| 6 |
Настройте полномочия по типу и номера для автоматического перевода.
 |
| 7 |
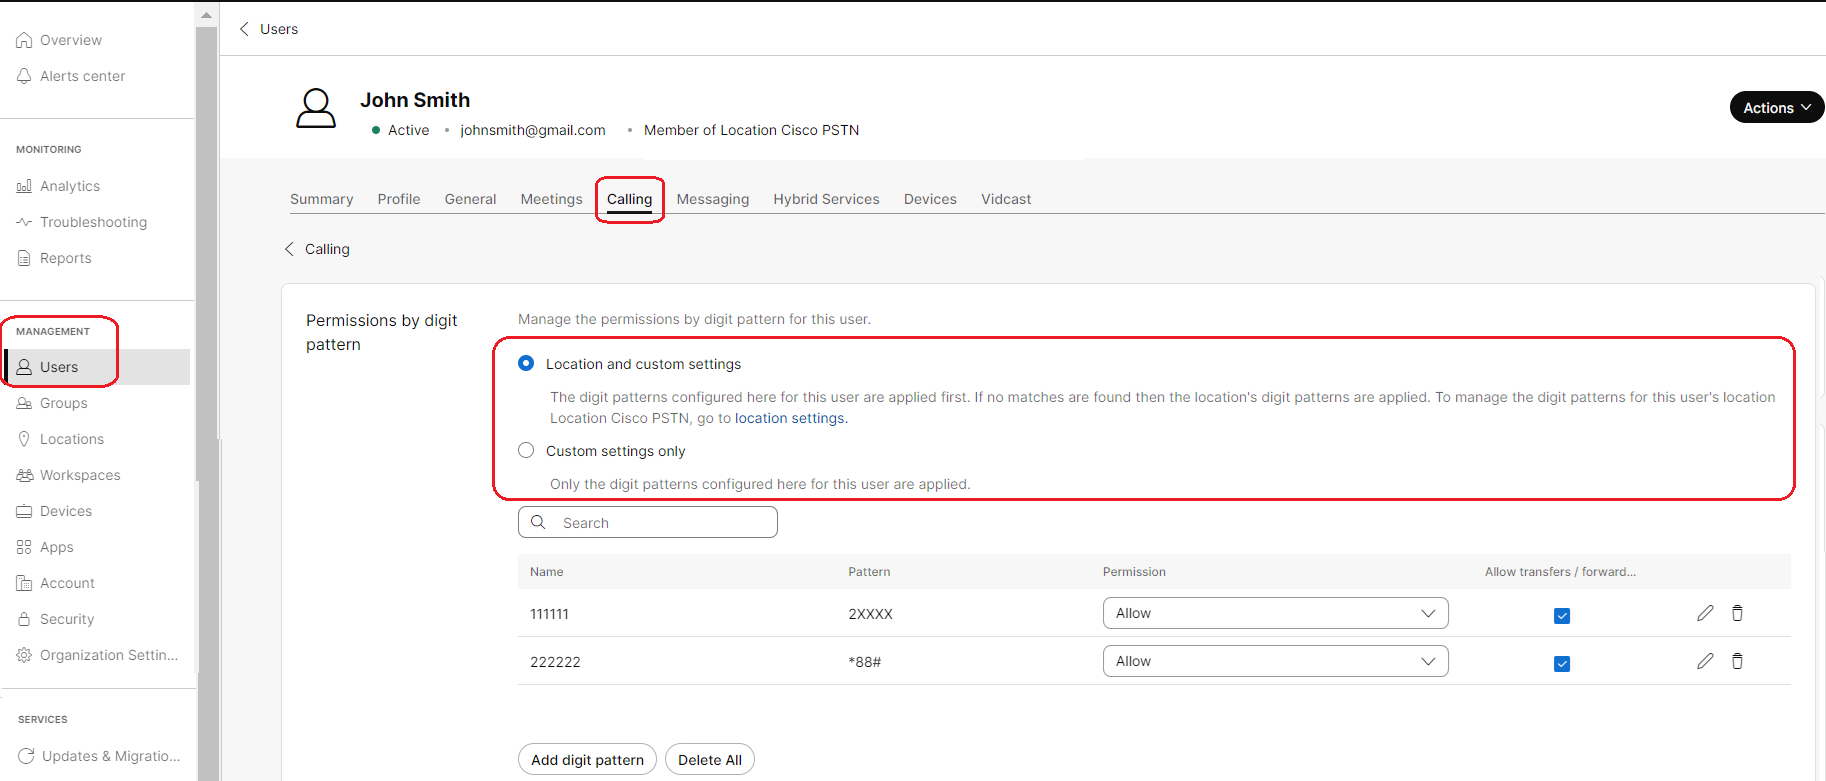
Настройте полномочия с помощью цифровых шаблонов и кодов авторизации.
 |
| 8 |
Выберите Только пользовательские настройки и настройте необходимые настройки. Нажмите Сохранить. |
Настройка полномочий на исходящие вызовы для виртуальной линии
| 1 | |
| 2 |
Перейдите к разделу Службы и щелкните Вызовы. |
| 3 |
Выберите Виртуальные линии. |
| 4 |
Выберите виртуальную линию из списка. Информацию об управлении виртуальными линиями см. в статье Поддержка нескольких линий в Webex Calling с помощью виртуальных линий. |
| 5 |
Выберите Вызовы. |
| 6 |
Прокрутите страницу вниз до раздела Обработка вызова. Щелкните, чтобы раскрыть полномочия на исходящие вызовы. Ниже перечислены типы полномочий на исходящие вызовы.
|
| 7 |
Щелкните Полномочия по типу , чтобы перейти на соответствующую страницу конфигурации. Подробную информацию о настройках типа полномочий см. в статье Полномочия на исходящие вызовы для местоположений Webex Calling. |
| 8 |
Настройте полномочия по типу и номера для автоматического перевода.
 |
| 9 |
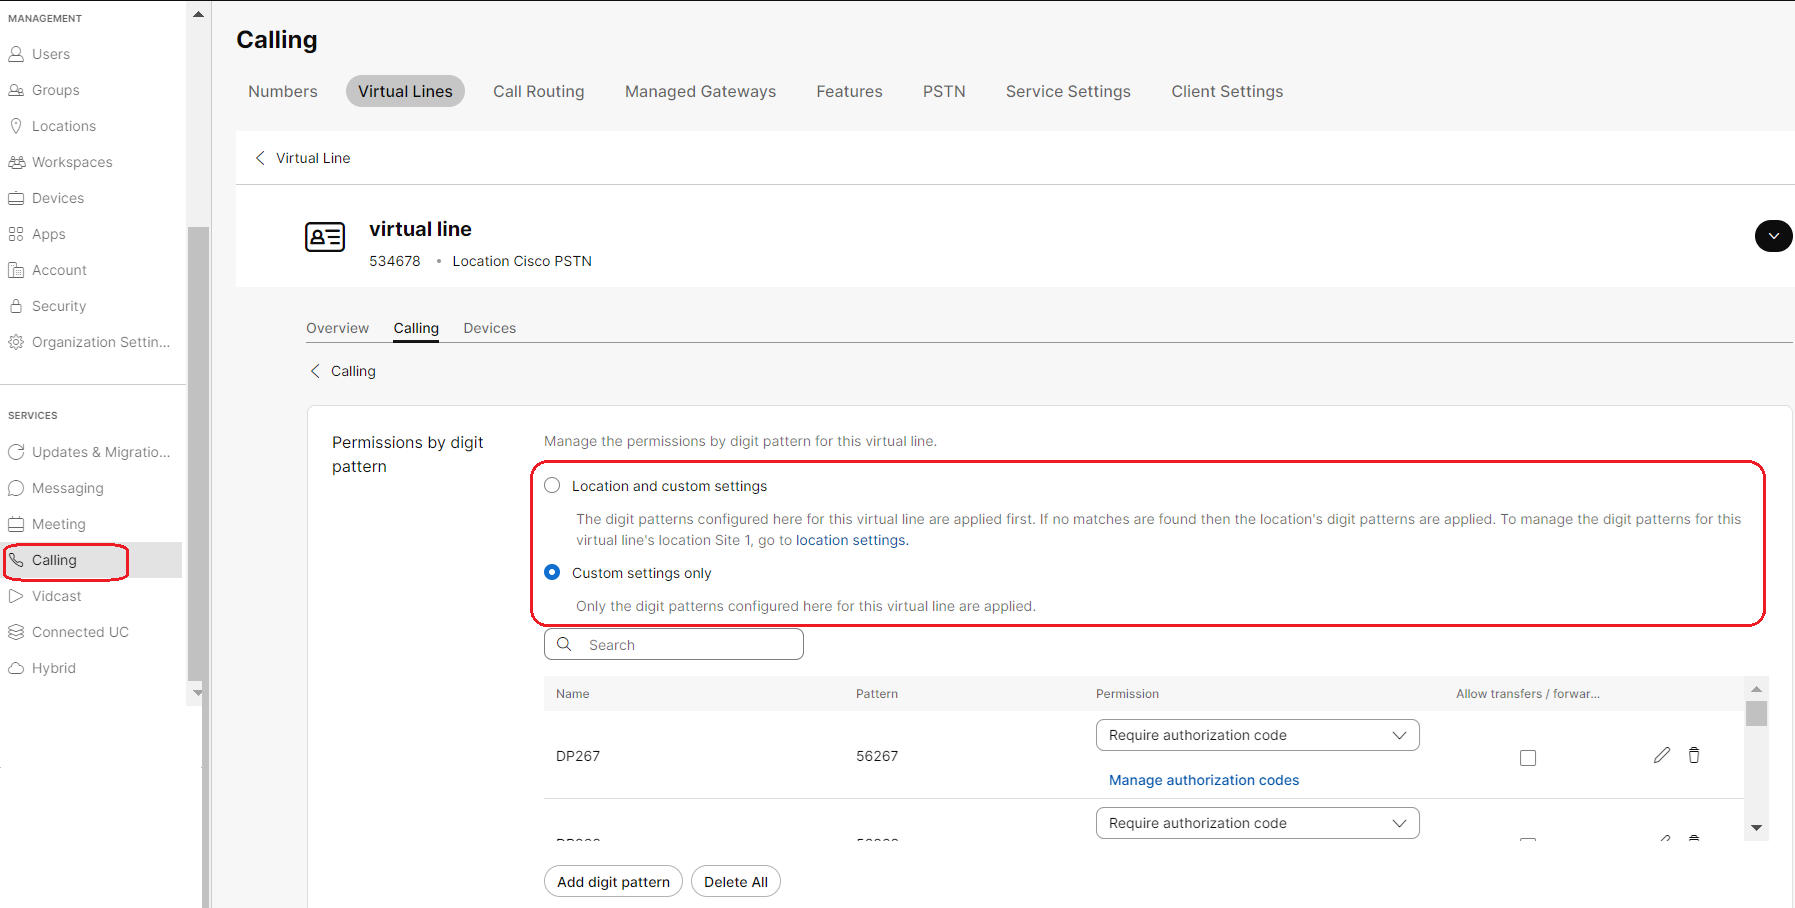
Настройте полномочия с помощью цифровых шаблонов и кодов авторизации.
 |
| 10 |
Выберите Только пользовательские настройки и настройте необходимые настройки. Нажмите Сохранить. |
Полномочия на входящие вызовы
Настройка полномочий на входящие вызовы для пользователя или рабочего пространства
| 1 | |
| 2 |
Перейдите в раздел Управление и щелкните Пользователи или Рабочие пространства. |
| 3 |
В выберите Области вызовов. Полномочия на входящие вызовы помогают управлять типами принимаемых вызовов (например, вызовы за счет вызываемого абонента). Значения параметров по умолчанию определяются разрешениями входящих вызовов вашей организации или местоположения. Если вызов заблокирован, вызывающие абоненты отключаются, не слушая никаких объявлений.
|
Настройка полномочий на входящие вызовы для виртуальной линии
| 1 | |
| 2 |
Перейдите к меню и выберите виртуальную линию, для которой необходимо настроить полномочия на входящие вызовы. |
| 3 |
Выберите в разделе Обработка вызовов . Полномочия на входящие вызовы помогают управлять типами принимаемых вызовов (например, вызовы за счет вызываемого абонента) для виртуальной линии. Настройки по умолчанию основываются на разрешениях на входящие вызовы вашей организации или местоположения. Если вызов заблокирован, вызывающие абоненты отключаются, не слушая никаких объявлений.
|
| 4 |
В разделе Пользовательские настройки выберите настройки, которые необходимо обновить, и щелкните Сохранить. 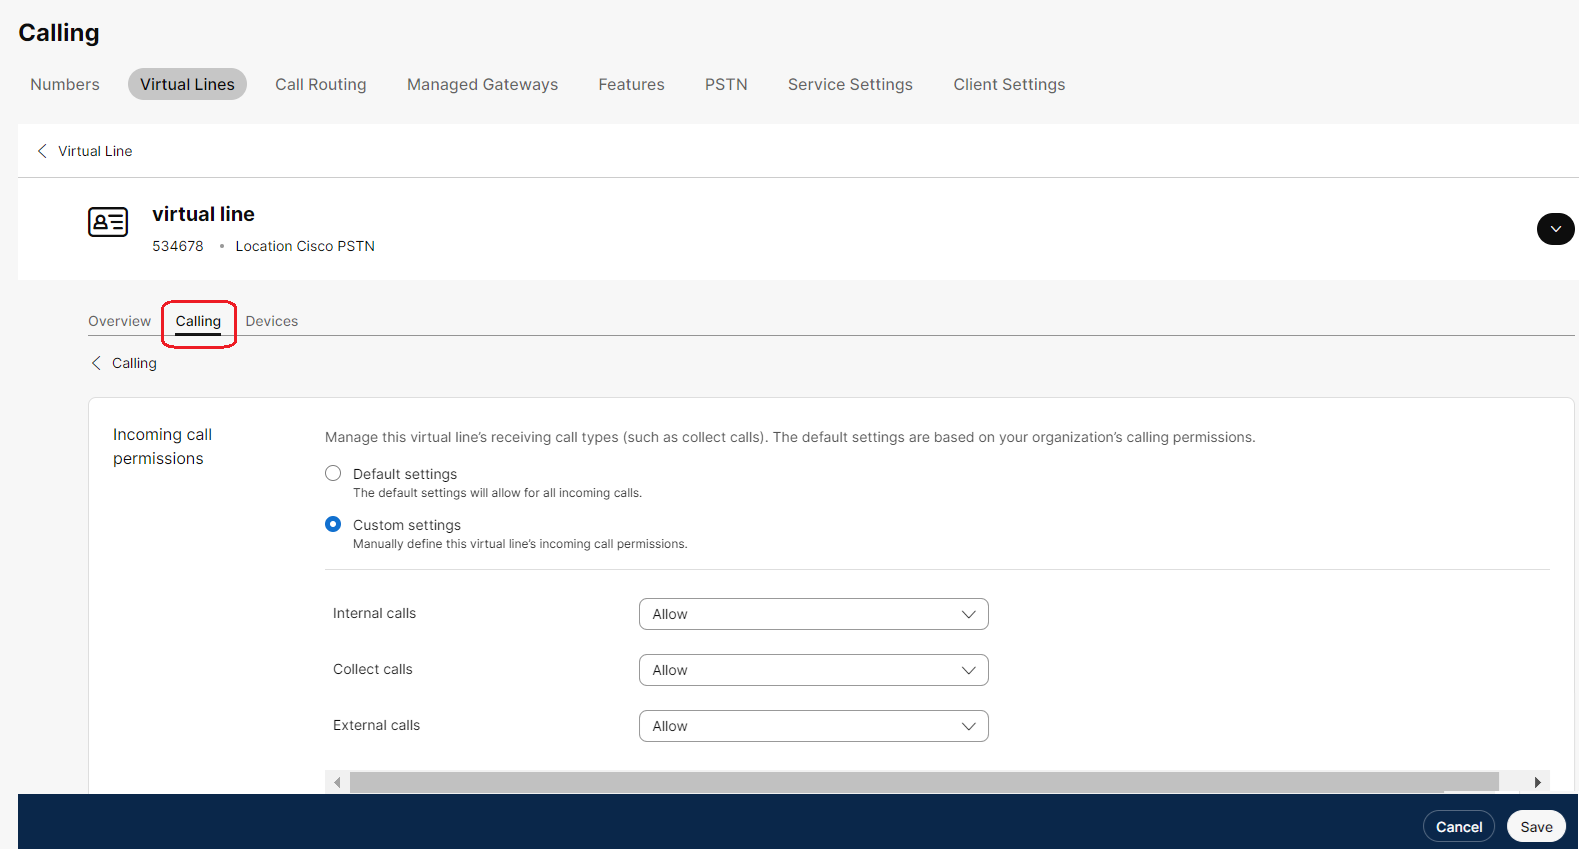 |


