- Home
- /
- Article

Thanks for your feedback.

 In this article
 Feedback?
Administrators can choose the software upgrade channel such as Stable, Preview, Stable-delay, and Beta channel for each device. Use these channels to install the latest software version, evaluate upcoming versions and suggest changes, and find a resolution for issues.
Overview of device software upgrade channels
The software upgrade channel determines the software version to install on a device.
You can choose from these software channels:
-
Stable—This is the default channel for all devices. The Stable channel installs the current preferred software available for devices. Configure most of your devices to use this upgrade channel.
-
Preview—This channel installs the upcoming default software two weeks before its availability in the Stable channel. This channel allows specific users such as the support staff, to try new features before they are made available to all users.
-
Stable delay—This channel installs a recent version of the software that was previously in the Stable channel. Updates are less frequent, typically once in a quarter. Use this channel to continue using the device, while investigating an issue identified in the Stable channel.
-
Beta—This channel is available for customers and partners who have joined the Beta testing (EFT) program. It allows you to do Beta testing before release of the software, with the device that you use every day.
-
Test—This channel is available to use during a problem investigation, but administrators can’t configure this channel from the Control Hub. The Cisco support team may move a device to the Test channel, to investigate an issue that you report.
External administrators can’t change the MPP software upgrade channel.
Best practices for using software upgrade channel
On moving a device to a different upgrade channel, the device updates to the software version in that channel in a few minutes.
If a bulk change is done to the channel of multiple devices, the devices in this channel update to the latest software version during the regular maintenance window.
You can’t use the device when the upgrade is in progress.
Don’t power down the device during the upgrade process.
The device restarts during upgrade.
Here are the best practices for using the software upgrade channel:
-
Ensure most devices are in the Stable channel. Stable channel is the default upgrade channel.
-
Configure a small number of devices to use the Preview channel. This setting helps to evaluate the upcoming Stable software version for new or changed features, benefits for users, and analyze the impact on workflows.
For example: You can configure the telecom support team or similar to use the Preview channel in your organization.
-
Join the Webex Calling Beta program and set devices to use the Beta channel. This capability allows access to new features earlier than the Preview channel. Also, you can provide feedback towards the implementation of the new features. Install the Beta software on your regular device and continue with your tasks. Using this configuration you can confirm if the software works in your environment.
If you’re part of the Beta program, then the Beta channel is available.
-
Use the Stable-delay channel only if you experience an issue with the Stable channel. Ensure to open a support case with the Cisco support team, to investigate the issue. While the investigation is in progress, you can move all affected devices to the Stable-delay channel.
You can’t use the stable-delay channel to delay upgrading the device software forever as the software in this channel is updated approximately every three months.
Devices that supports software upgrade channels
| Device Type | Model |
|---|---|
|
MPP |
All MPP devices |
|
ATA |
|
|
Yealink devices |
|
Configure the software upgrade channel for a single device
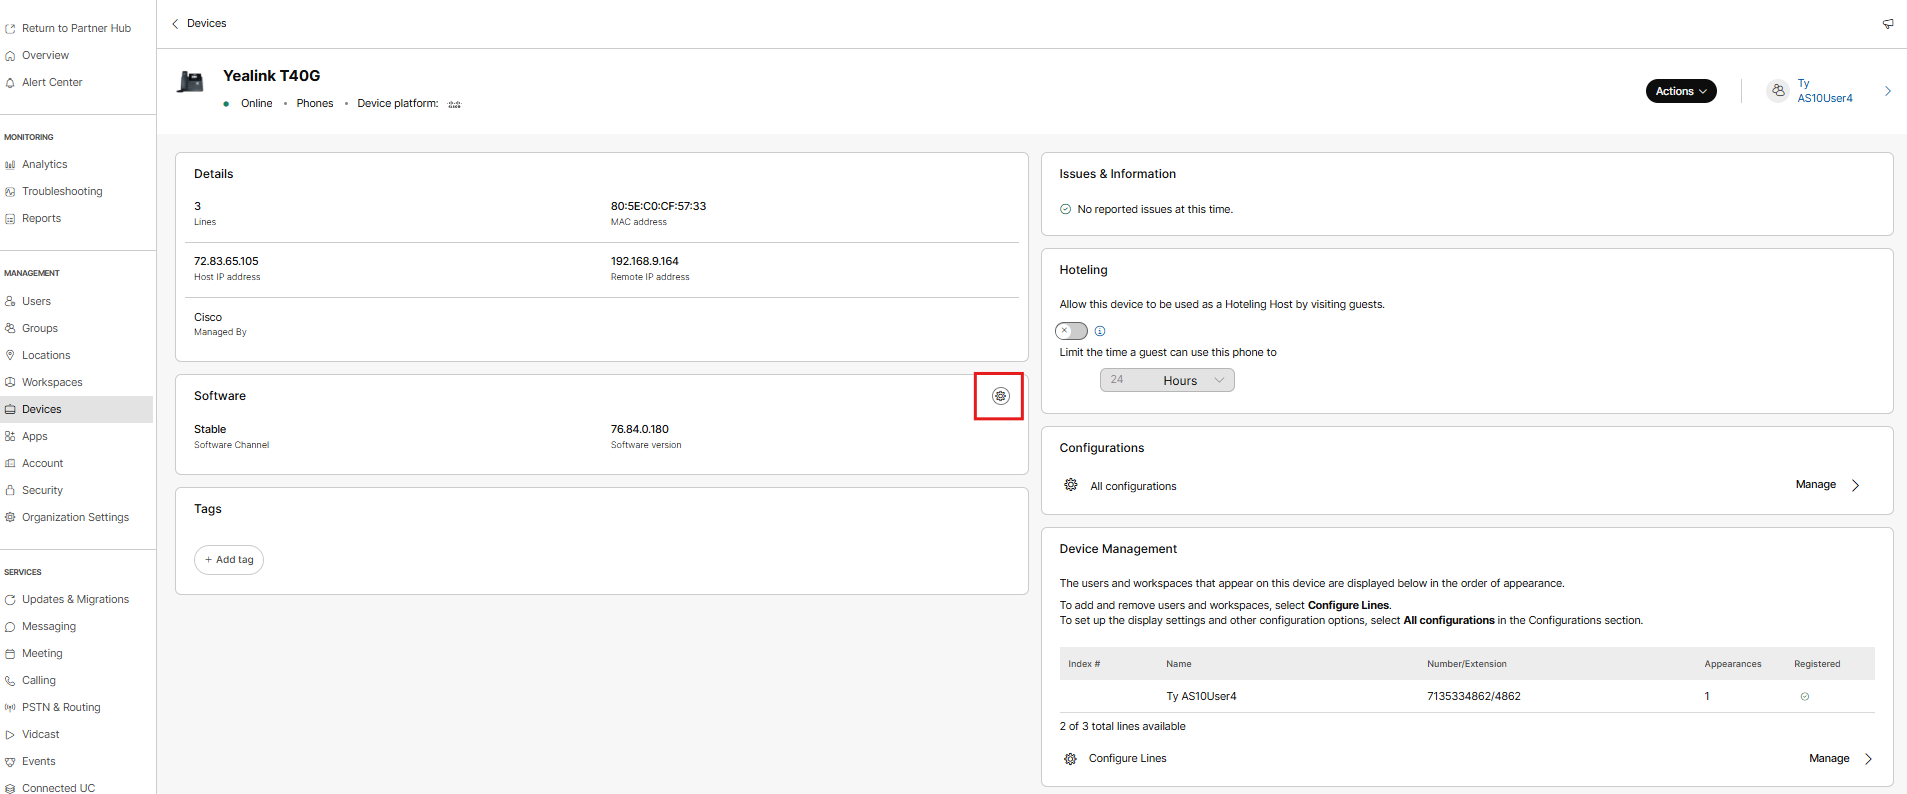
You can check the software version and the software upgrade channel that your device is currently on:
-
From the Control Hub, go to Devices.
-
Select the device to inspect. You can view the following details in the Software widget on Device details page:
-
Software version indicates the software version that the device is currently running.
-
Software channel indicates the software upgrade channel that the device is configured to use.
-
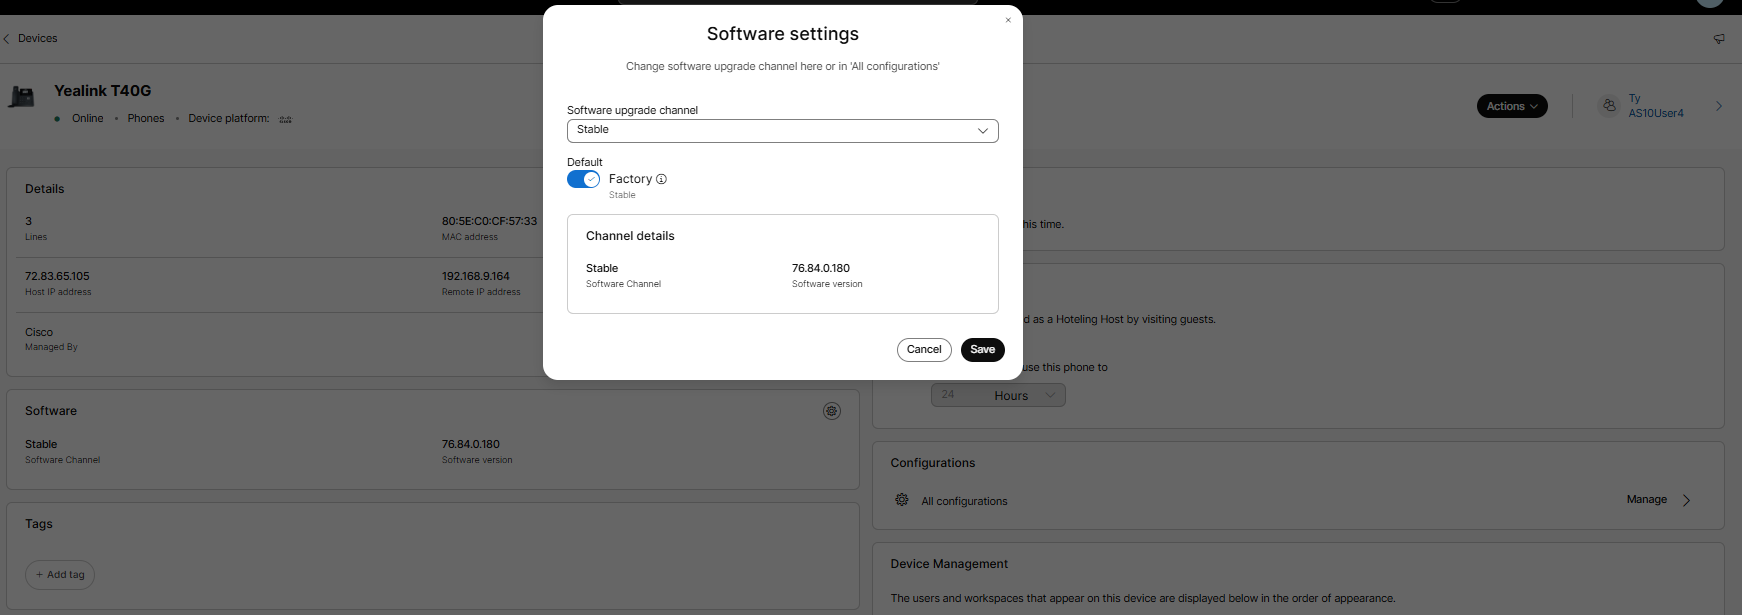
- To configure the upgrade channel, click the cogwheel icon in Software widget.
-
Click the Software Upgrade Channel drop-down, to choose the required channel. Click Save.
A success notification confirms that a channel change request is raised. The device software version associated with the updated channel is installed within few minutes.
Configure the software upgrade channel for multiple devices
You can choose to run the bulk update option to update the firmware on the devices listed under your organization.
| 1 |
From the Control Hub, go to Devices. |
| 2 |
Select up to 1000 devices from the list to upgrade the firmware, then click Edit. 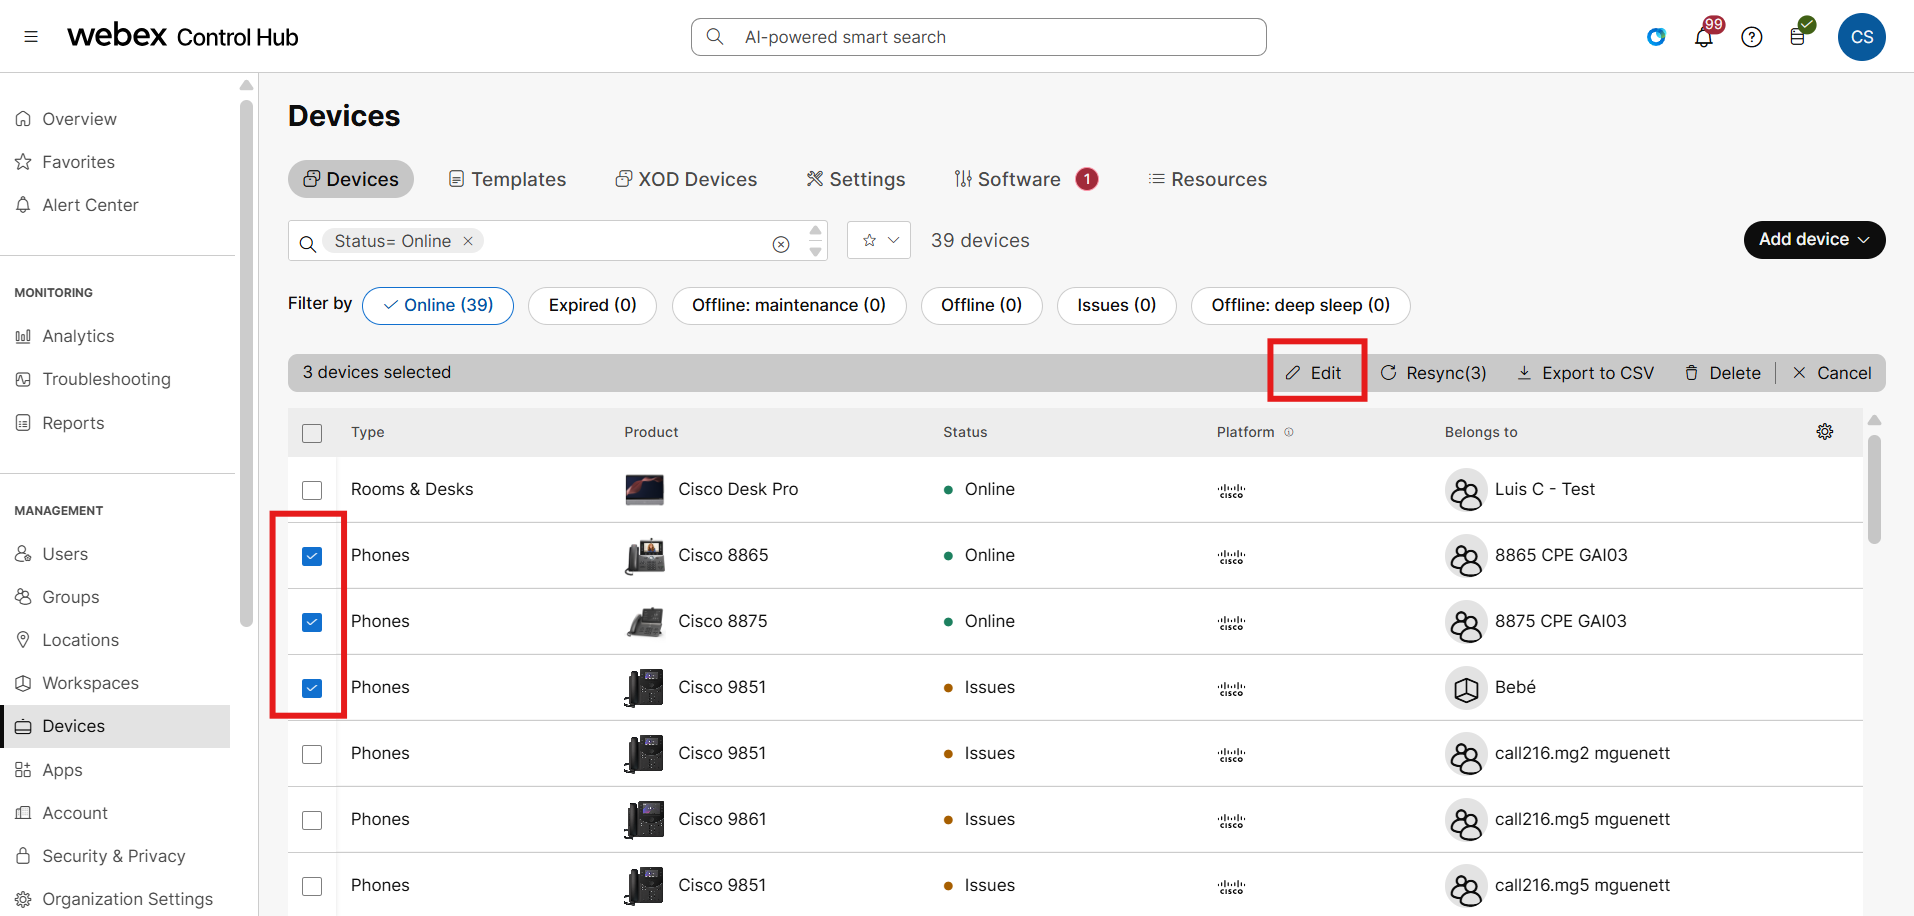
|
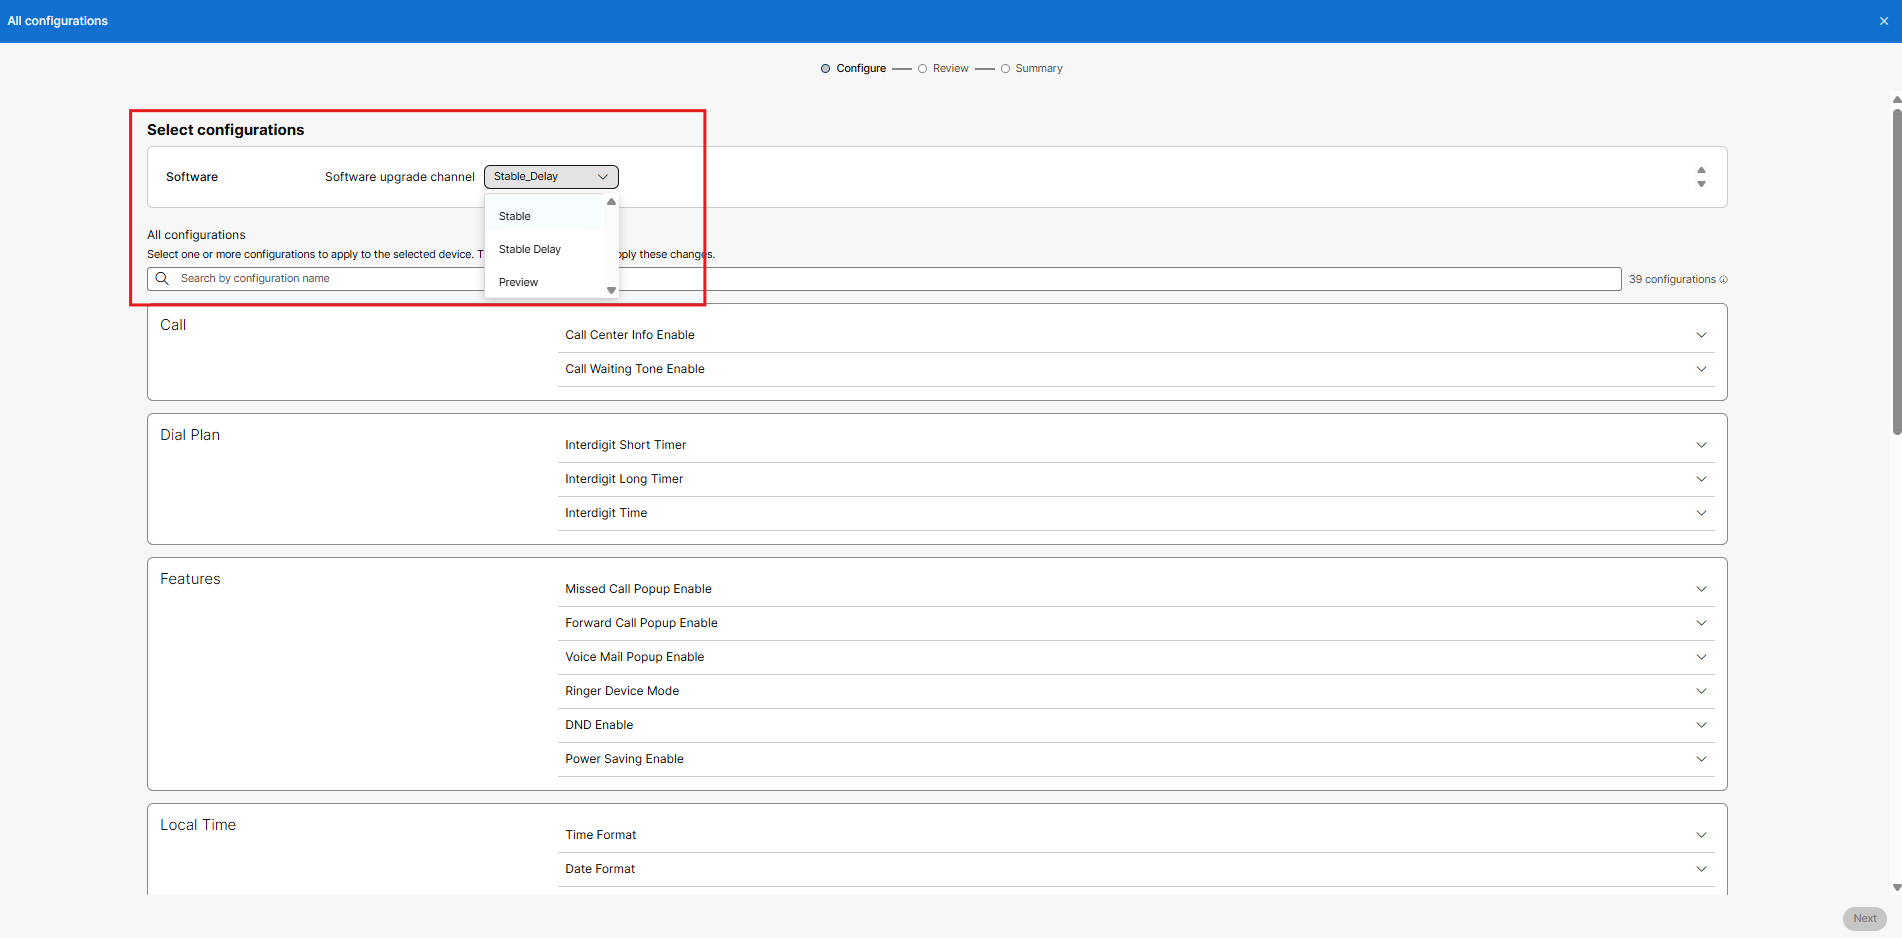
| 3 |
On Select configurations screen, select Upgrade channel from the drop-down, which you want to deploy on selected devices in bulk. The available channels are Stable, Stable Delay, and Preview.
|
| 4 |
Click Next. |
| 5 |
Review the selected configuration. Click Apply. 
Few devices may not support all the configurations and values. A success notification confirms that a channel change request is raised. The
installation of device software version associated to selected channel is done in nightly
maintenance period.
|


