- Home
- /
- Article

Thanks for your feedback.

How to Convert UCM Cloud to Dedicated Instance
 In this article
 Feedback?
You can change your UCM Cloud subscription to Webex Calling Dedicated Instance mid-contract facilitating you with the latest cloud calling features.
Overview
Benefits of converting to Dedicated Instance:
-
Allows you to deploy the Knowledge Workers and Workspaces across Webex Calling multi-tenant and Dedicated Instance platforms based on the business needs.
-
Access to the latest cloud calling features, such as Webex Go, Voicemail transcription, etc.
-
Webex Contact Center integrates seamlessly with multi-tenant Calling platform.
-
Unified Cloud Connected PSTN (CCP) for multi-tenant and dedicated instance users.
There is no impact to the existing UCM Cloud licences when converted to the Dedicated Instance. Peering, IP addressing, virtual machines and Domain remains the same after the conversion to Dedicated Instance.
Steps to convert UCM Cloud to Dedicated Instance
The following are the steps to convert an existing UCM Cloud subscription to Dedicated Instance subscription.
Step 1: Change/Modify UCM Cloud CCW Order
|
To change or modify to the existing UCM Cloud order: 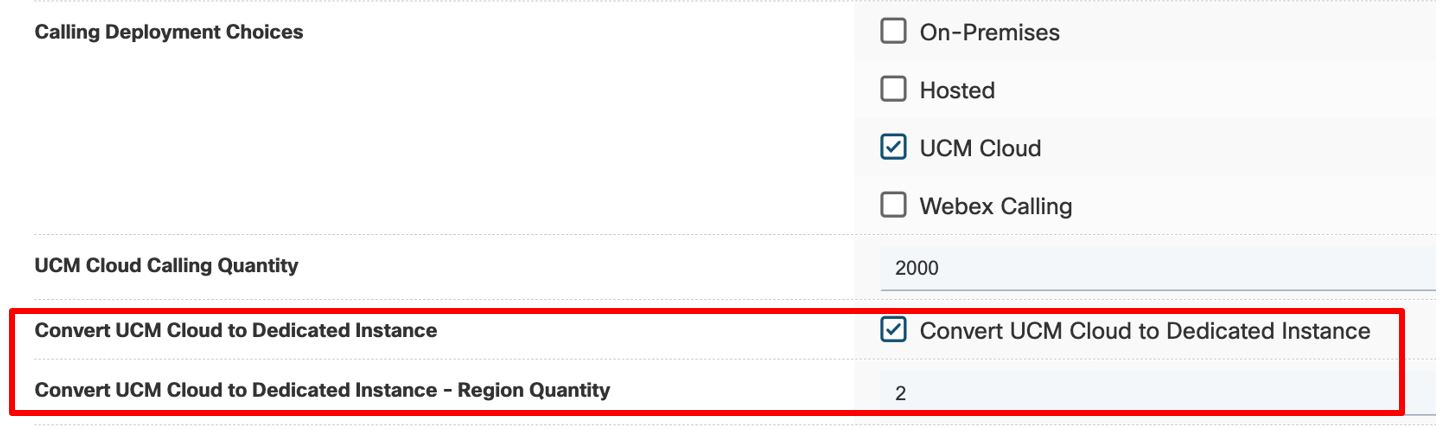
The UCM Cloud region quantity can be the same number of actively deployed regions (not future state). Adds a $0 SKU A-FLEX-DI-UCM-CLD to the subscription. |
Step 2: First Time Setup Wizard
| 1 |
Upon successful modification of subscription, you will receive an email with a link to trigger the conversion of your UCM Cloud to Dedicated Instance. |
| 2 |
Launch the First Time Setup Wizard to activate the services. Below is an example of the Summary of subscription changes. 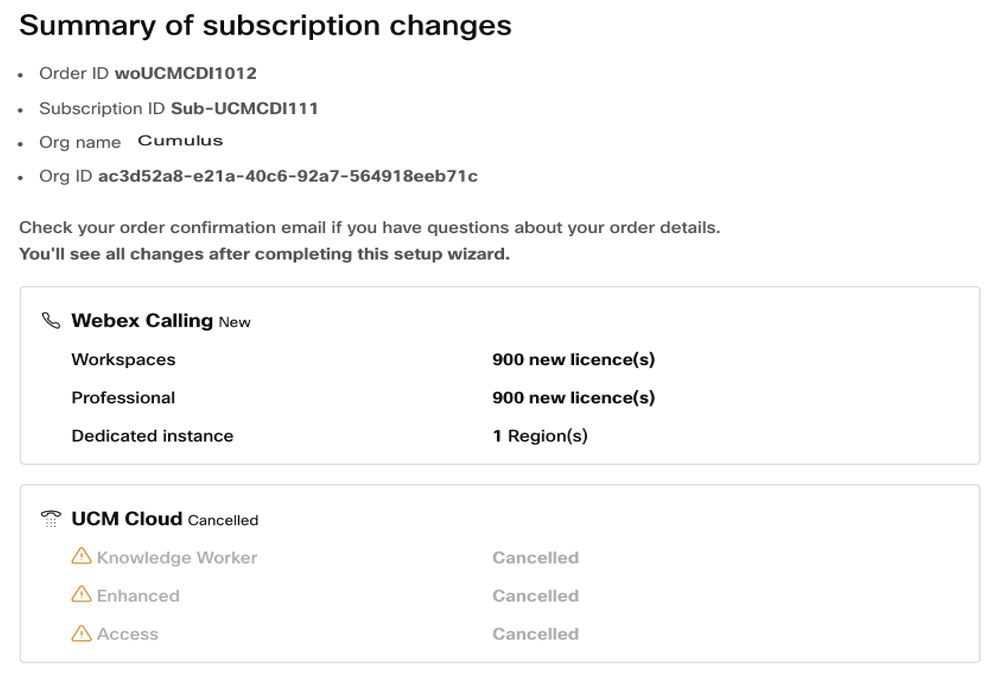
The UCM Cloud subscription is Canceled and the equivalent licenses of Webex Calling subscription is added. The Dedicated Instance number of regions that displays is the same as the region quantity provided in CCW step 1. |
| 3 |
Click Setup now and provide necessary information to activate the Webex Calling multi-tenant. If Webex Calling is enabled, the information is prepopulated. |
| 4 |
In the Set up Dedicated Instance, the regions are pre-configured based on the existing UCM Cloud deployment. You can provide the number of users and Workspace devices in each region. 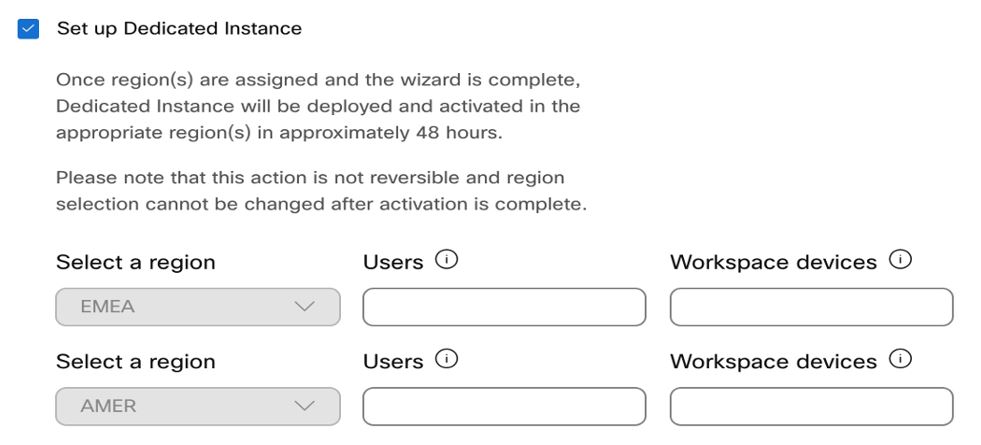
The number of Users and Workspace devices cannot exceed the total subscription licenses purchased. |
| 5 |
Click Next to review the details and click Done. |
Step 3: View Status in the Control Hub
| 1 |
Once the activation is complete, you can view the Dedicated Instance status under . 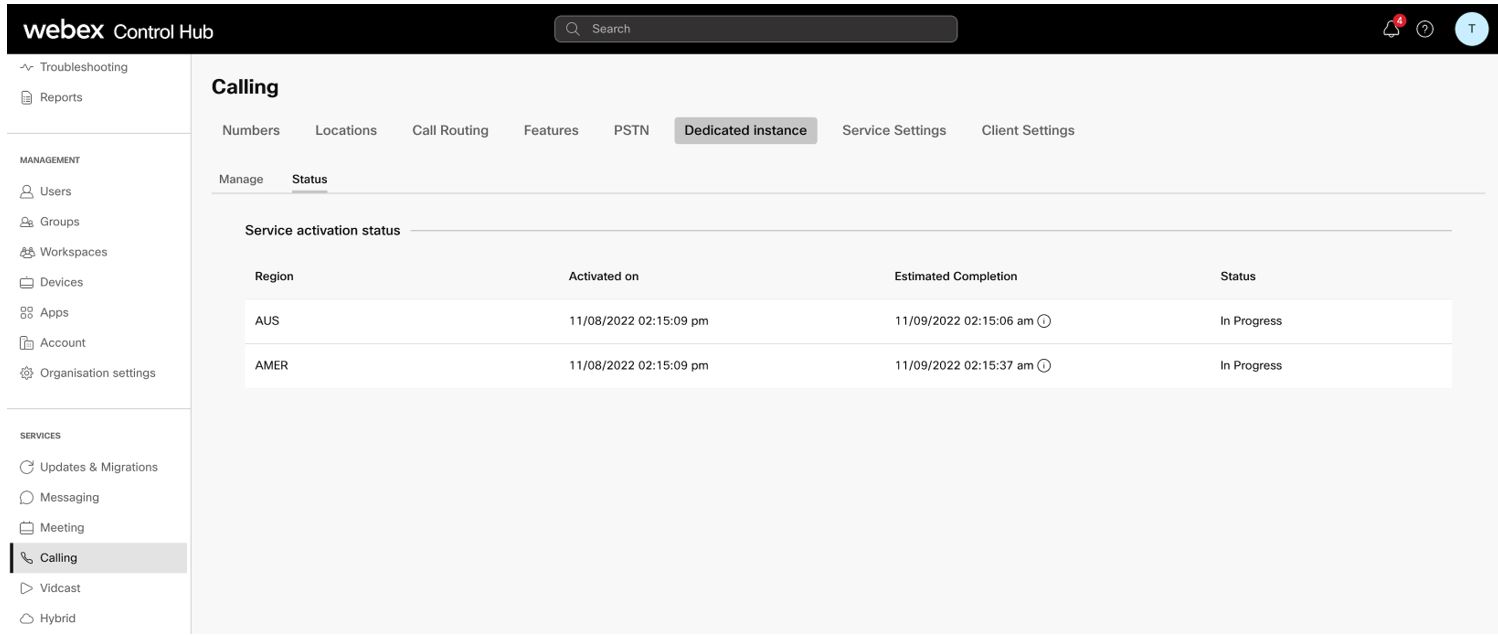
The UCM Cloud to Dedicated Instance conversion takes up to 12 hours and there is no maintenance period during the conversion. |
| 2 |
Post the conversion, You notice a new tab for Dedicated Instance under Calling and the UCM Cloud is removed. |
| 3 |
See Access Dedicated Instance Applications from Control Hub for more details. |


