- Home
- /
- Article

Thanks for your feedback.

 In this article
 Feedback?
Use this article to configure the ServiceNow connector for Webex Contact Center with certificate-based authentication.
Configure ServiceNow connector for Webex Contact Center
Use this article to configure the ServiceNow connector. The ServiceNow connector is an Interactive Voice Response (IVR) connector that creates or extracts information from ServiceNow and uses it to make routing decisions. It uses certificate-based authentication to meet advanced enterprise security requirements.
The ServiceNow connector provides advanced authentication methods within the HTTP Request activity, designed for use within the Flow Designer module. You can update and rotate certificate configurations easily within Webex Control Hub.
Configuring the ServiceNow connector is a step-by-step procedure that involves the following tasks:
- Creating the public and private key certificates
- Uploading the certificate on the ServiceNow instance
- Creating a ServiceNow technical user
- Configuring the ServiceNow OAuth application
- Configuring the ServiceNow connector in Webex Contact Center
See the following sections for details.
Create public and private key certificates
| 1 |
Install OpenSSL. |
| 2 |
Run the following commands: |
What to do next
Upload the certificate on ServiceNow.
Upload the certificate on ServiceNow
Before you begin
- Create the public and private key certificates.
| 1 |
On the main menu, search for x.509 certificate and create a new record. |
| 2 |
Enter a name and description. |
| 3 |
Keep PEM as the format. |
| 4 |
Use Trust Store Cert as the type. |
| 5 |
Copy the content of the 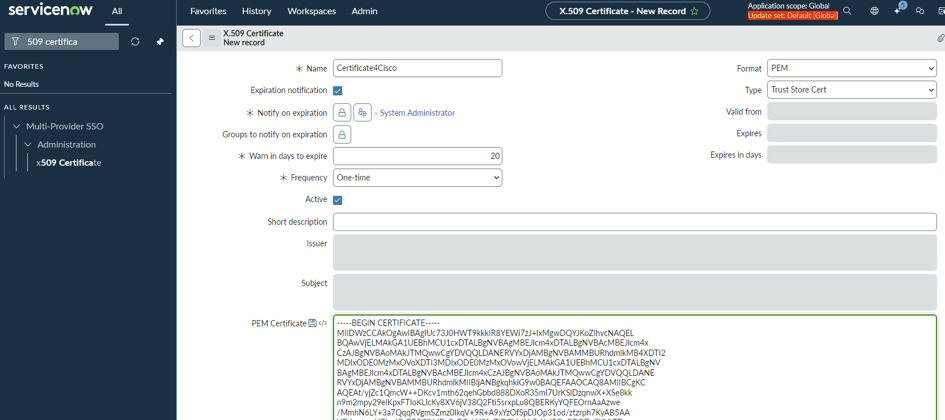 |
| 6 |
Click Validate / Install trusted Code Signing cert. 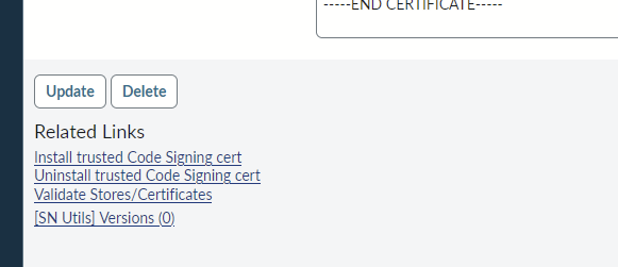 |
What to do next
Create a ServiceNow technical user.
Create a ServiceNow technical user
Before you begin
- Create the public and private key certificates.
- Upload the public certificate on the ServiceNow instance.
| 1 |
From the main menu, go to the Users section and create a new user. |
| 2 |
Enter a user ID and select Machine as the identity type. |
| 3 |
If you use a certificate grant, enter an email address. |
| 4 |
Make sure the Web Service Access only check box is enabled. This option might not be available for developer instances. |
| 5 |
Click Save. 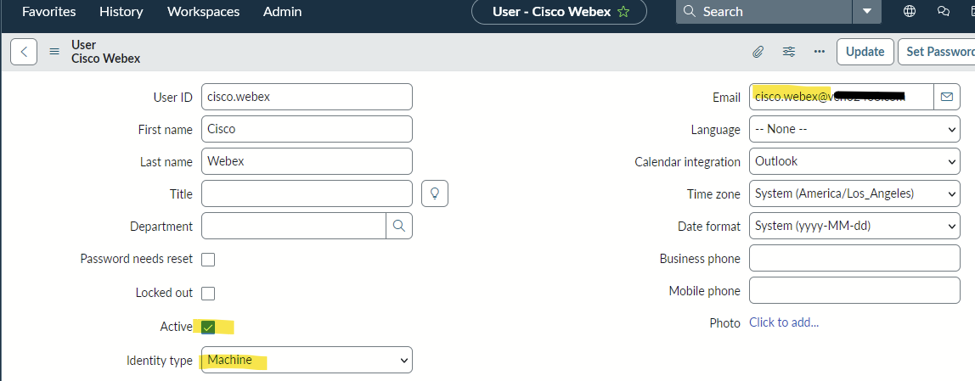 |
| 6 |
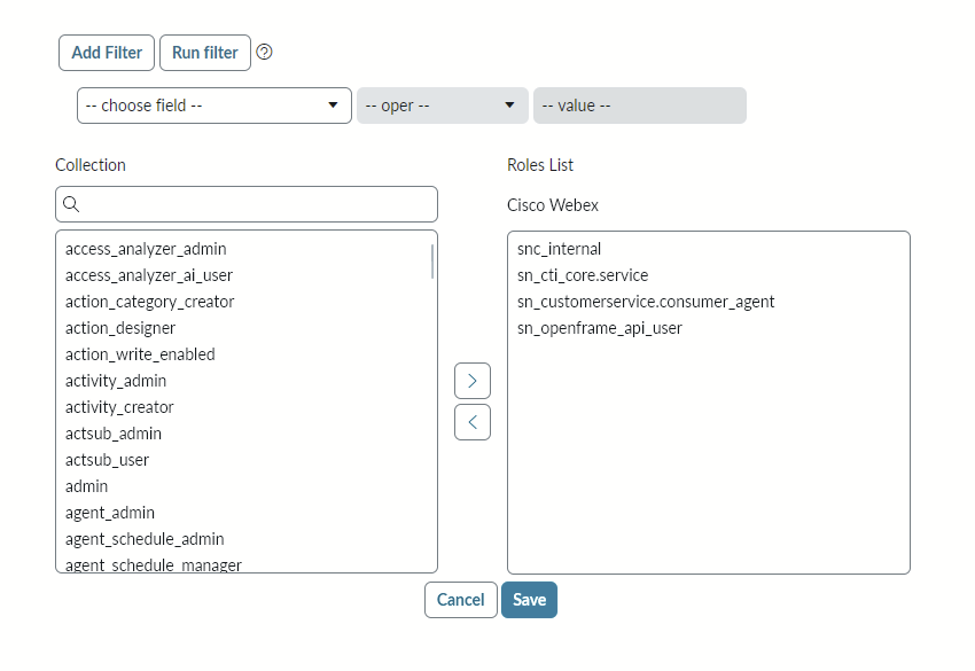
Assign the roles required for the ServiceNow APIs. The following roles are required:
 |
What to do next
Configure the ServiceNow OAuth application.
Configure ServiceNow OAuth application
Before you begin
- Create the public and private key certificates.
- Upload the public certificate on the ServiceNow instance.
- Create a ServiceNow technical user.
| 1 |
On the main menu, search for Application registry and click New to create a new record. |
| 2 |
Select New Inbound Integration Experience. 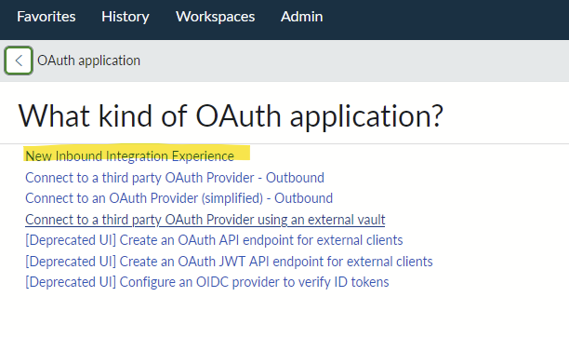 |
| 3 |
Click New Integration and select OAuth - JWT bearer grant. 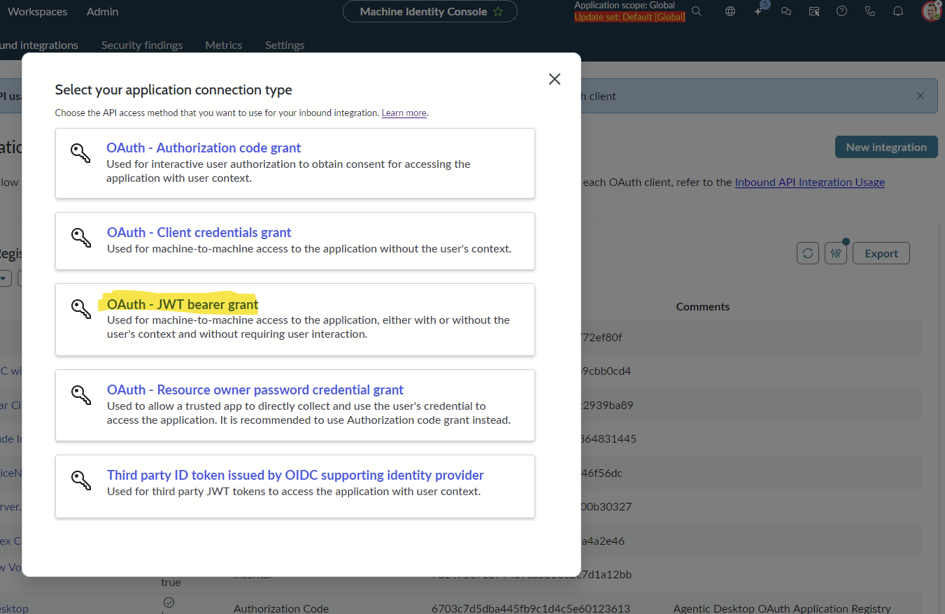 |
| 4 |
Enter a name. The Client ID and Client secret are generated when you save the application. 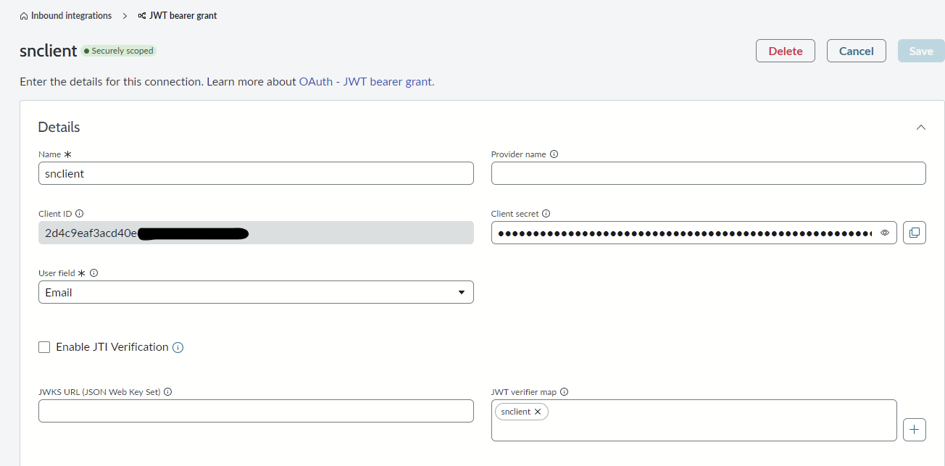 |
| 5 |
Turn off the Enable JTI verification option. |
| 6 |
Click + to add a JWT verifier map. |
| 7 |
Enter a name, copy the generated Kid, and select the certificate that you created. 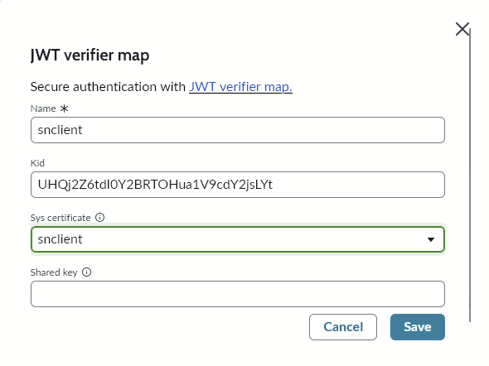 |
| 8 |
Configure the Auth scope as follows: 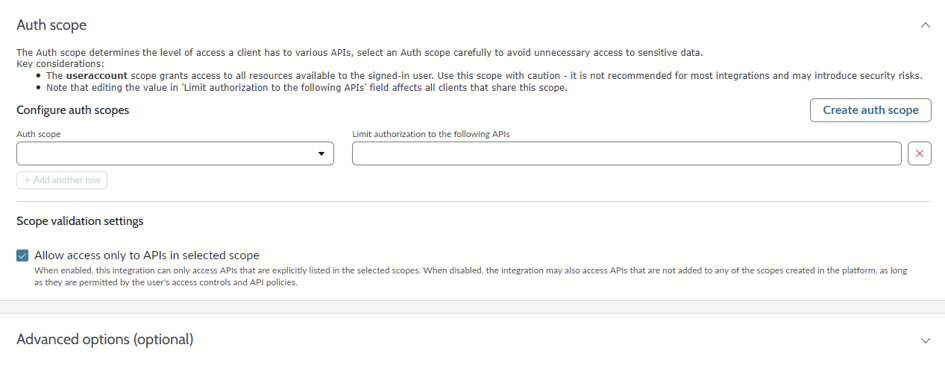 |
Create ServiceNow Connector on Webex Contact Center
Before you begin
- Create the public and private key certificates.
- Upload the public certificate on the ServiceNow instance.
- Create a ServiceNow technical user.
- Configure a ServiceNow OAuth application.
| 1 |
Sign in to your customer organization in Control Hub. |
| 2 |
Navigate to Services > Contact Center > Tenant Settings > Integrations > Connectors. |
| 3 |
On the ServiceNow card, click Set Up or Add more. |
| 4 |
On the Add configuration details page, enter the following details:
|
| 5 |
Click Save to save the configuration. Webex Contact Center validates connectivity to the ServiceNow connected application. If the connection is successful, the system saves the credentials and displays a confirmation message. |
What to do next
After you successfully save the connector, you can use it in Flow Designer. For more information, see the HTTP Request settings section in the Flow Designer Guide.


