- Home
- /
- Article

Thanks for your feedback.

Configure a paging group in Control Hub
 In this article
 Feedback?
Group Paging allows a user to place a one-way call or group page to up to 75 target users and workspaces by dialing a number or extension assigned to a specific paging group.
Paging group feature notes
You can create a paging group so that users can send an audio message to a person, a department, or a team. The Group Paging service makes a simultaneous call to all the assigned targets and announces to the originator that the system is ready for paging. After speaking, the originator ends the page by hanging up the call.
A few things to note before setting up this feature:
-
You can assign a user as both a paging target and paging originator in a paging group.
-
Paging group works only for primary devices and doesn't work for shared devices.
-
Locations can have multiple Group Paging services configured because you can define a paging originator and/or a paging target in multiple paging groups.
-
If a user isn’t on the phone, the call from a group page is automatically answered and the target hears a paging announcement to alert them that they are receiving a page.
-
If a paging target is on a call, the page isn't automatically answered. If a paging target chooses not to answer the page, the group paging call won't forward to the paging target’s voice mail.
-
If a paging target has Don’t Disturb enabled on their phone, they aren’t paged.
-
If a paging target has Single Number Reach (Office Anywhere), Call Forwarding or Simultaneous Ring enabled, the configured destination service isn’t called.
-
When the page is set up to the paging targets, the originator receives a “Paging System Ready” announcement alerting them to begin speaking.
-
The group page is a one-way audio service. The paging originator has a one-way talk path to the paging targets. The paging targets don’t have a talk path to each other or to the paging originator during the page.
Configure a paging group in Control Hub
Before you begin
-
Check that the extensions you plan to assign to a paging group are available and unassigned.
-
Paging groups must have more than one member, and each member must have at least one registered device. If someone pages a group with no registered devices, they hear a busy signal.
-
Paging groups only work with the Cisco IP Phone 6800, 7800, 8800, 8875, or 9800 Series, and Analog Telephone Adapters (ATAs) 191 and 192.
The paging group feature is only partially supported on ATA devices, as its functionality depends on the device connected to it. For the ATA 192, the feature works only if the call is manually answered within 1–2 seconds or if an external device with auto-answer capability is connected to the ATA.
For customers in the Asia-Pacific region, the Calling Line field is autopopulated with the username. You can’t modify the Calling Line field.
| 1 |
Sign in to Control Hub. |
| 2 |
Go to . |
| 3 |
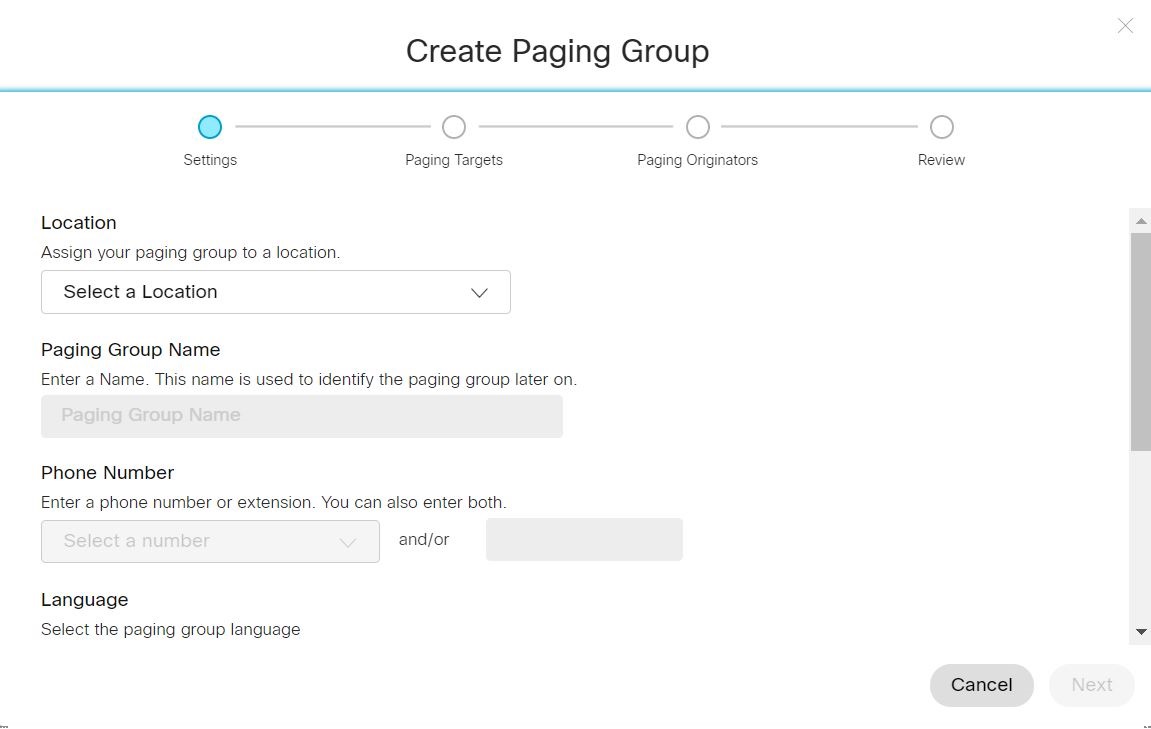
Select the Paging Group card and click Add New to create a new paging group. |
| 4 |
In Settings, select the Location, Paging Group Name, and then a Phone Number or Extension or both.
|
| 5 |
Select the group paging language in the Language drop-down menu. |
| 6 |
Select Direct line caller ID name, a caller ID to display on target users' phones when performing a group page.
Other direct line caller ID name supports unicode characters of maximum 128 characters length. |
| 7 |
Enter Dial by Name, a name which you want to use to dial this paging group. Dial by Name field supports ASCII characters. |
| 8 |
Select the Calling ID Label to show on the target users' caller ID when performing a group page. Click Next.
|
| 9 |
In the Paging Targets section, search for and add up to 75 users, workspaces, or virtual lines in the organization that can receive paging announcements. |
| 10 |
Select the Copy my paging targets to my paging originators check box to copy added users for paging originators in the next section. Click Next. |
| 11 |
In the Paging Originators section, search for and add users, workspaces, or virtual lines in the organization that can initiate paging announcements. Click Next. If you selected the Copy my paging targets to my paging originators check box in the previous section, there’s no requirement to add users in this section. |
| 12 |
In the Paging Group Settings Review section, review your settings under each tab. Click Create. |
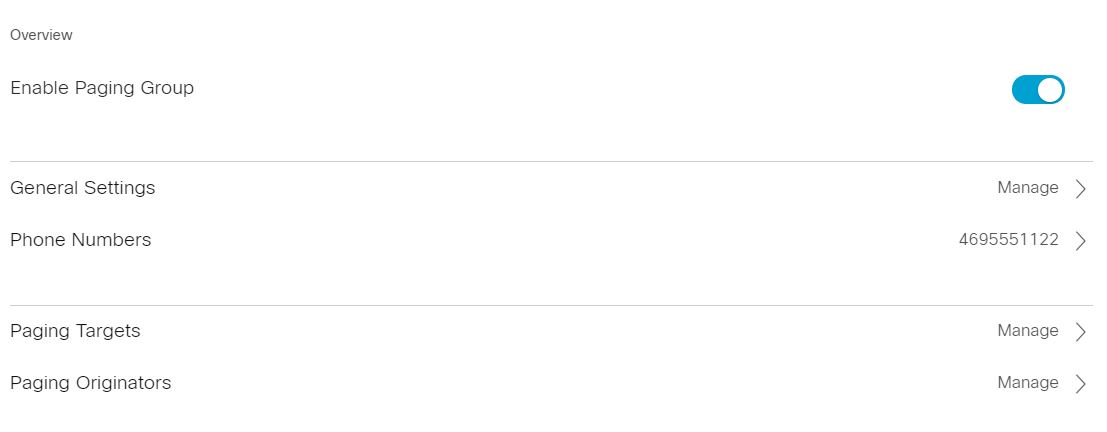
Edit a paging group in Control Hub
| 1 |
Sign in to Control Hub. |
| 2 |
Go to . |
| 3 |
Select Paging Group, and select a paging group that you want to edit from the list.
|
| 4 |
You can edit the following settings:
|
| 5 |
Click Save after making any changes to the paging group. |