- Home
- /
- Article

Thanks for your feedback.

 In this article
 Feedback?
Use this article to configure the External Client App that Webex Contact Center uses to configure a Salesforce connector. Salesforce has deprecated Connected Apps in favour of External Client Apps. This is the new procedure.
External Client App for Webex Contact Center integration
Configure the External Client App for Webex Contact Center Salesforce Connector
To use Service Cloud Voice to its full extent, the Contact Center call flow can be adapted to create the Voice Call record and to execute a Salesforce Omni-Channel flow while the call is on the IVR.
Create Certificate
Ensure that you've already created a digital certificate as per your organization's security policy.
To generate a digital certificate, see the Salesforce documentation at https://developer.salesforce.com/docs/atlas.en-us.voice_pt_developer_guide.meta/voice_pt_developer_guide/voice_pt_generate_certificate.htm.
Example
openssl genrsa -des3 -passout pass:<password> -out server.pass.key 2048
openssl rsa -passin pass:<password> -in server.pass.key -out server.key
rm server.pass.key
openssl req -new -key server.key -out server.csr

    Country Name (2 letter code) [AU]:CH
    State or Province Name (full name) [Some-State]:
    Locality Name (eg, city) []:
    Organization Name (eg, company) [Internet Widgits Pty Ltd]:
    Organizational Unit Name (eg, section) []:
    Common Name (e.g. server FQDN or YOUR name) []:
    Email Address []: my-api-user@my-example-org.com
    Please enter the following 'extra' attributes
    to be sent with your certificate request
    A challenge password []:<password>
    An optional company name []:

openssl x509 -req -sha256 -days 365 -in server.csr -signkey server.key -out server.crt
server.crt => Certificate for the Salesforce External Client App
server.key => Private key for the Salesforce Connector in Webex Control Hub
Create Salesforce External Client App
Create a new External Client App
There are two options to connect your Salesforce data with third-party applications. Both Connected Apps and External Client Apps are frameworks to integrate data. External Client Apps are the next generation of connected apps.
To configure the Salesforce External Client App that is used by Cisco Webex Contact Center:
- From Setup, navigate to Apps | External Client Apps | External Client App Manager.
- Click on New External Client App.
-
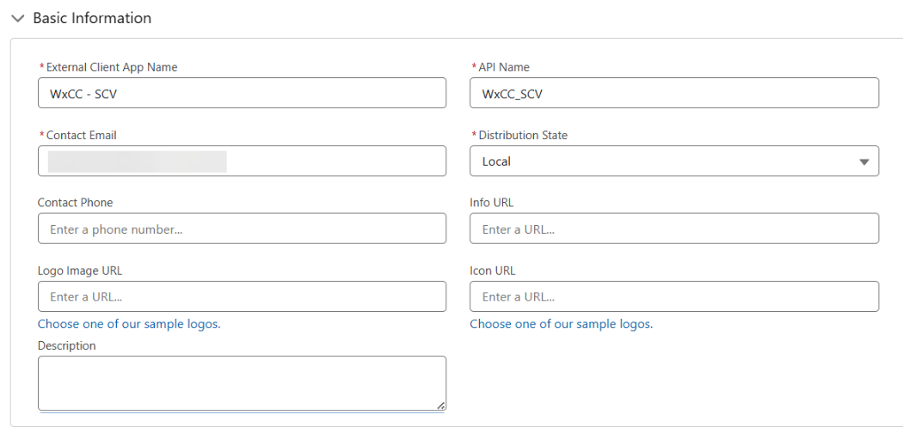
External Client App—Basic Information
- External Client App Name: WxCC - SCV
- API Name: WxCC_SCV
- Contact Email: < your email >
- Distribution State: select Local
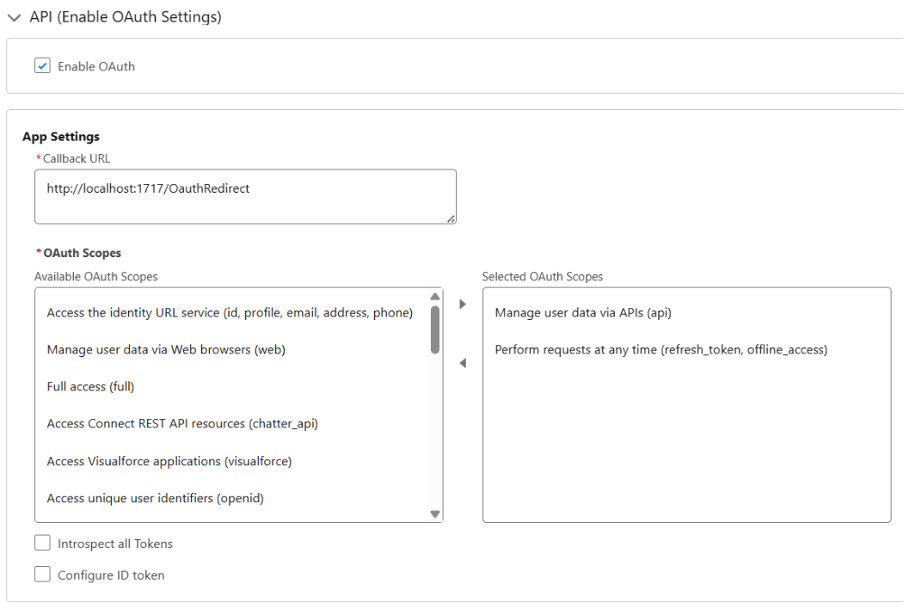
External Client App—API (Enable OAuth Settings)
- Select: Enable OAuth
- App Settings
- Callback URL: http://localhost:1717/OauthRedirect as a sample callback URL
- OAuth Scopes
- Select OAuth scopes:
- Manage user data via APIs (api)
- Perform requests at any time (refresh_token, offline_access)
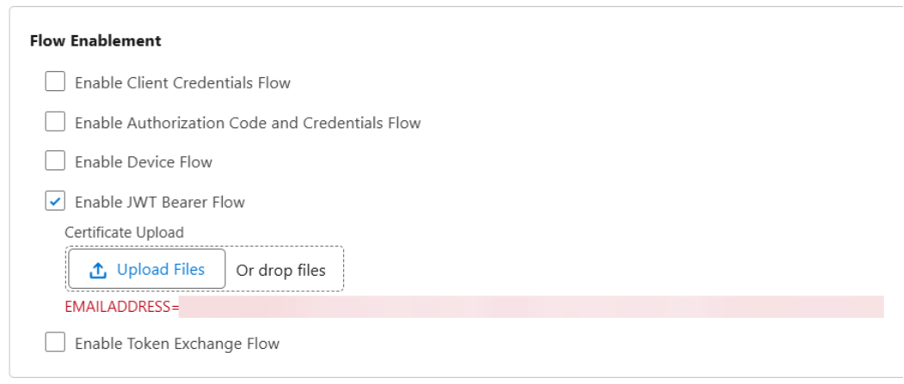
Flow Enablement
- Select: Enable JWT Bearer Flow
- Click Upload Files and upload the
server.crtfile that contains your digital certificate.
Security
Uncheck the Require secret for the Web Server Flow option.
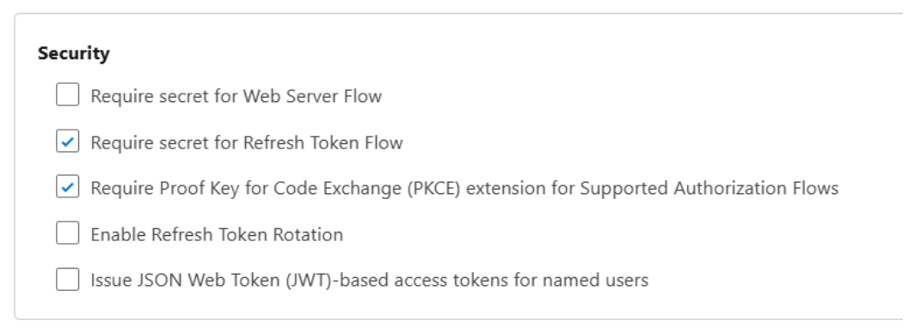
- Click on Create button.
- Change to Tab Policies and then click on Edit button.
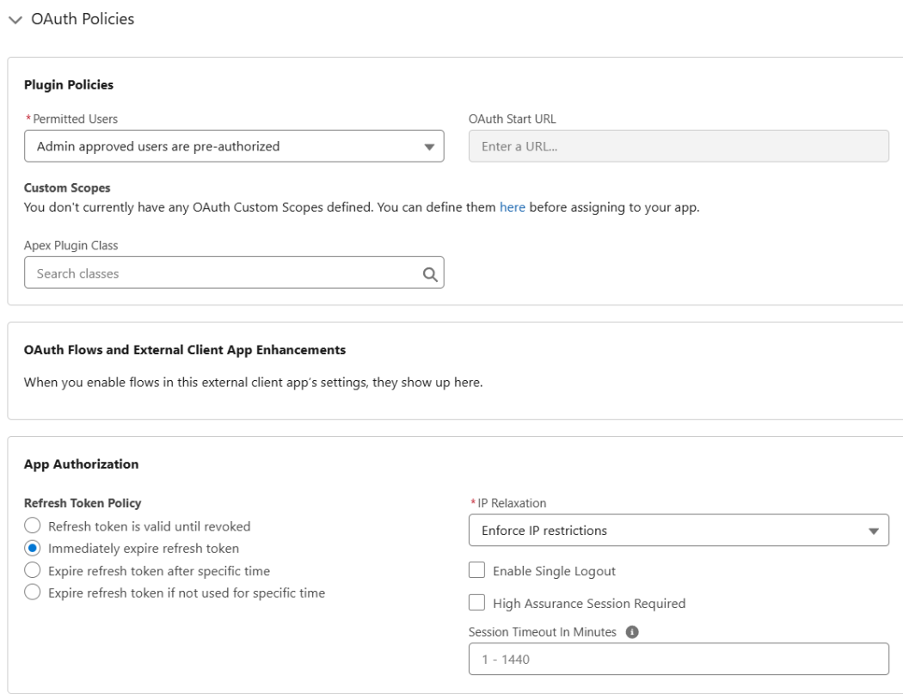
- Policies—OAuth Policies
- Plugin Policies
- Permitted Users: select Admin approved users are pre-authorized
- Confirm the change
- App Authorization
- Refresh Token Policy: select Immediately expire refresh token
- IP Relaxation: select Enforce IP restrictions
- Plugin Policies
- Policies—App Policies
- Start page—none
- Select Permission Sets—Assign the Permission Set created before ("IVR Access to SCV Apex Classes")
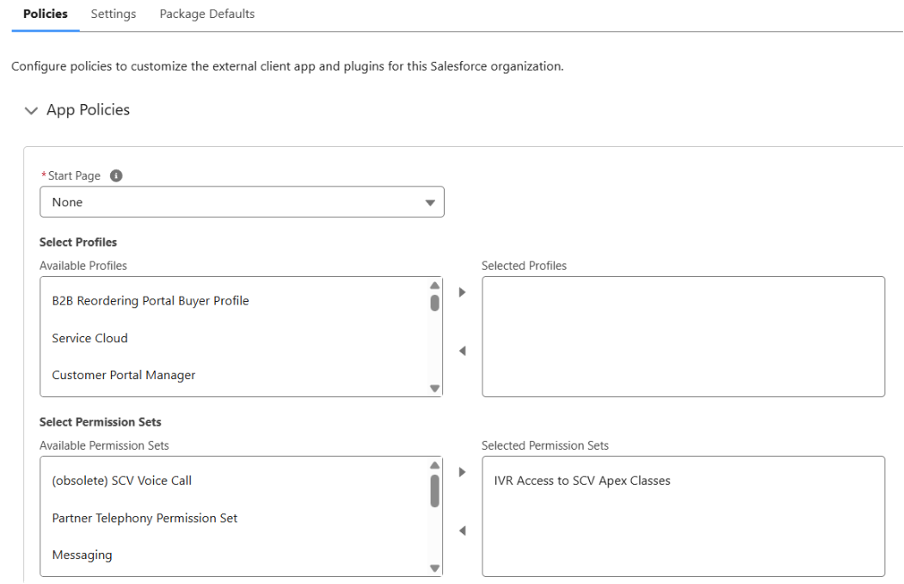
- Click Save.
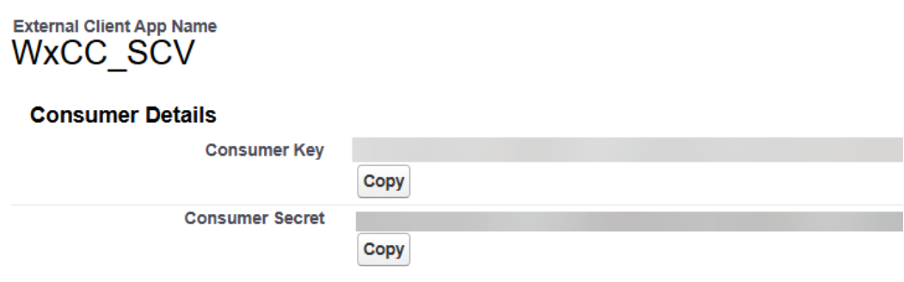
- Change to Tab Settings.
Section OAuth Settings, click Consumer Key and Secret button; wait for email and verify your identity. A new browser tab opens a screen with consumer details.
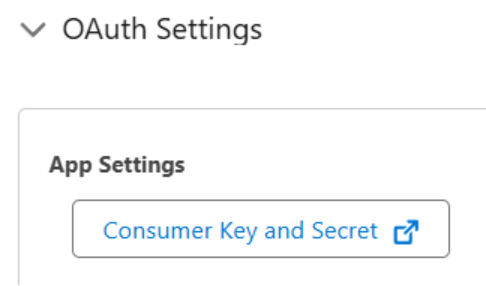
- Click Copy and save the Consumer Key. The consumer key is used later to create the Salesforce Connector on Webex Contact Center Control Hub.